Get the most out of GymNext Flex Timer
A walkthrough of every feature in the Flex Timer iPhone app — from your first sign-in to running a stadium full of synchronized timers. Use the sidebar to jump to a topic, or read straight through.
1. Logging in & creating an account
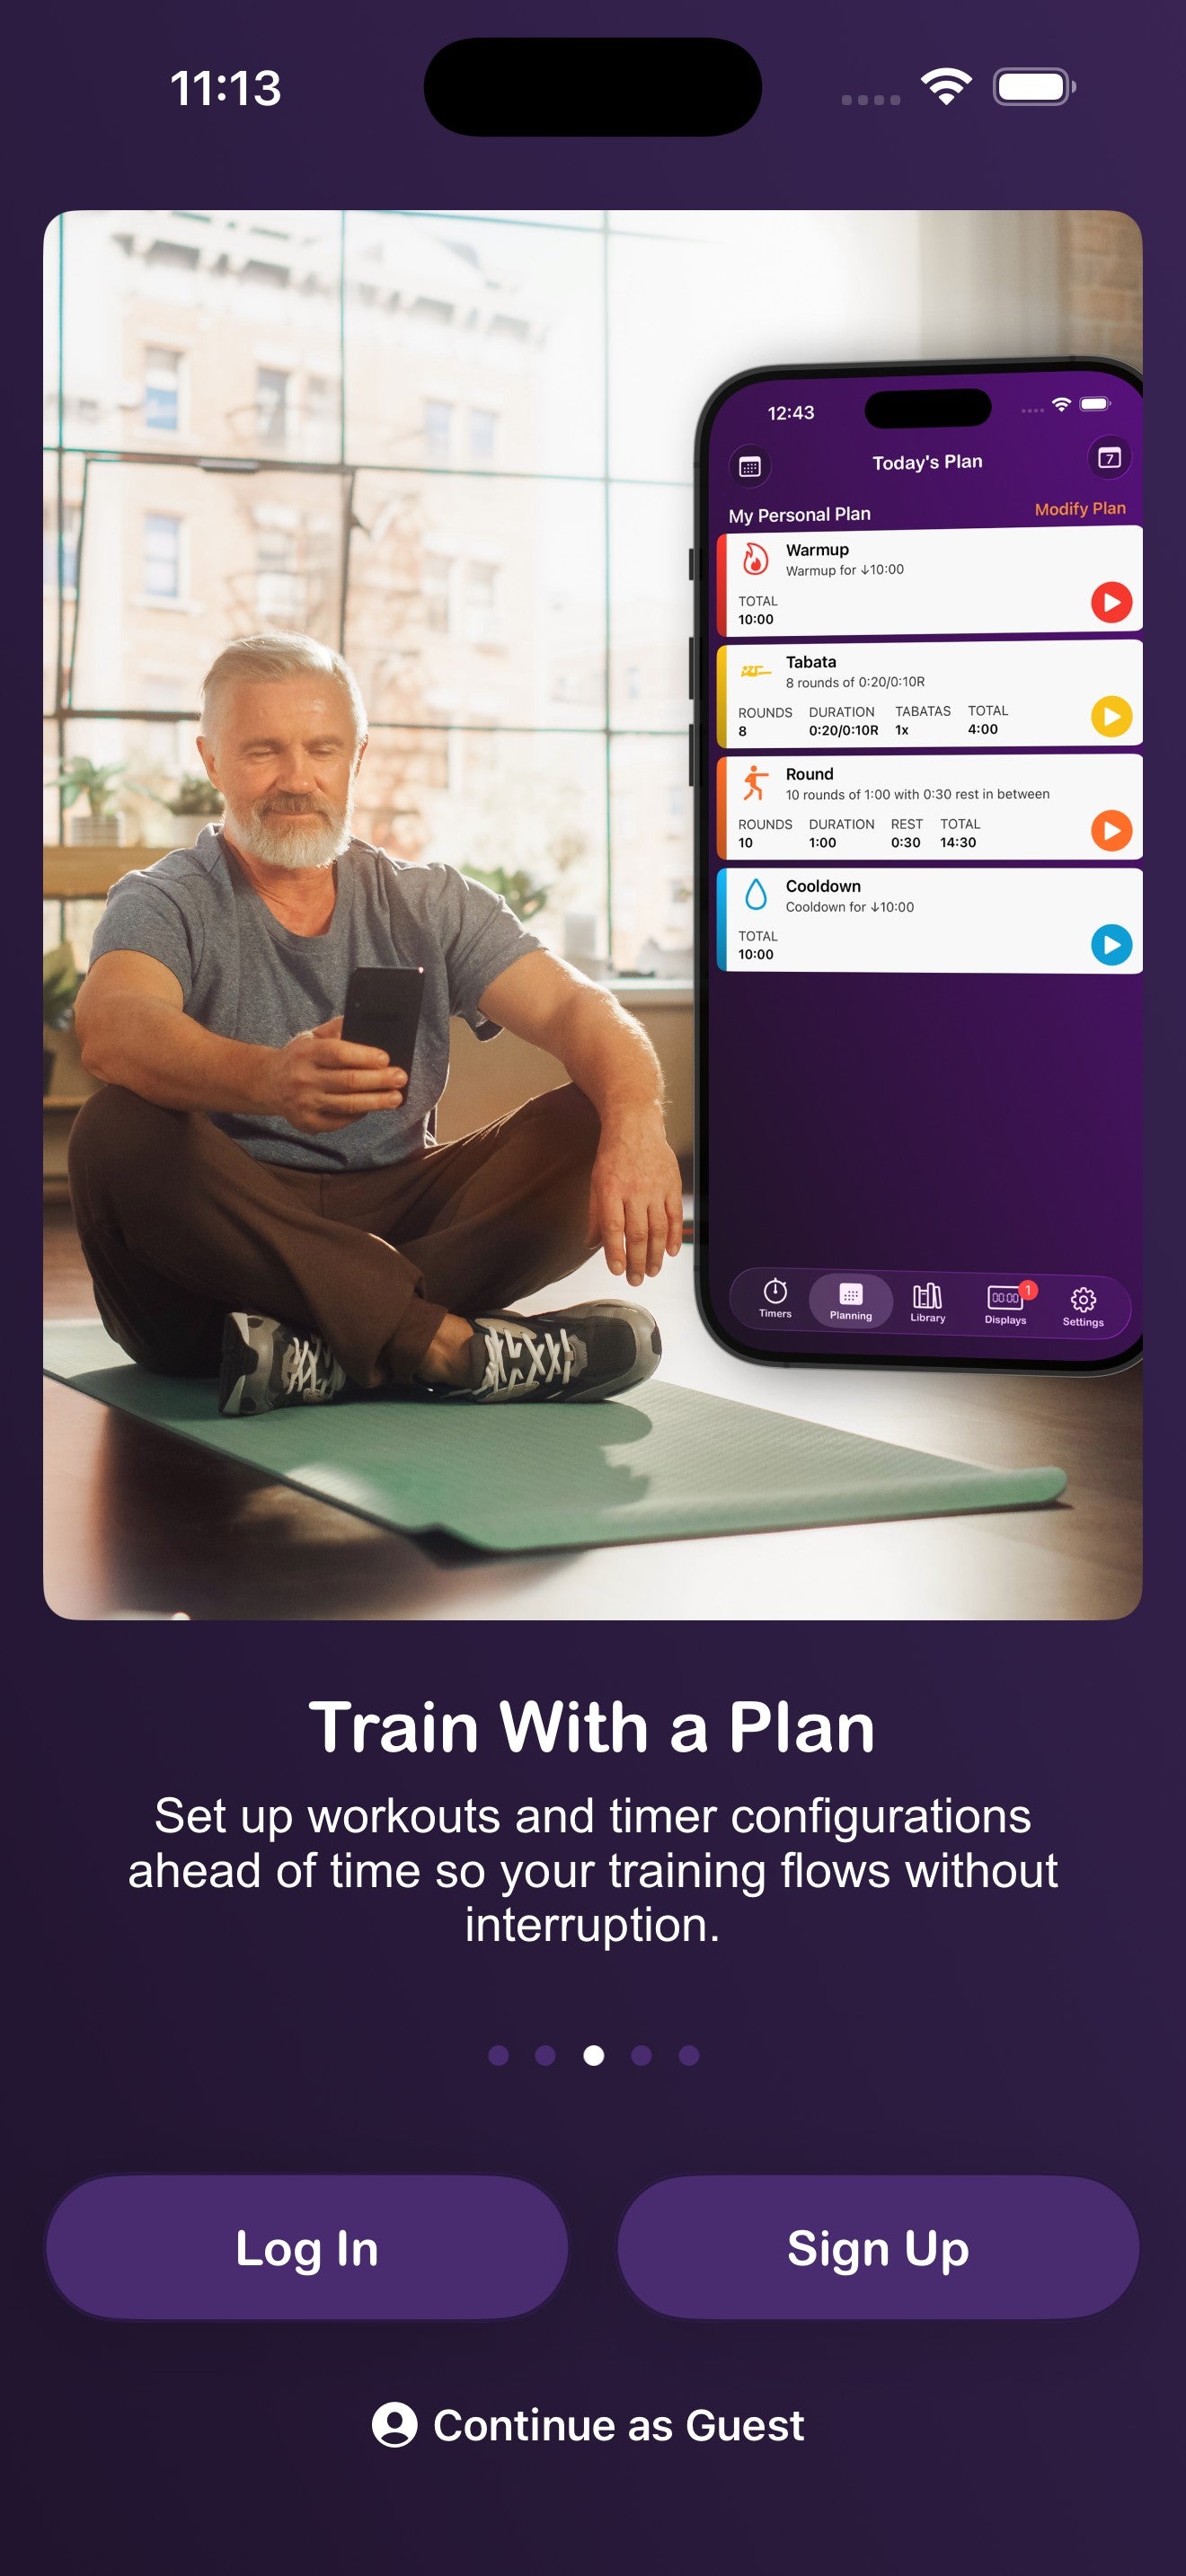
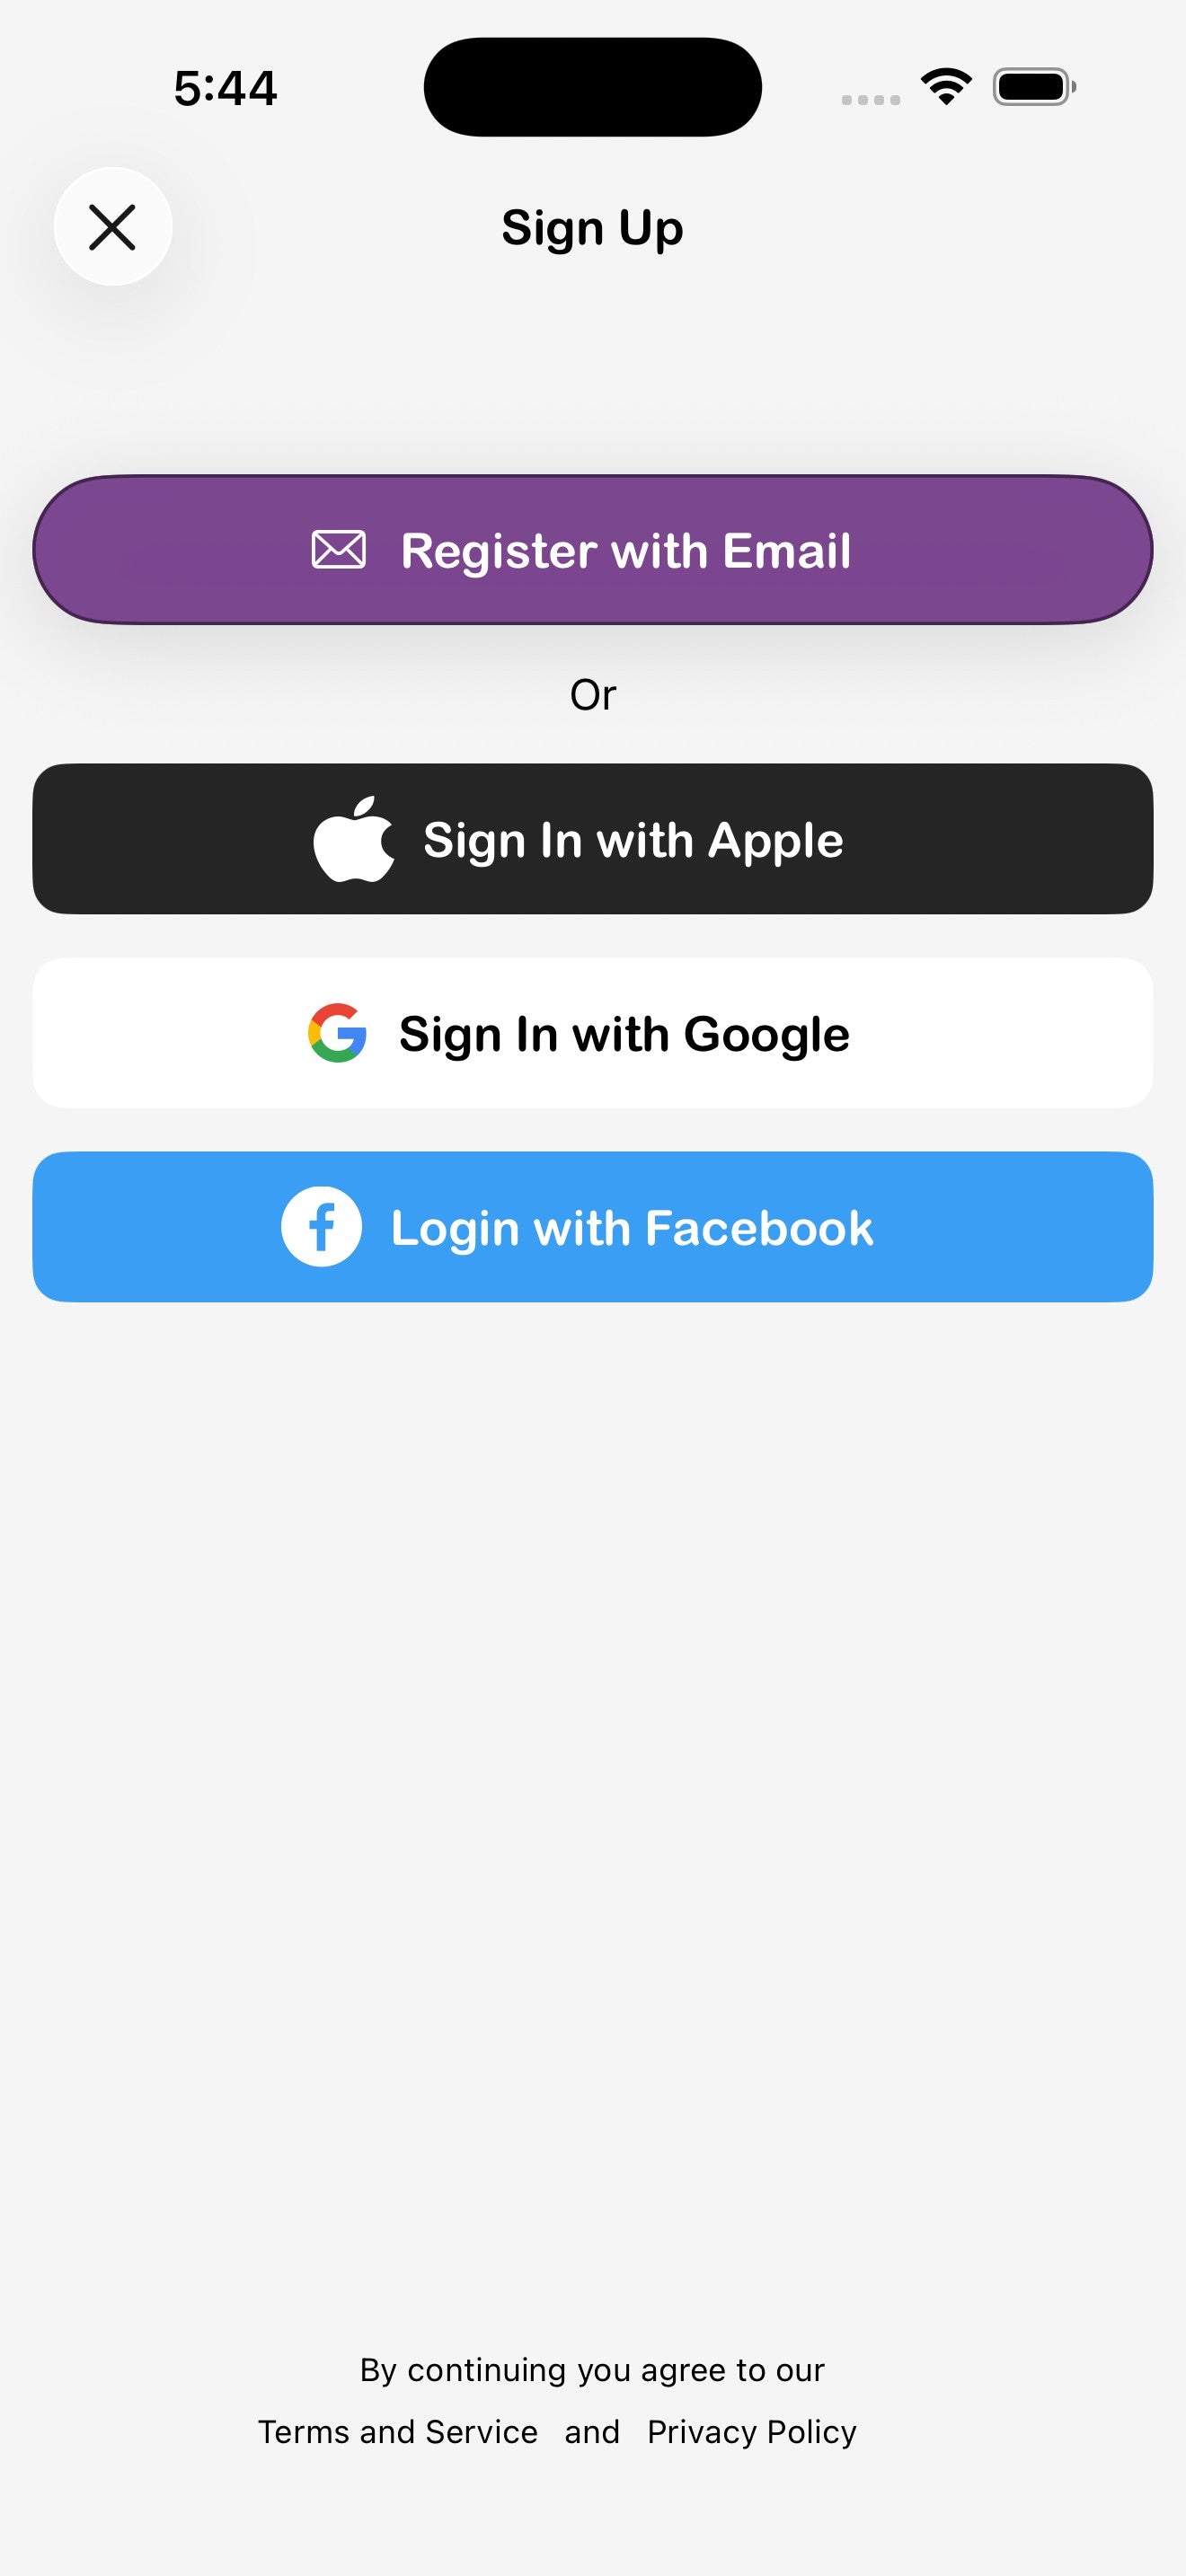
When you launch the app for the first time, you'll land on the welcome screen with three options: Log In, Sign Up, or Continue as Guest.
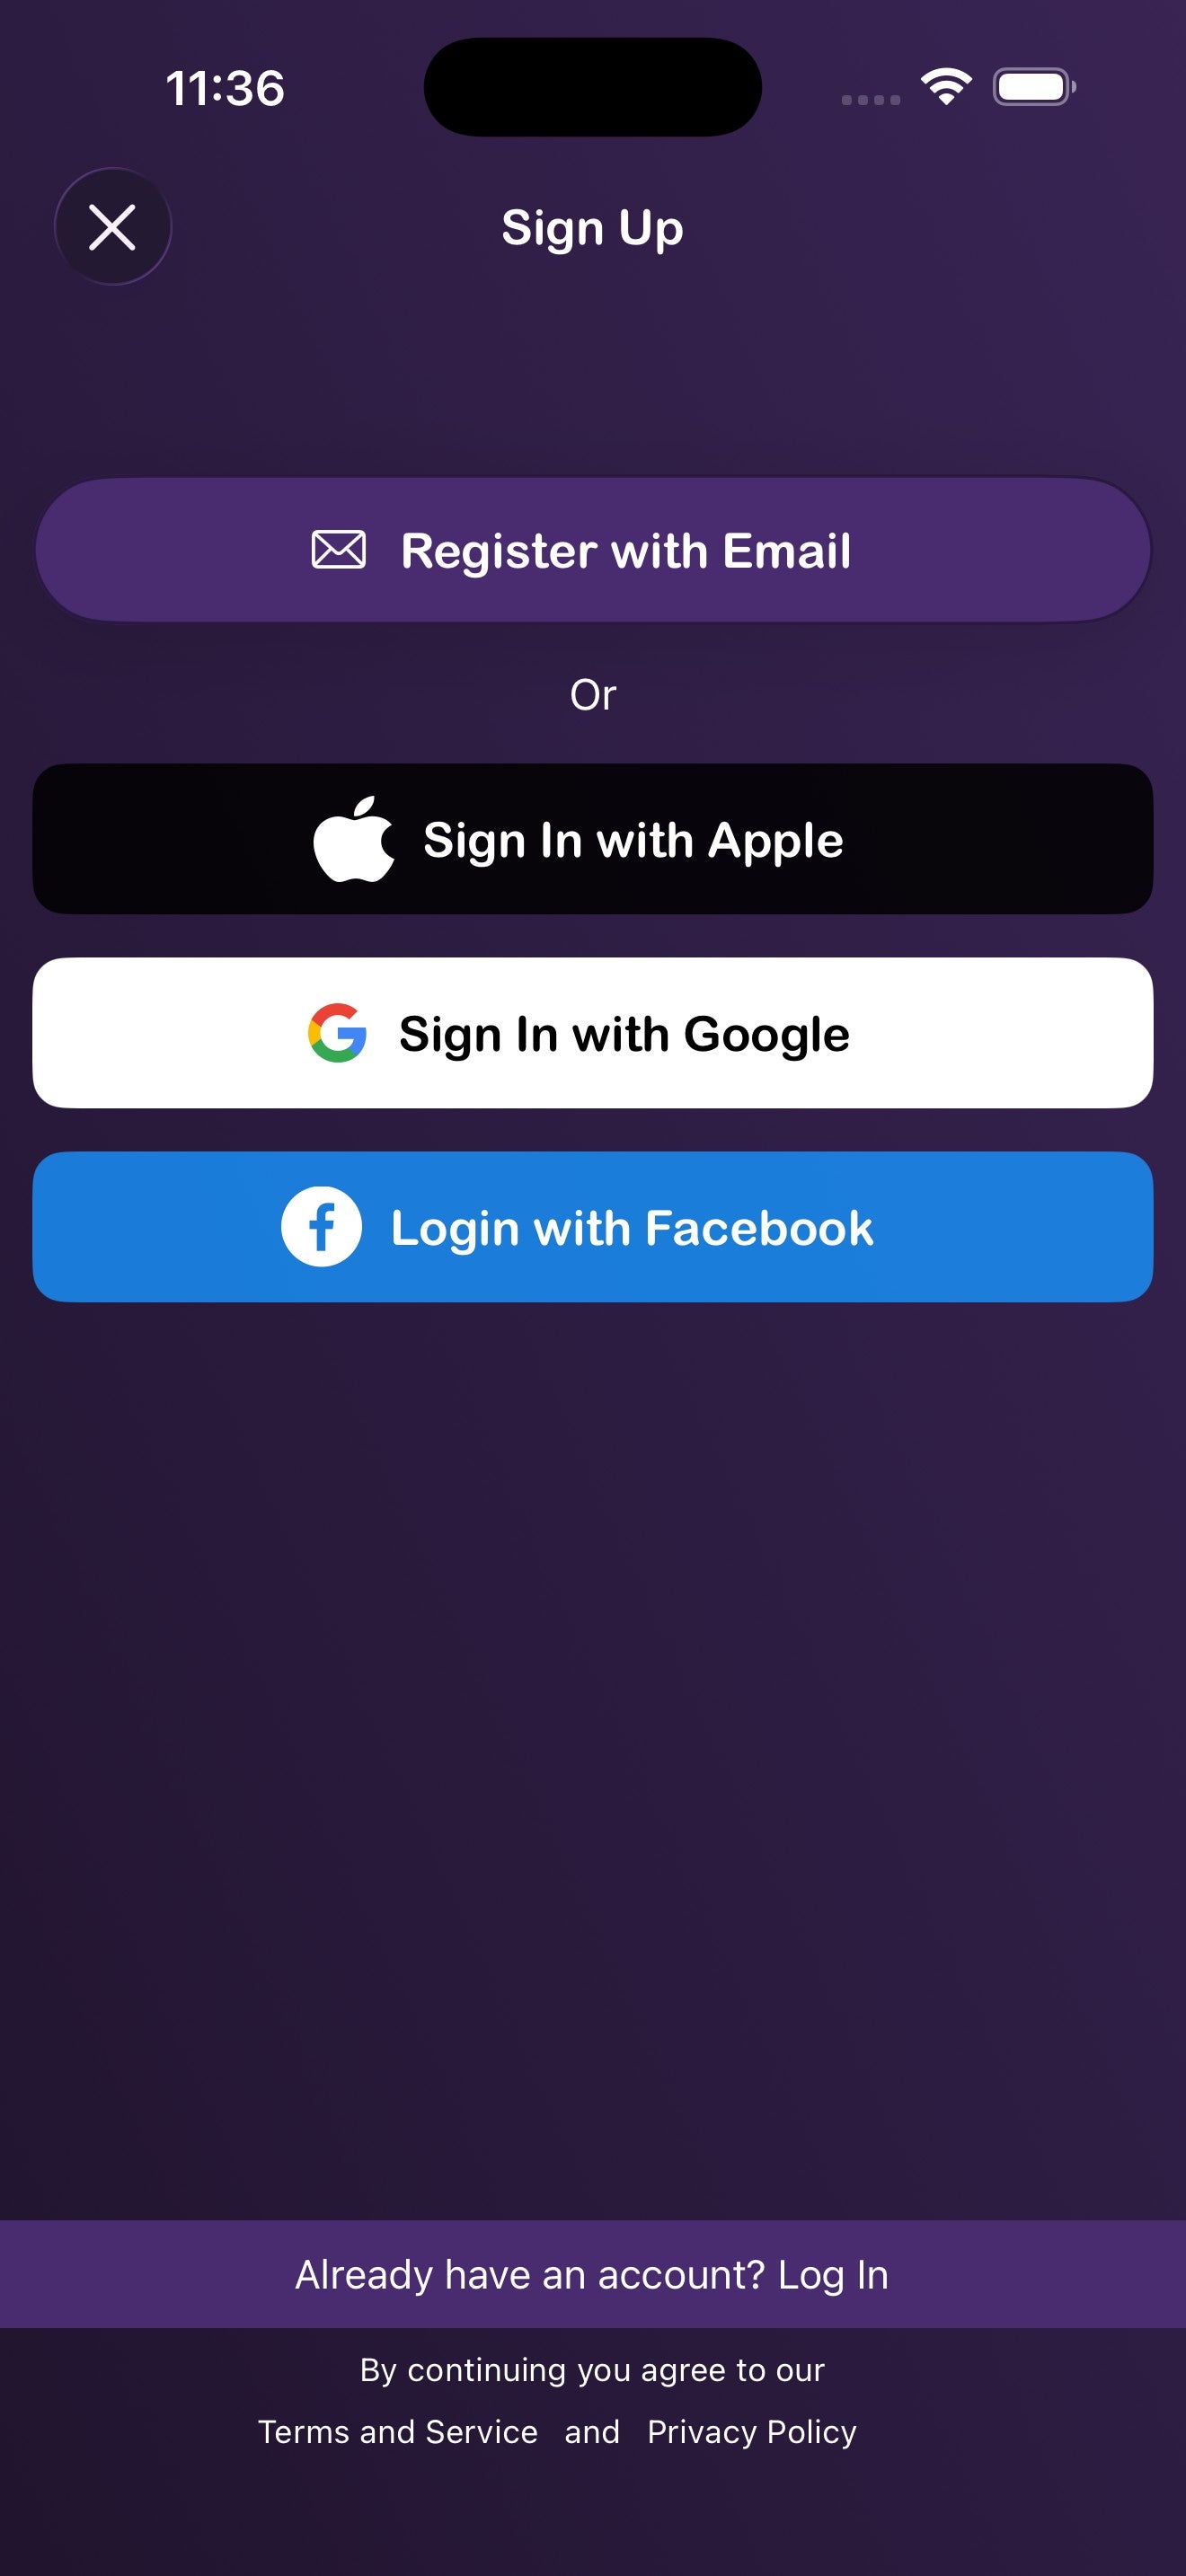

Sign up with email
- On the welcome screen, tap Sign Up.
- Tap Register with Email.
- Enter your first name, last name, email address, and a password (you'll be asked to confirm it).
- Tap Create My Account to finish.
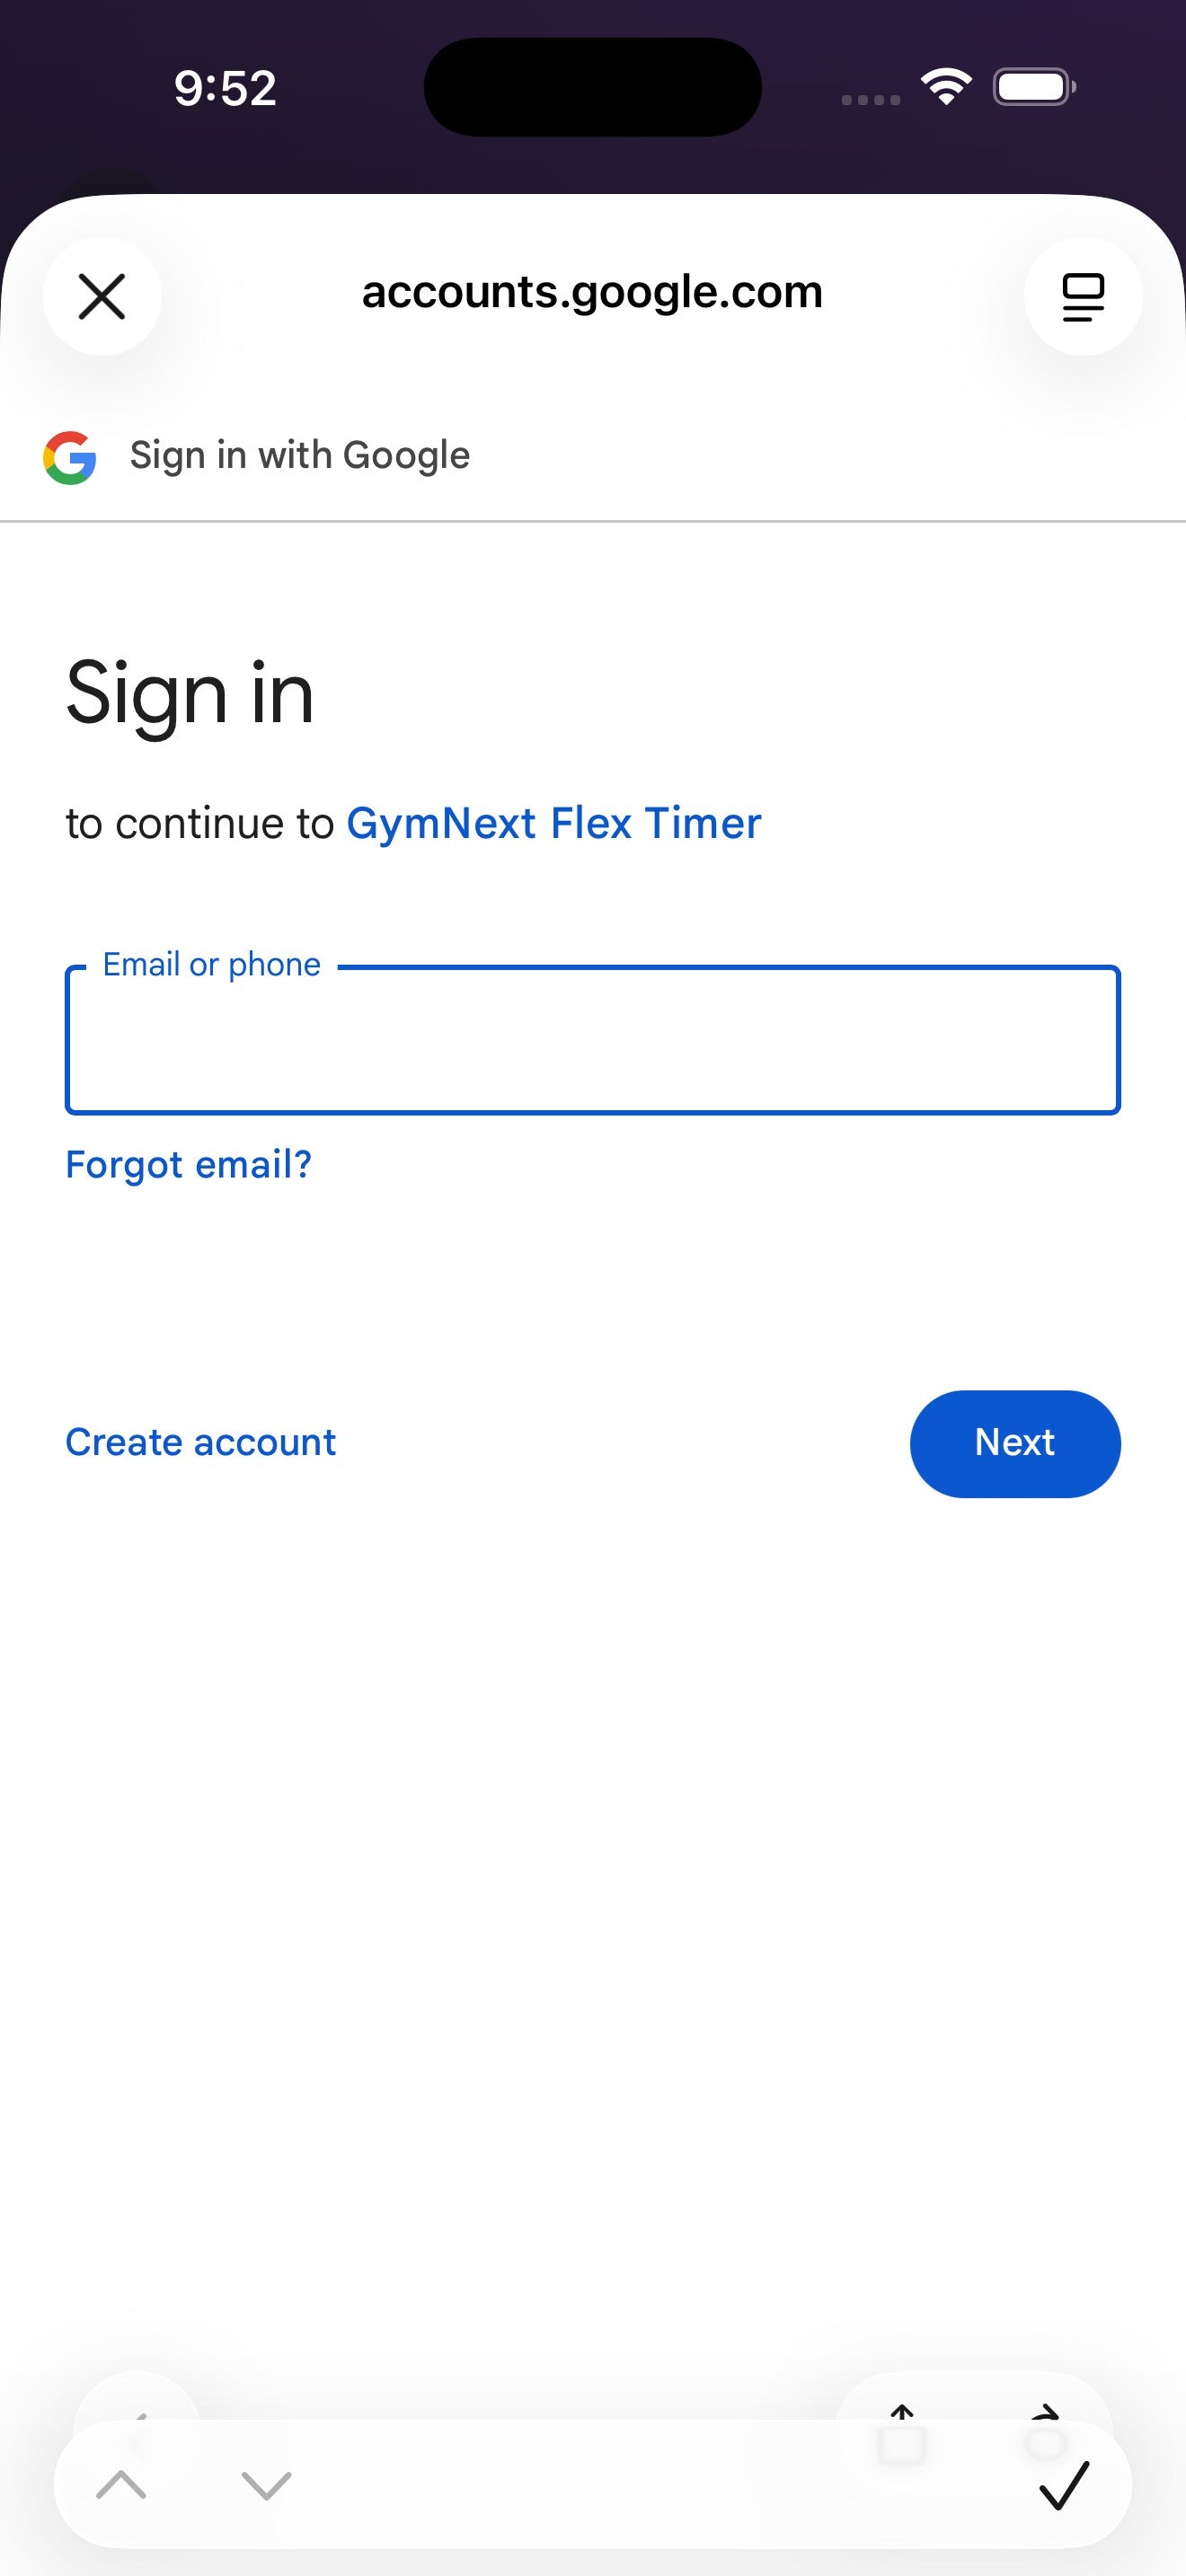
Sign up or sign in with Apple, Google, or Facebook
From either the Sign Up or Log In screen you can use your existing Apple, Google, or Facebook account. Tap the matching button and complete the prompt from that provider.
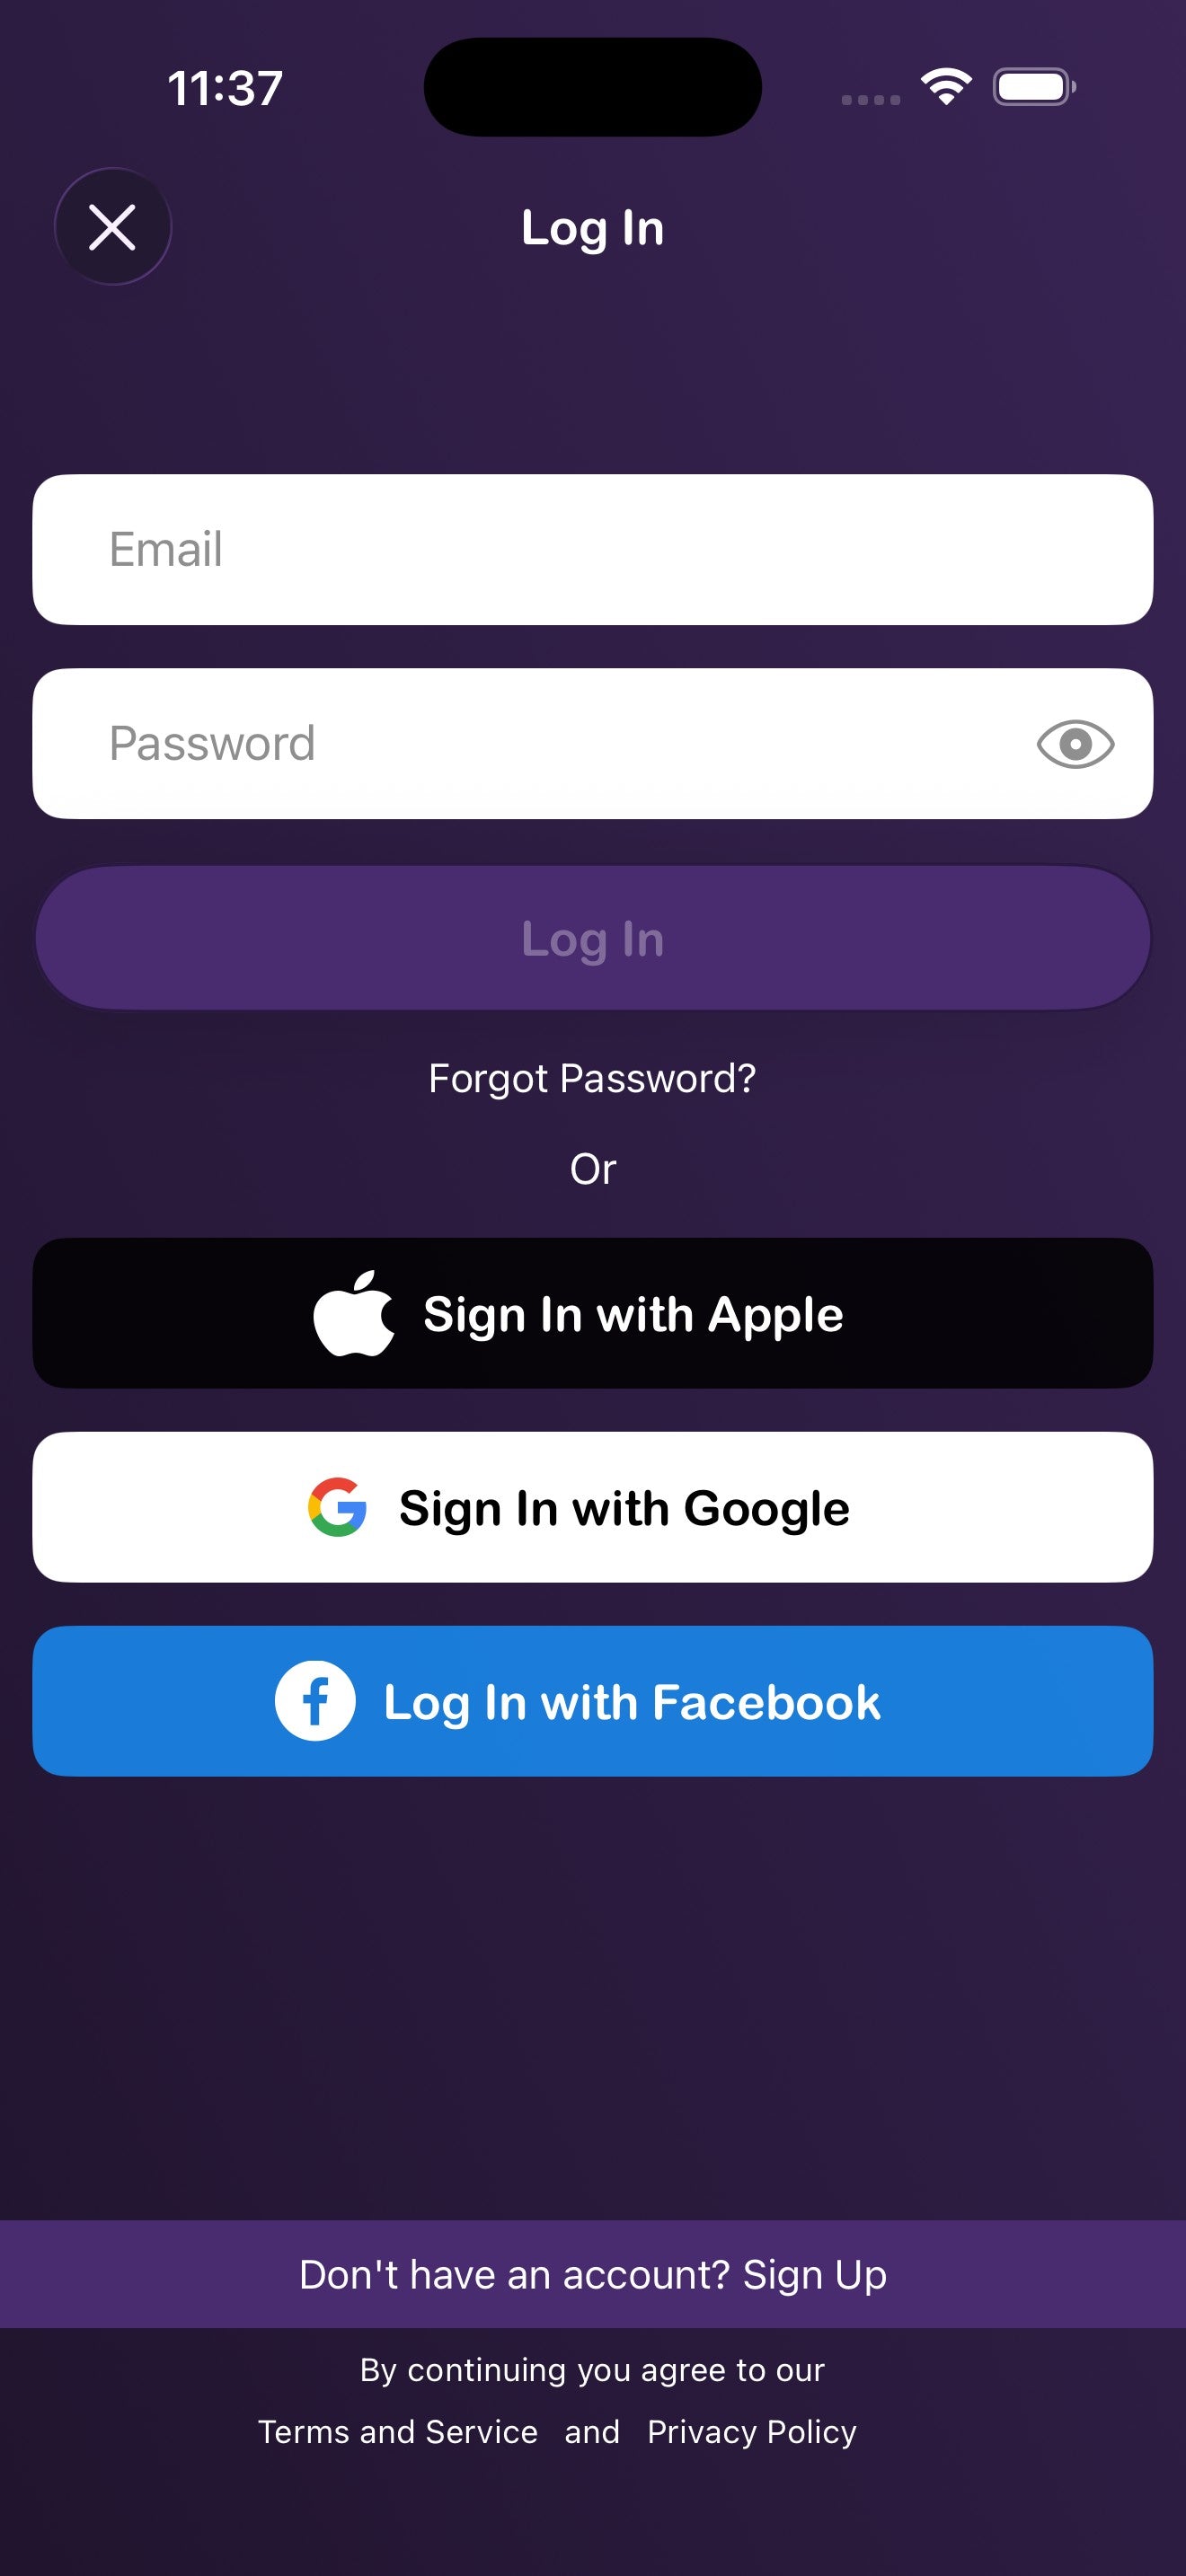
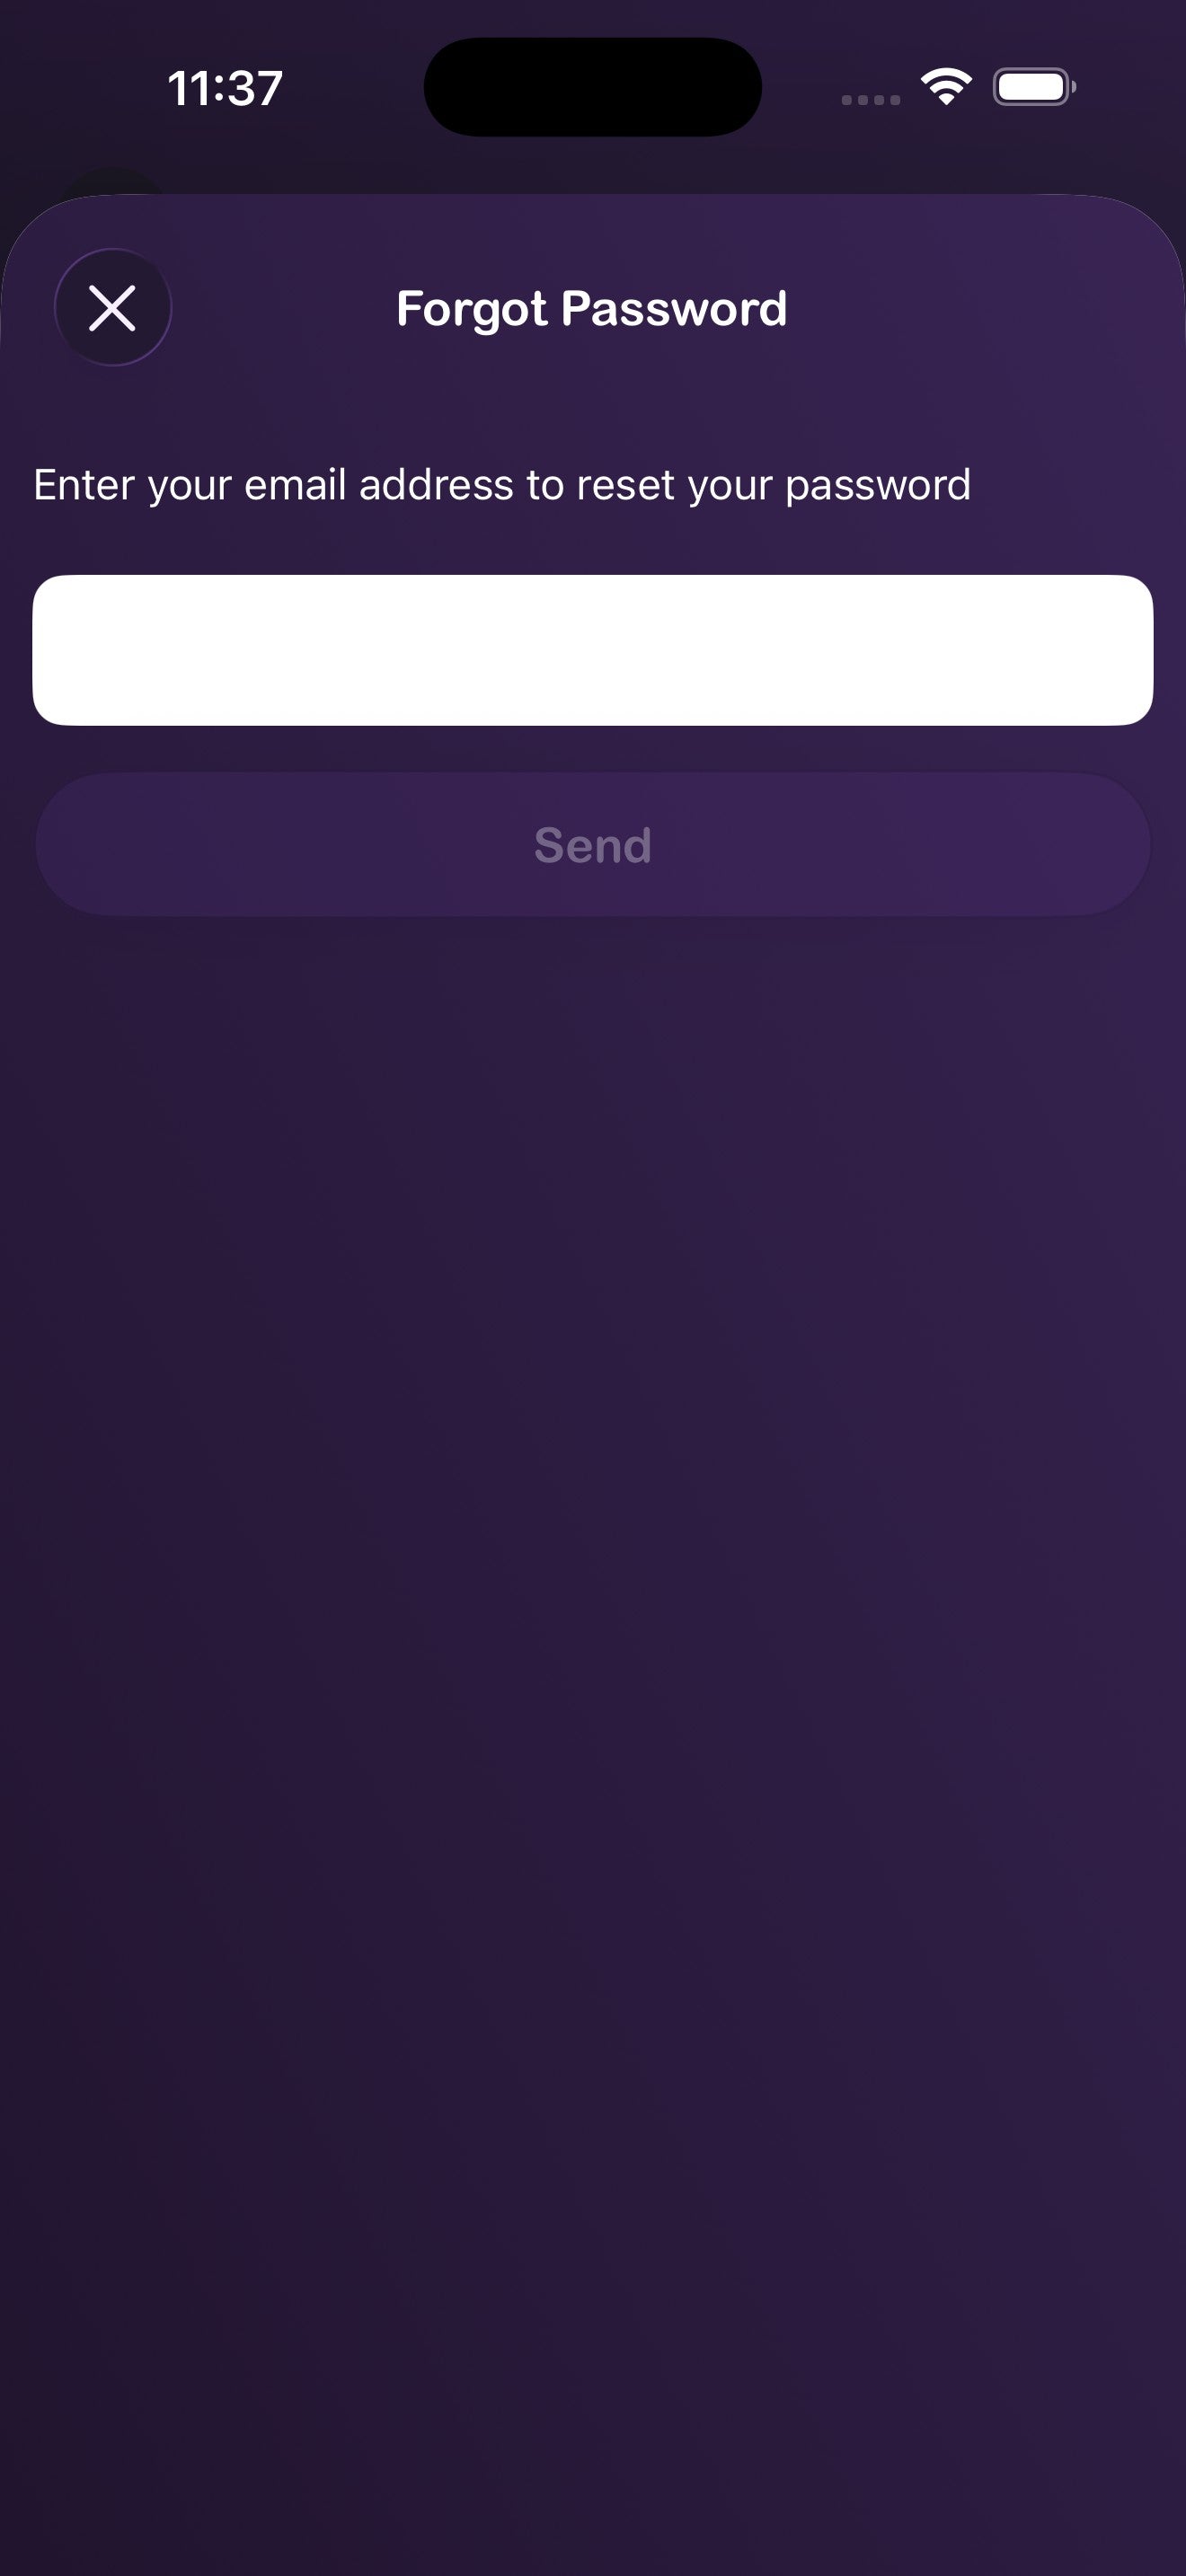
Reset a forgotten password
- On the Log In screen, tap Forgot Password?
- Enter the email tied to your account and tap Send.
- Check your inbox and follow the link to set a new password.
2. Continuing as a guest & upgrading later
Want to try the app without signing up? Tap Continue as Guest on the welcome screen. Everything you create — timers, favorites, plans — is saved locally and migrates safely when you upgrade.
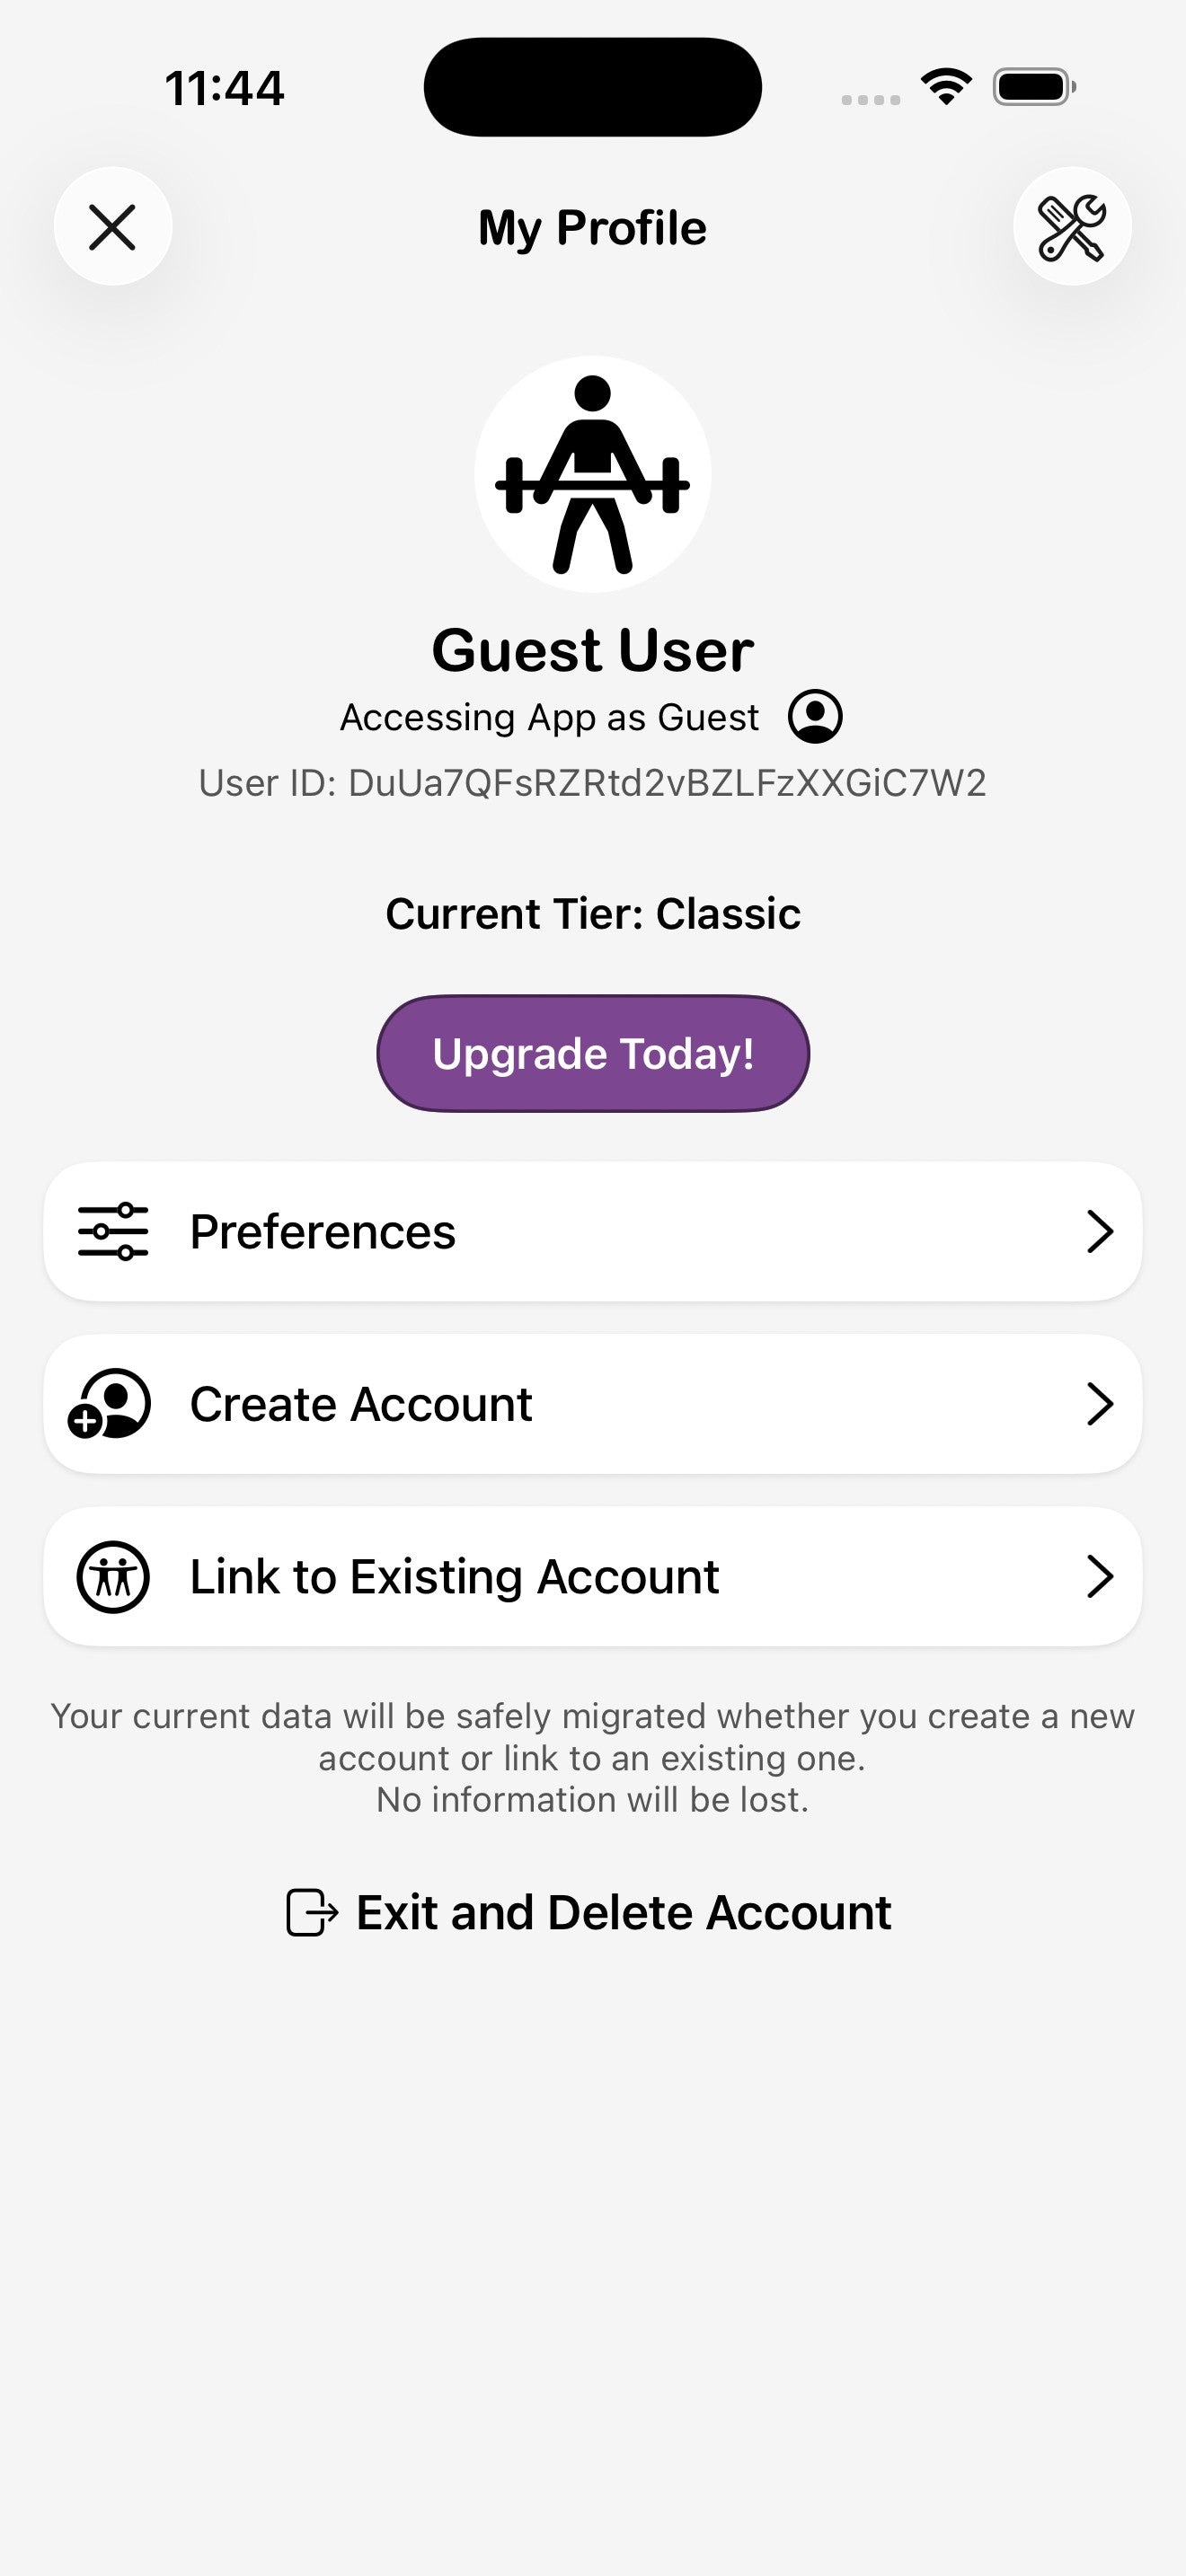

Upgrade a guest account to a full account
- From any screen, tap Settings in the bottom nav, then My Profile.
- Tap Create Account if you're new, or Link to Existing Account if you already have a GymNext account on another device.
- Choose a sign-up method (email, Apple, Google, or Facebook) and complete the prompts.
What's on the profile screen
3. Personalizing your experience
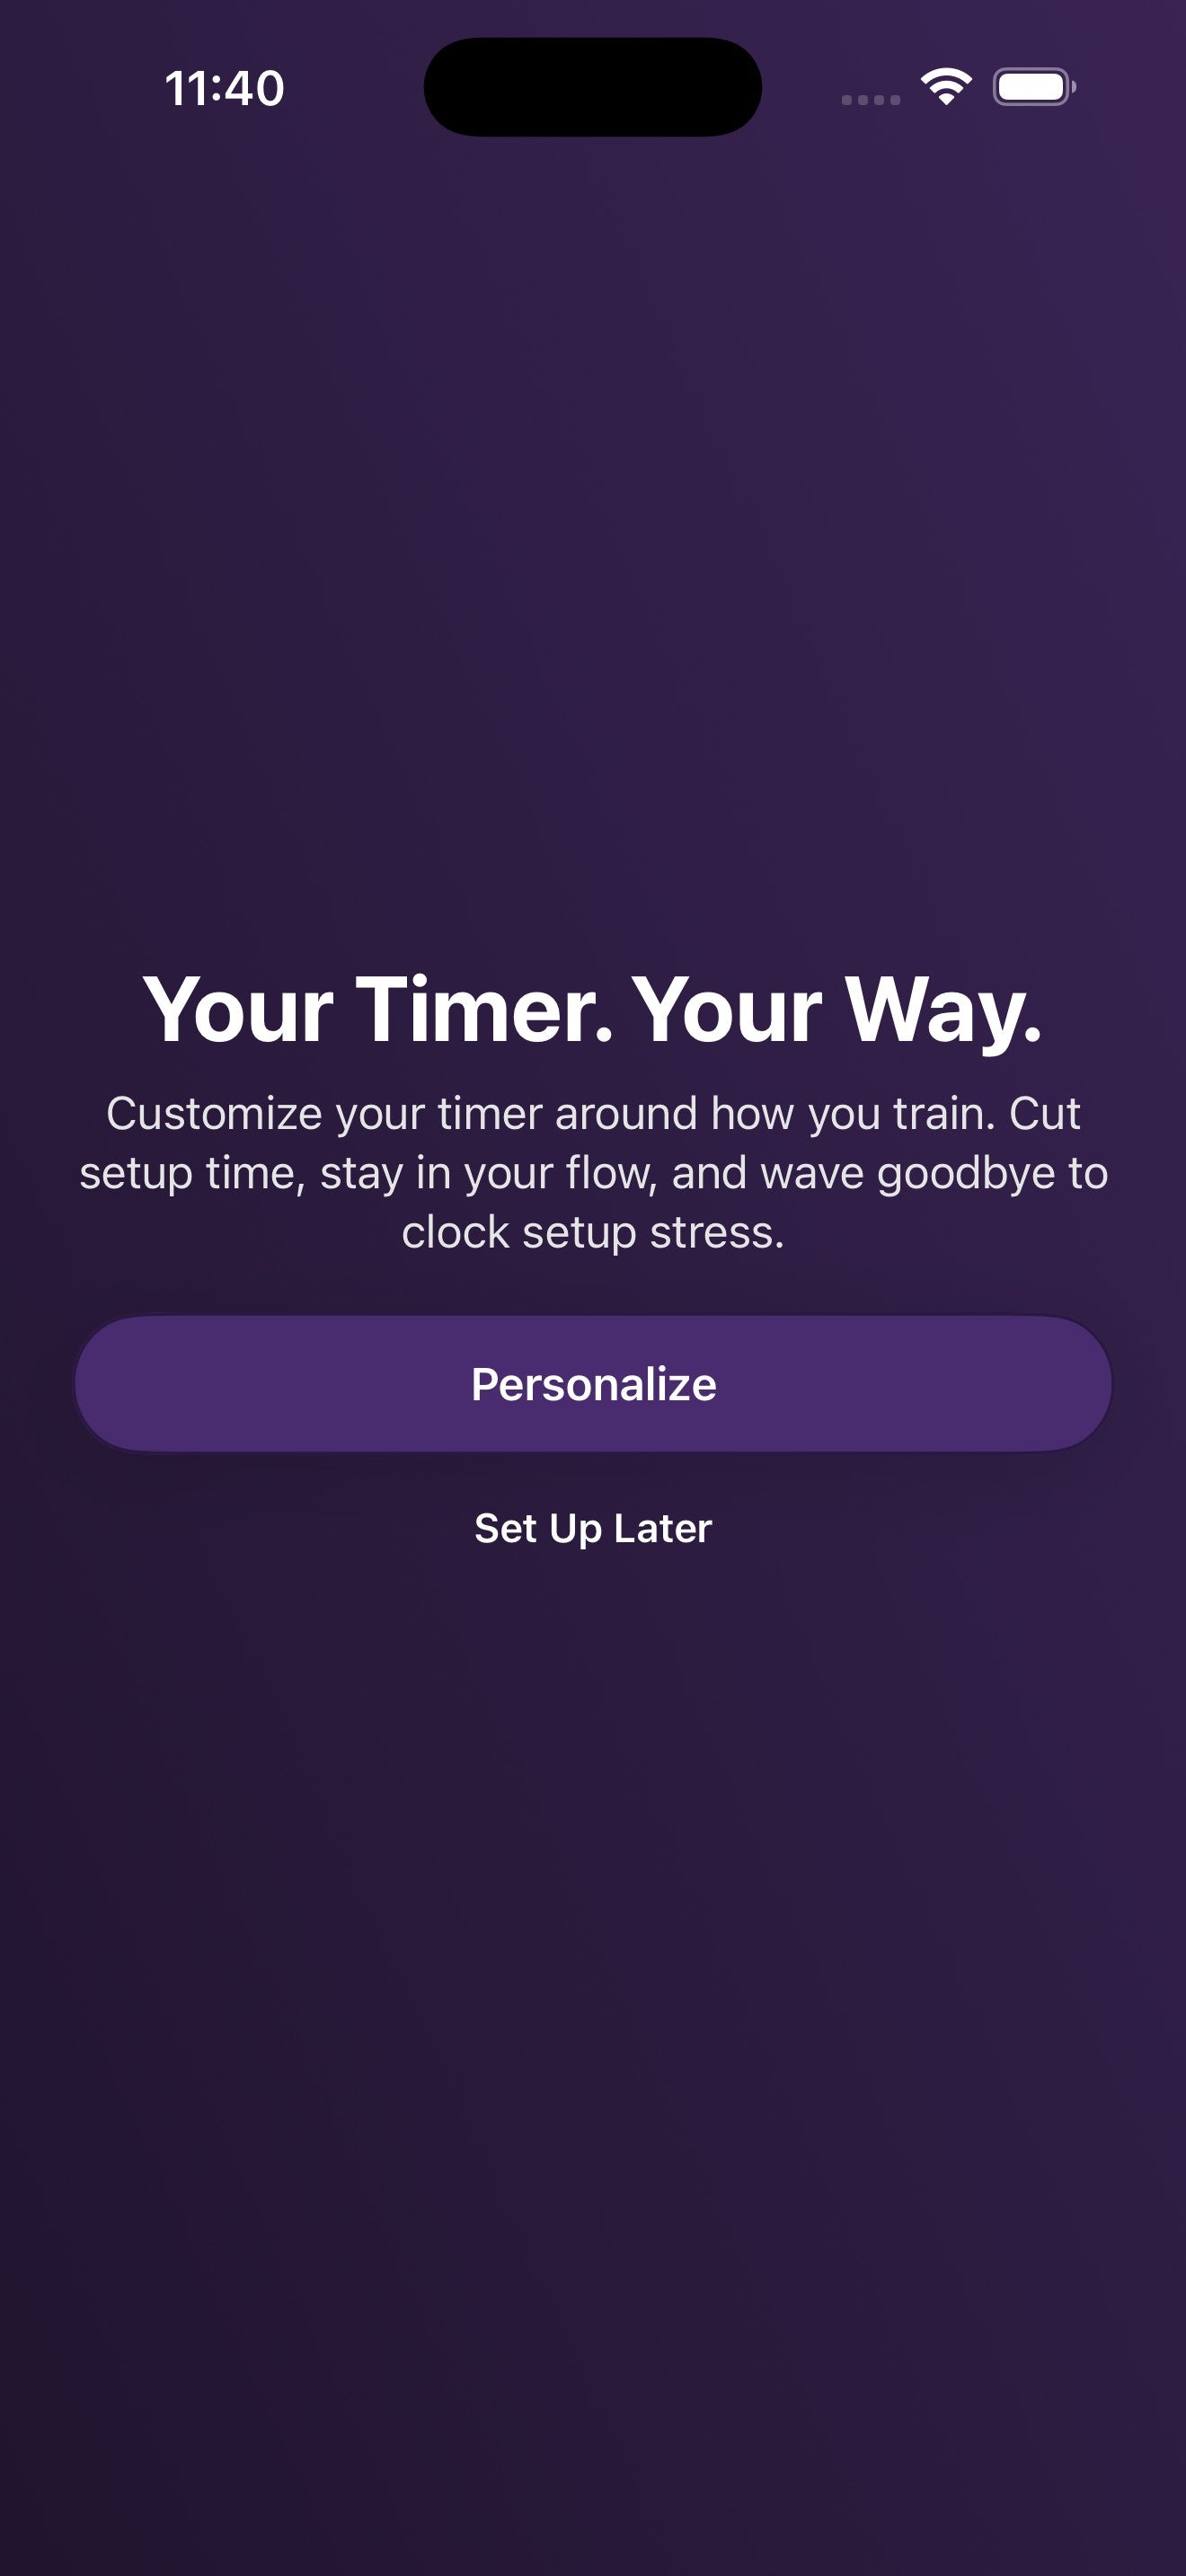
After signing up, the app walks you through a short setup so the timer matches the way you train. You can change any of these later in Settings → Preferences.
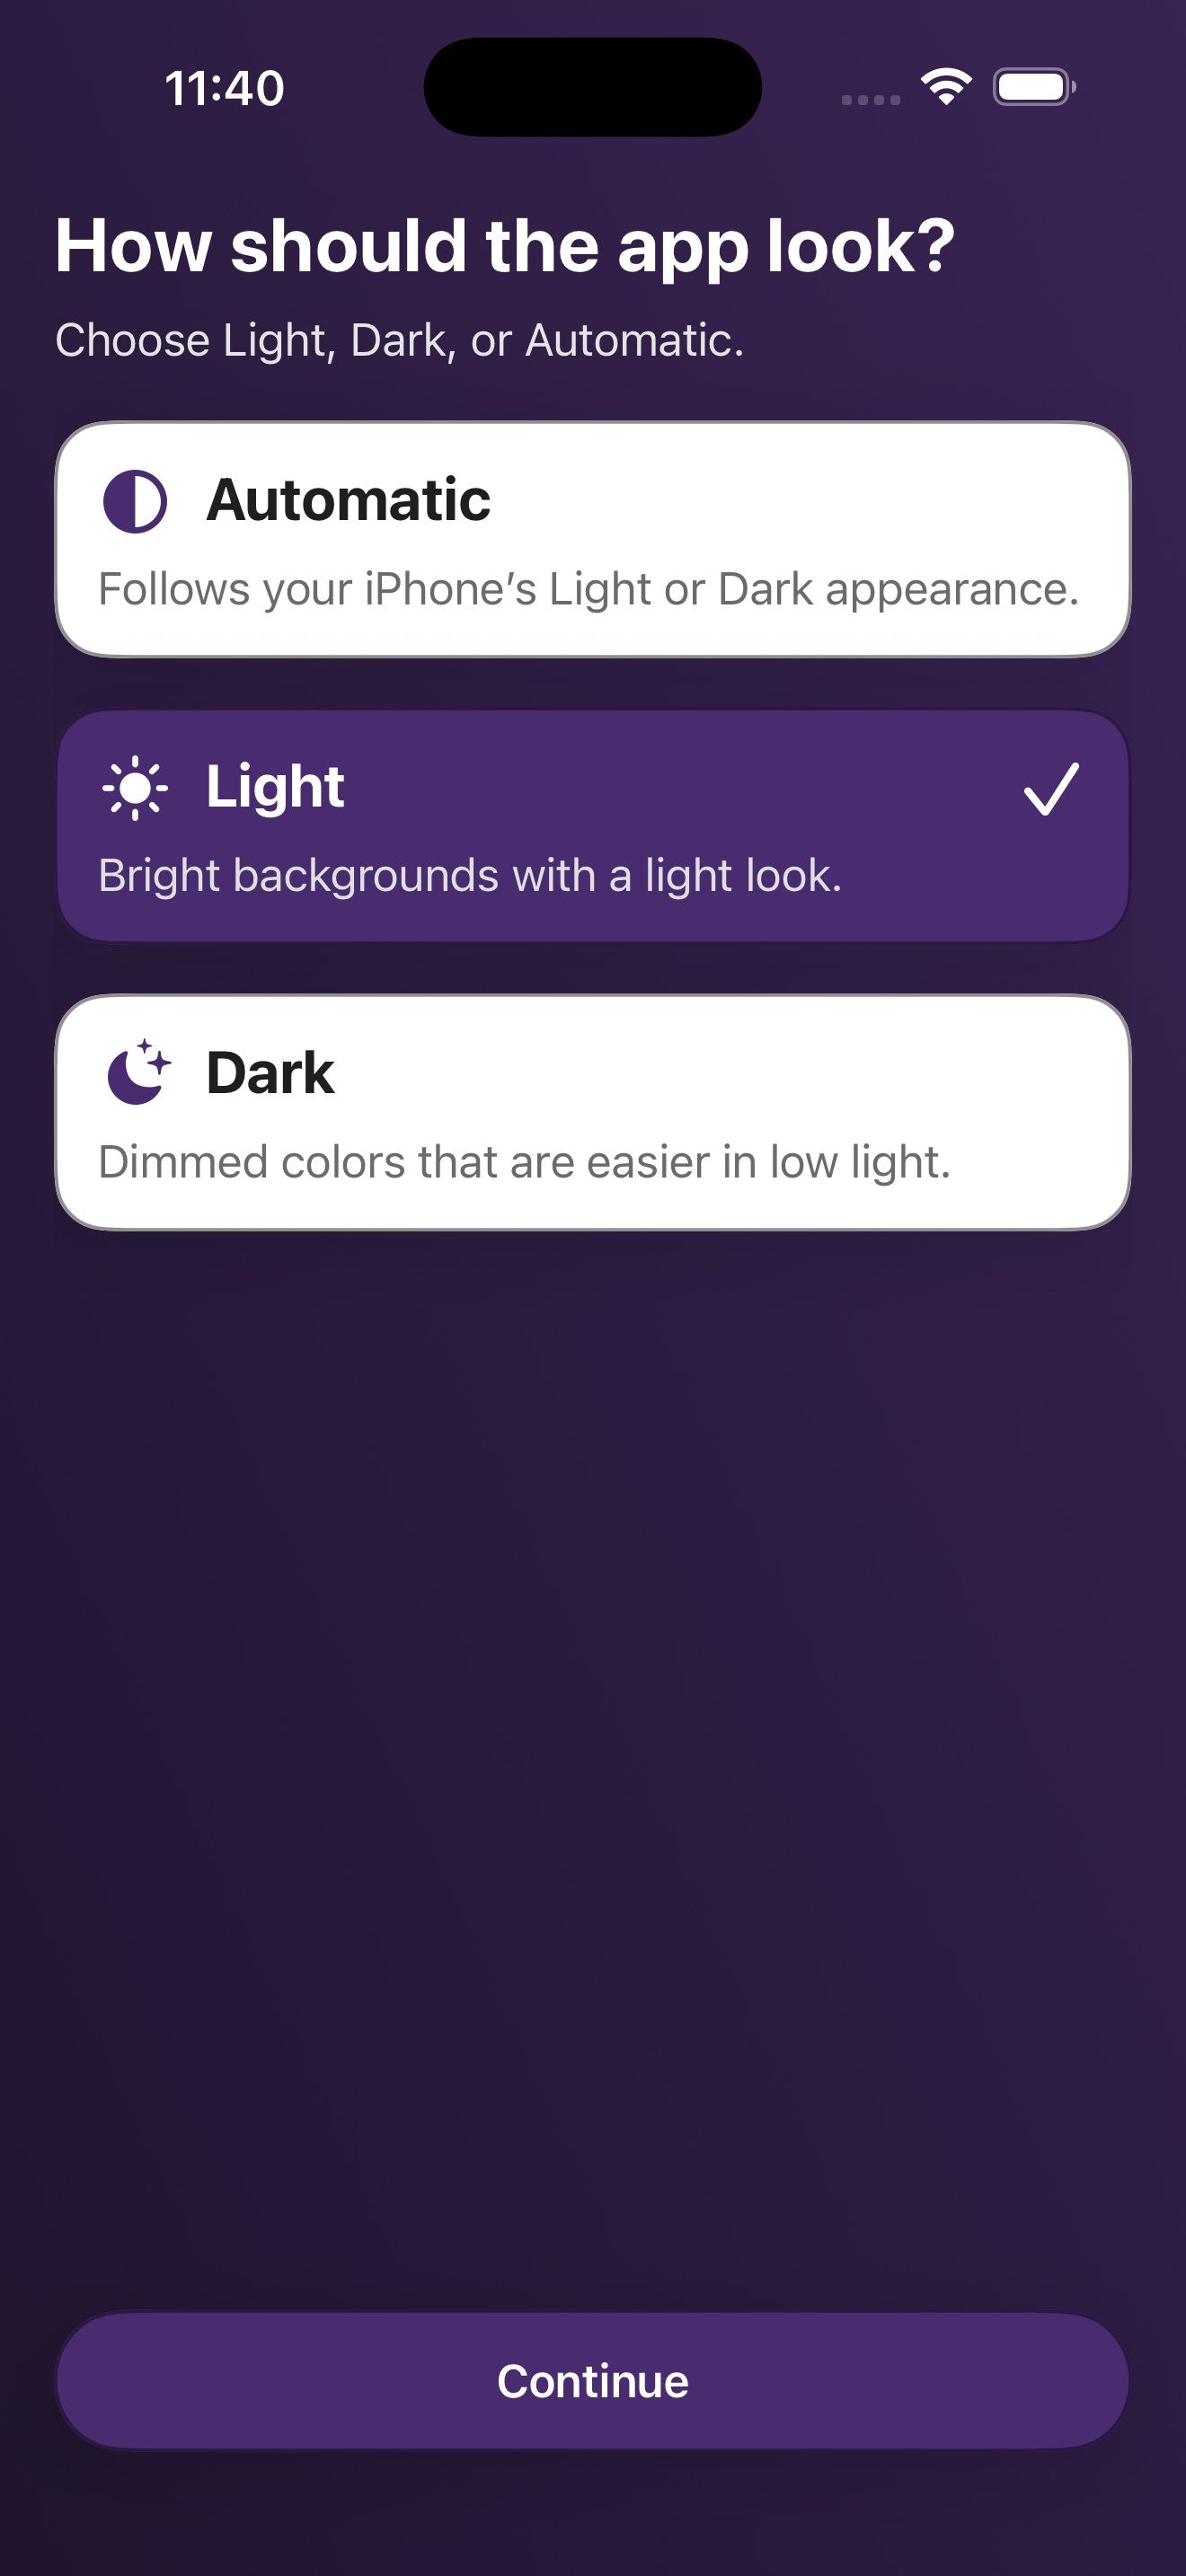
Step 1 · Light, Dark, or Automatic
Choose how the app should look. Automatic follows your iPhone's appearance setting. Light and Dark override that.
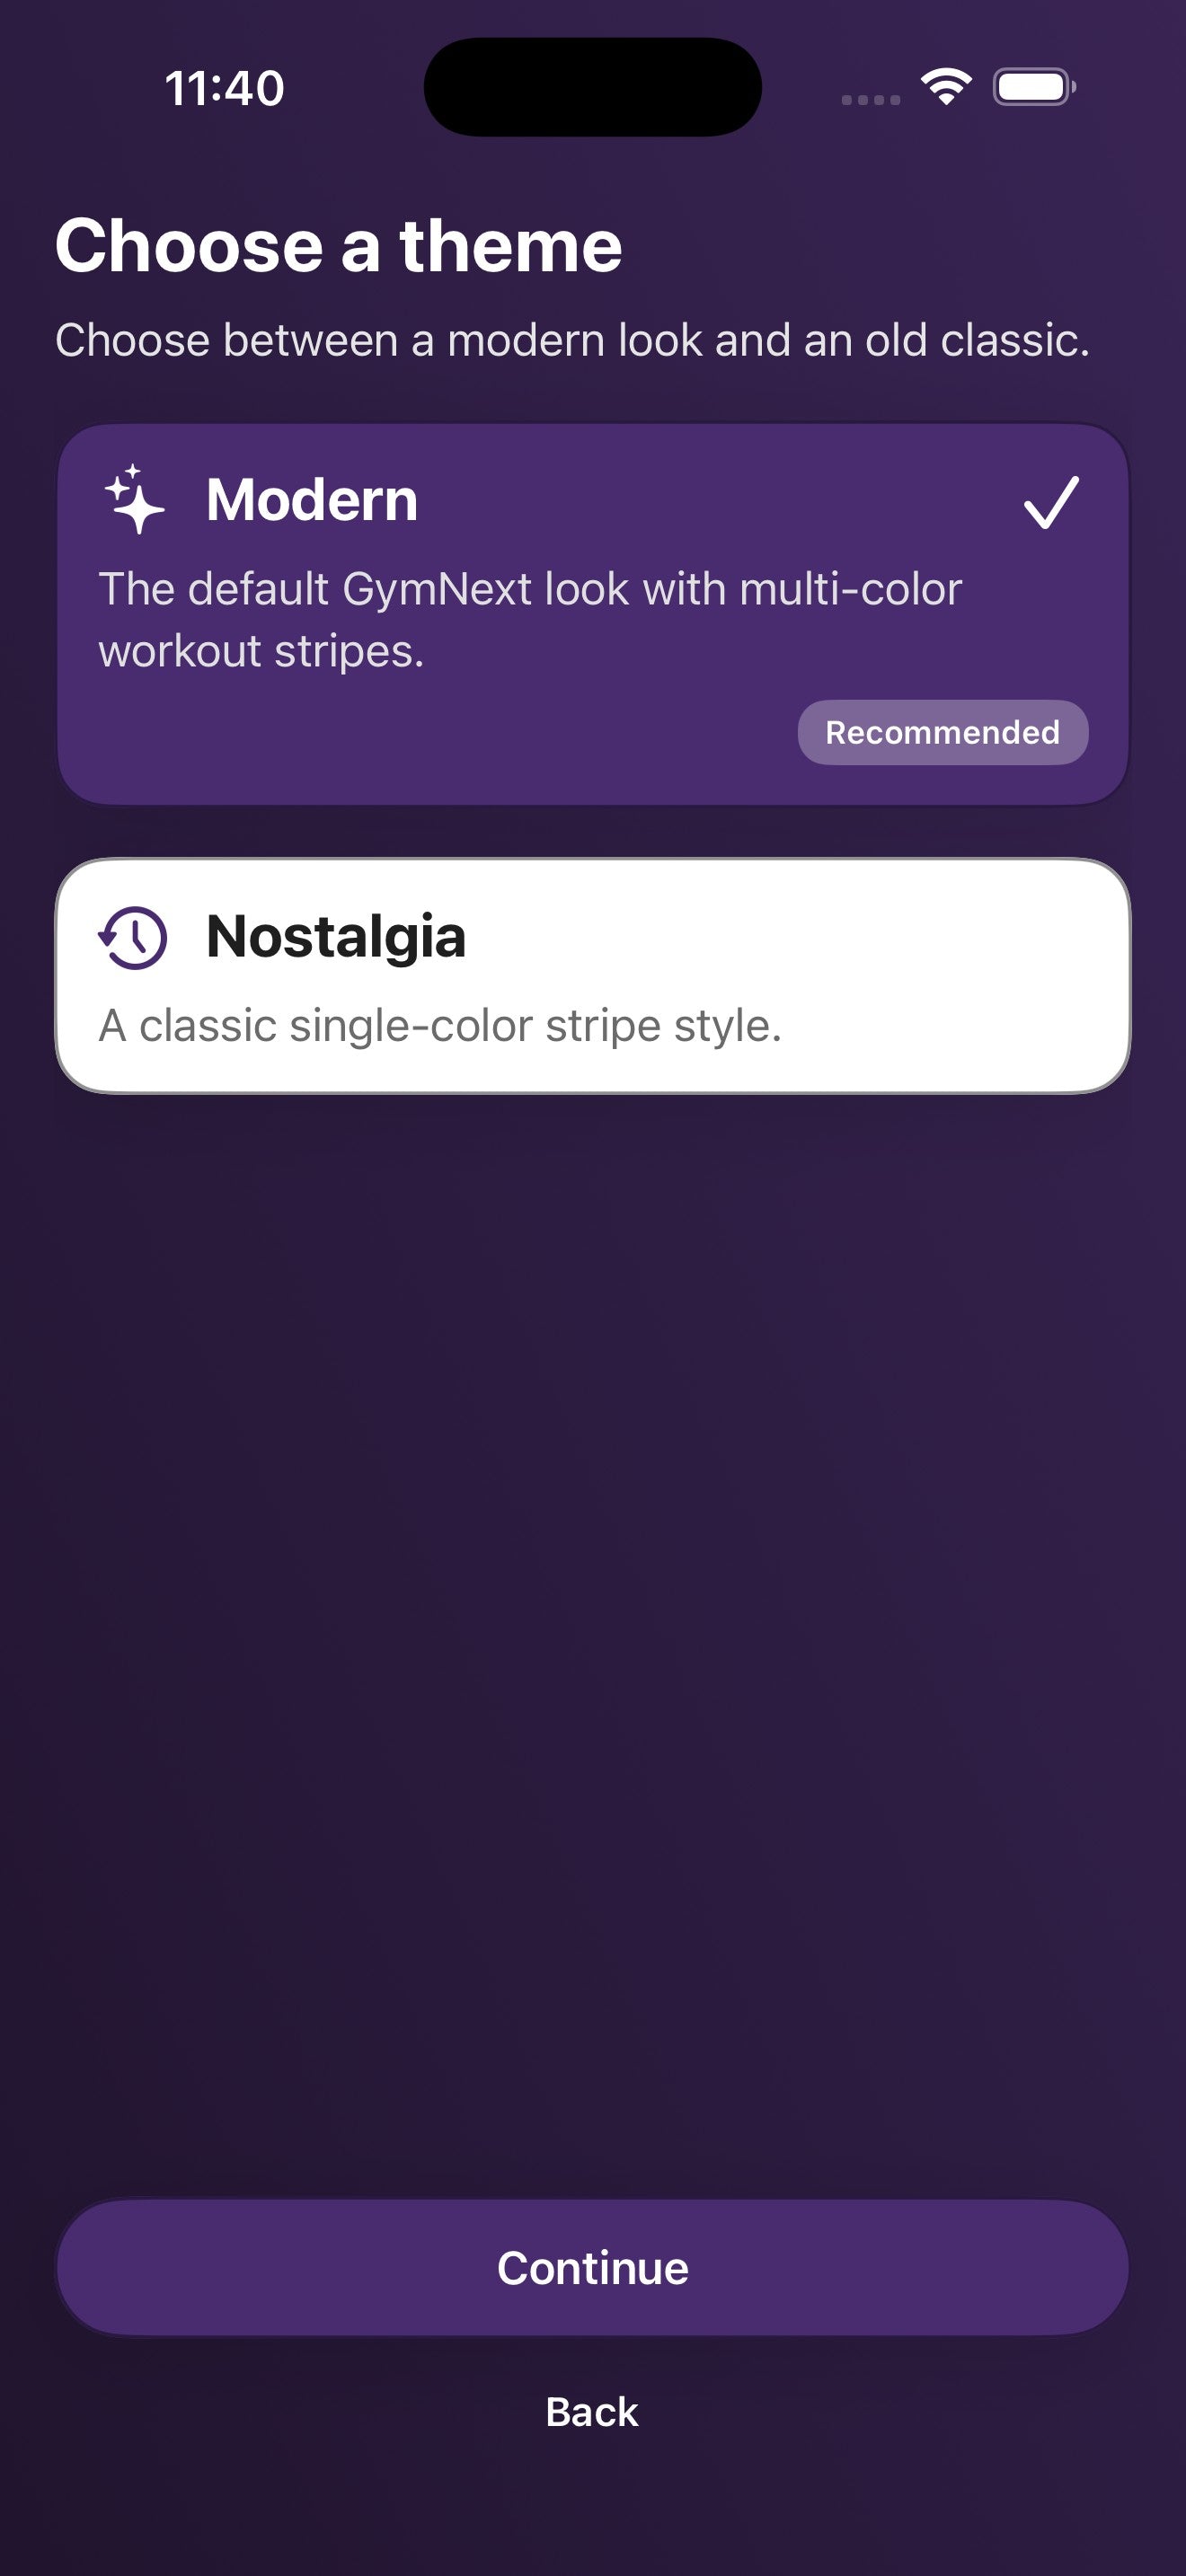
Step 2 · Modern or Nostalgia
Modern is the default GymNext look with multi-color workout stripes. Nostalgia is a classic single-color stripe style for users who prefer the original feel.
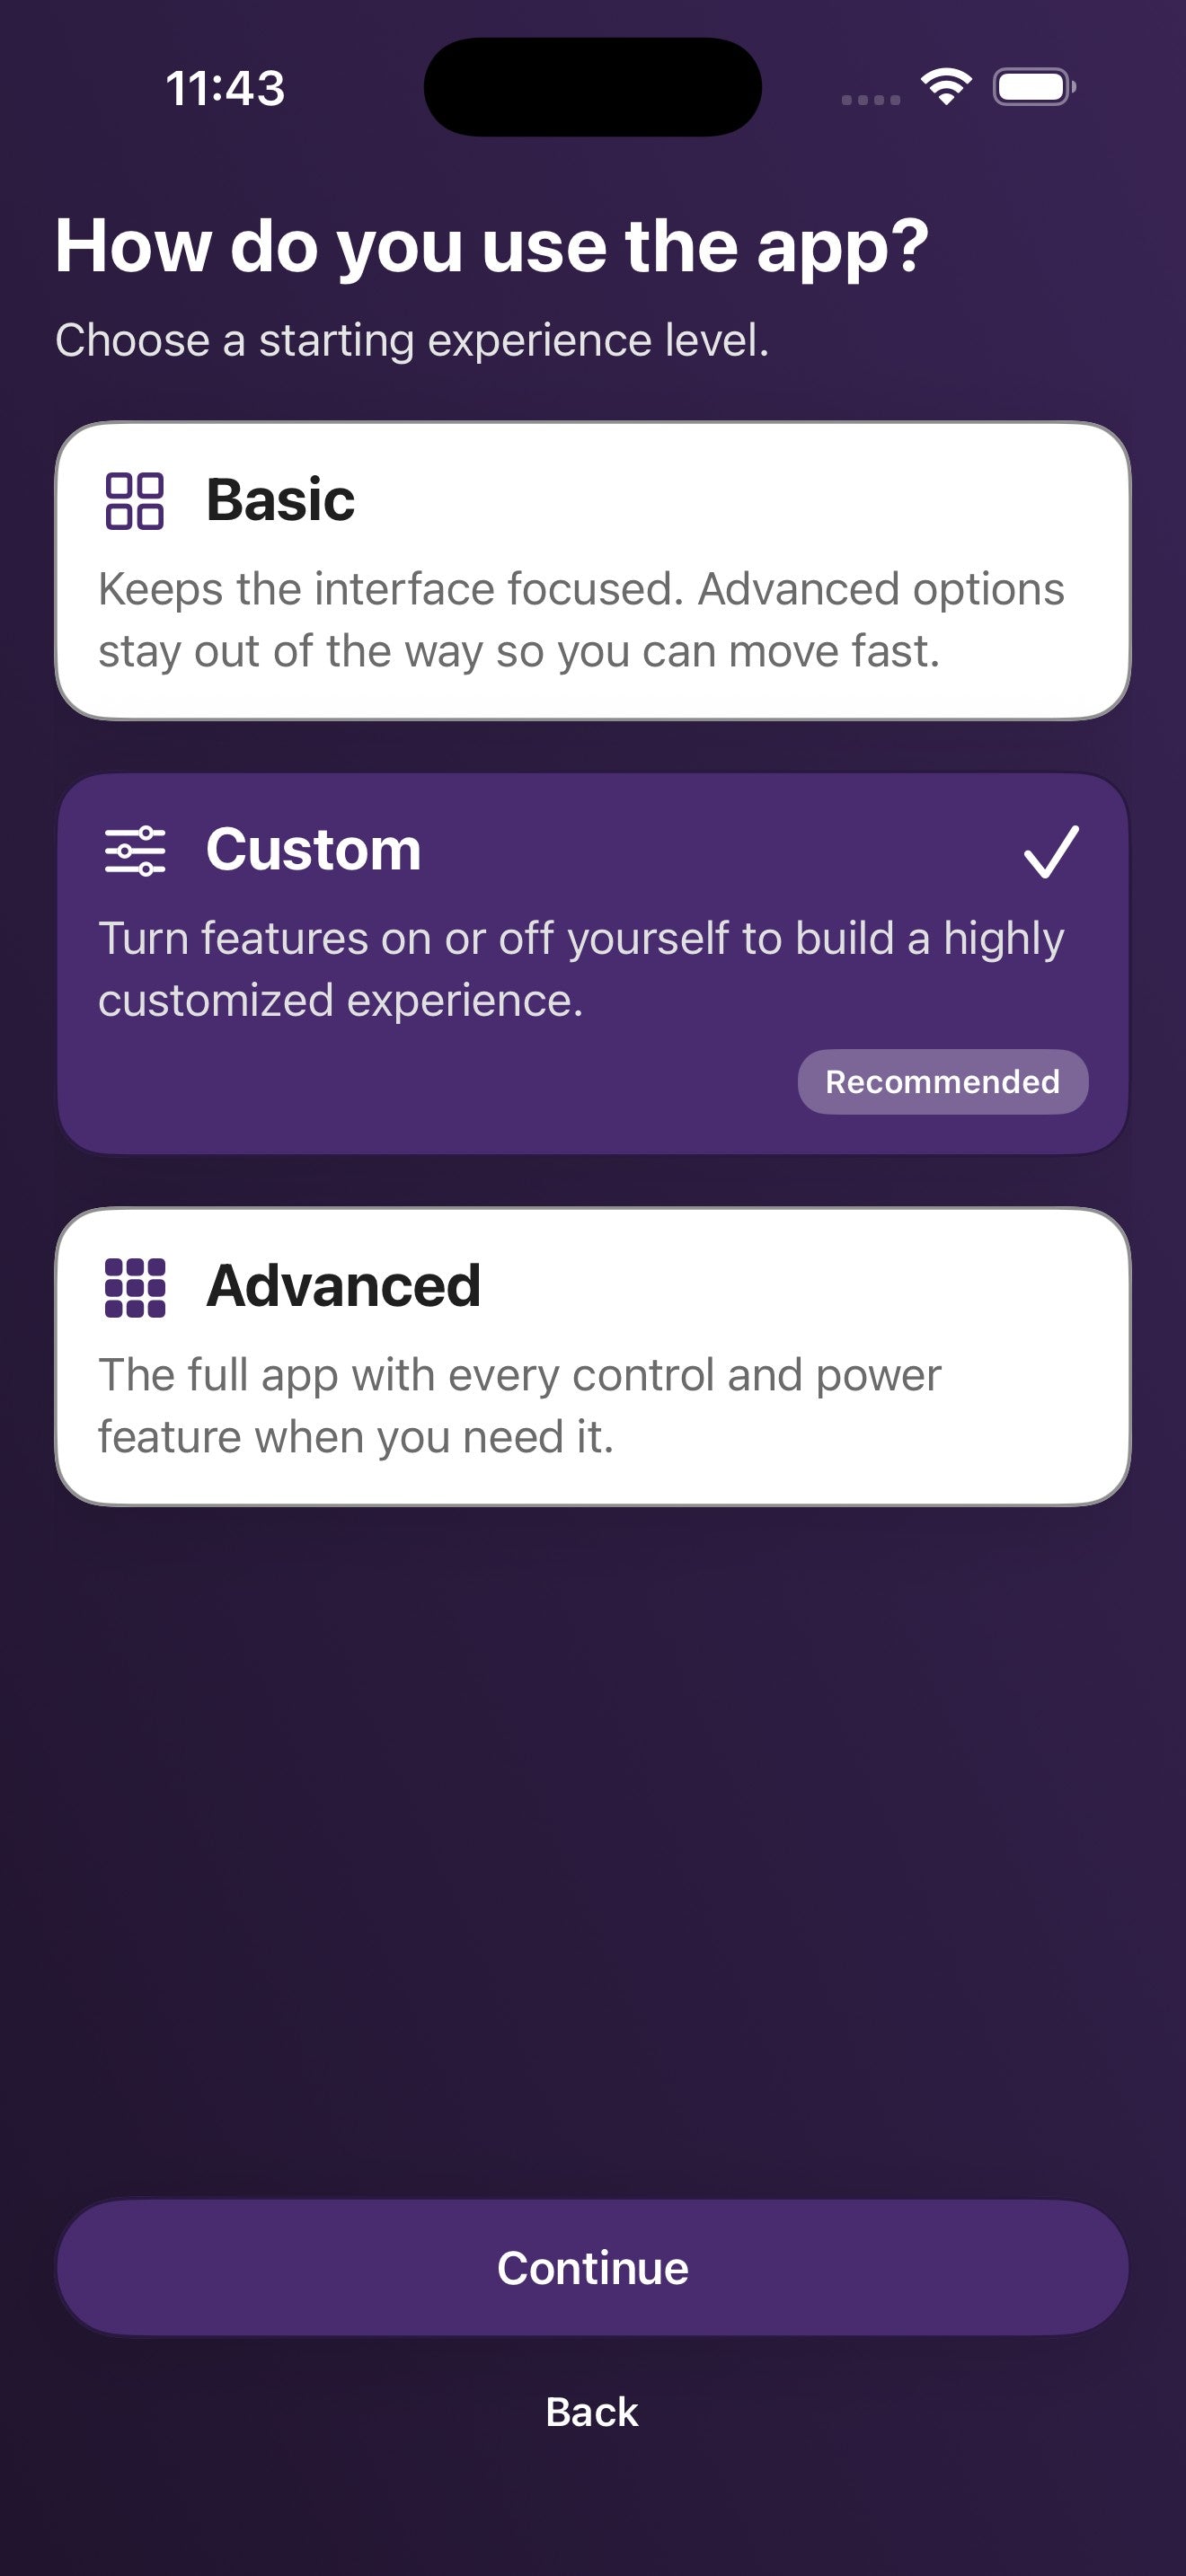
Step 3 · Basic, Custom, or Advanced
Basic hides power-user controls so you can move quickly. Custom (recommended) lets you turn individual features on or off to build a highly personalized experience. Advanced exposes every option. You can switch any time.
Step 4 · Pick your training style
The "Train Your Way" step picks a default workflow. Each one biases the home screen toward the way you actually train.
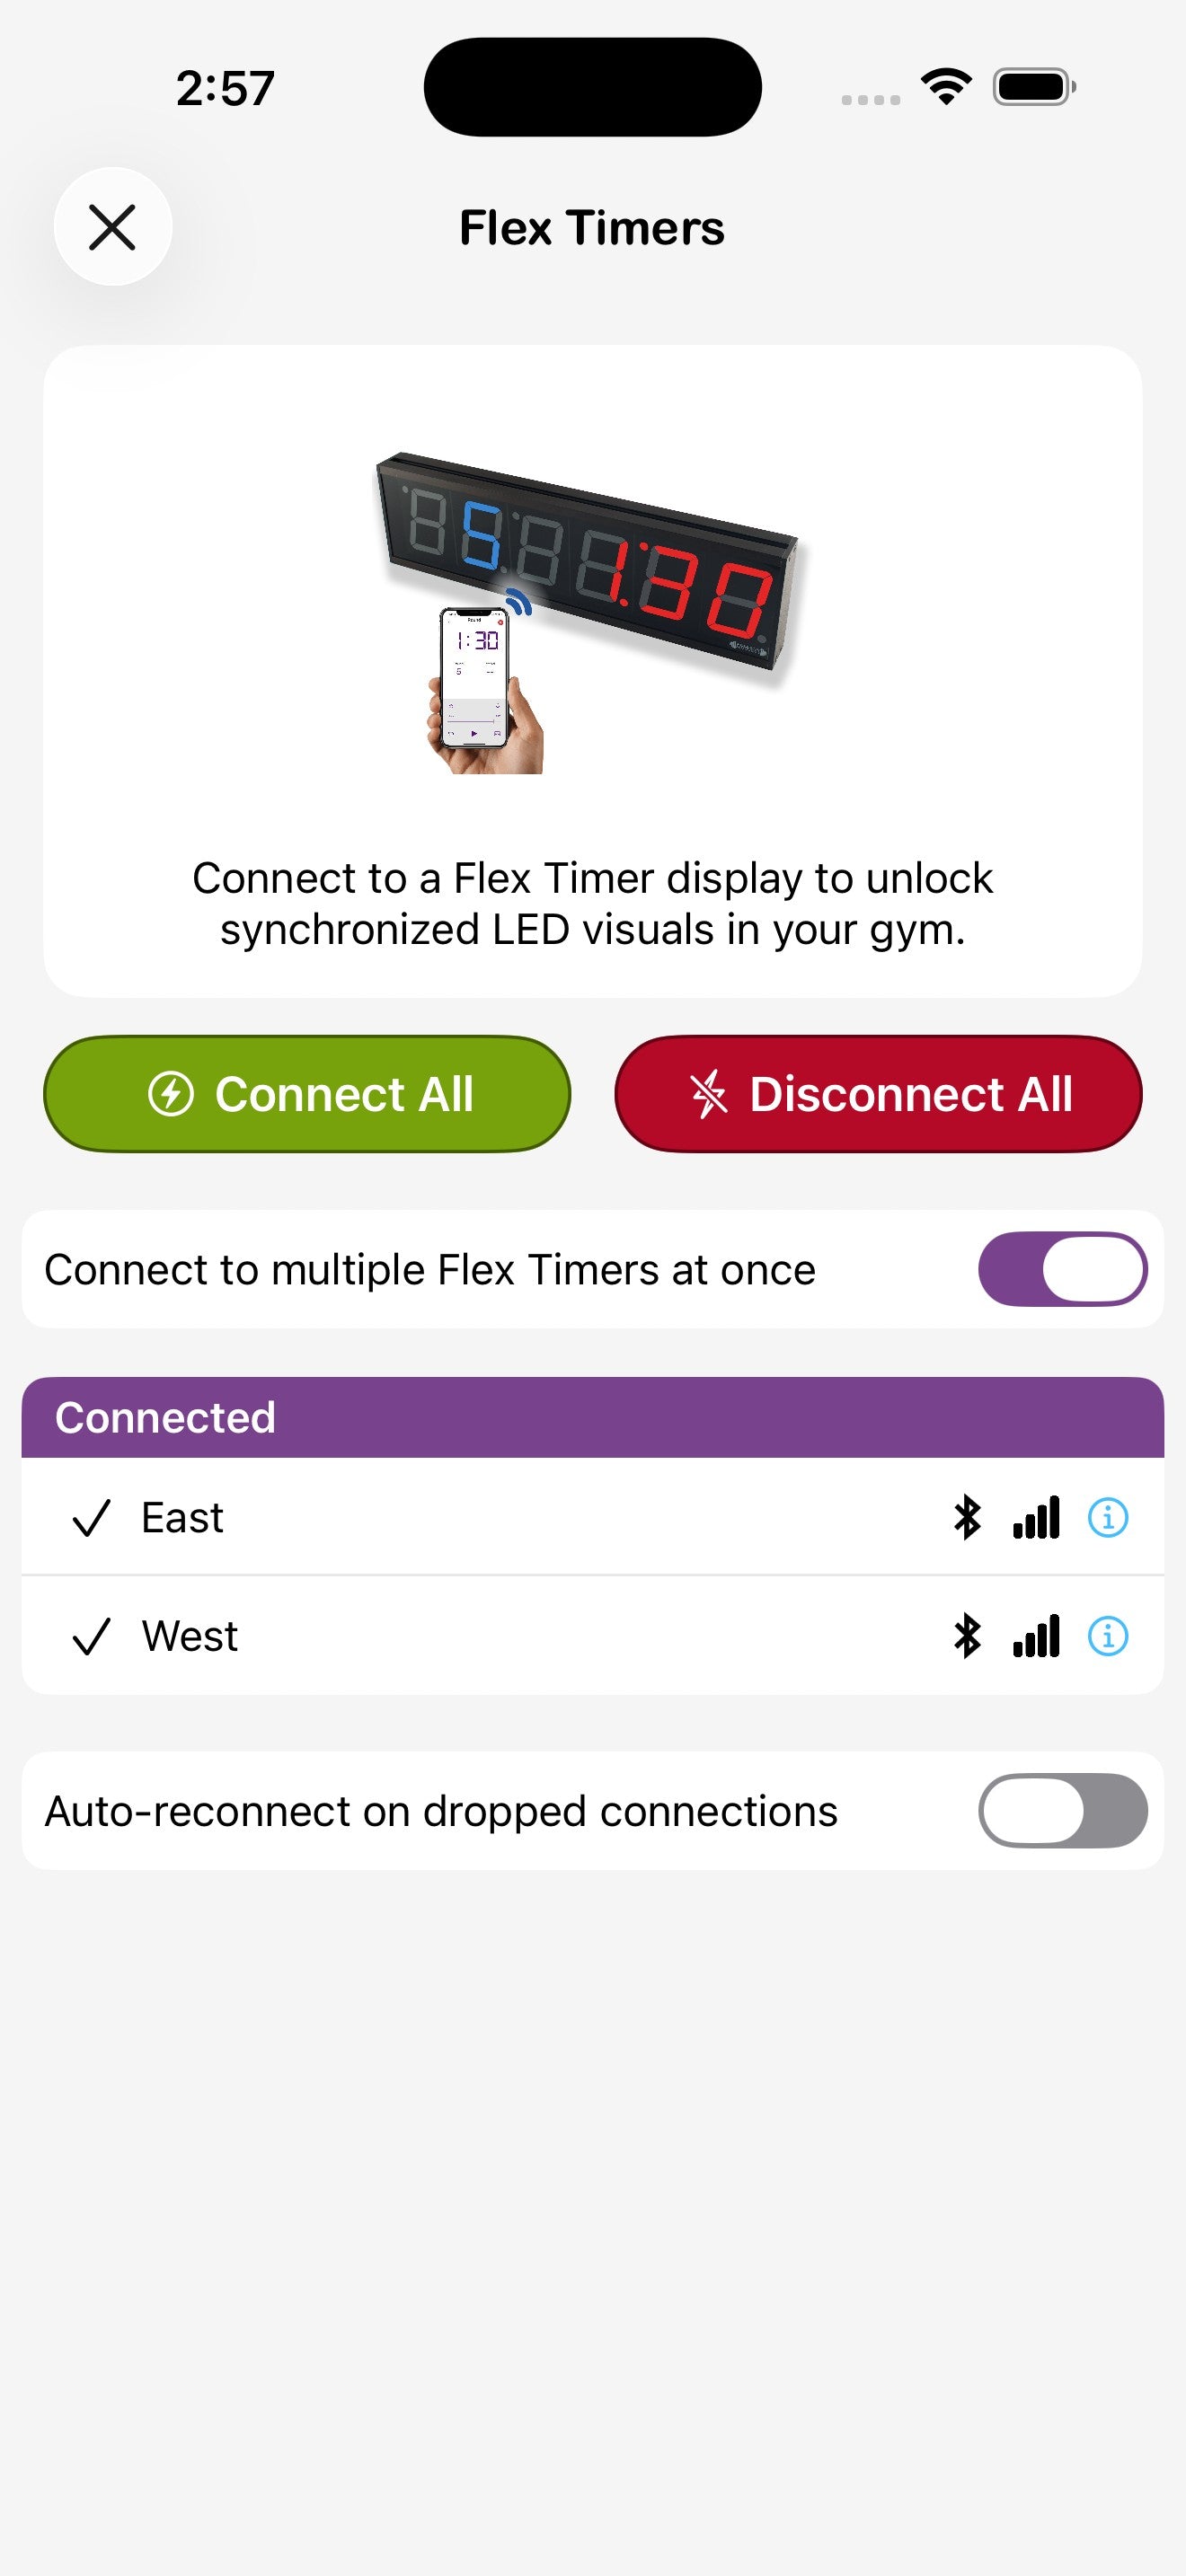
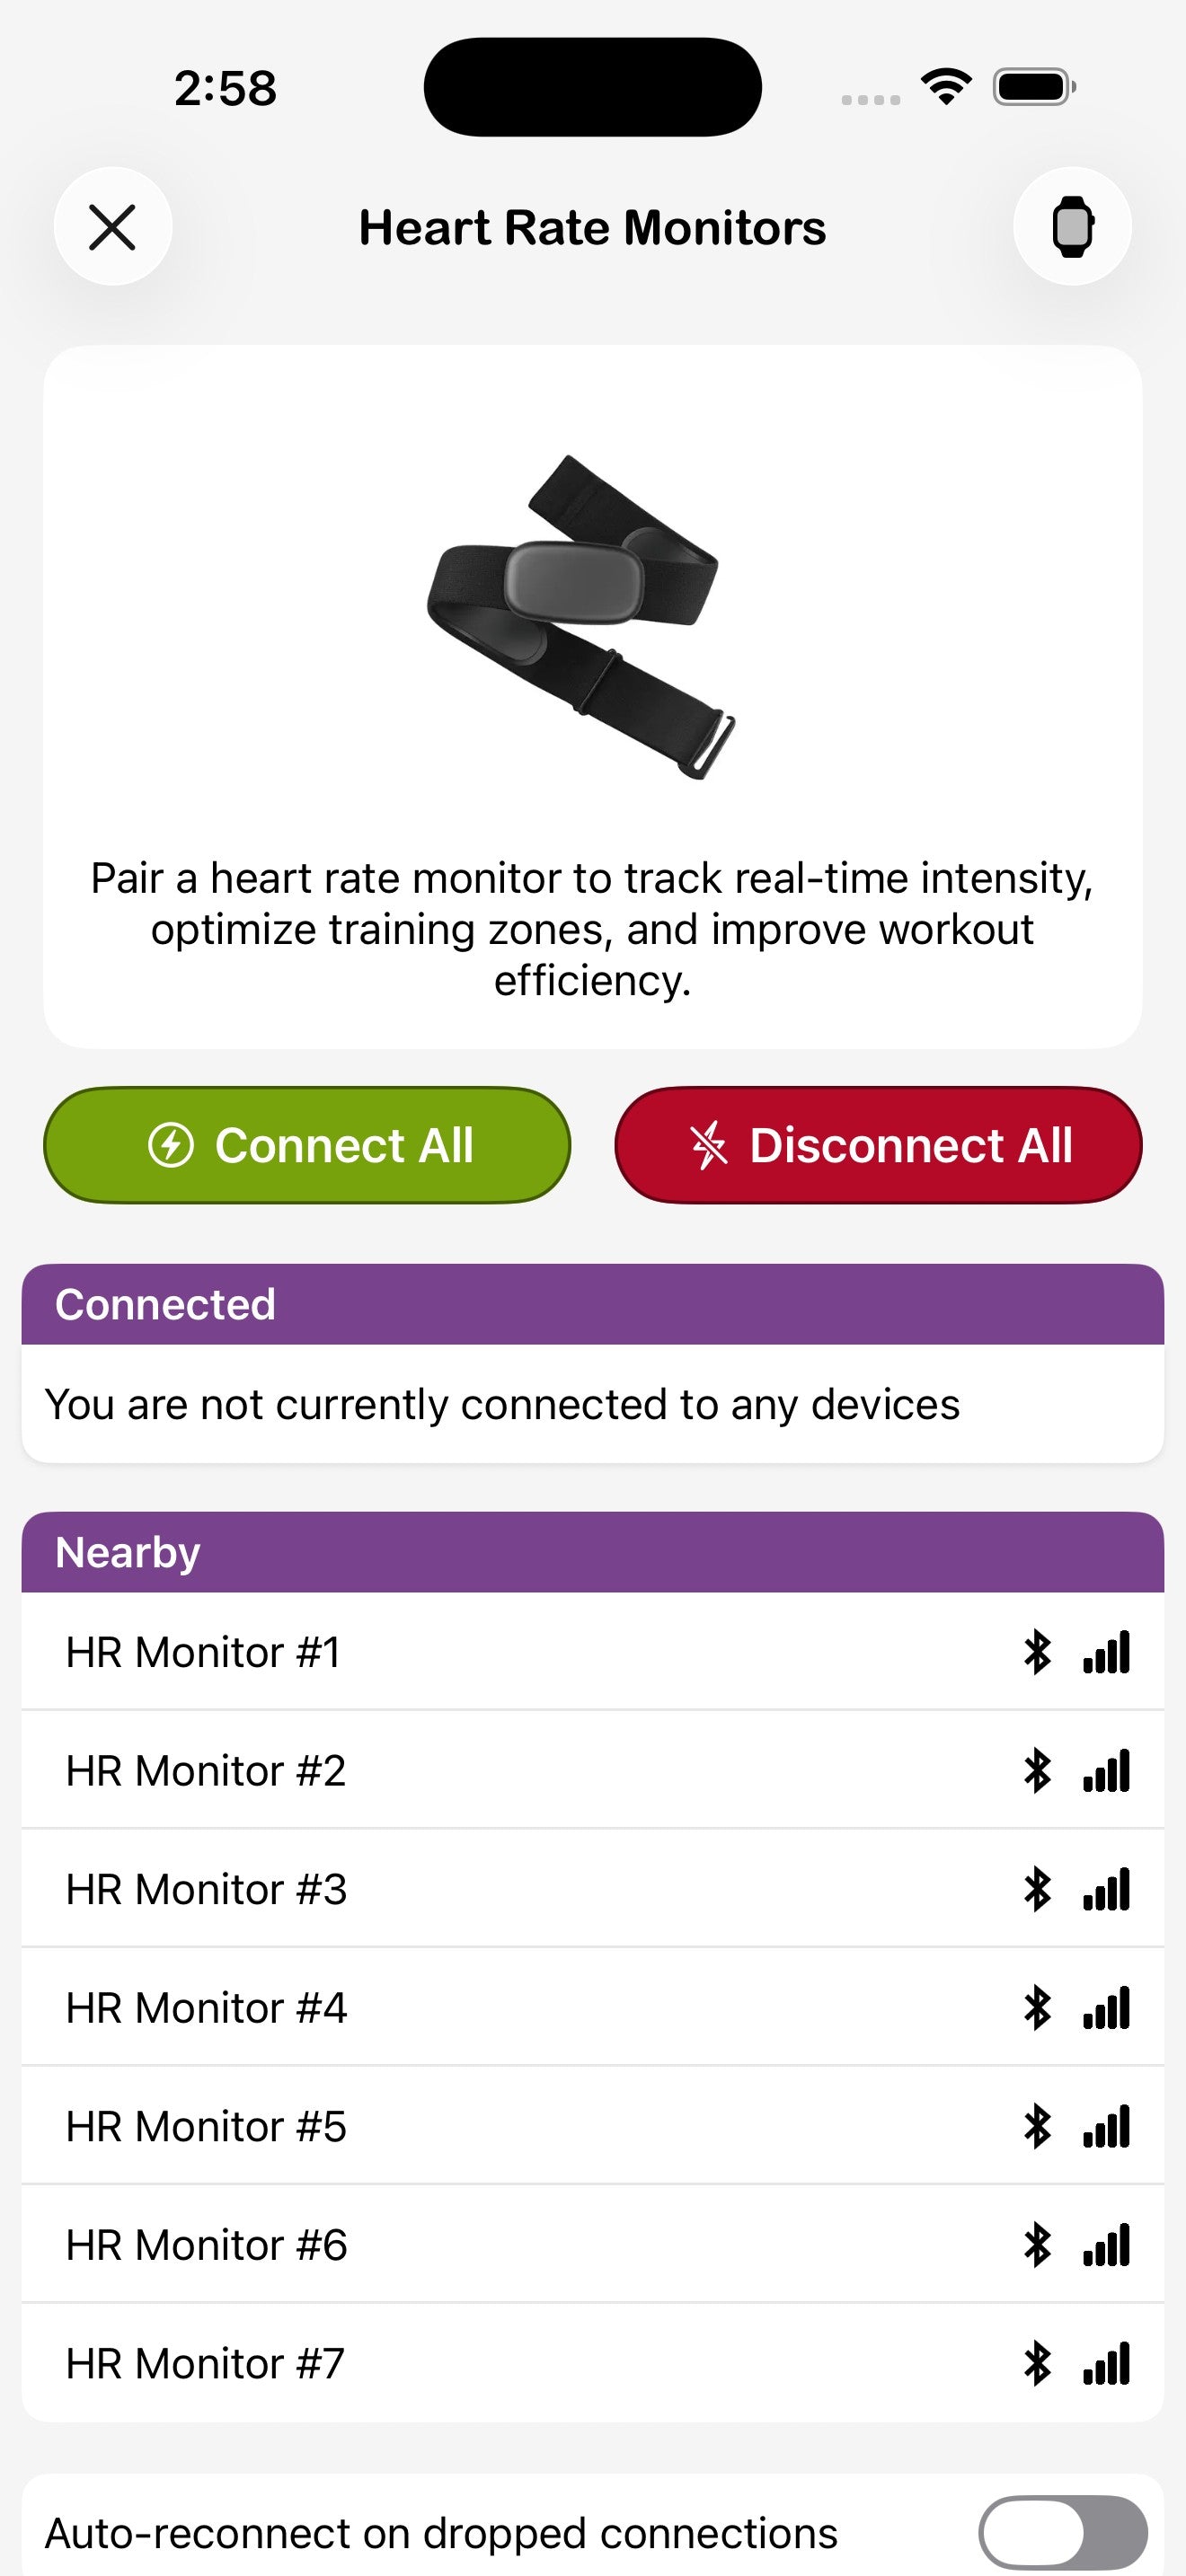
4. Connecting Flex Timer displays
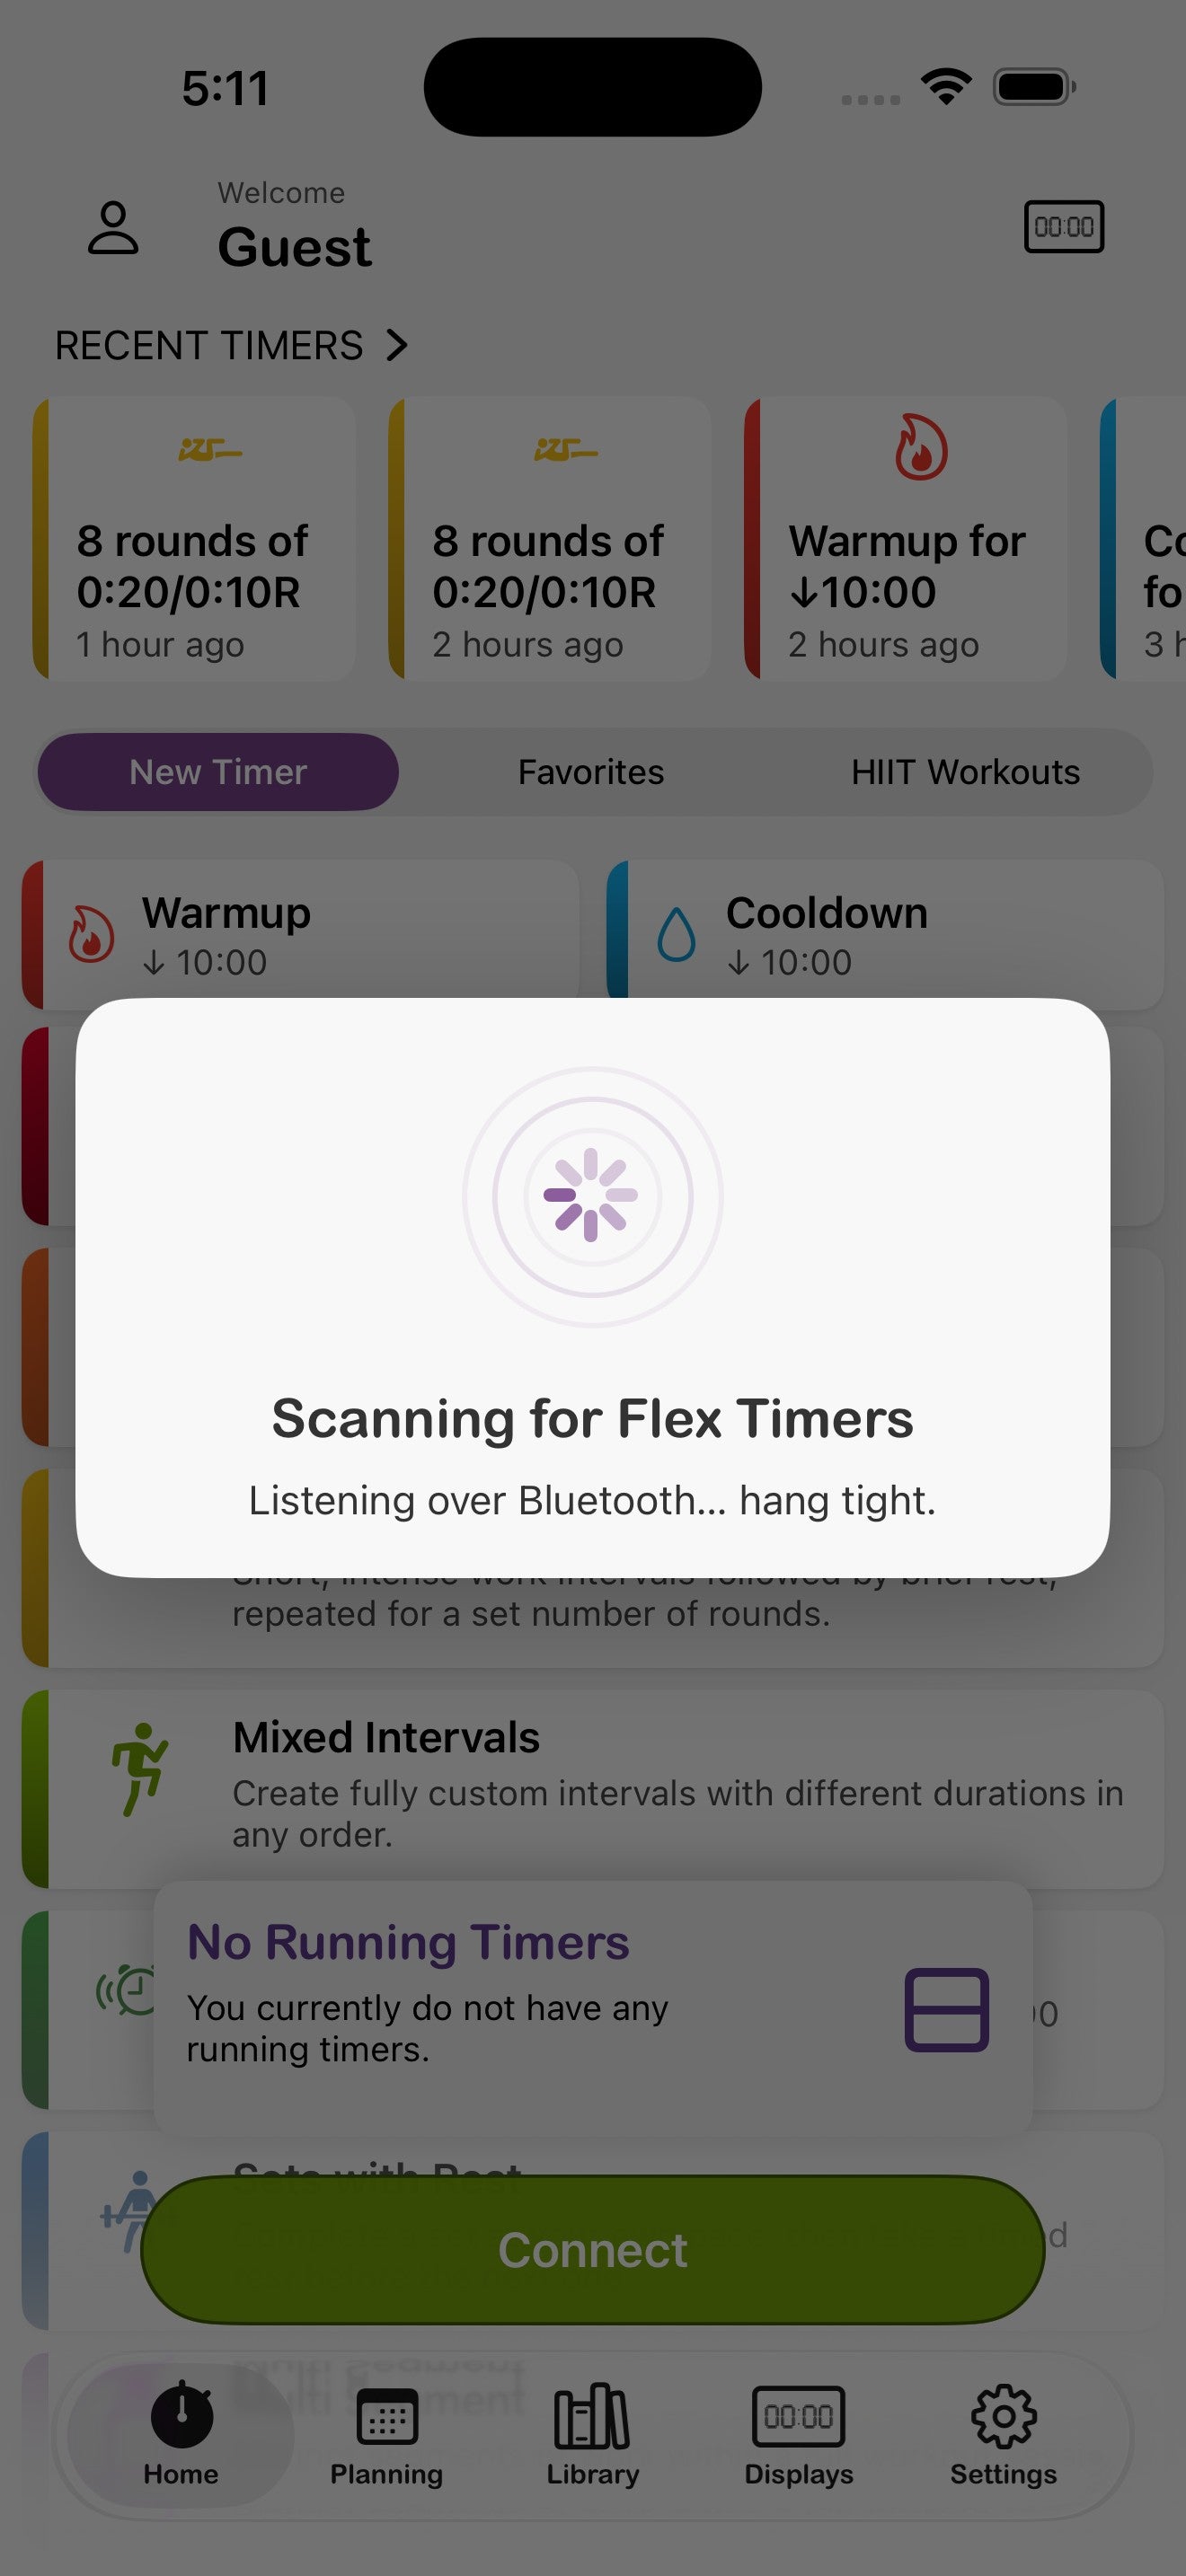
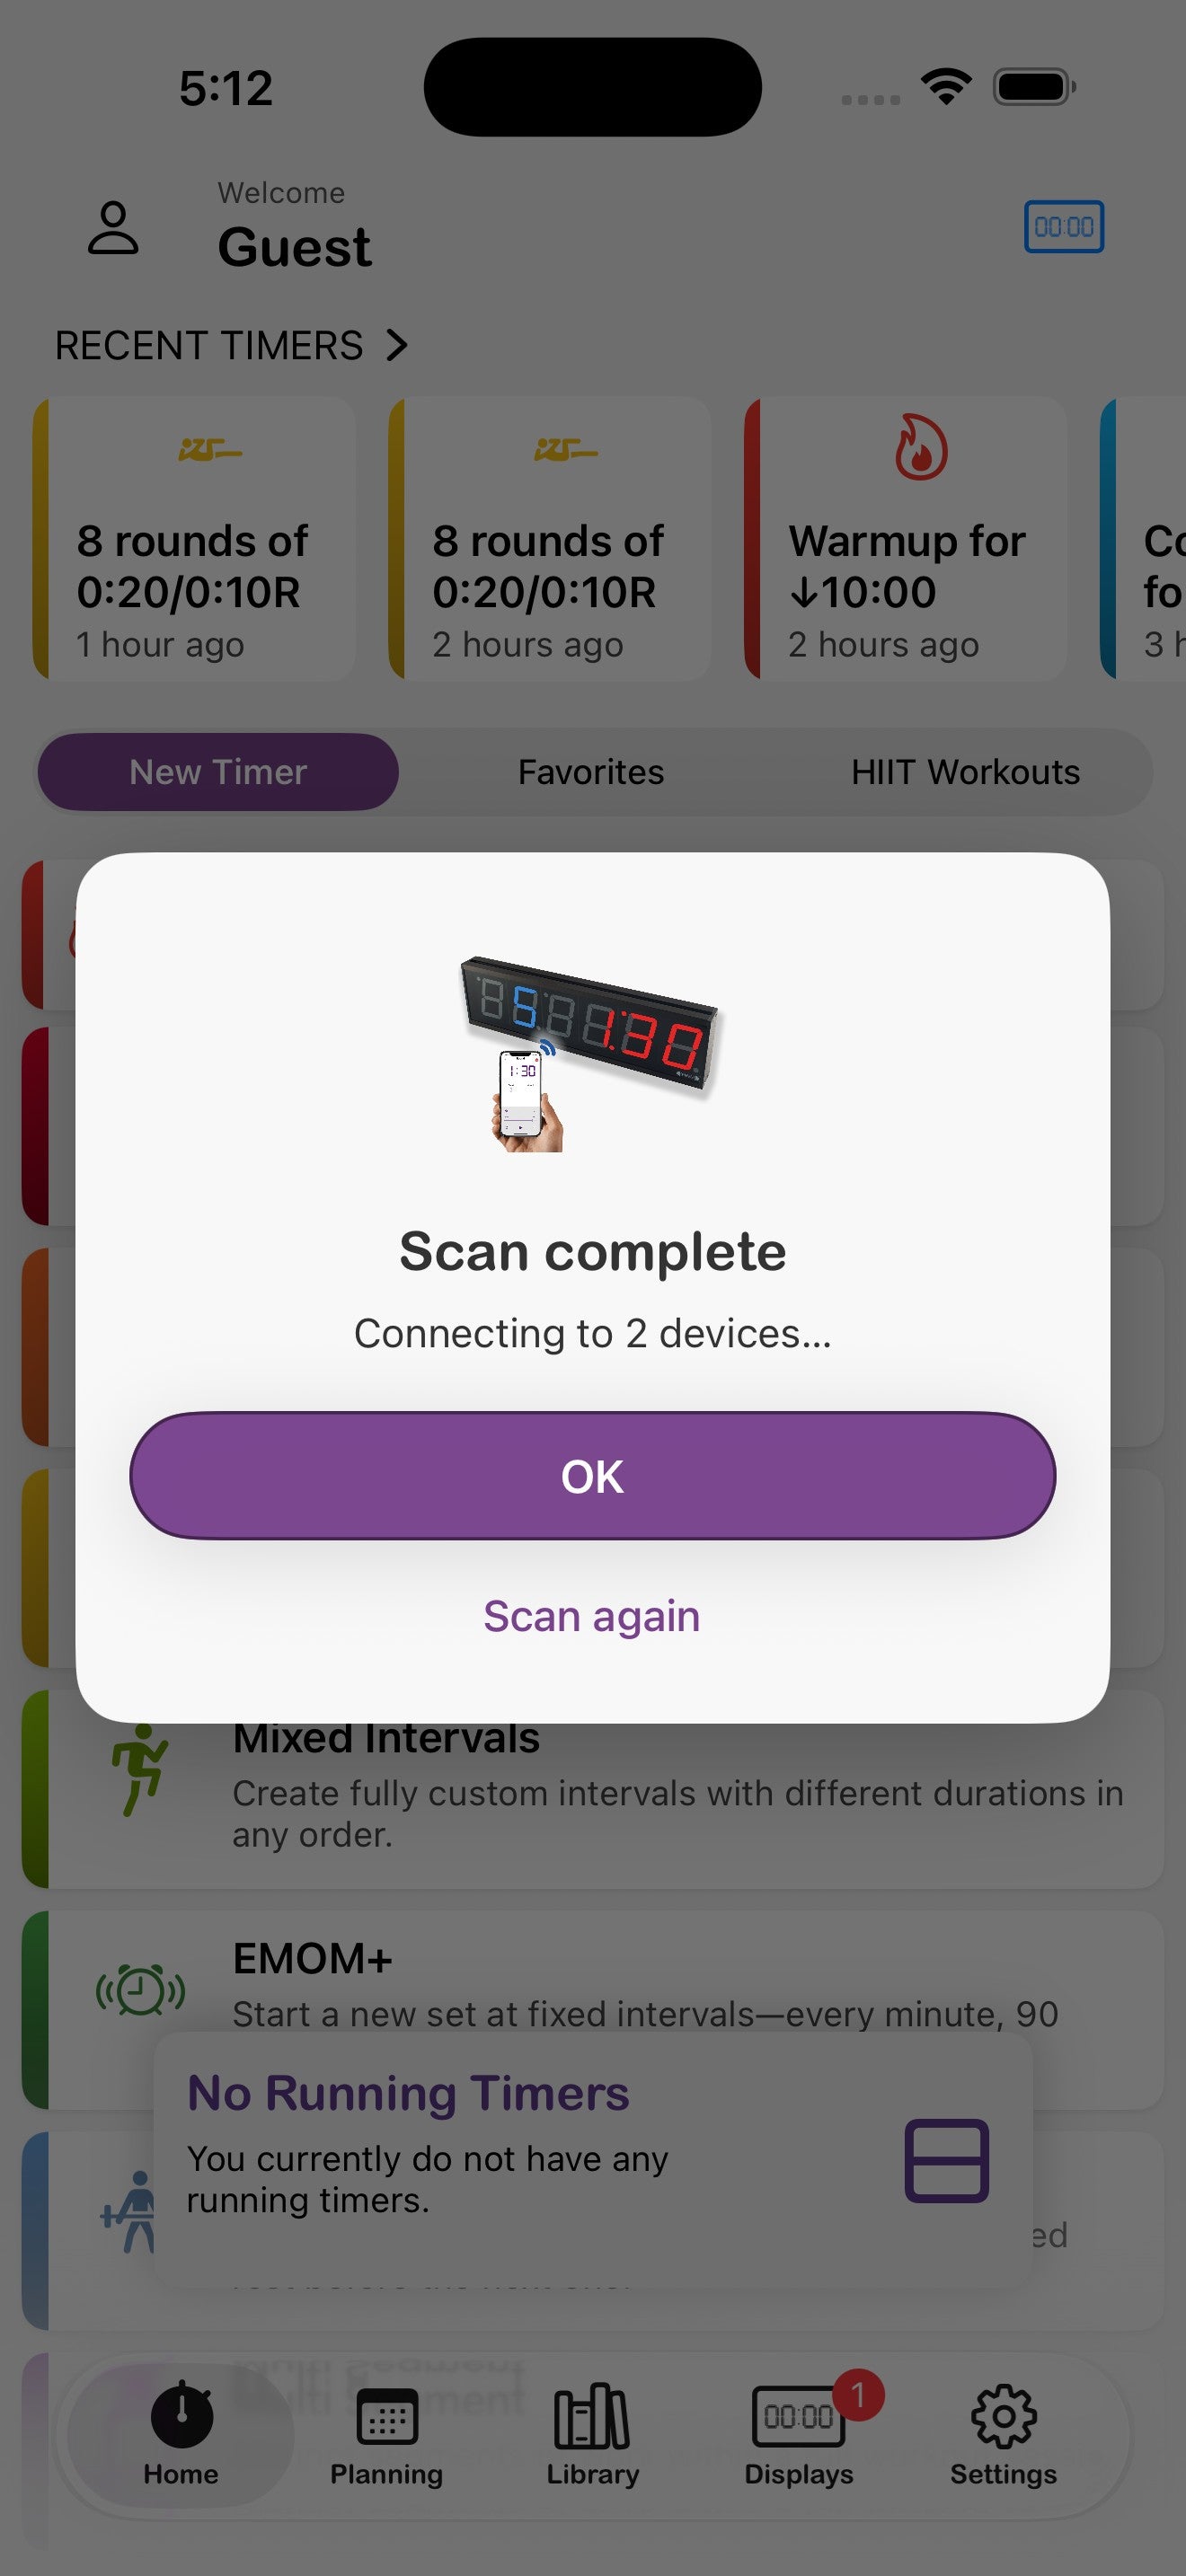
The app works on its own, but it's at its best when paired with one or more physical Flex Timer LED displays. The big Connect button at the bottom of the home screen scans for nearby displays over Bluetooth.
Pair a new display
- Power on the Flex Timer hardware and make sure it's within Bluetooth range.
- From the home screen, tap the green Connect button.
- Wait for the scan to finish, then tap OK.
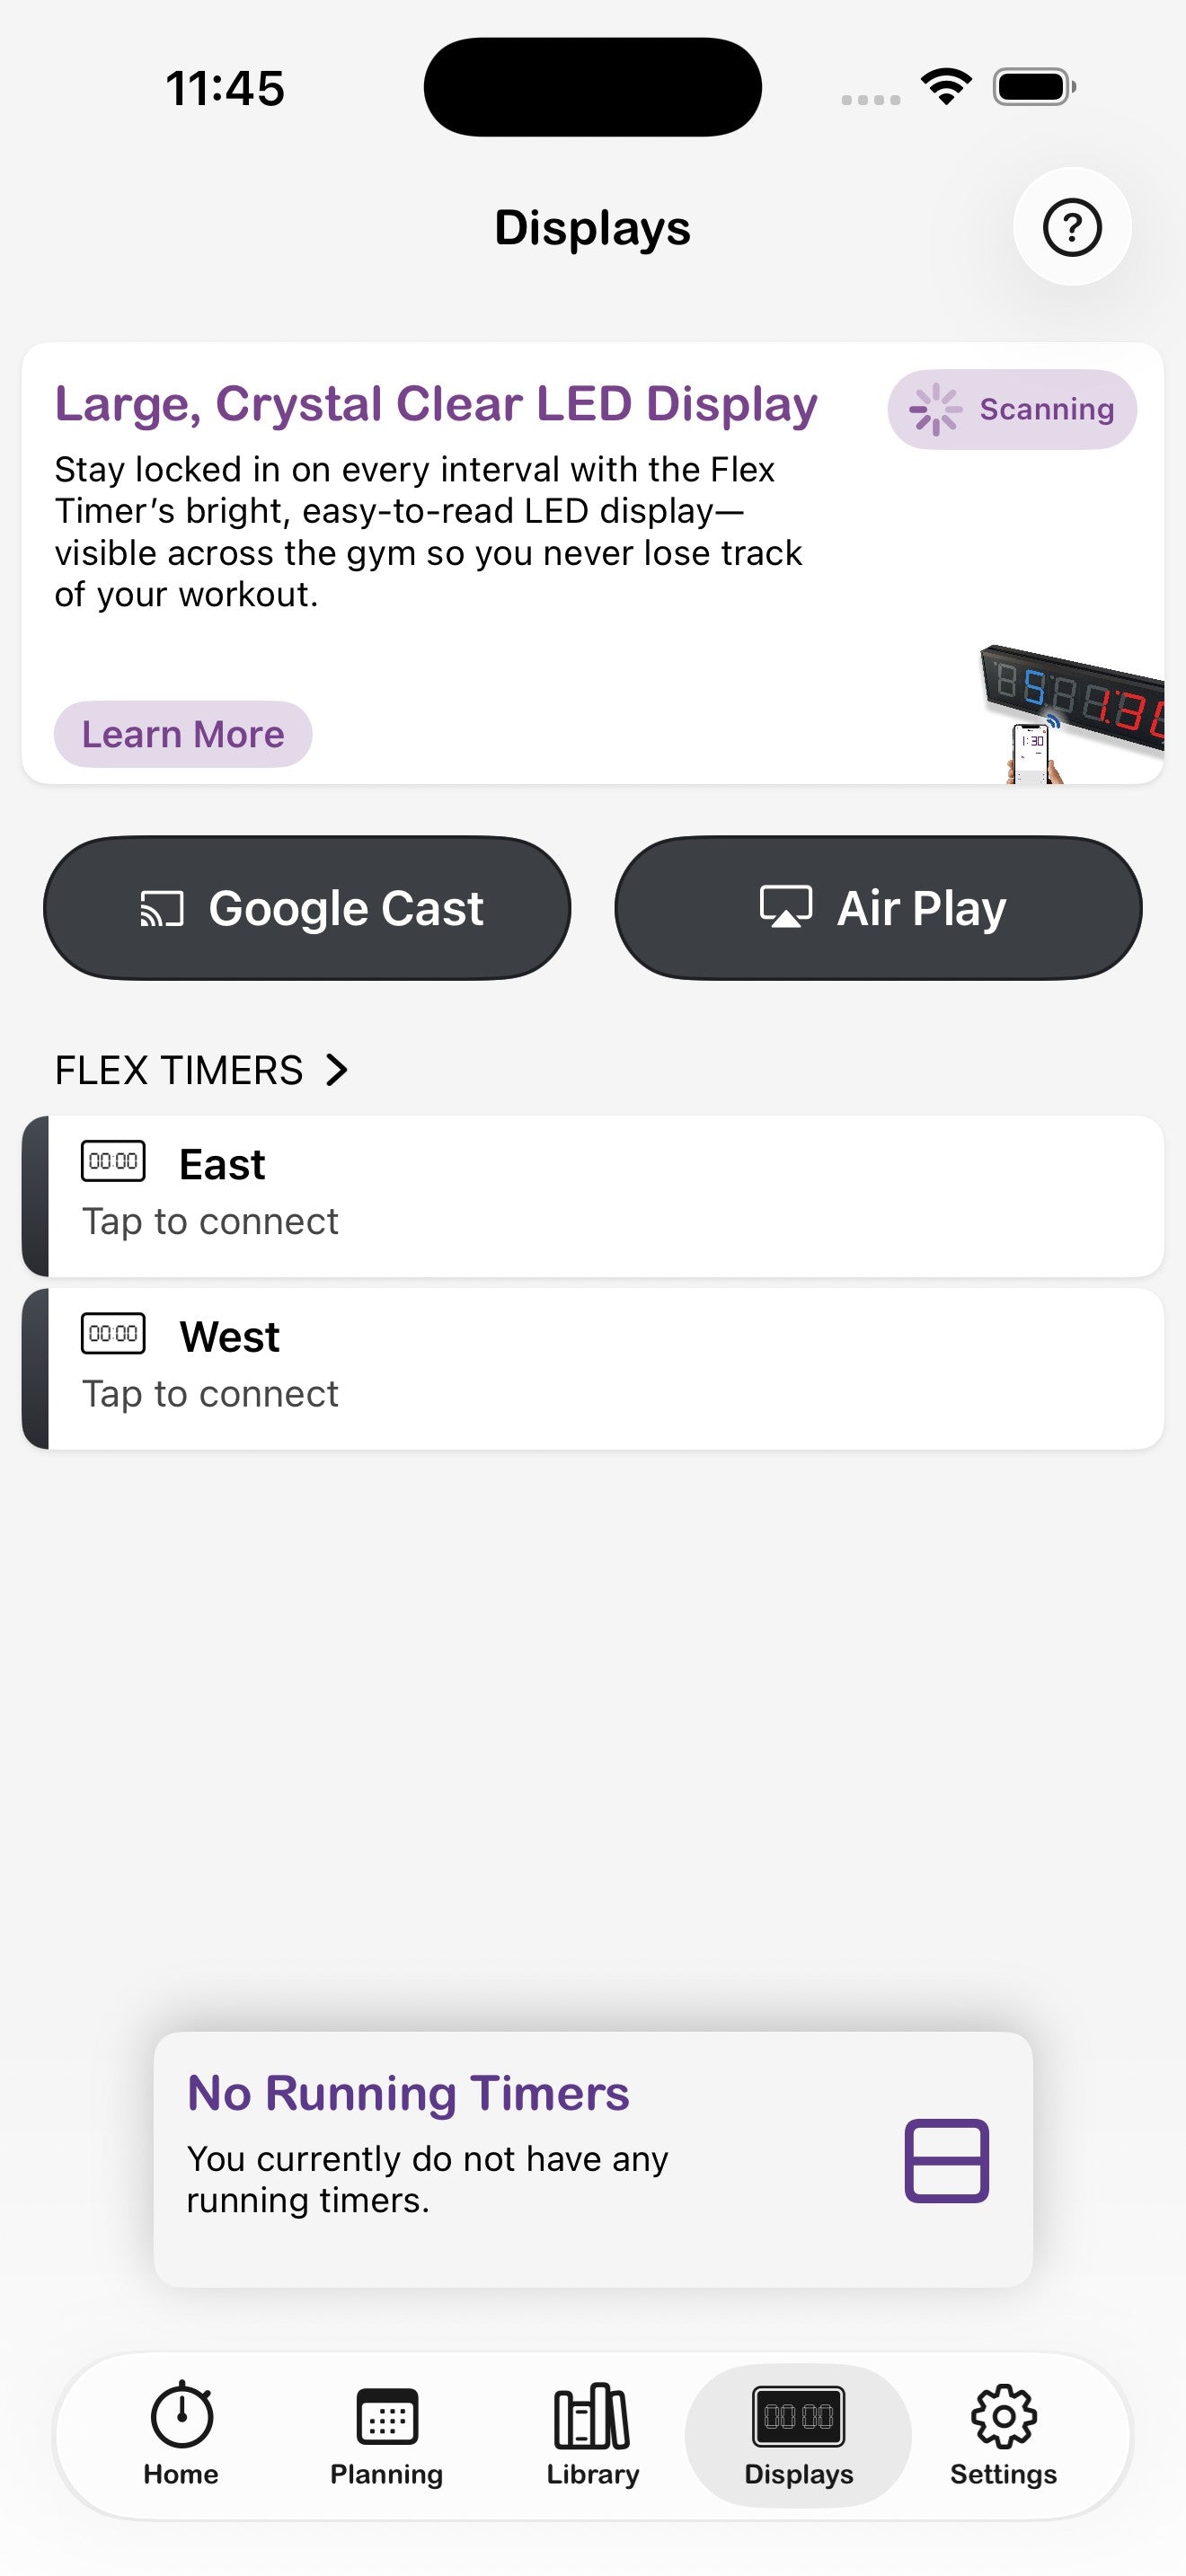
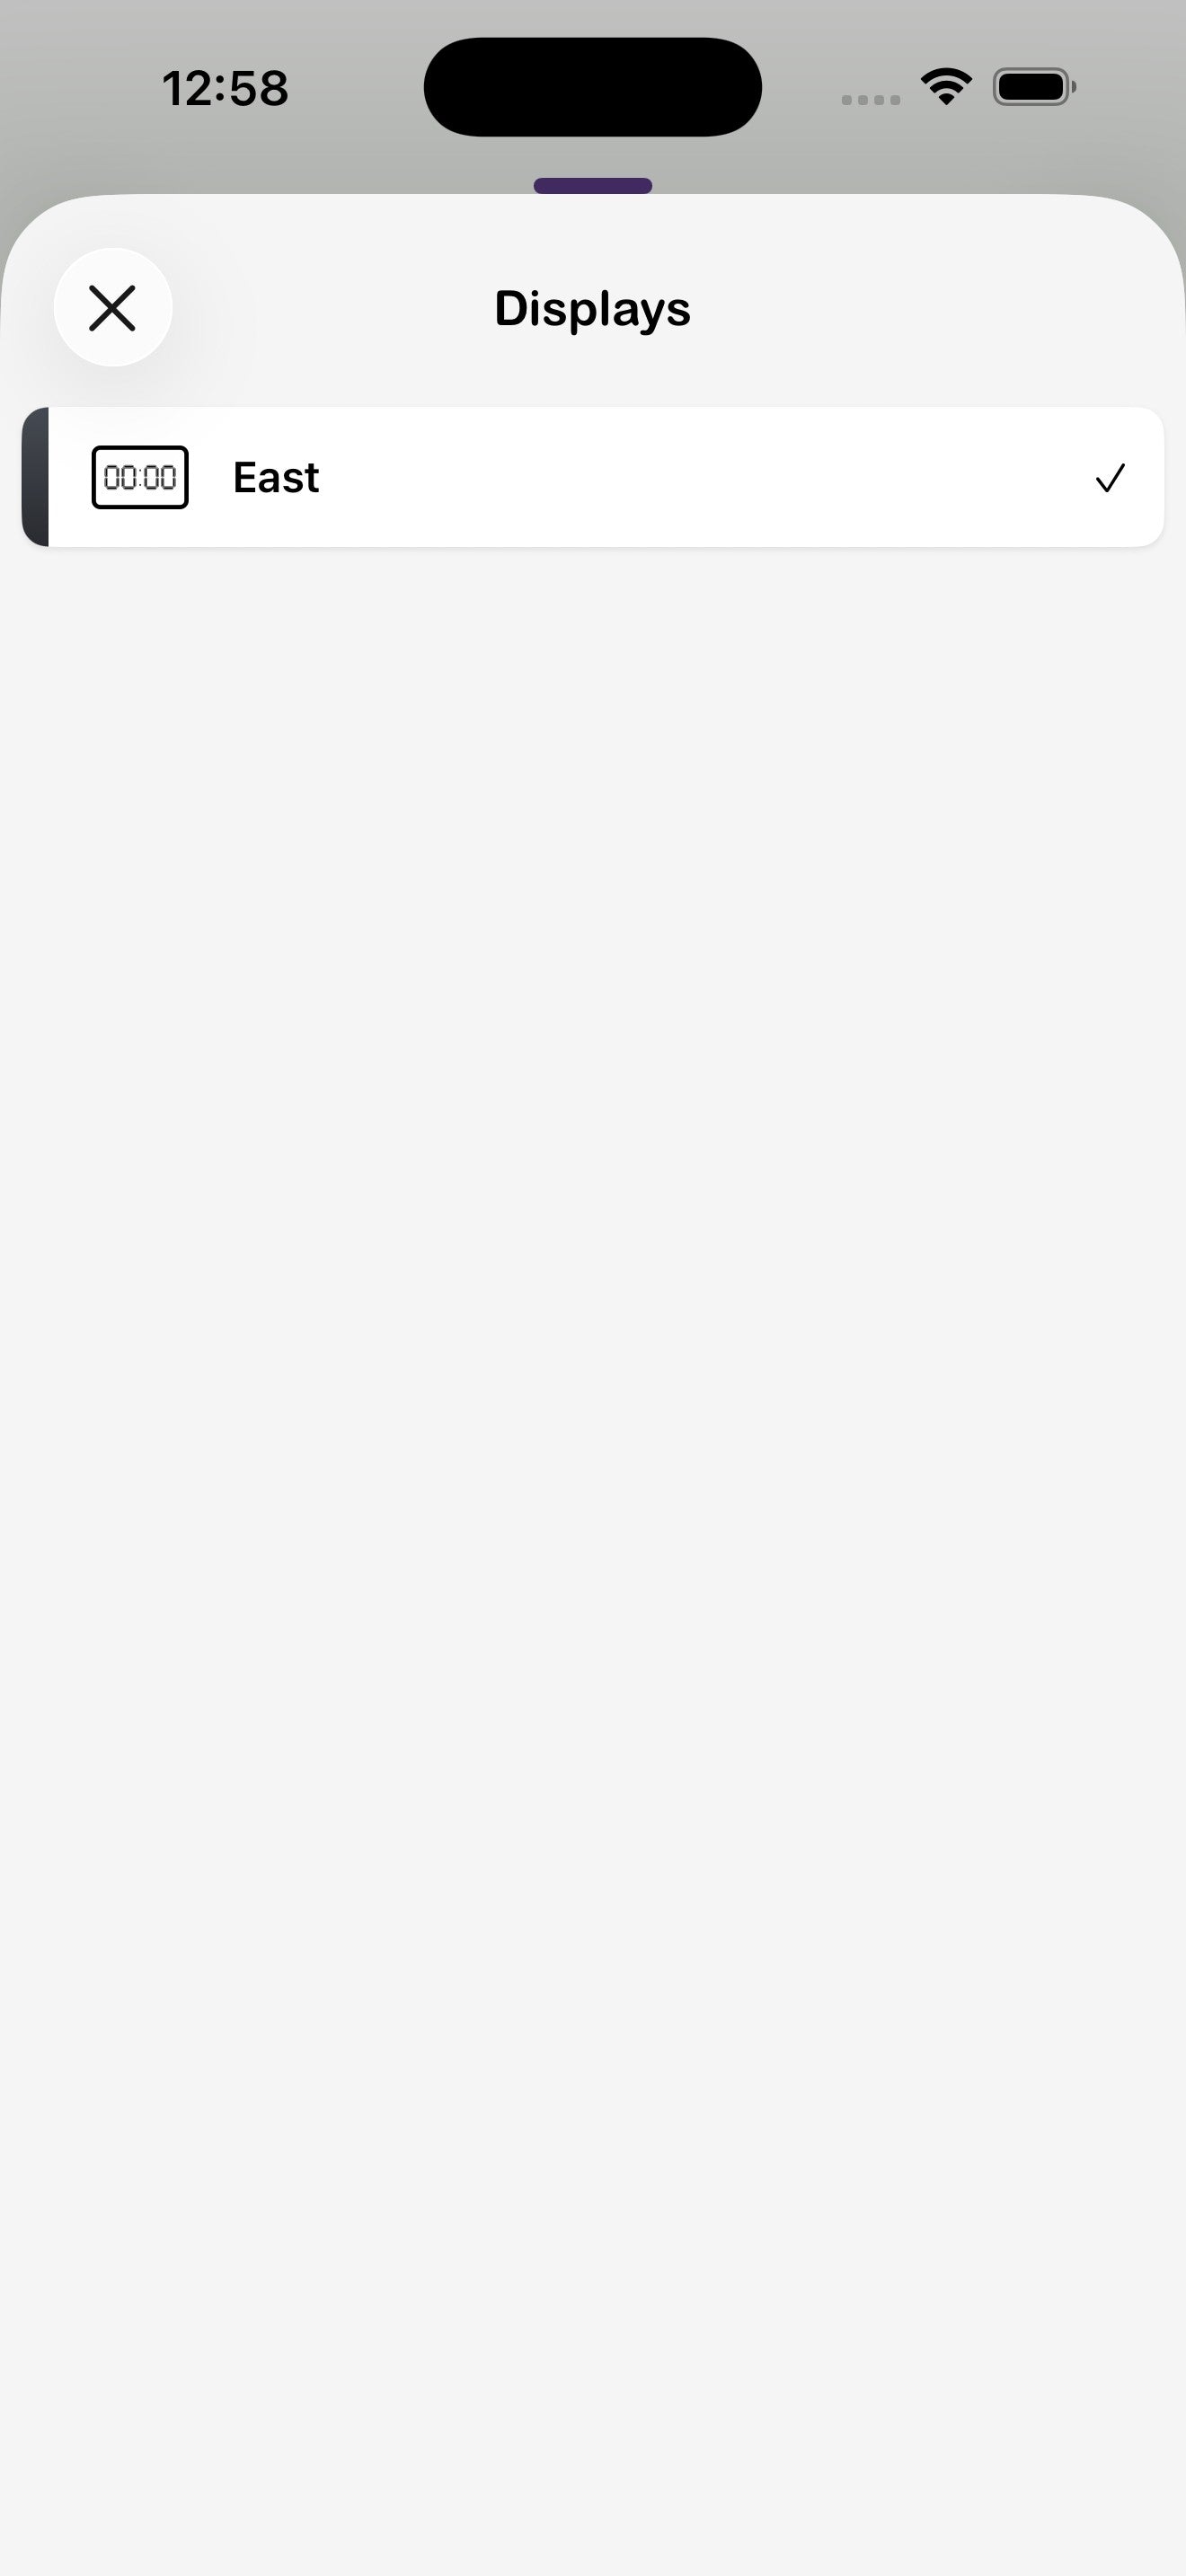
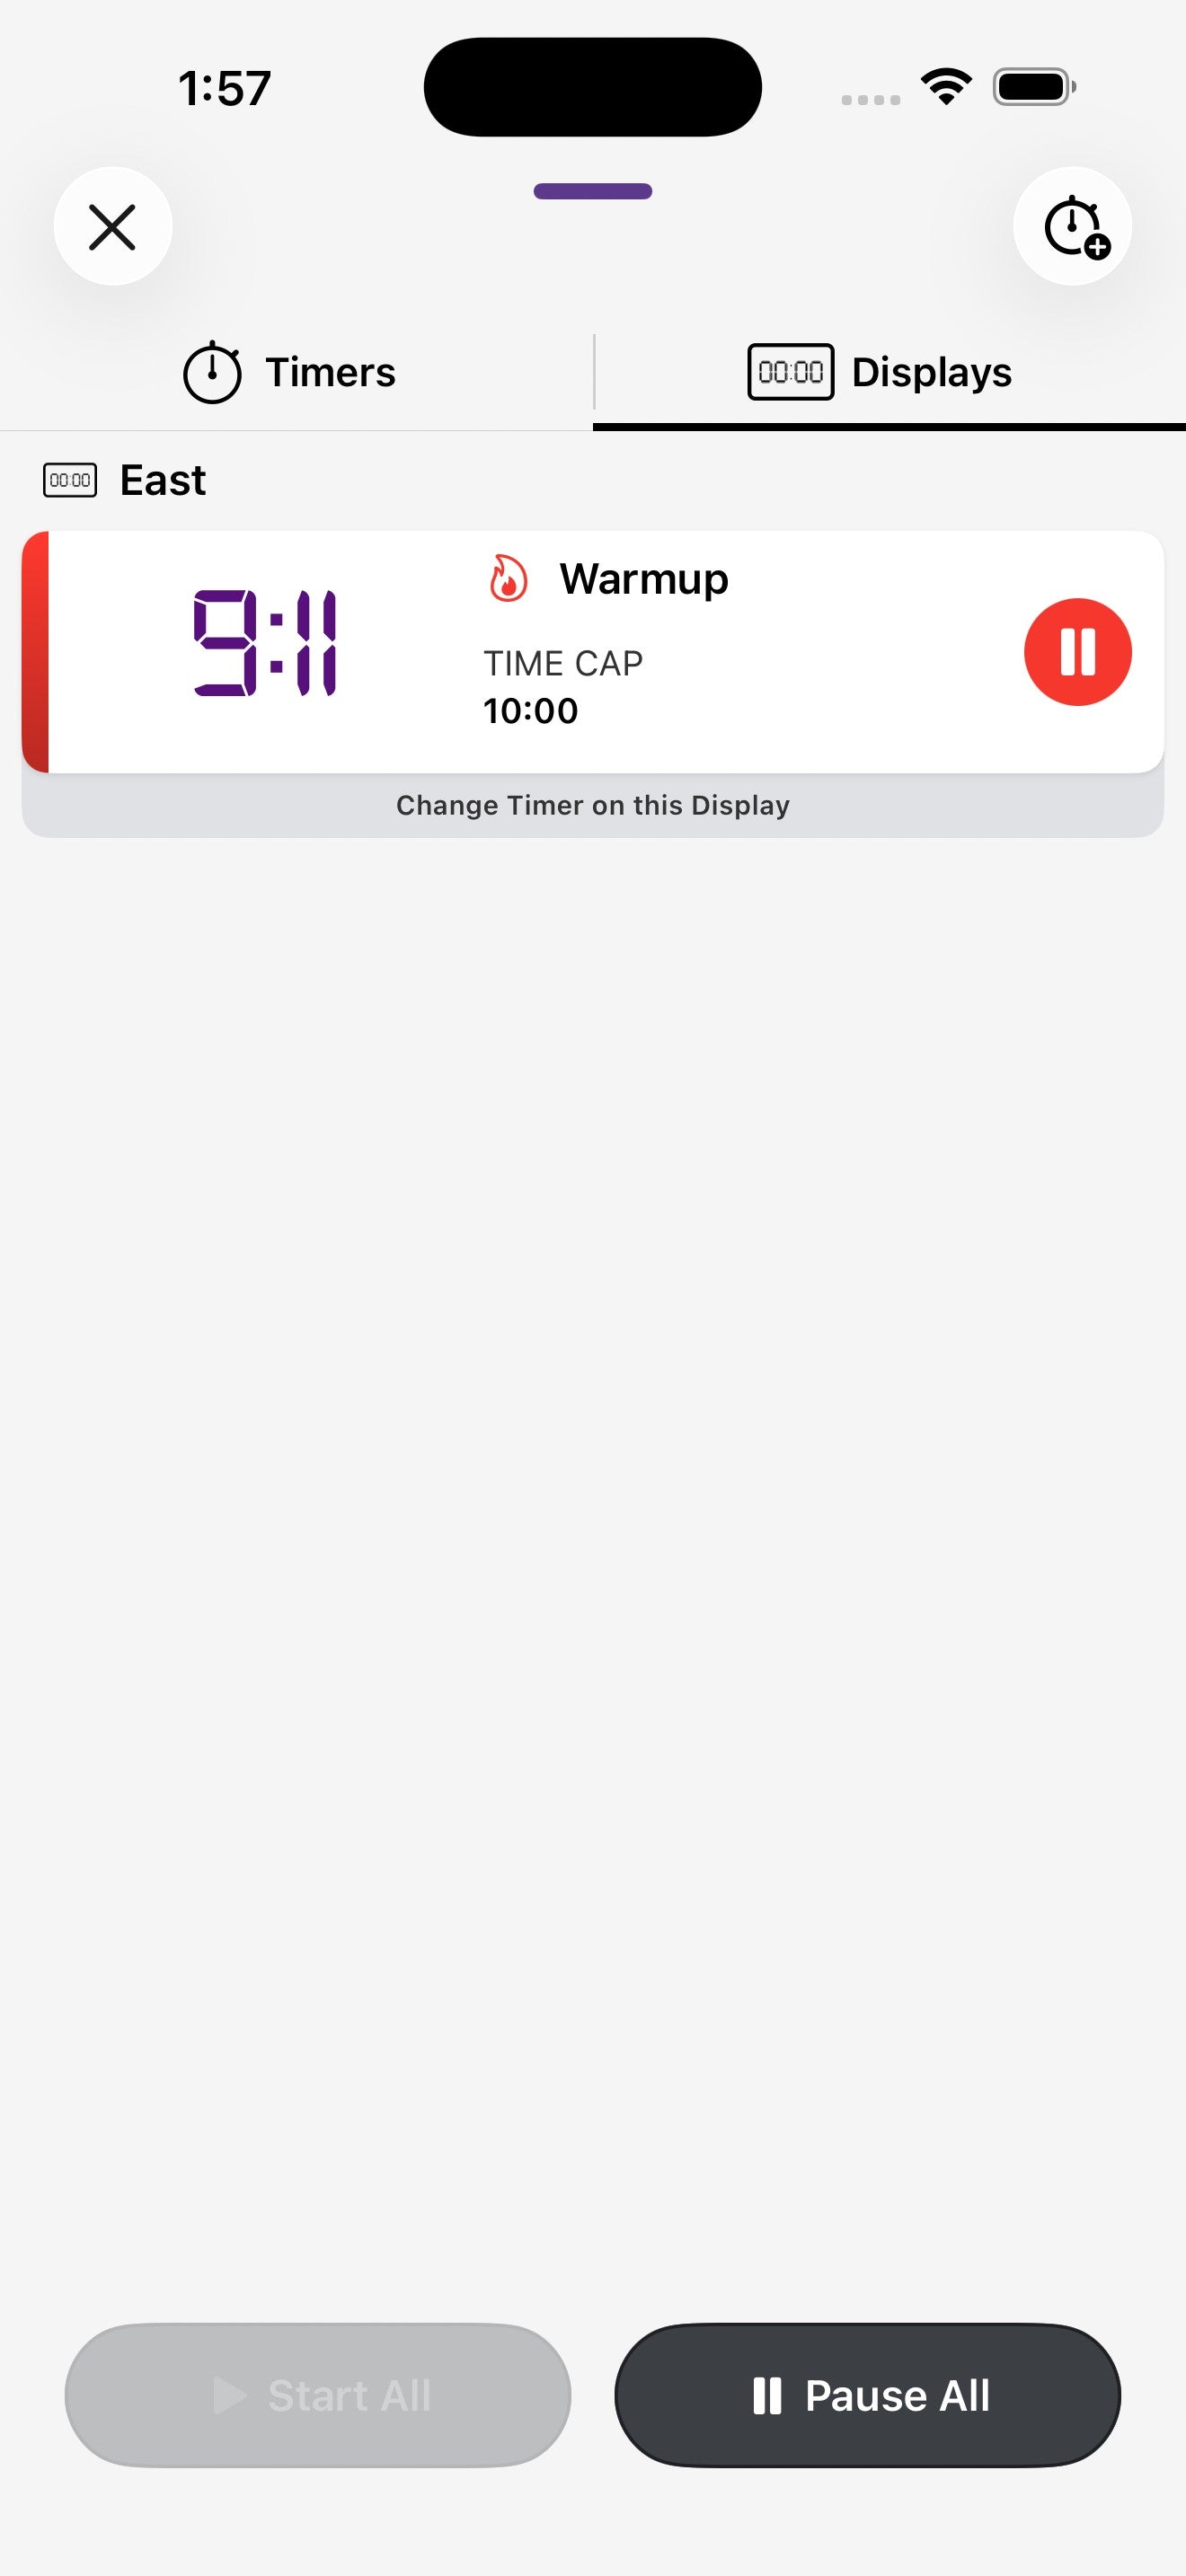
The Displays tab
Open Displays from the bottom nav to see every connected Flex Timer, plus options to mirror to Google Cast or AirPlay. Each display shows its software/hardware version and any warnings — for example, a Timezone Mismatch banner you can fix with one tap.
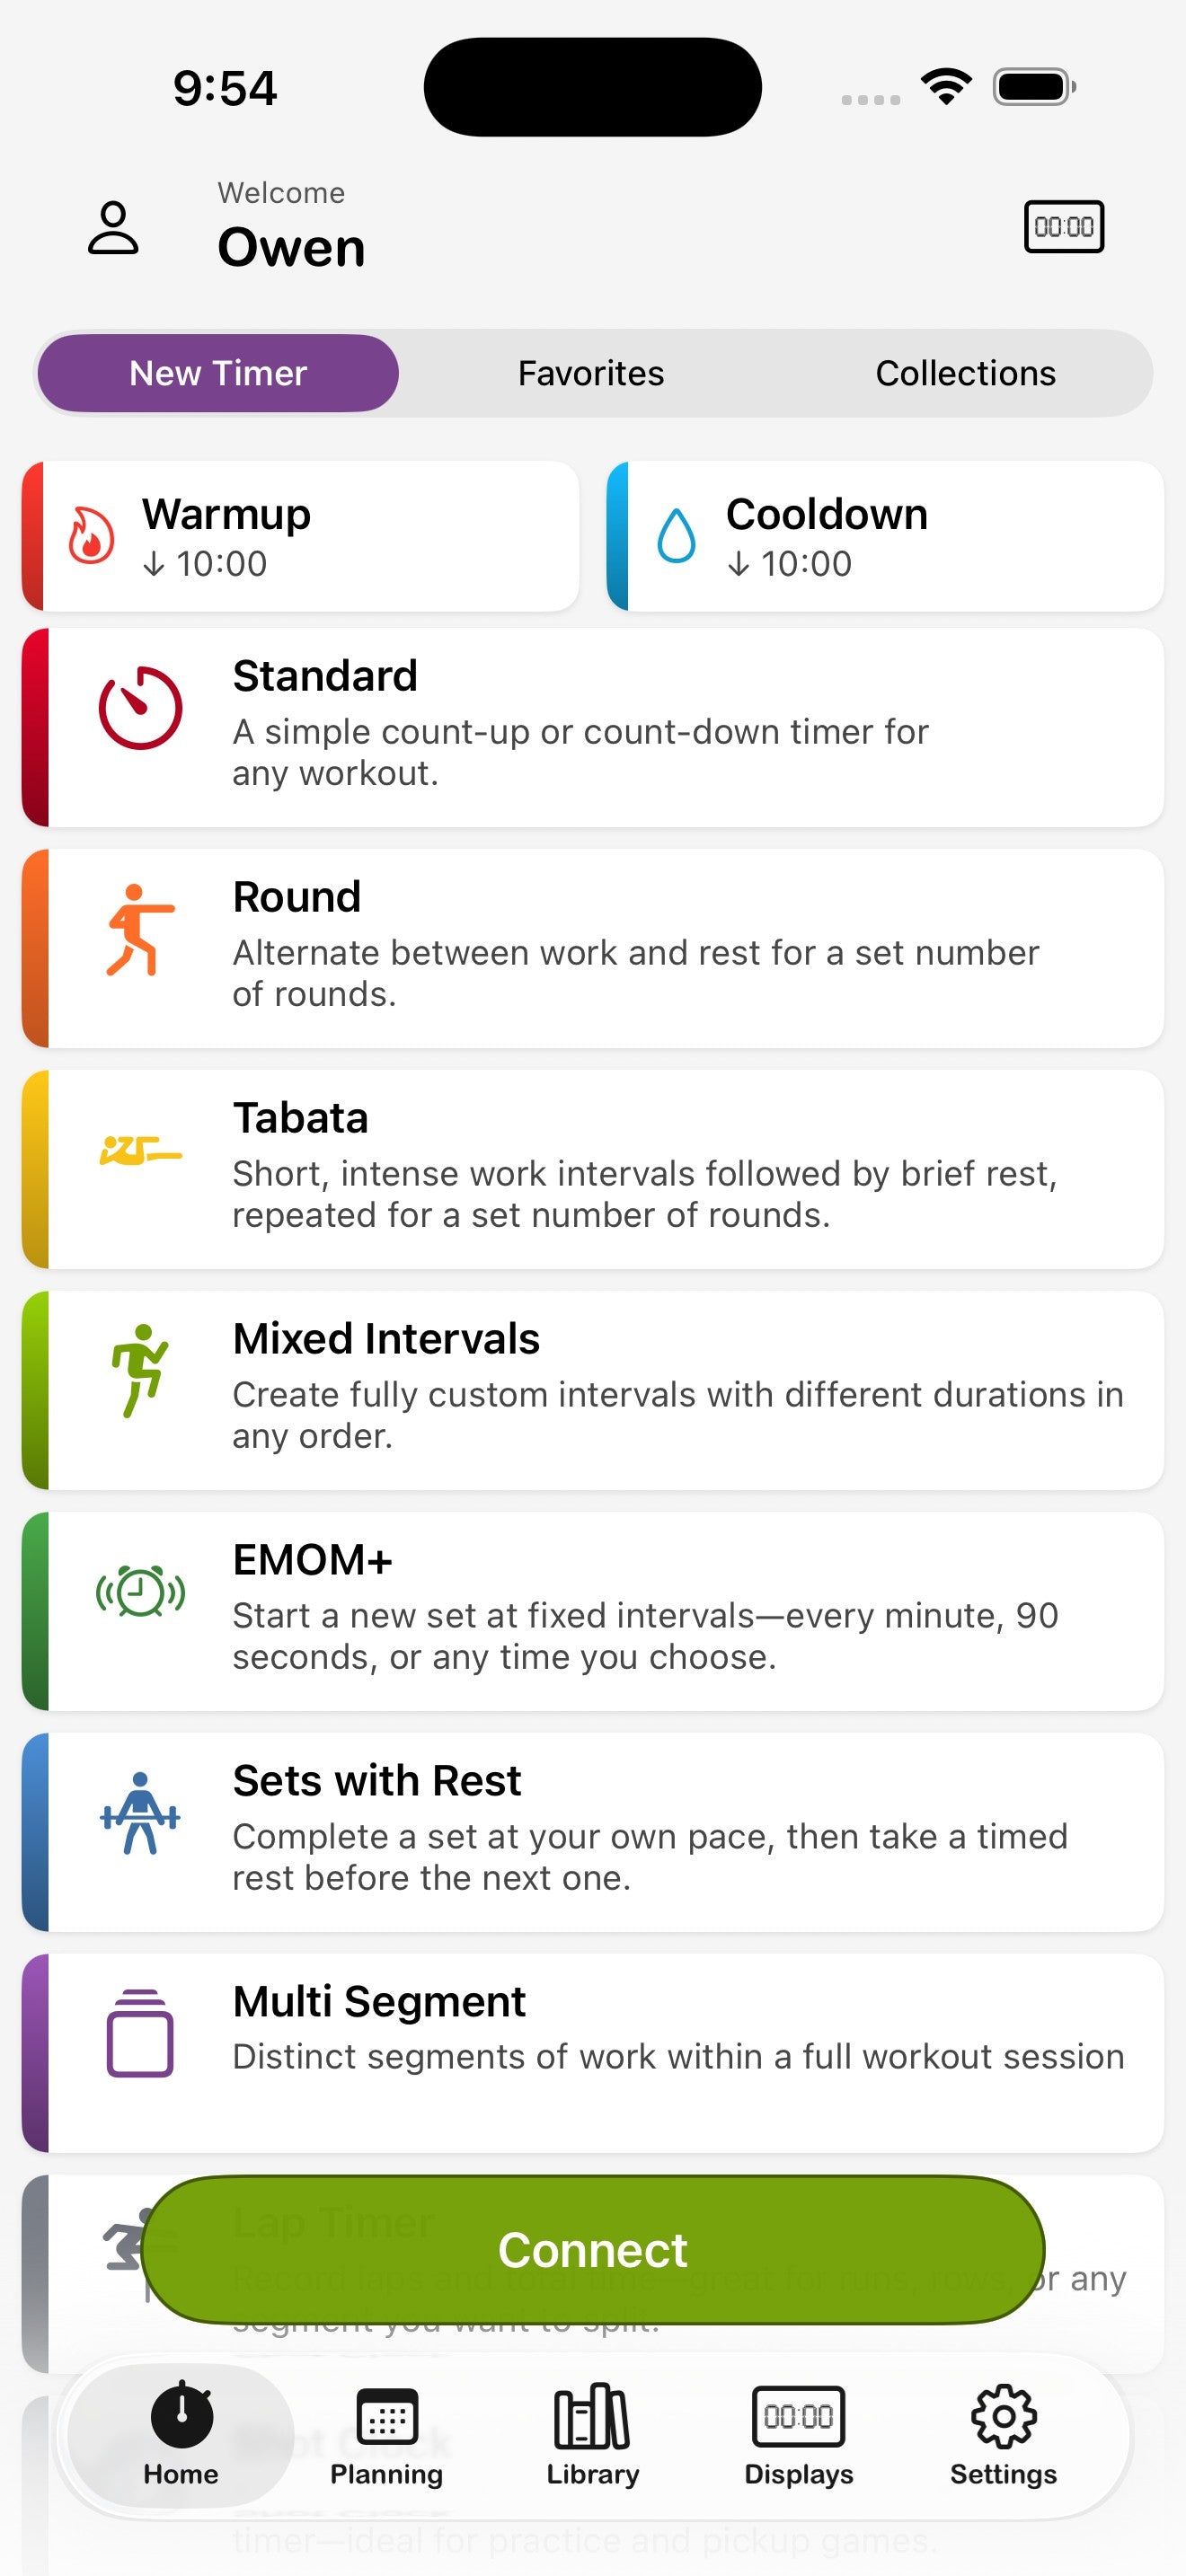
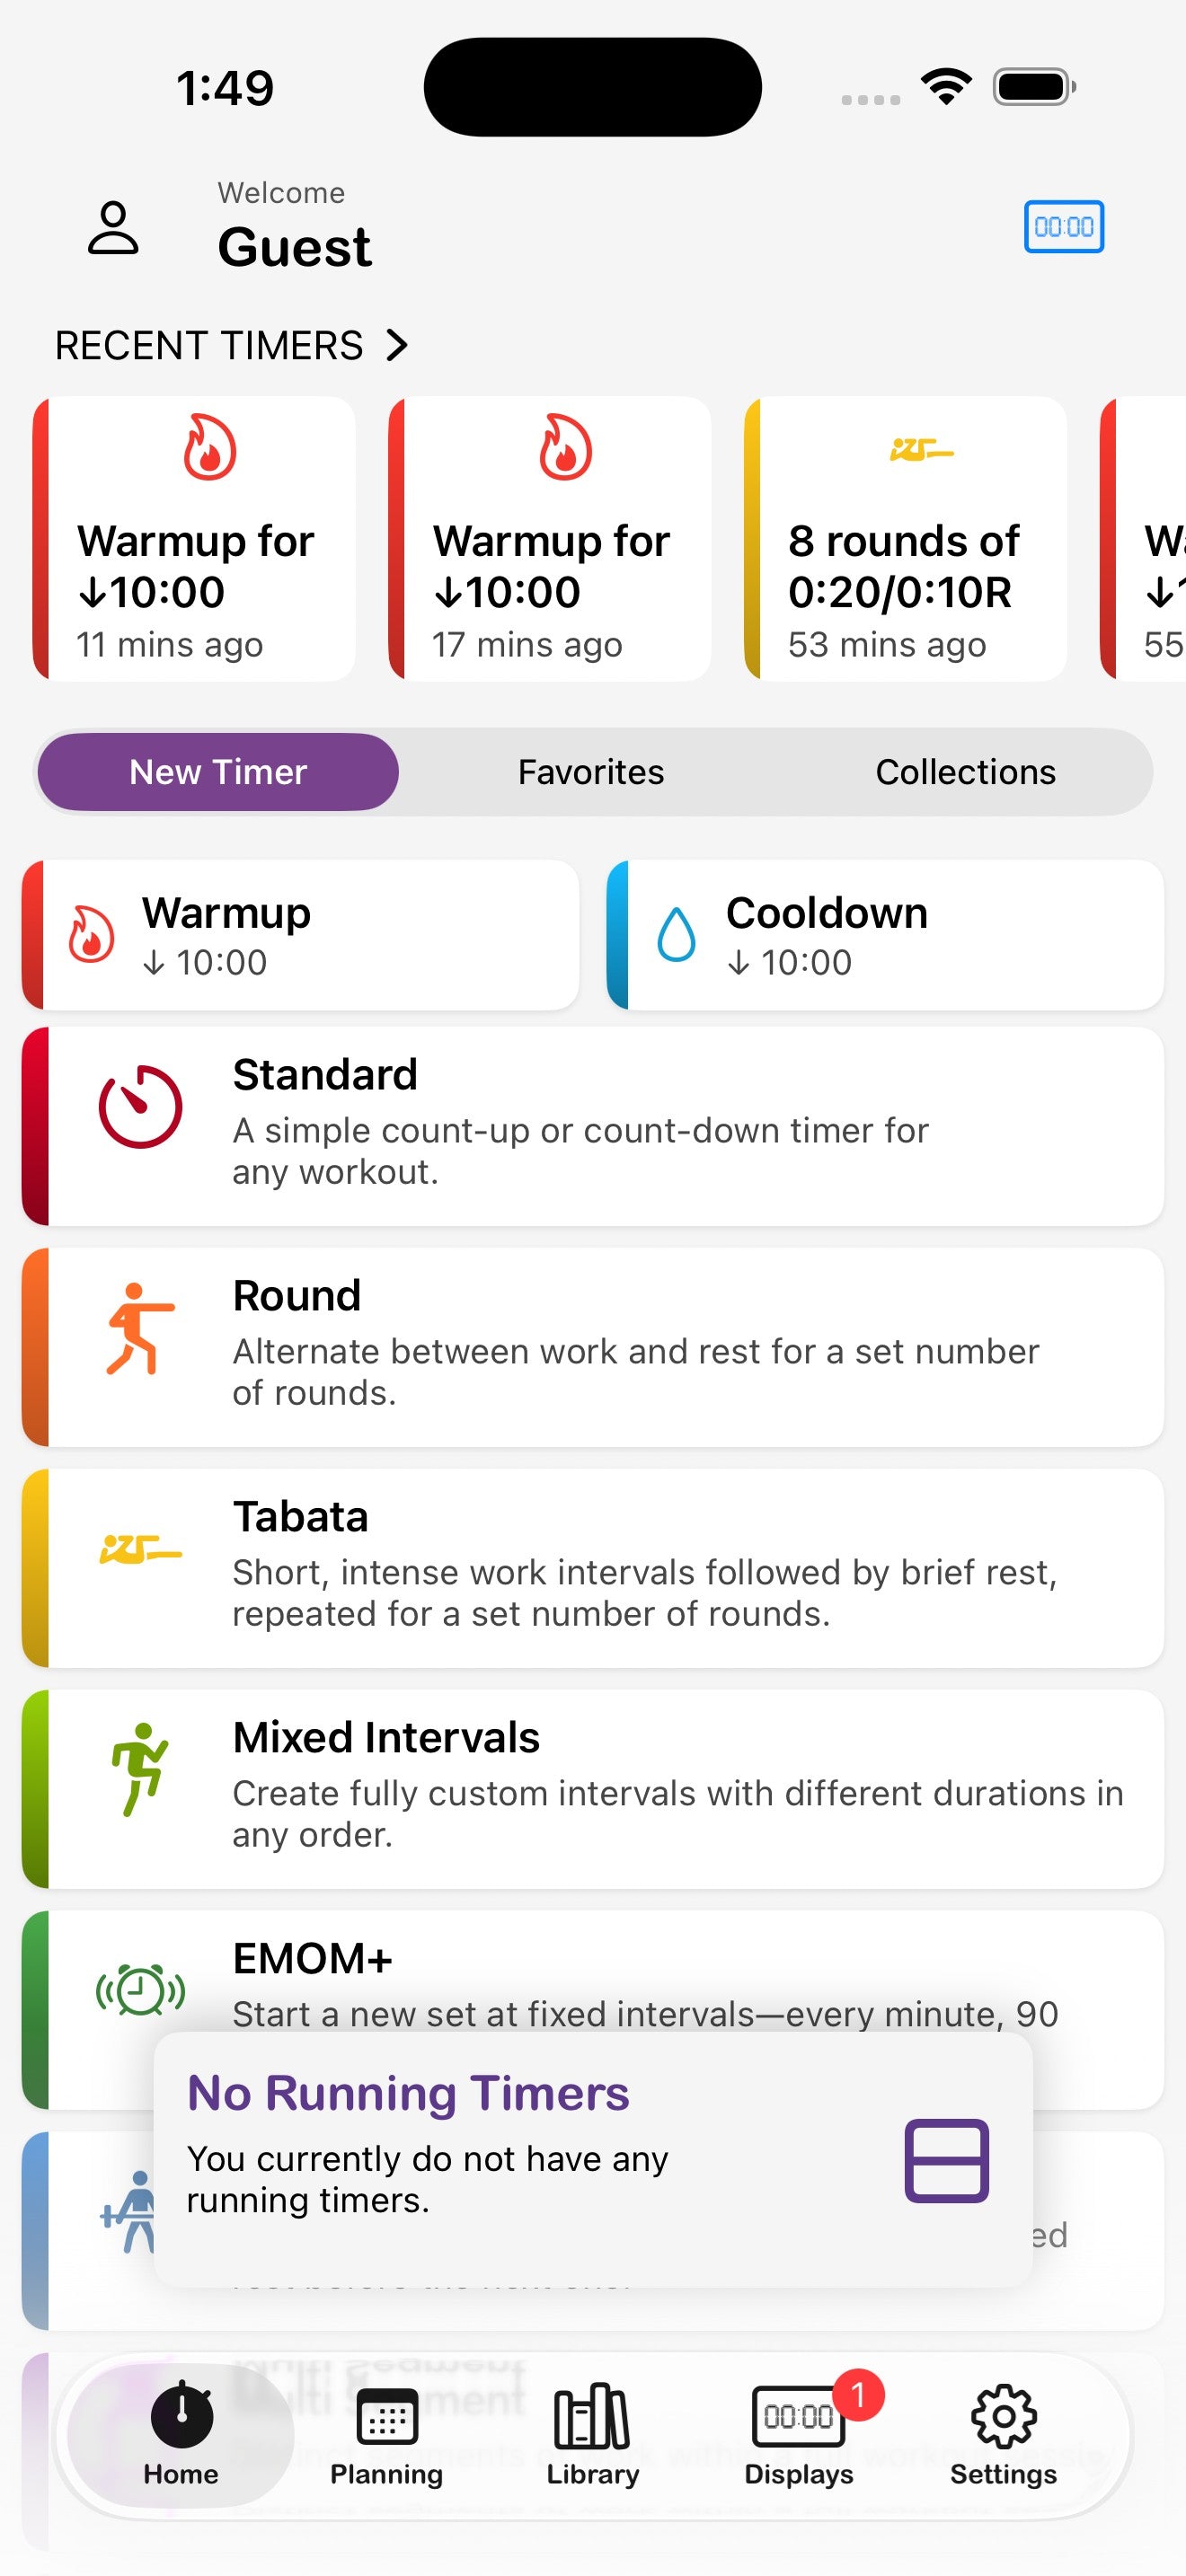
5. Creating timers
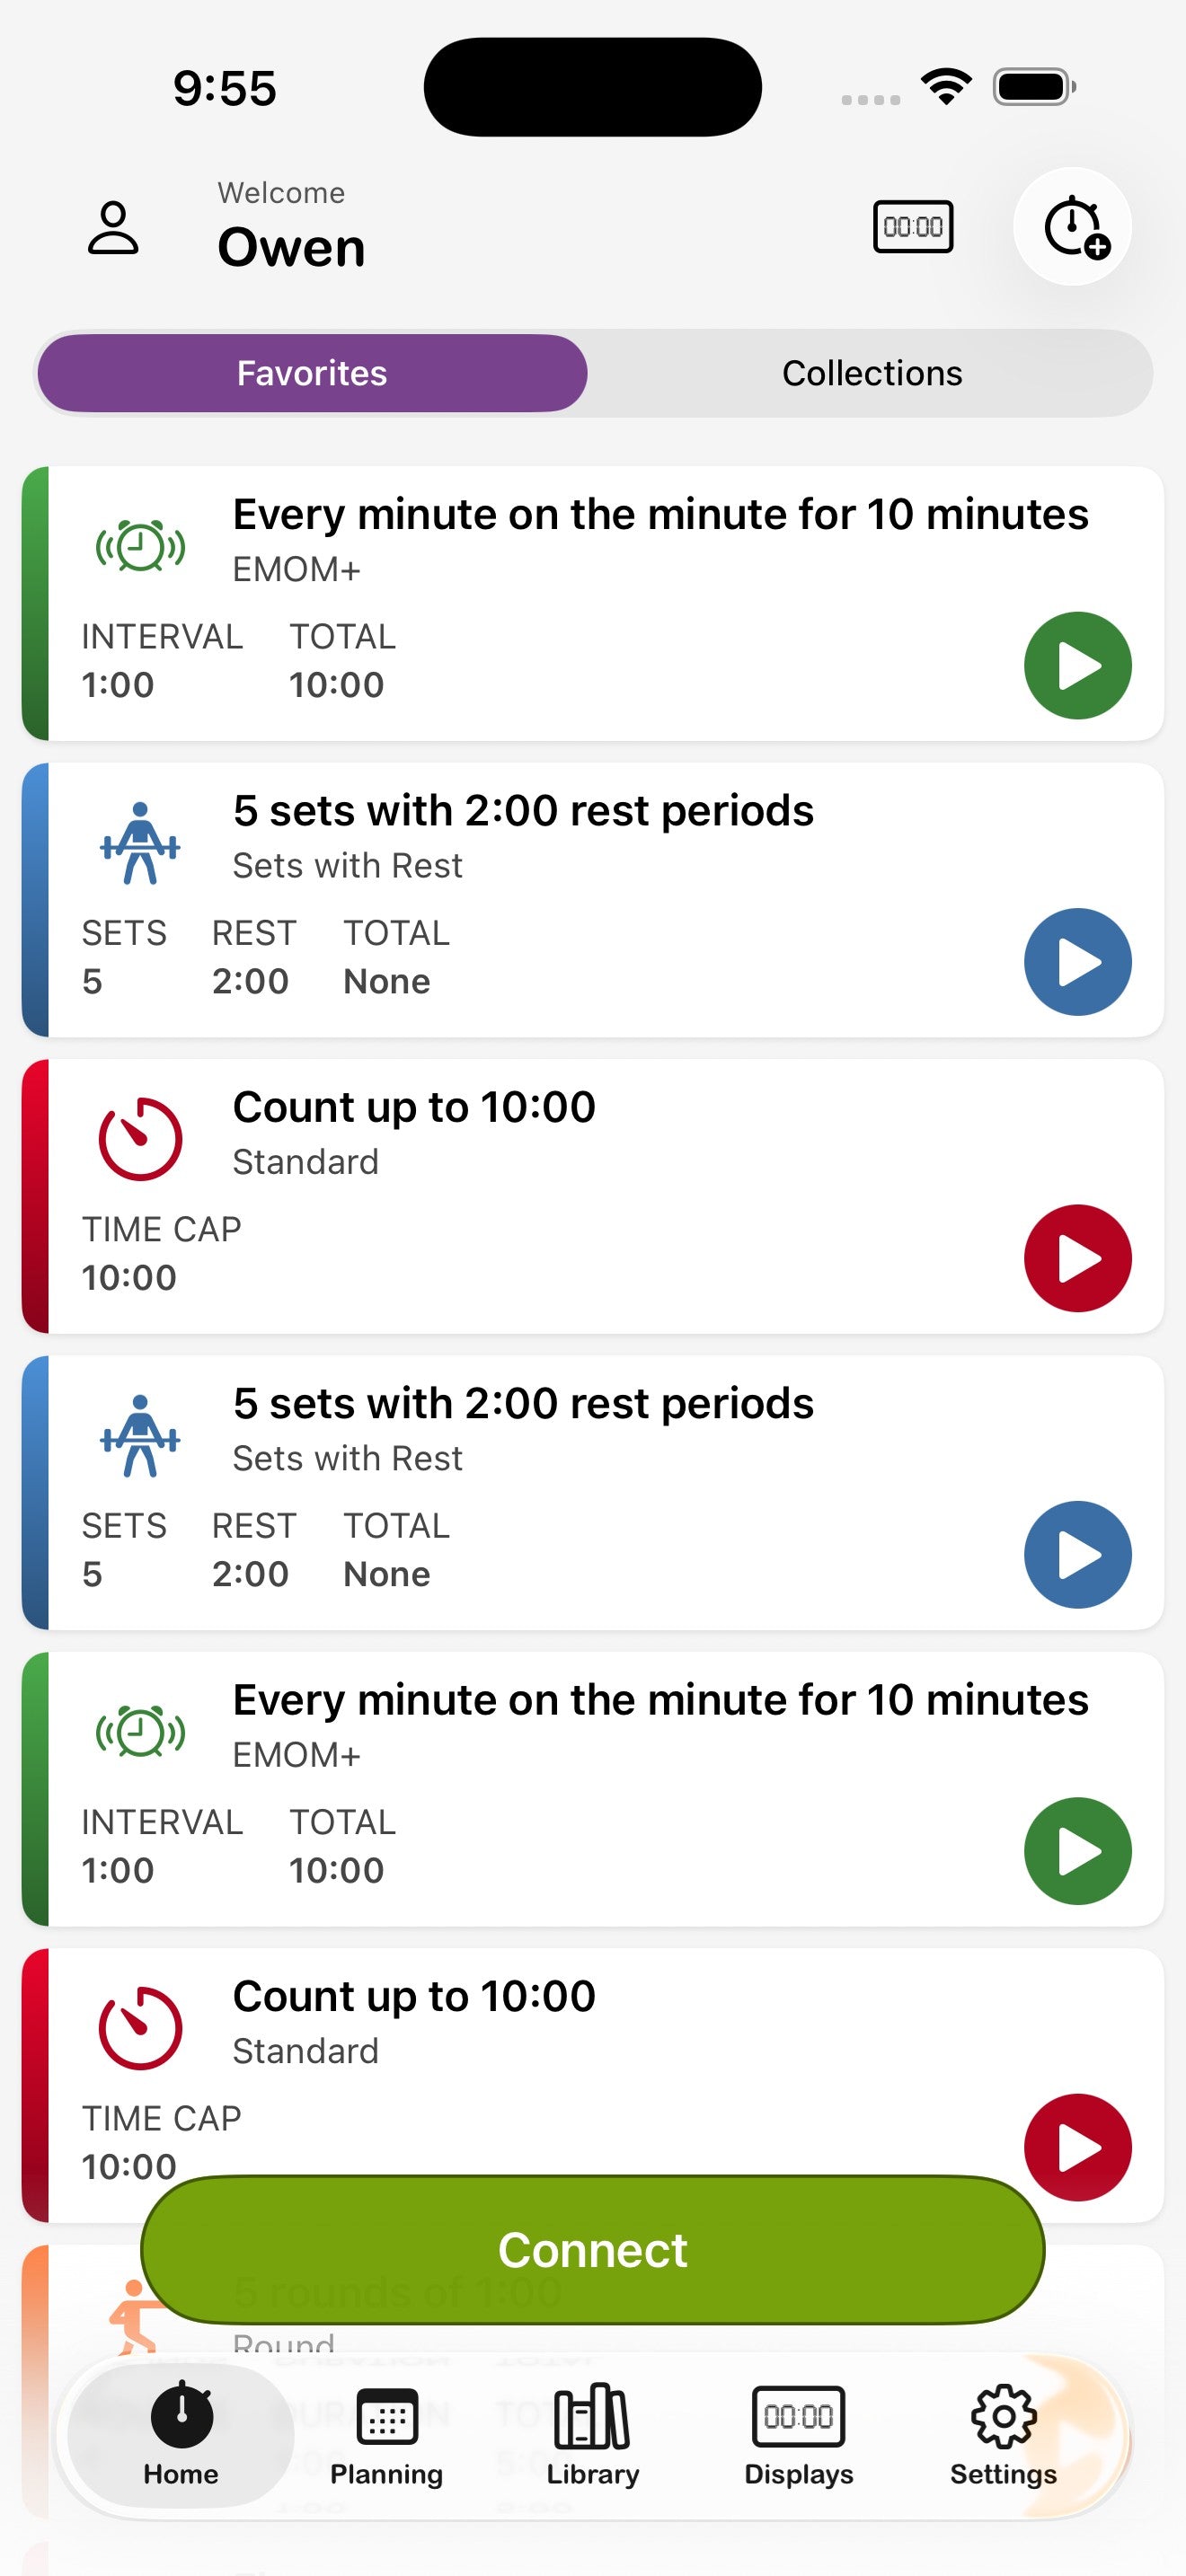
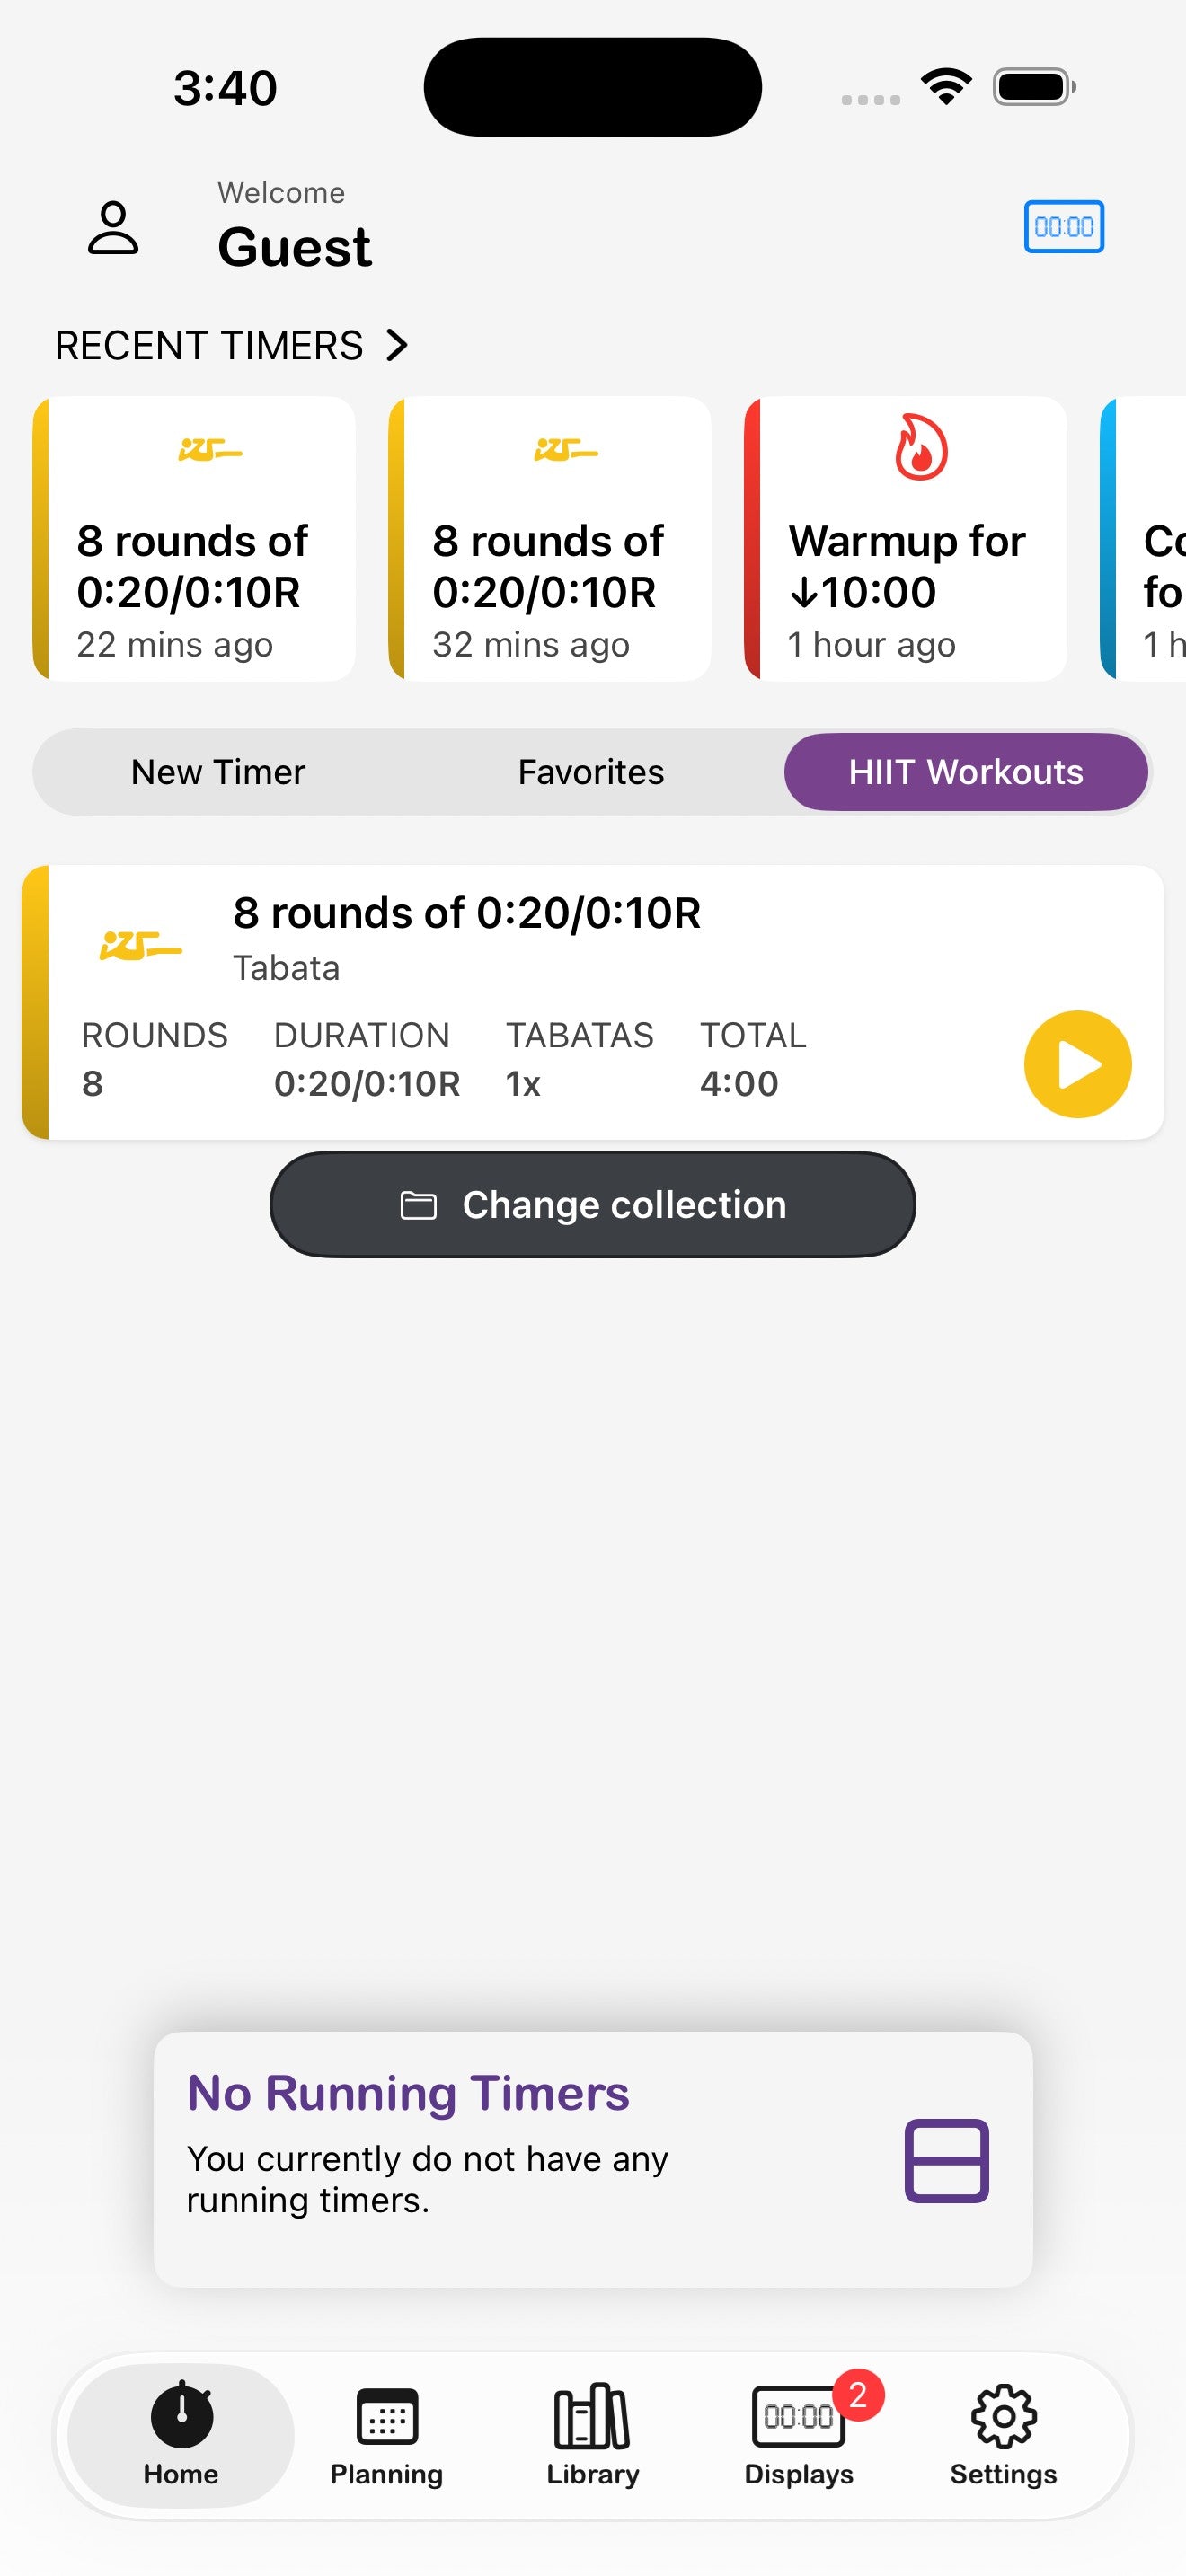
How you start a timer depends on your training mode. In Freestyle (the default), timer modes are listed directly on the home screen — just tap one to configure and go. In Replay, Program, and Maestro modes, a + button in the top-right opens the Create New Workout sheet instead. All modes give you access to Favorites and Collections from the home screen.

The timer types at a glance
Start a brand-new timer (Freestyle mode)
In Freestyle mode, the home screen lists all timer modes directly. Tap any mode to open its configuration screen, adjust settings (see Configuring timers), then tap Save to start.
Start a brand-new timer (Replay, Program & Maestro modes)
- Tap the + icon in the top-right of the home screen.
- In the Create New Workout sheet, choose a timer type.
- Adjust settings and tap Save.
Run a saved or favorited workout
- On the home screen, switch to the Favorites tab for go-to workouts, or the Collections tab to browse your themed groups.
- Tap the play button on any workout card to launch it immediately.
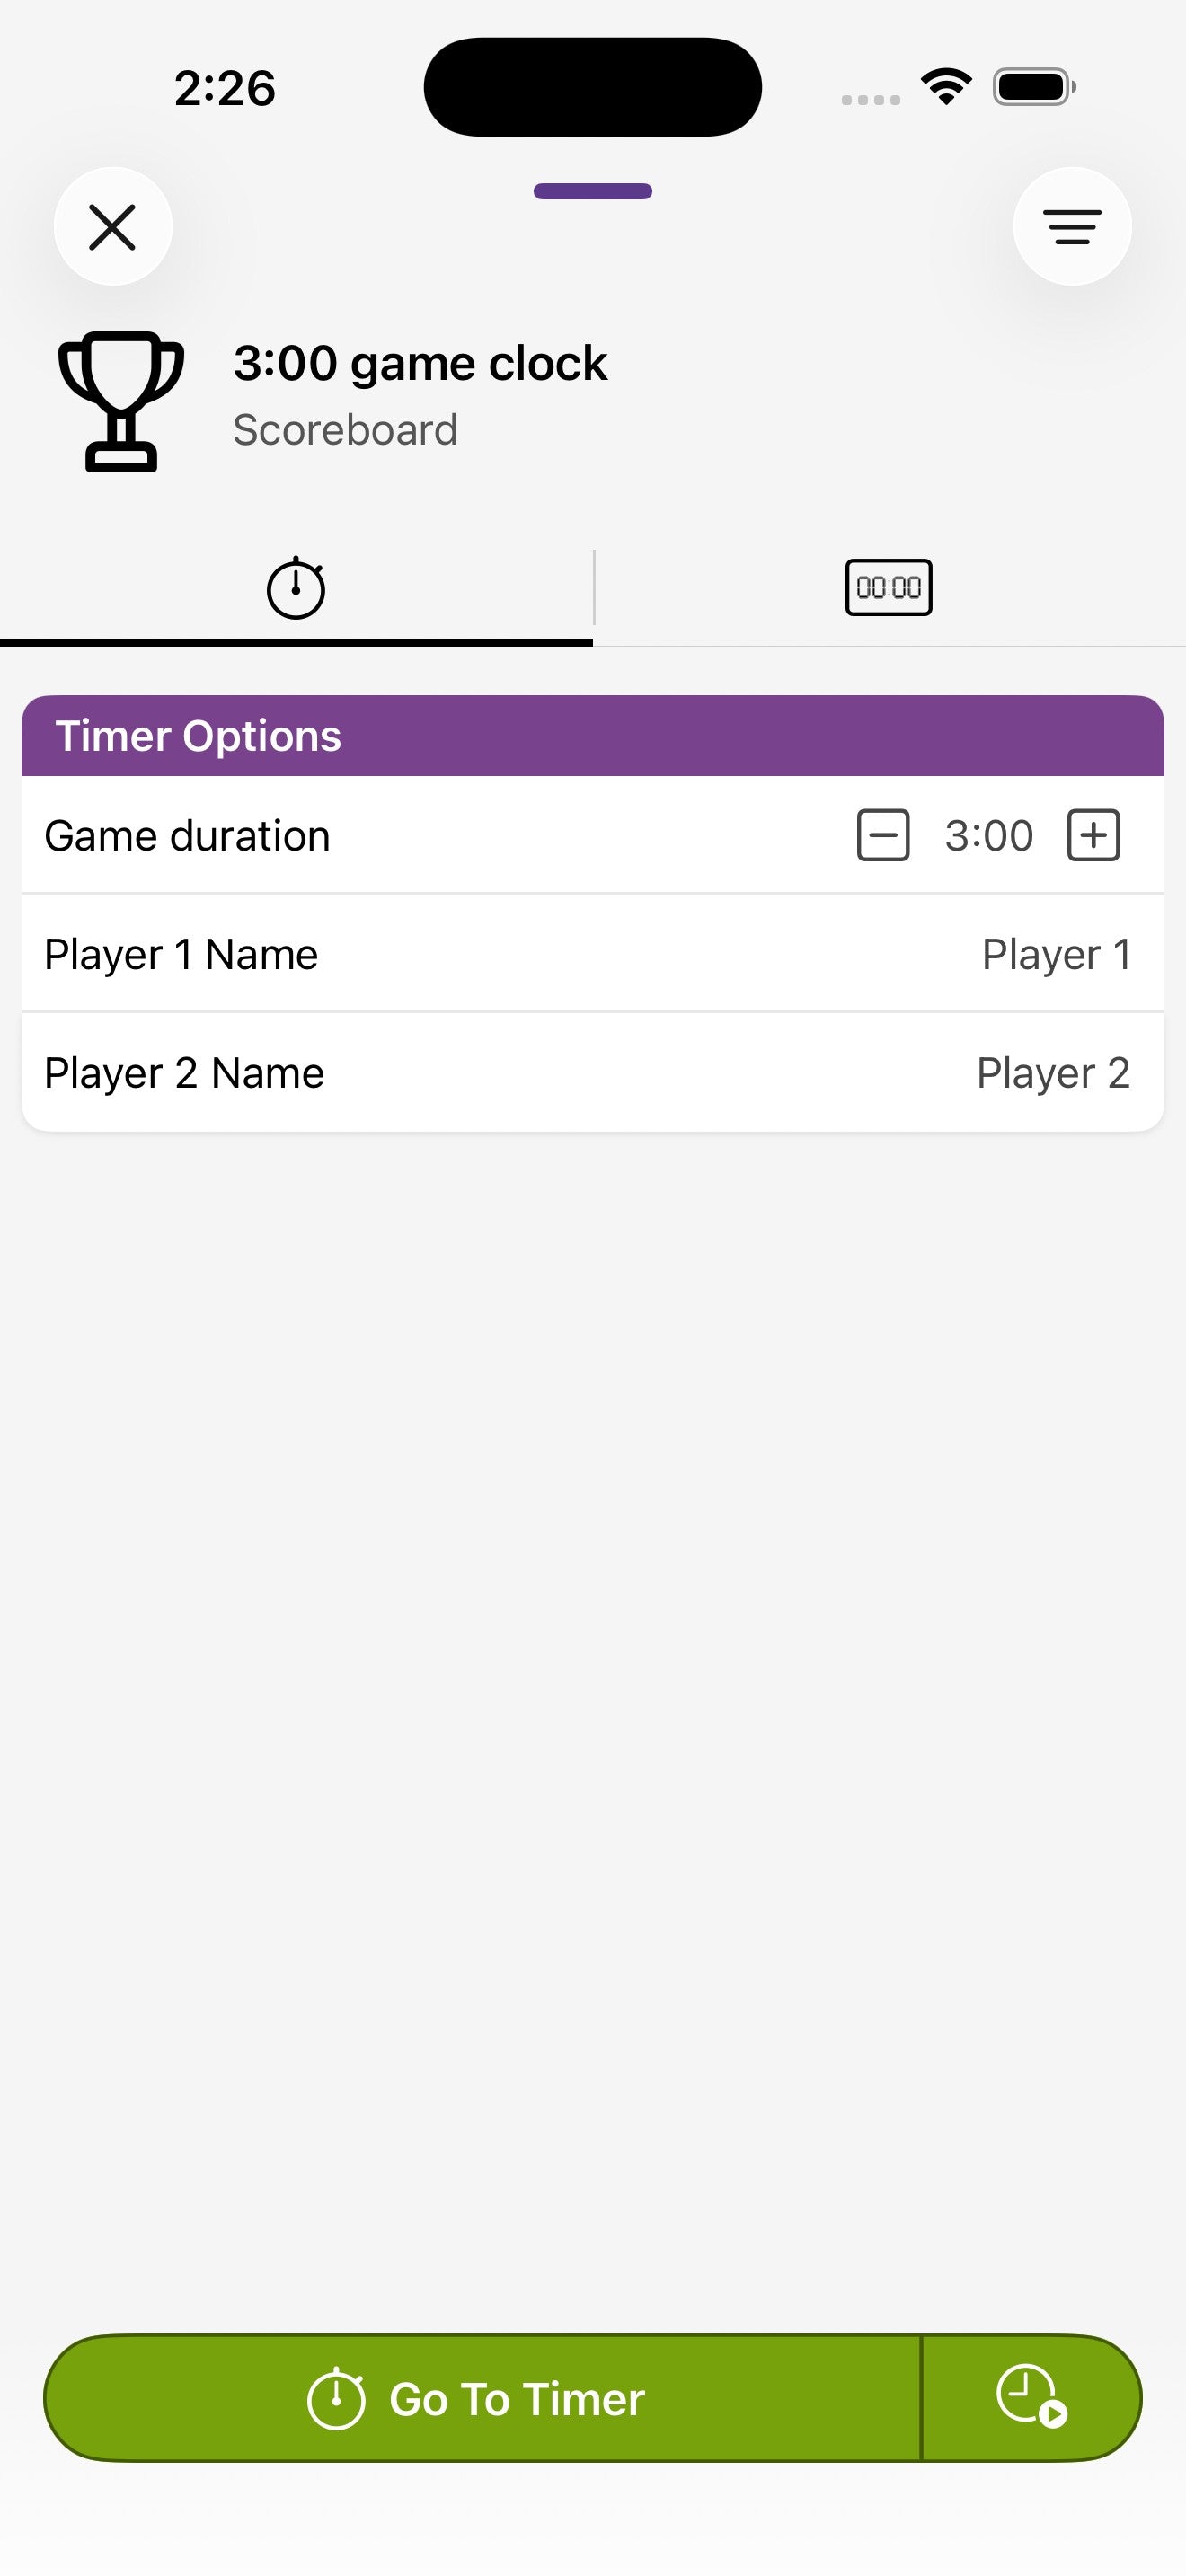
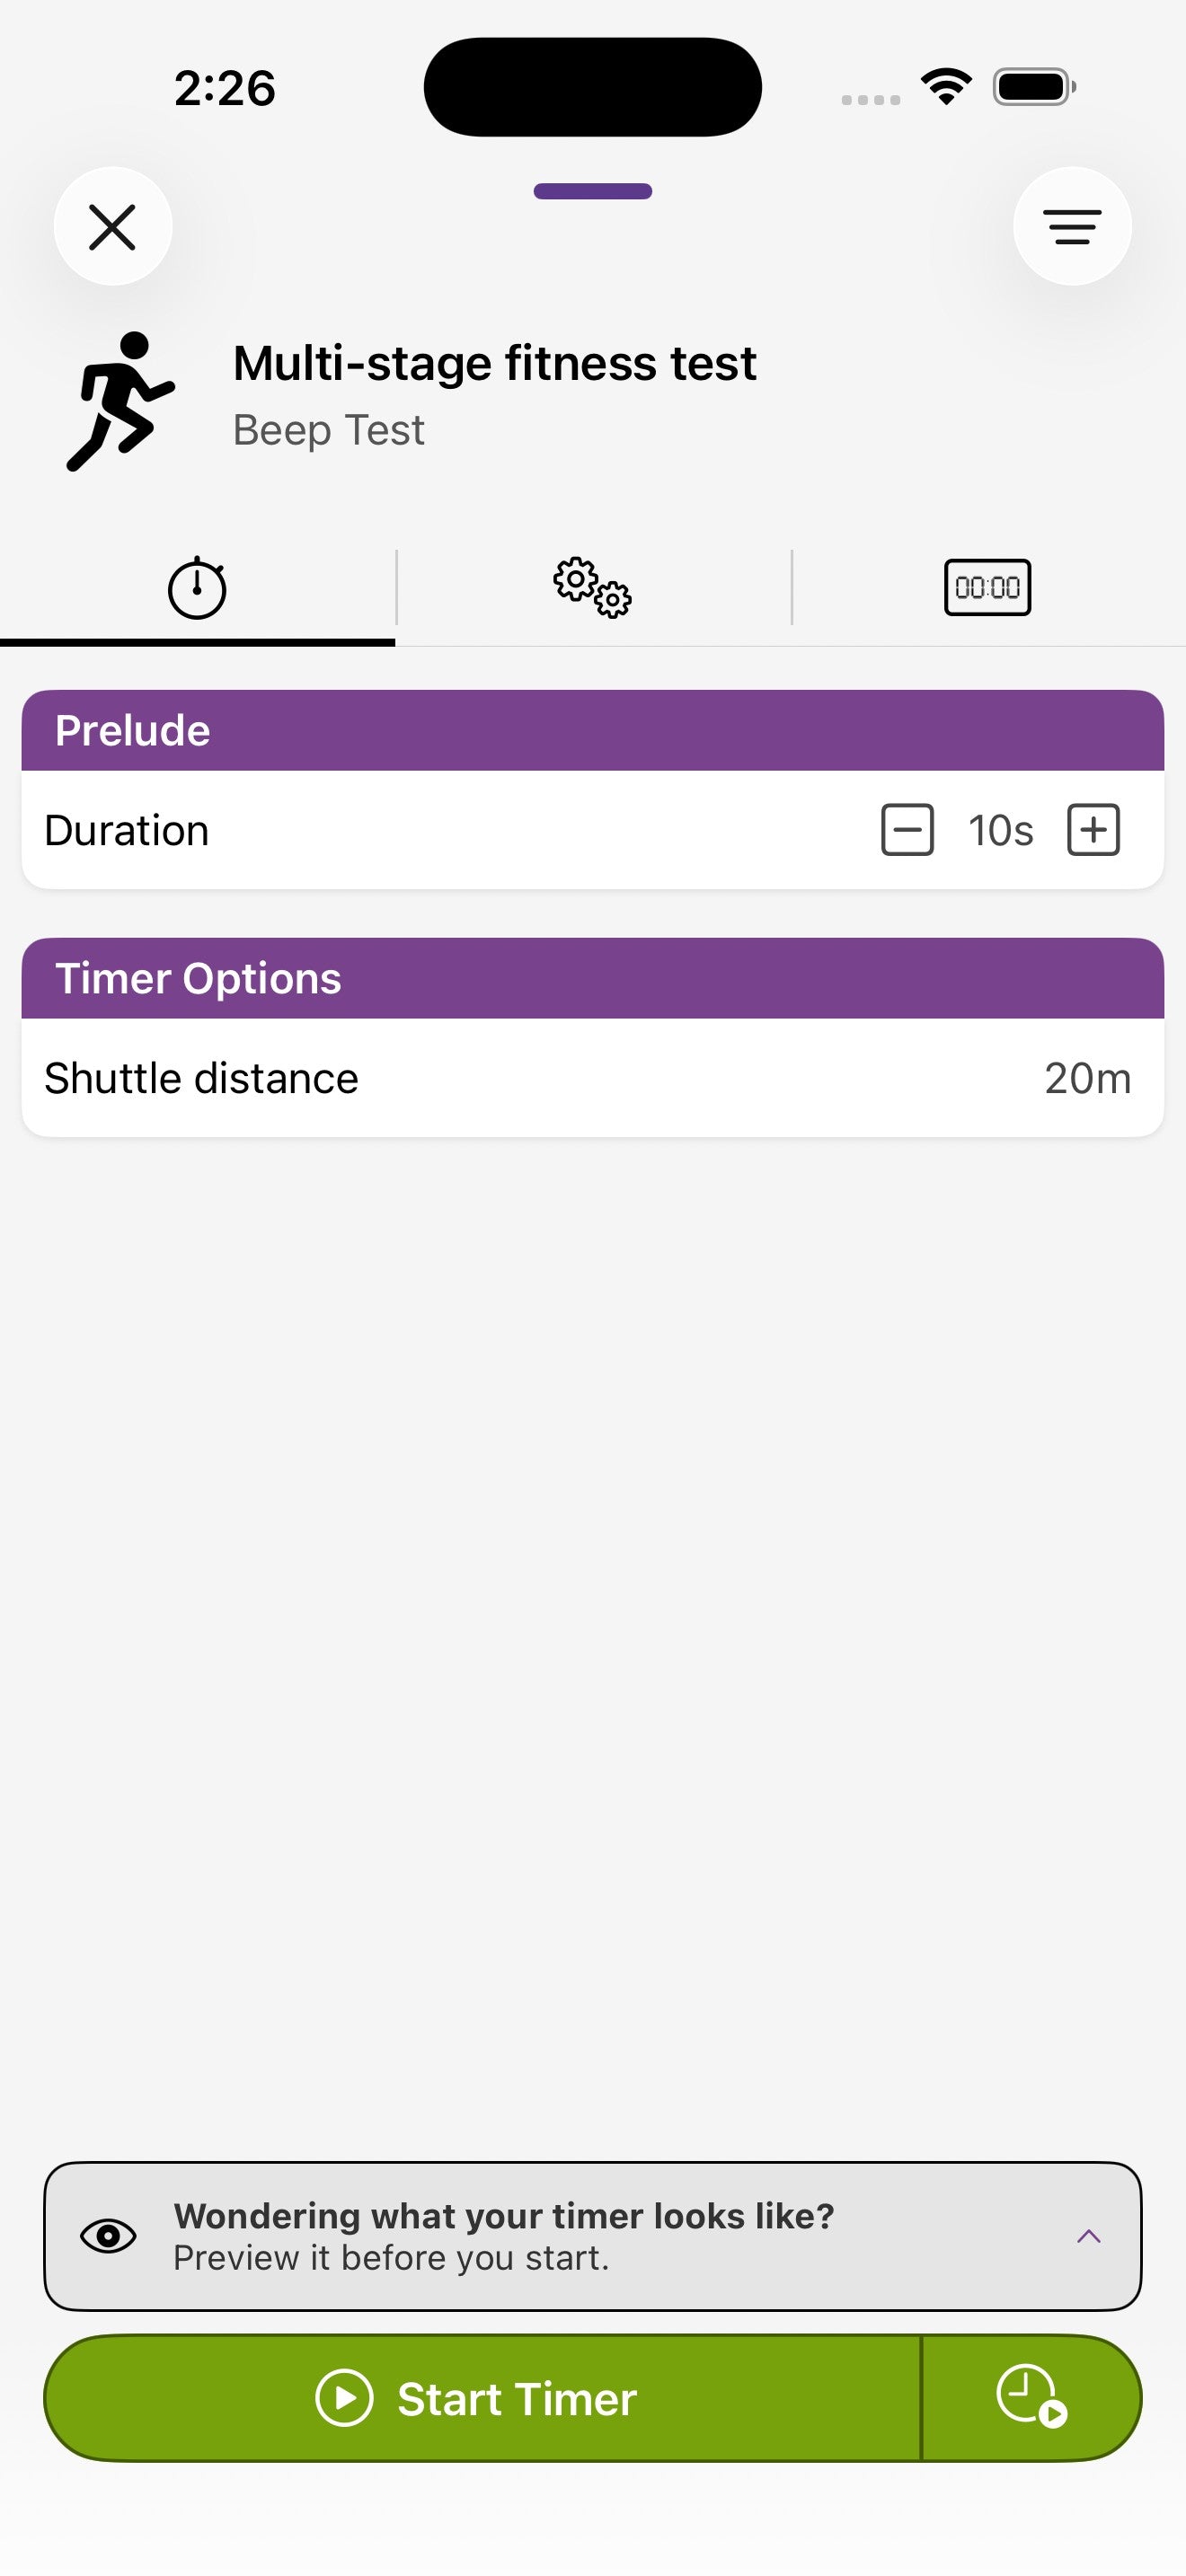
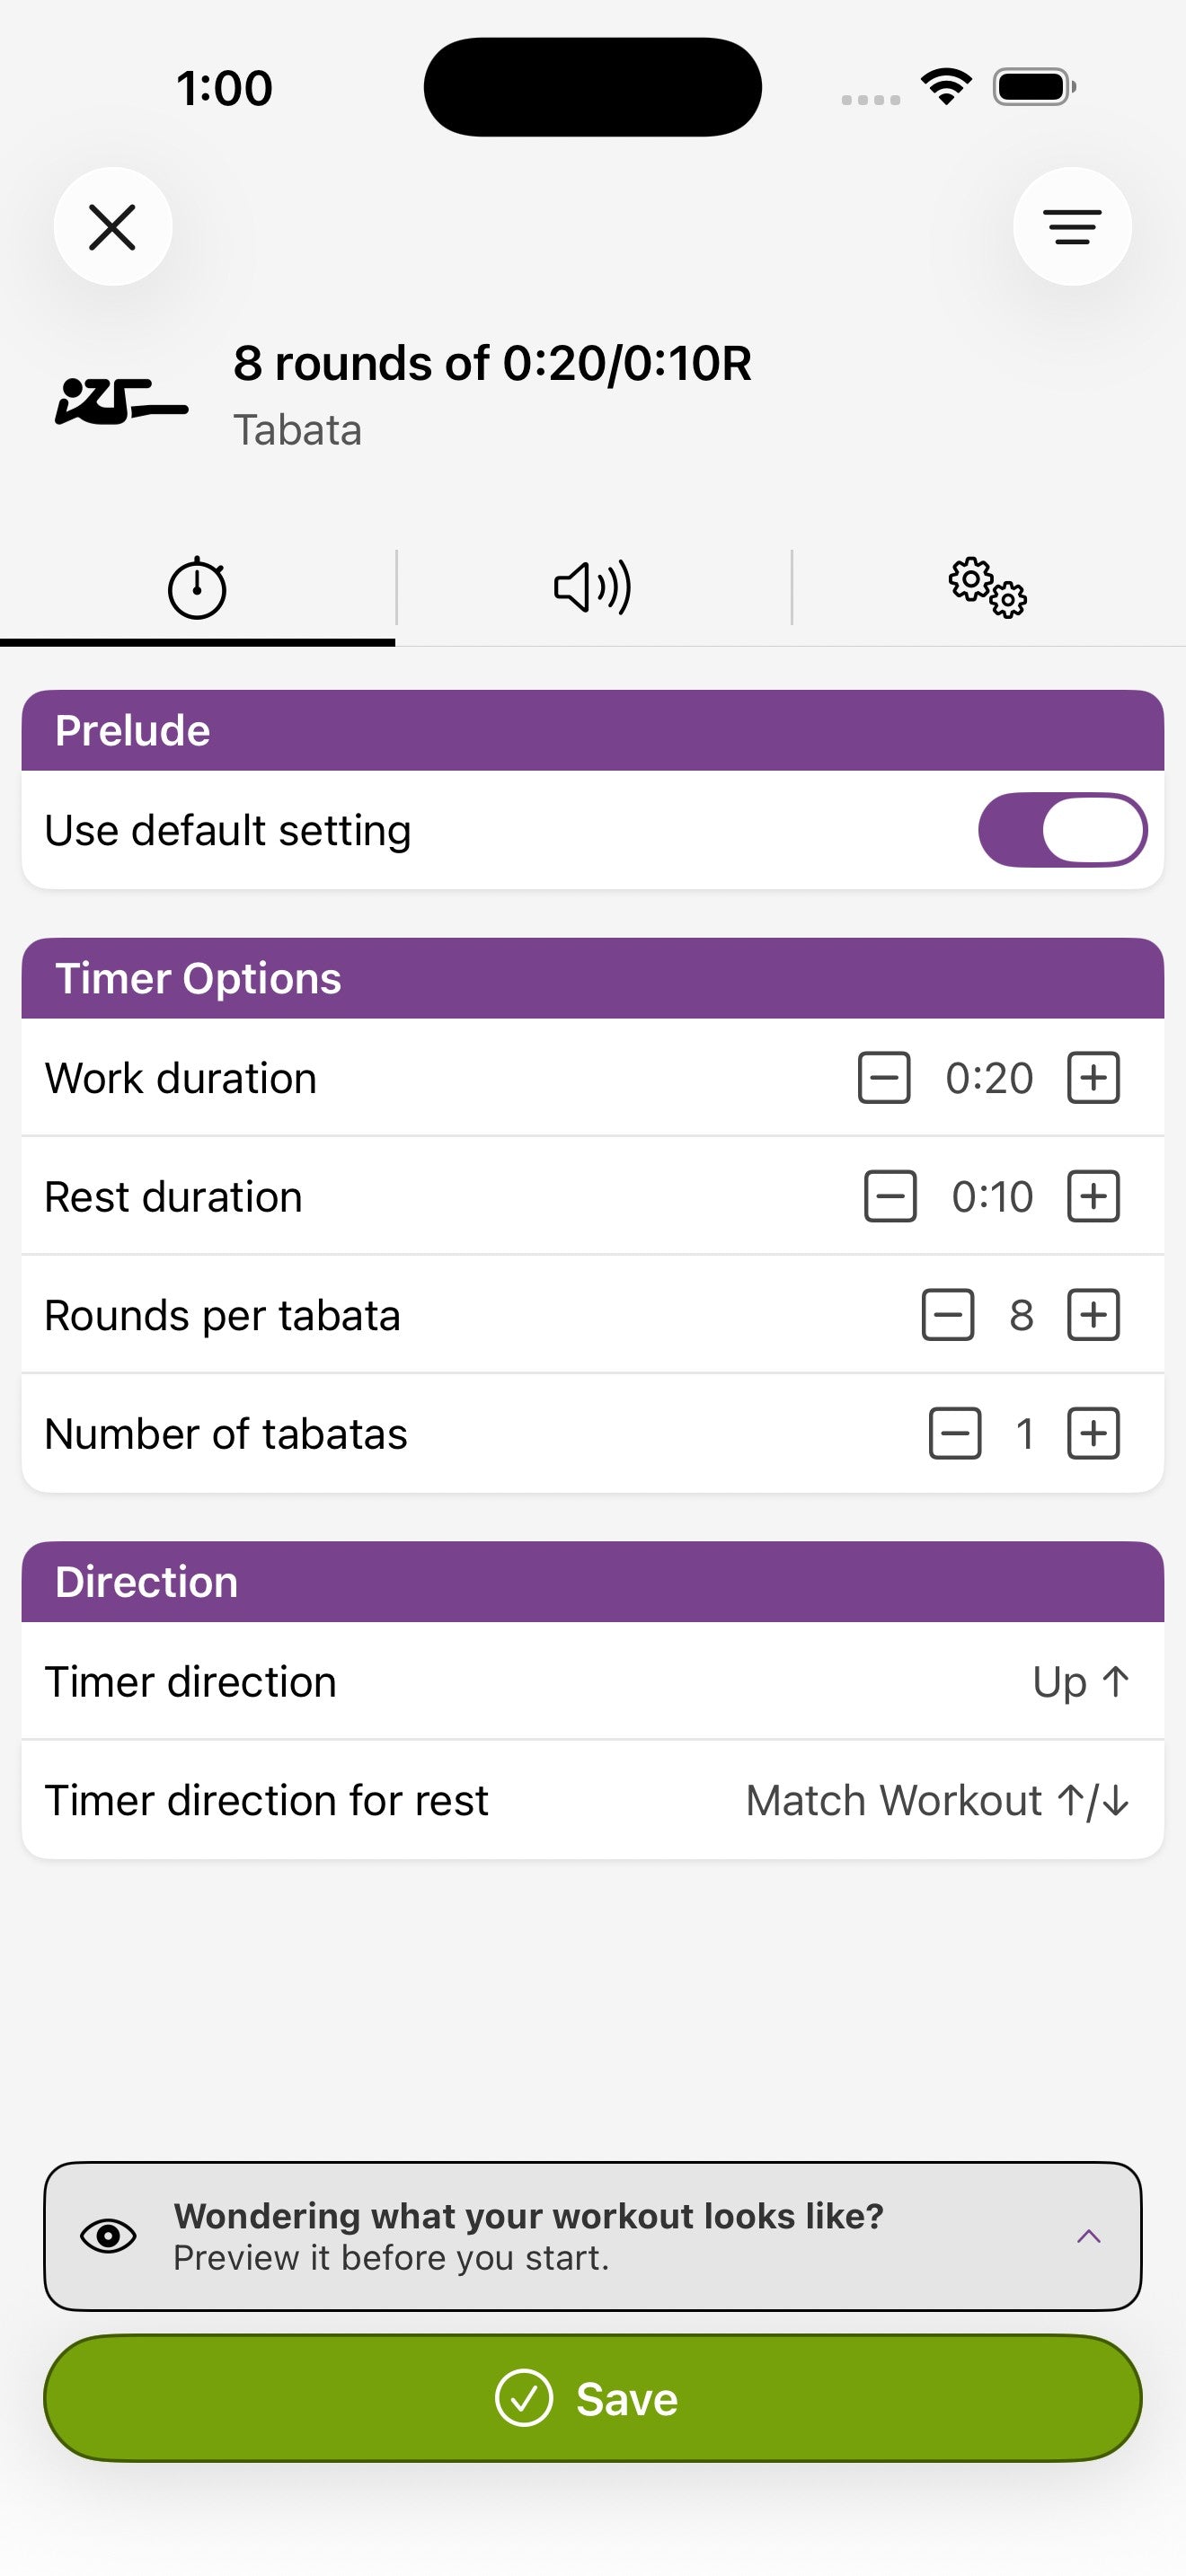
6. Configuring timers
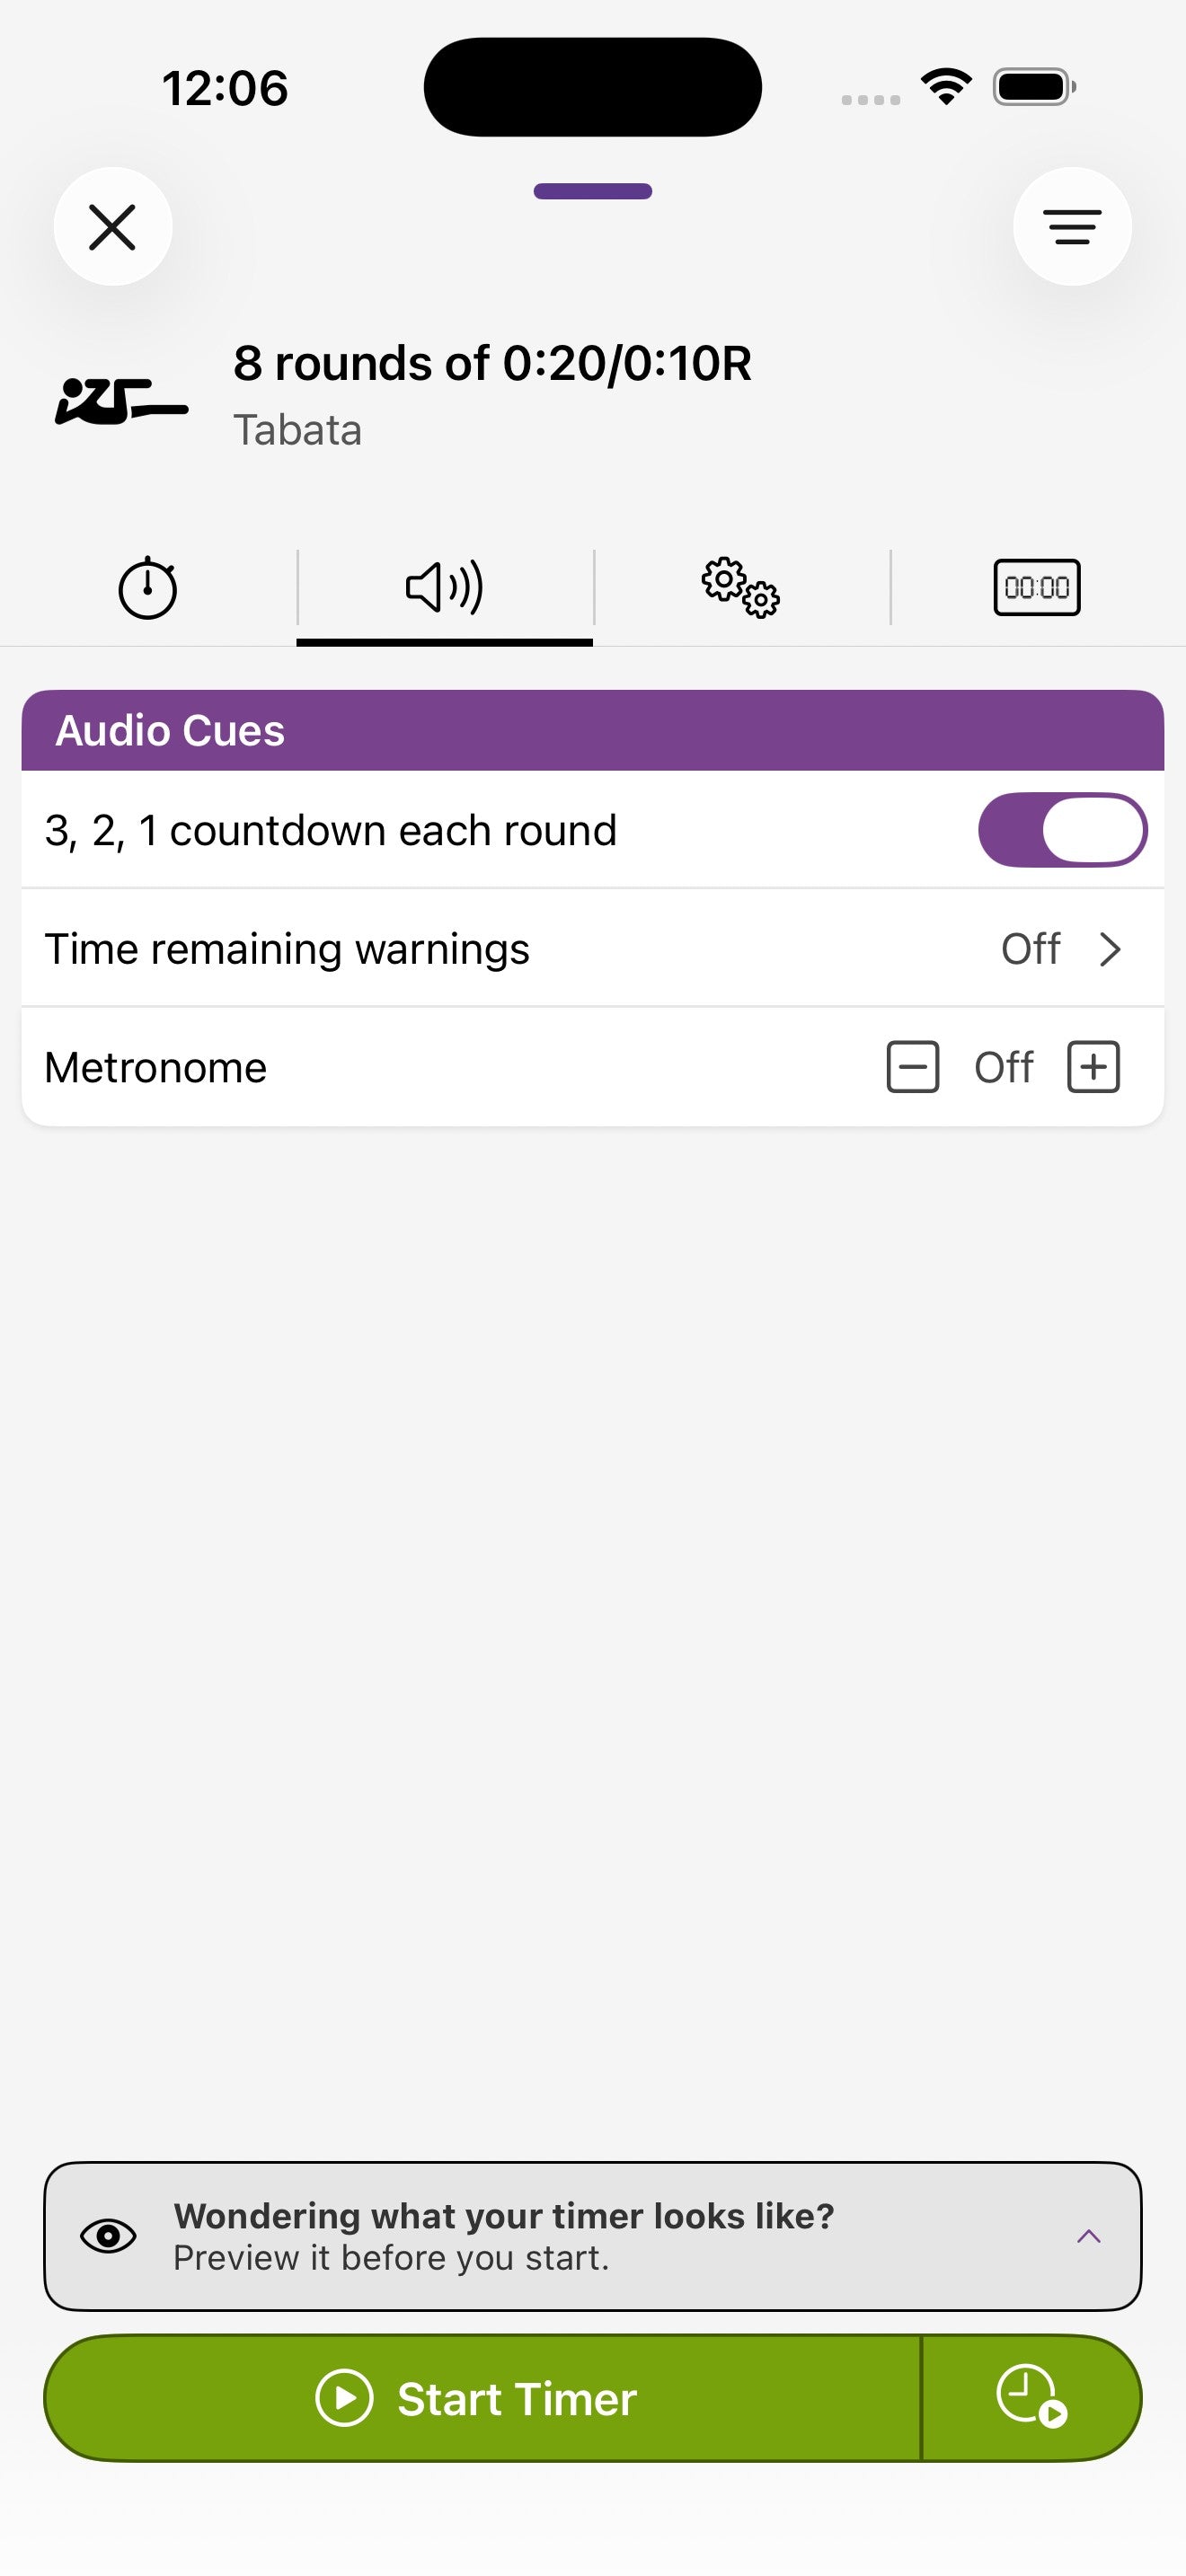
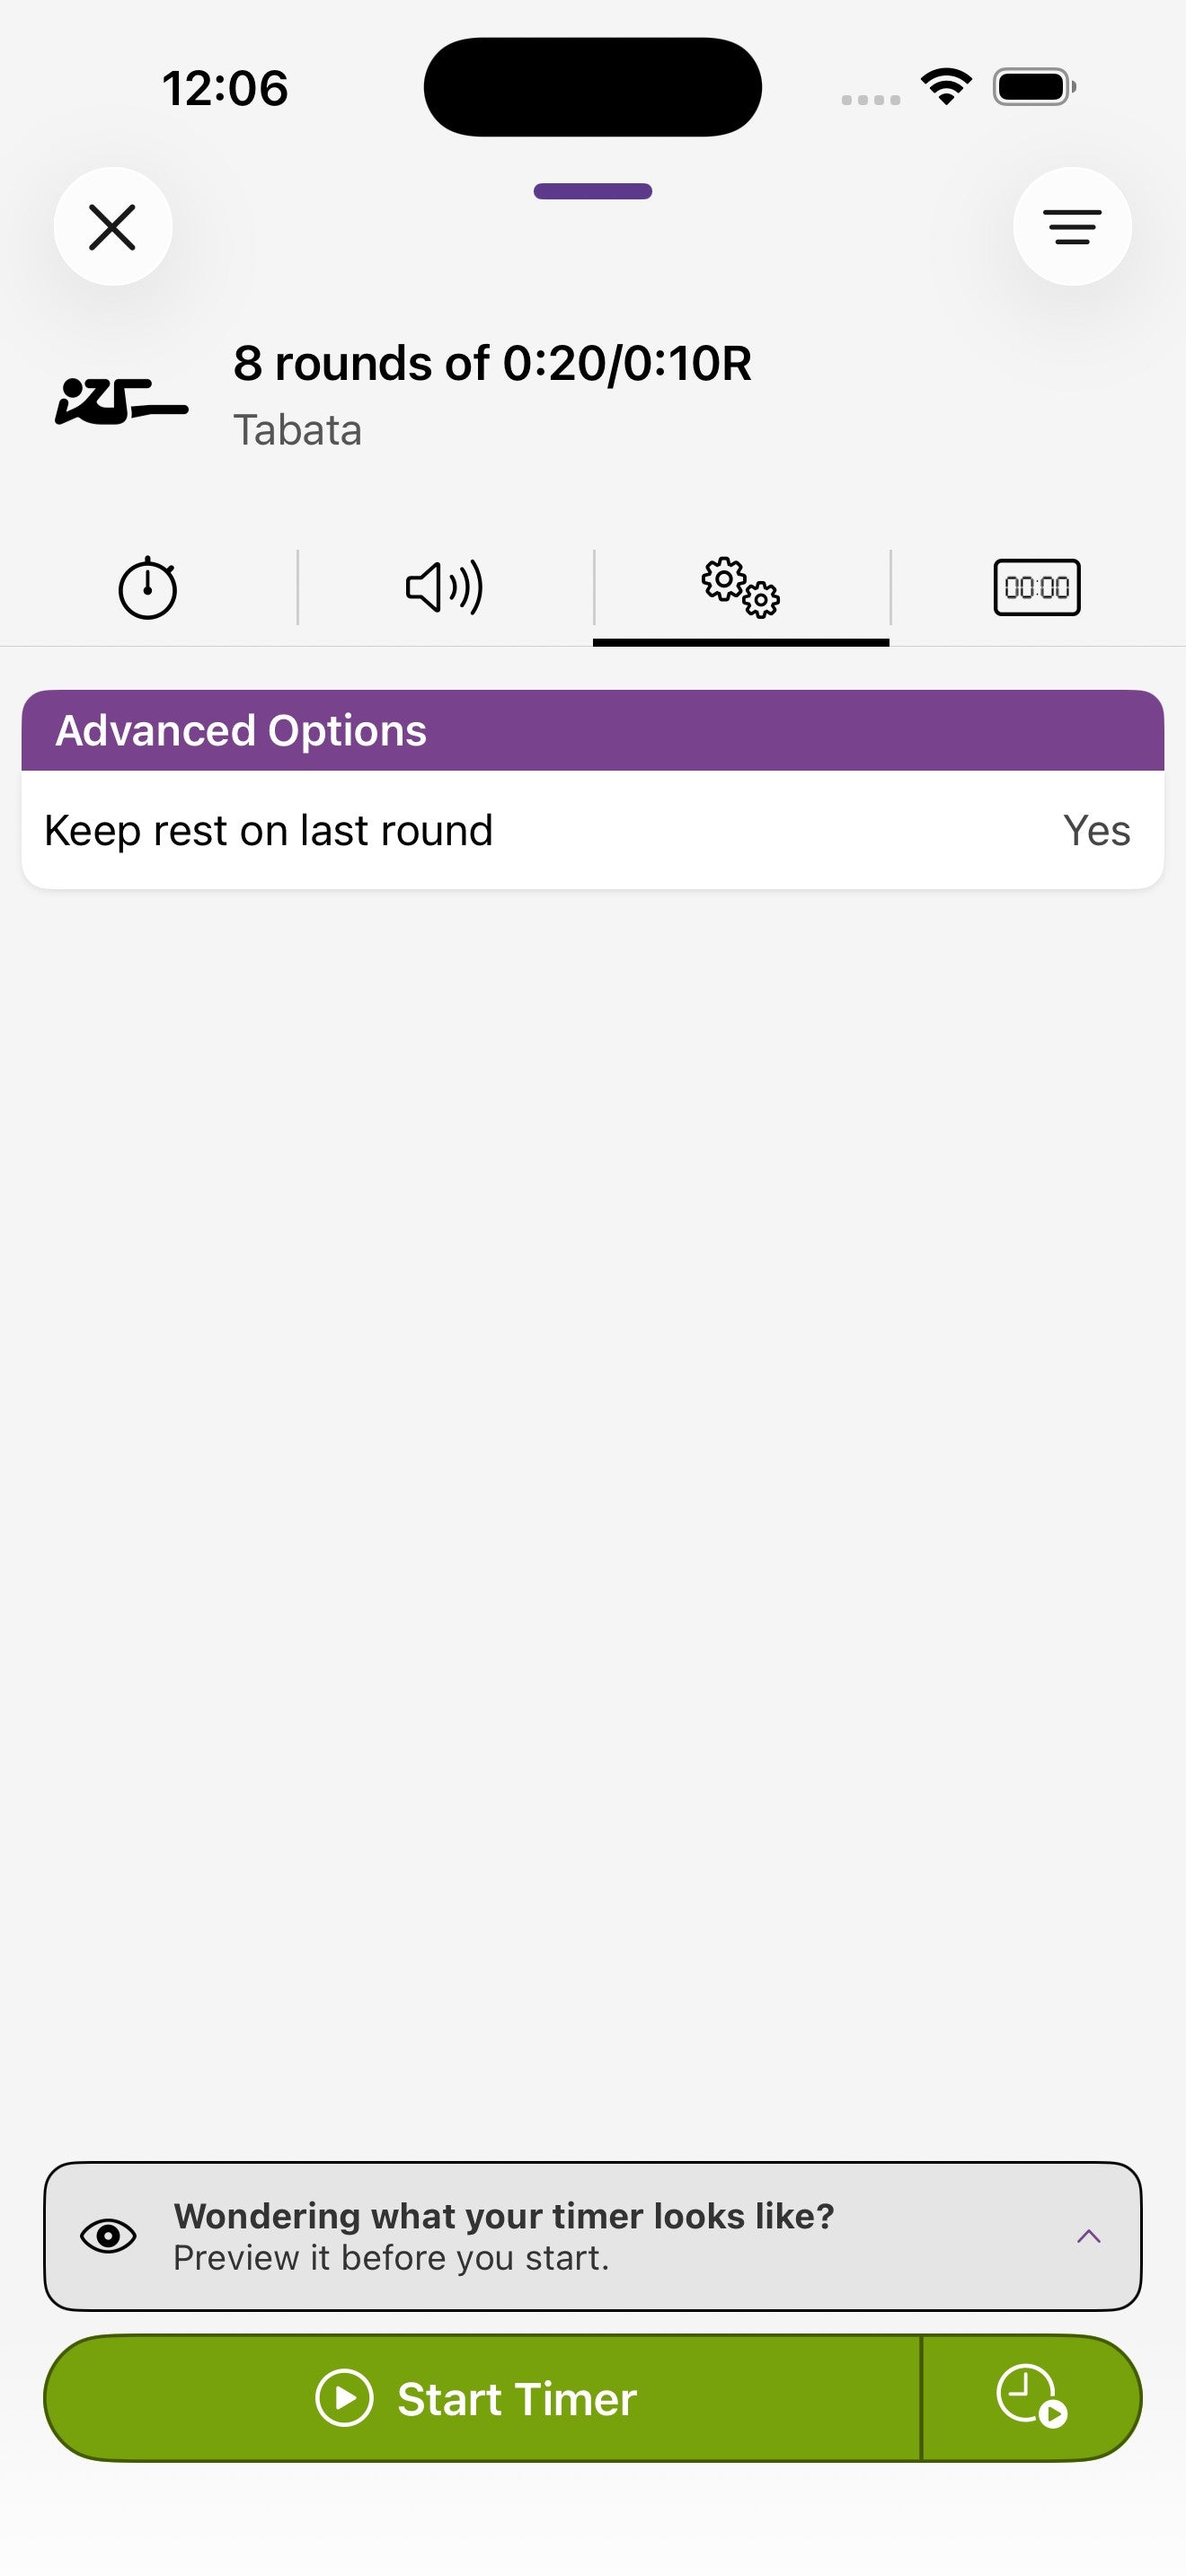
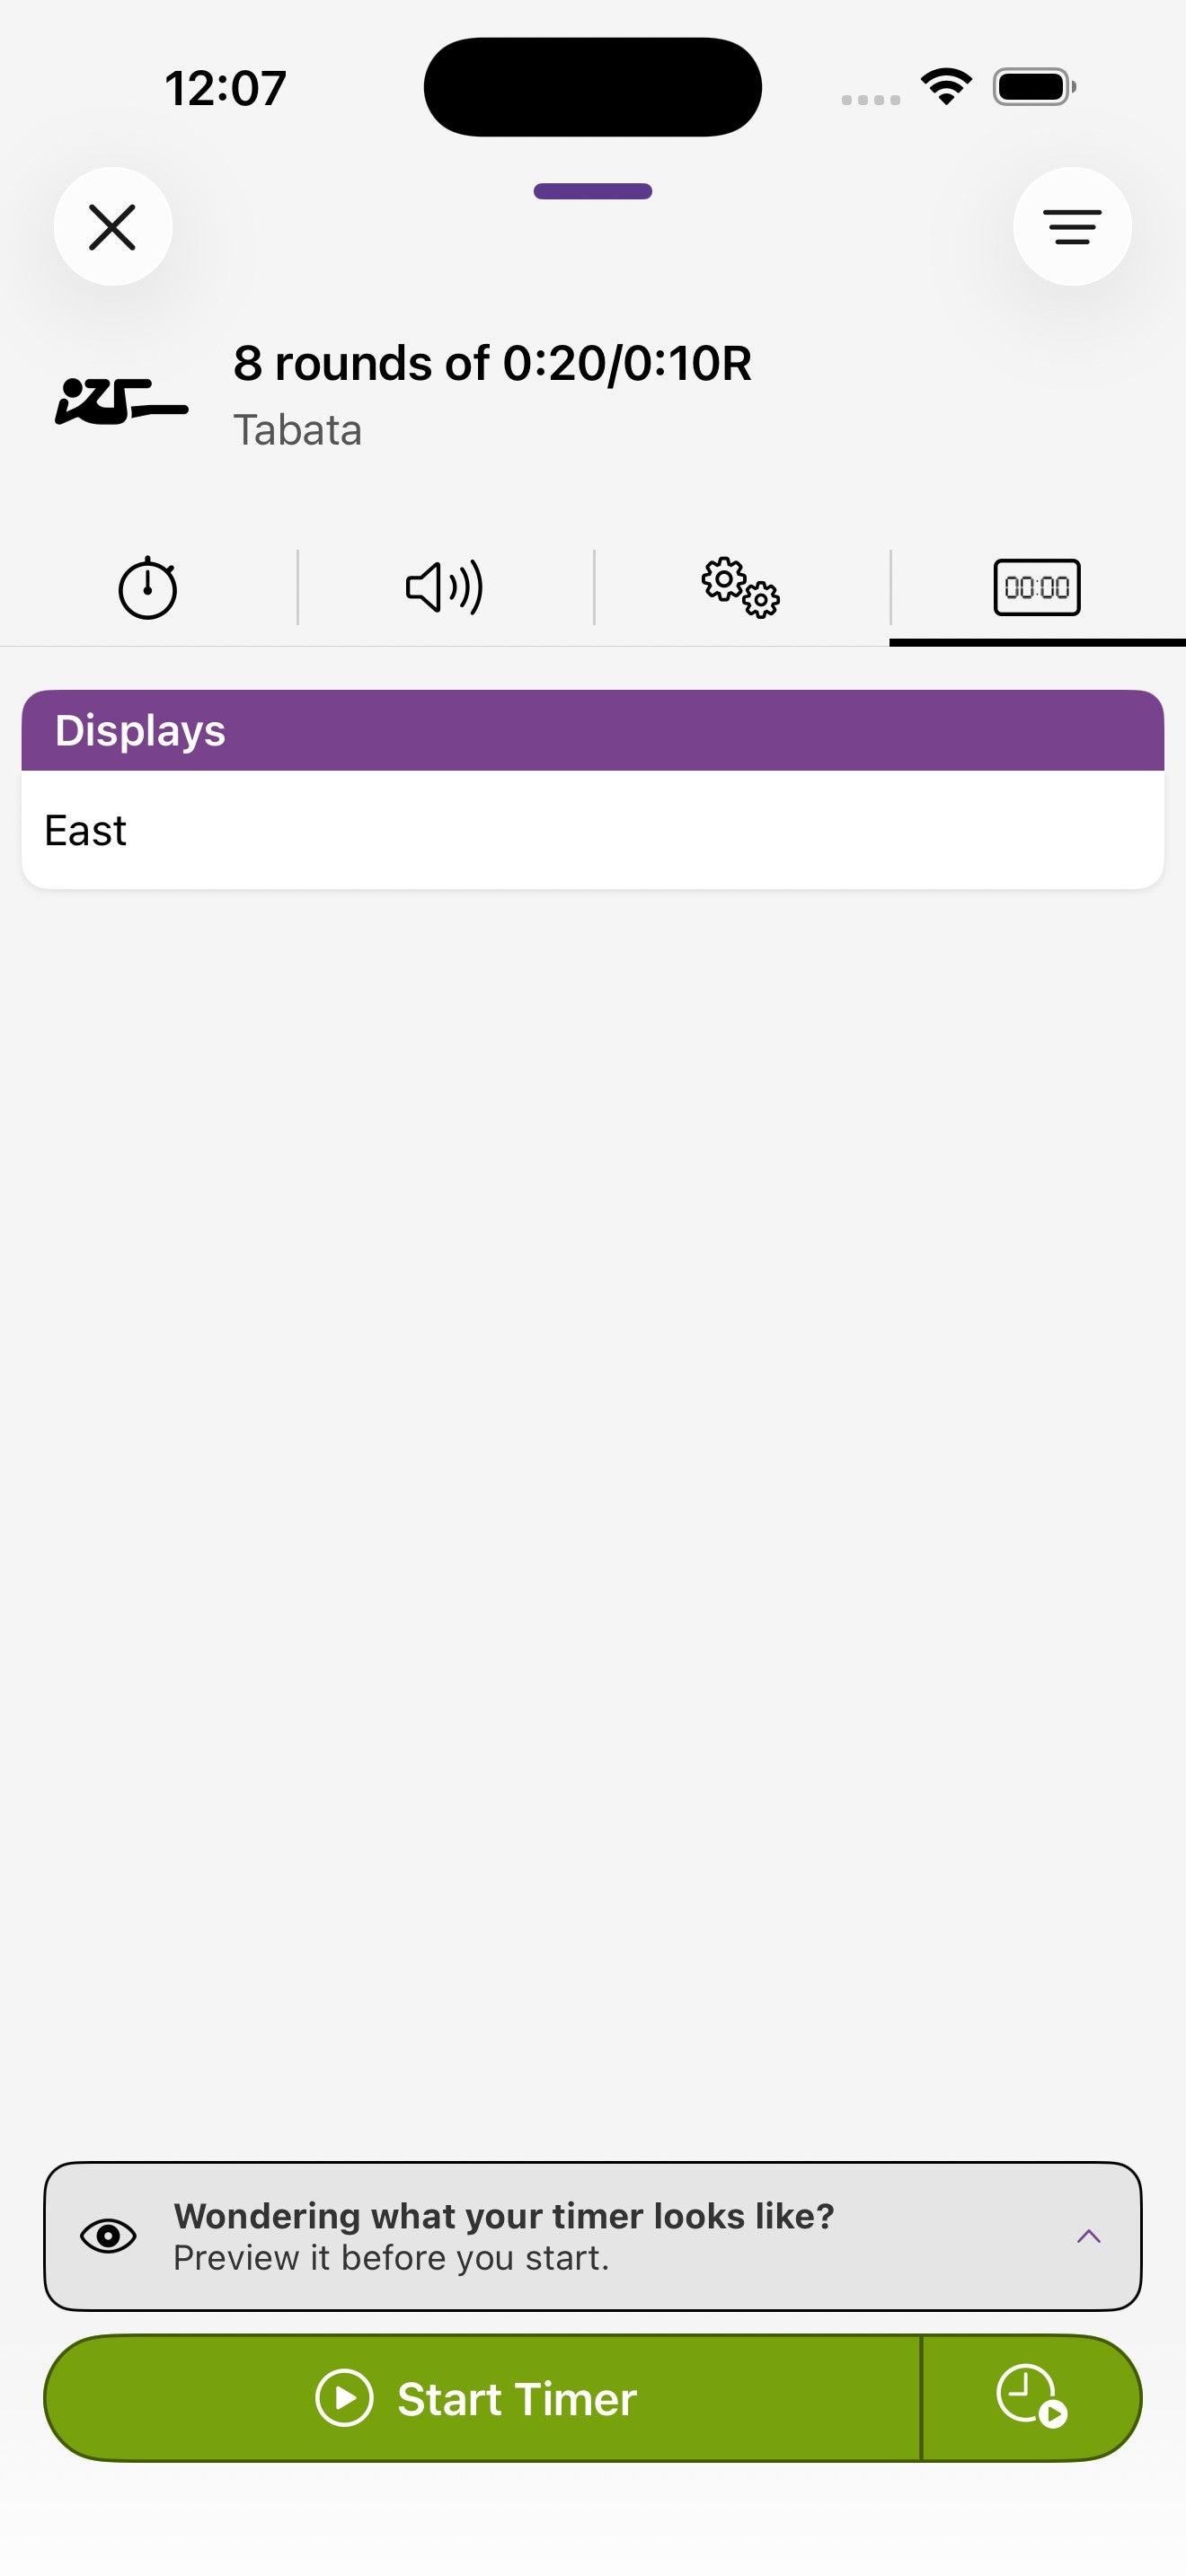
Every timer has the same four configuration tabs across the top: a clock for timing, a speaker for audio cues, a gear for advanced options, and a Flex Timer icon for choosing which displays receive the workout.
The four tabs

Common Clock-tab options
Audio Cues
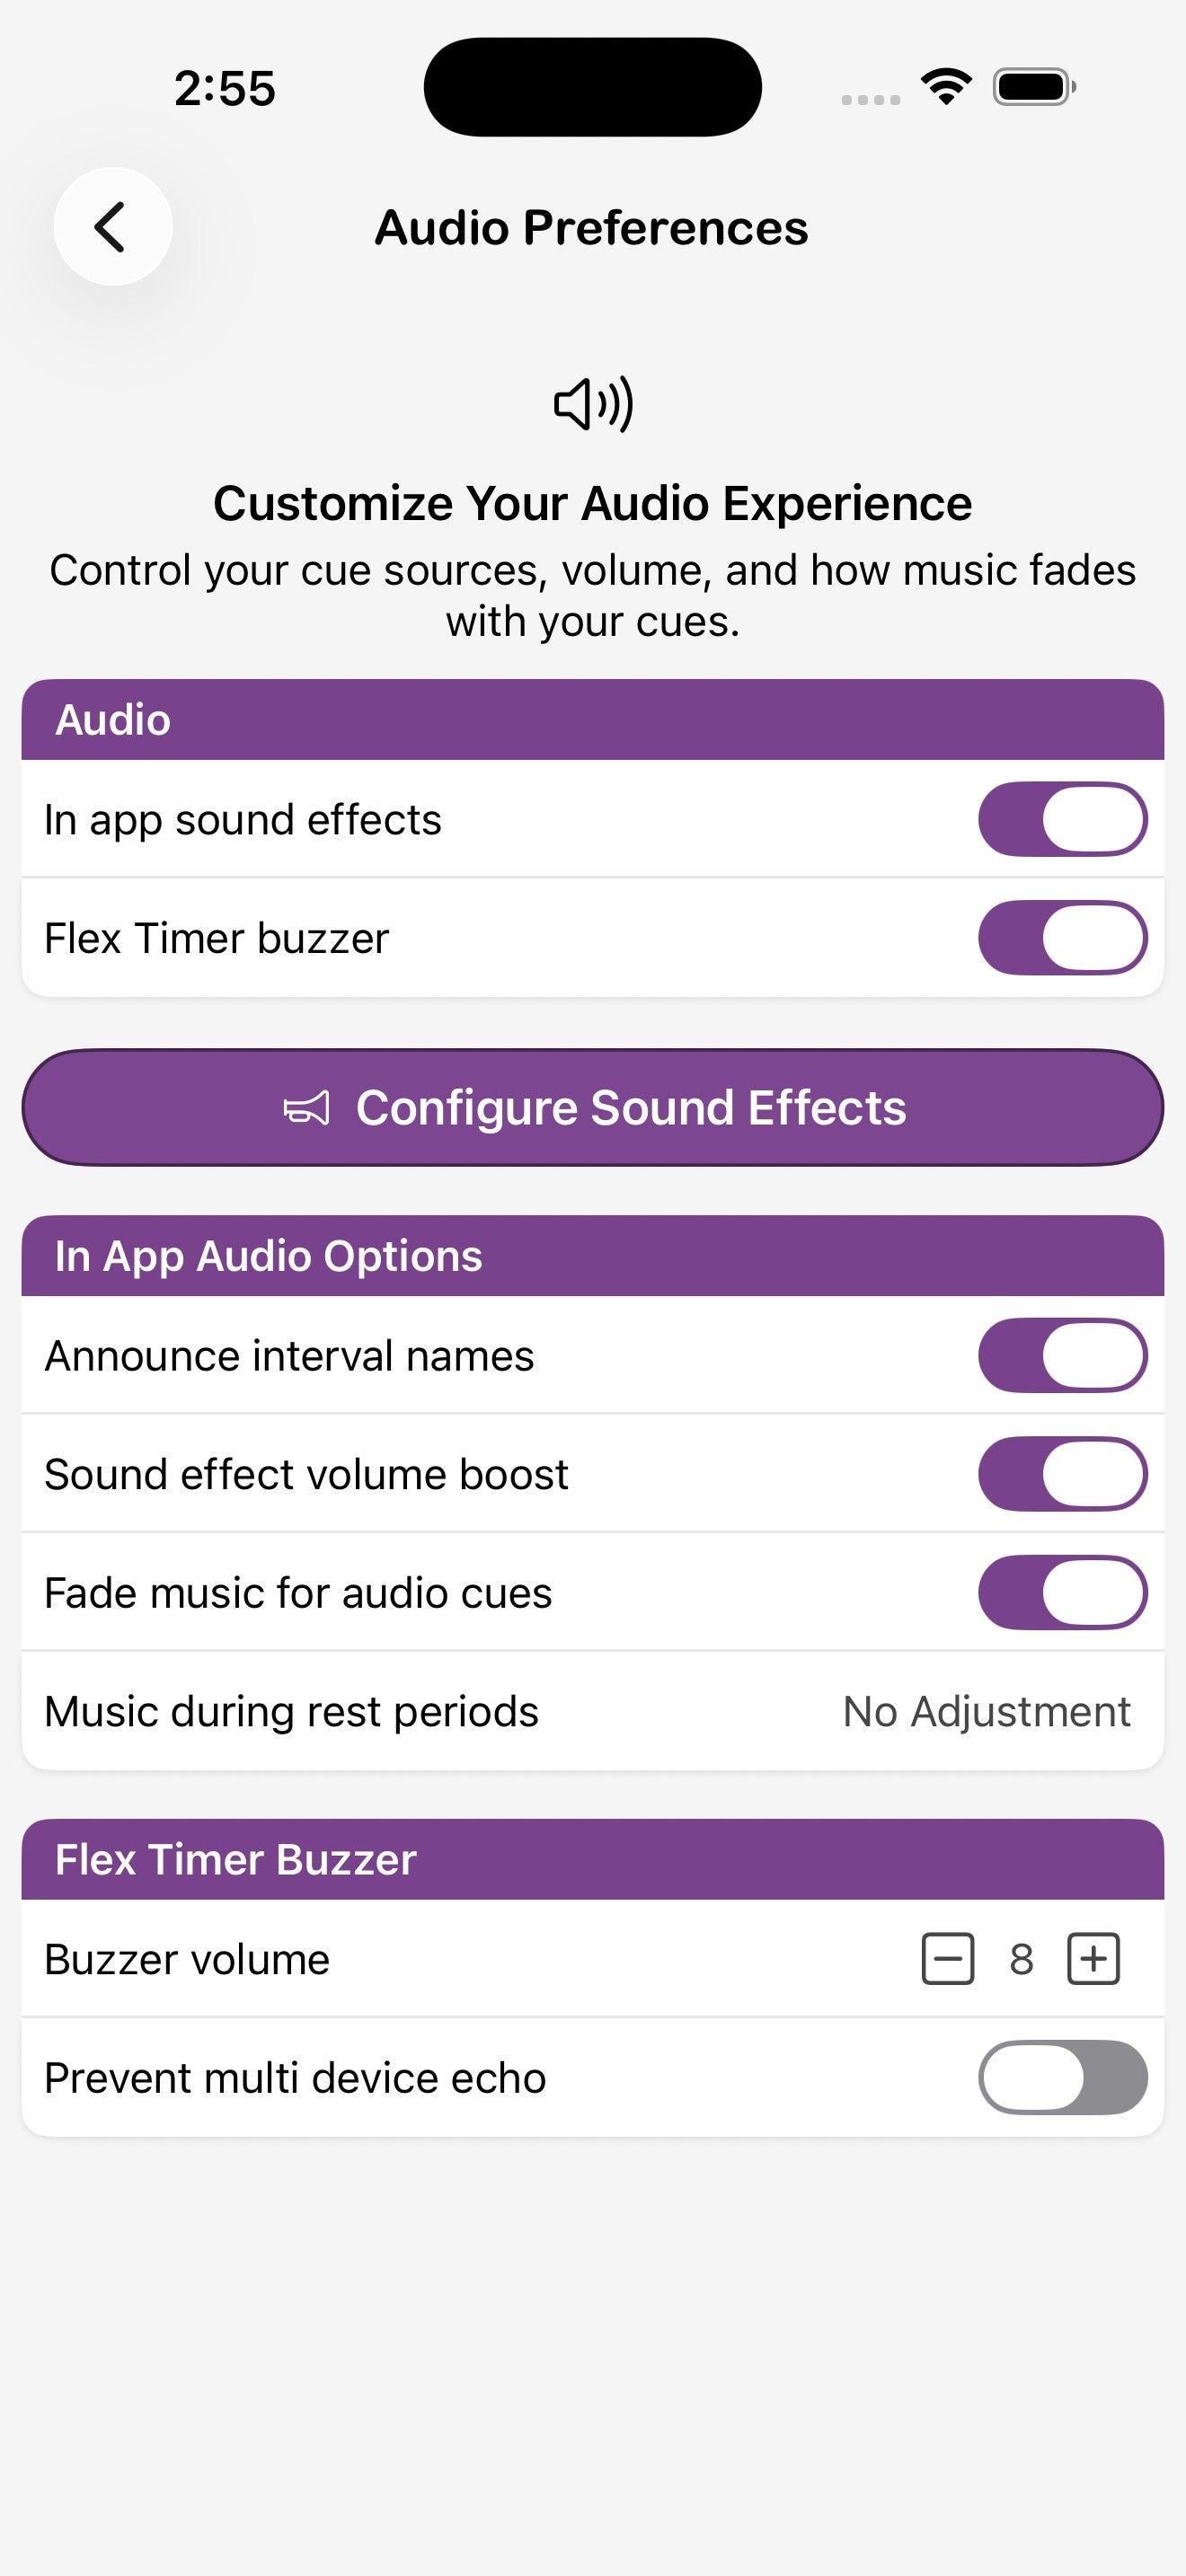
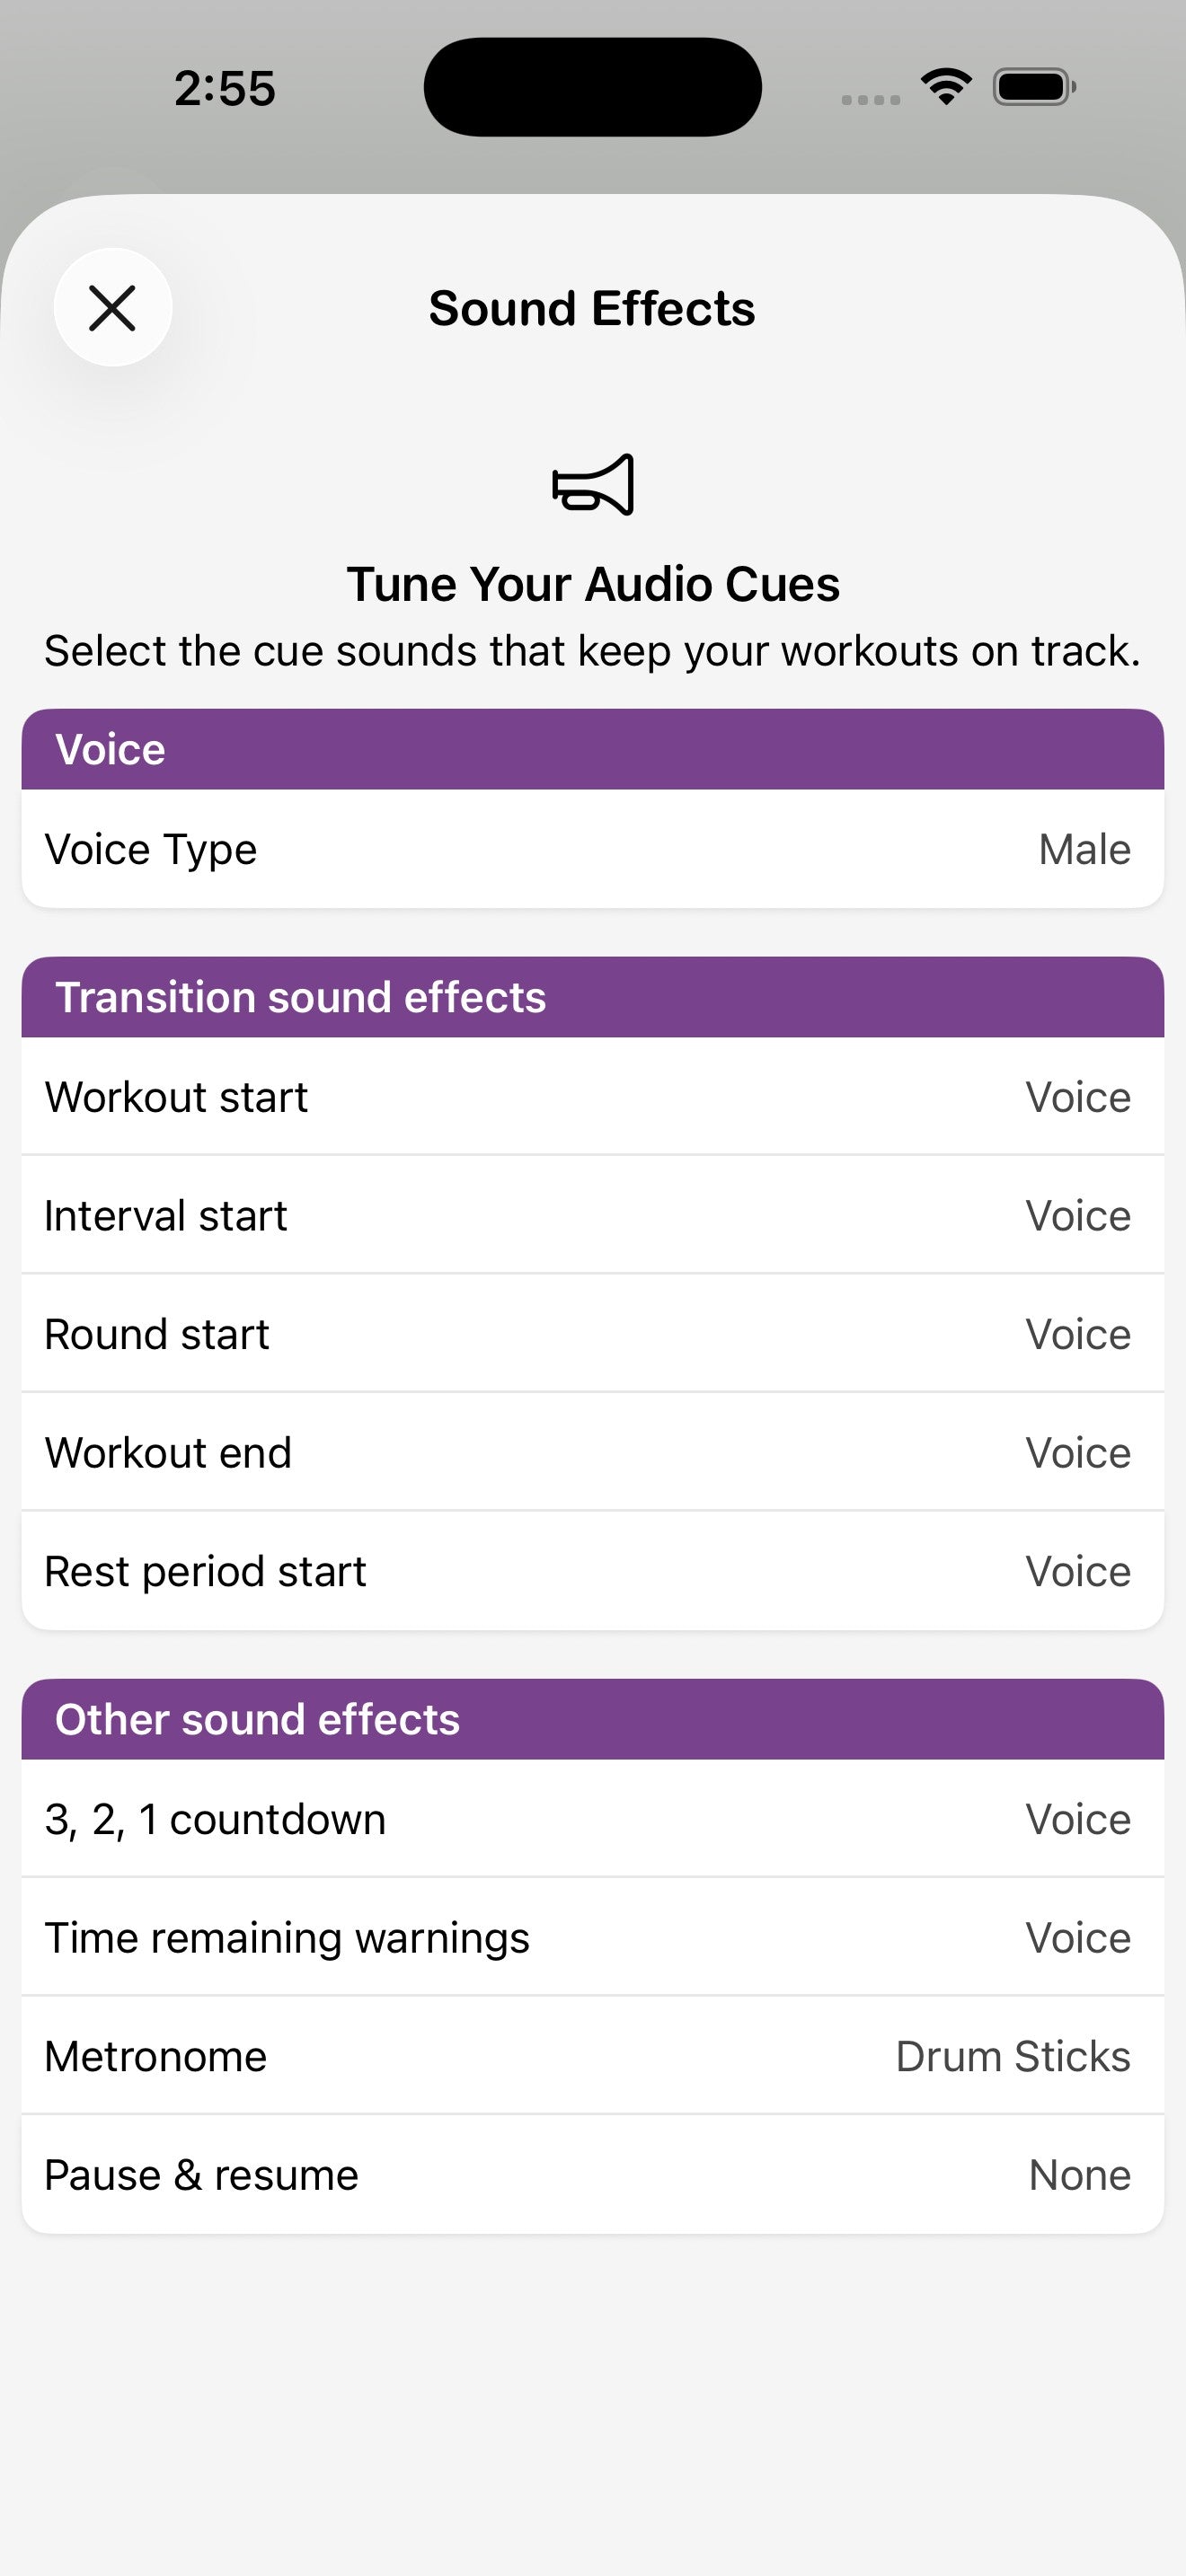
Toggle a 3, 2, 1 countdown at the end of each round, set time-remaining warnings, and add a metronome at any BPM. The voice and individual sound effects can be tuned globally in Preferences → Audio.
Choosing displays
On the Displays tab (the small clock icon at the right), tick which Flex Timers should run this workout. Untick a display to leave it free for another timer.
Timer-specific options
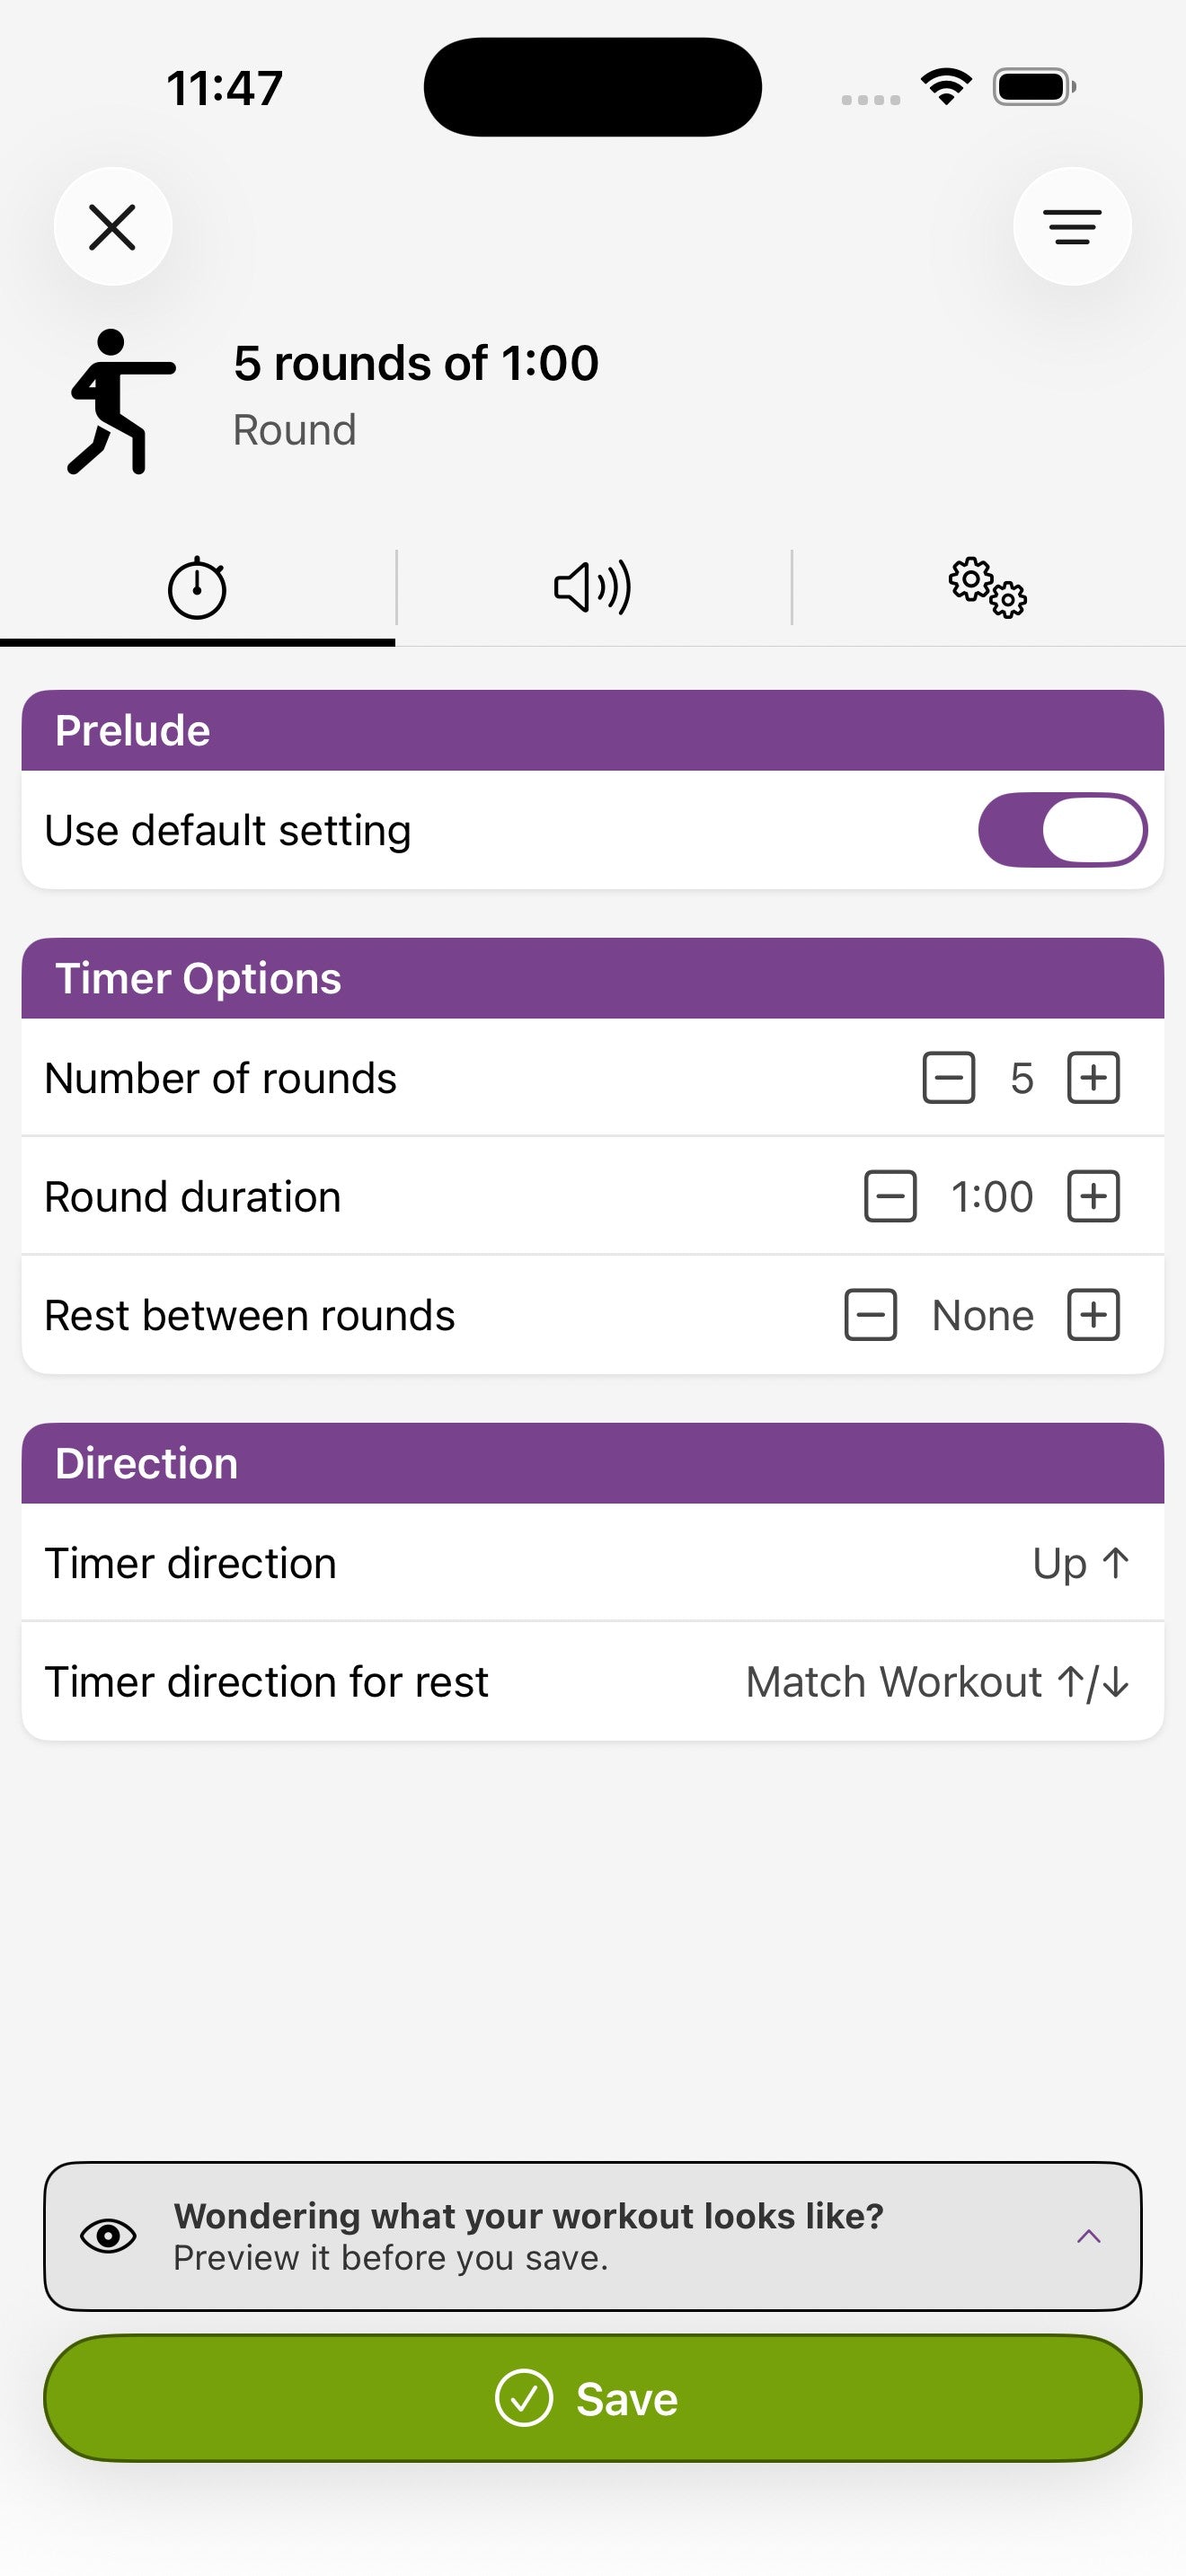
Round
Set the number of rounds, the duration of each round, and an optional rest between rounds. Each round can count up or down independently.
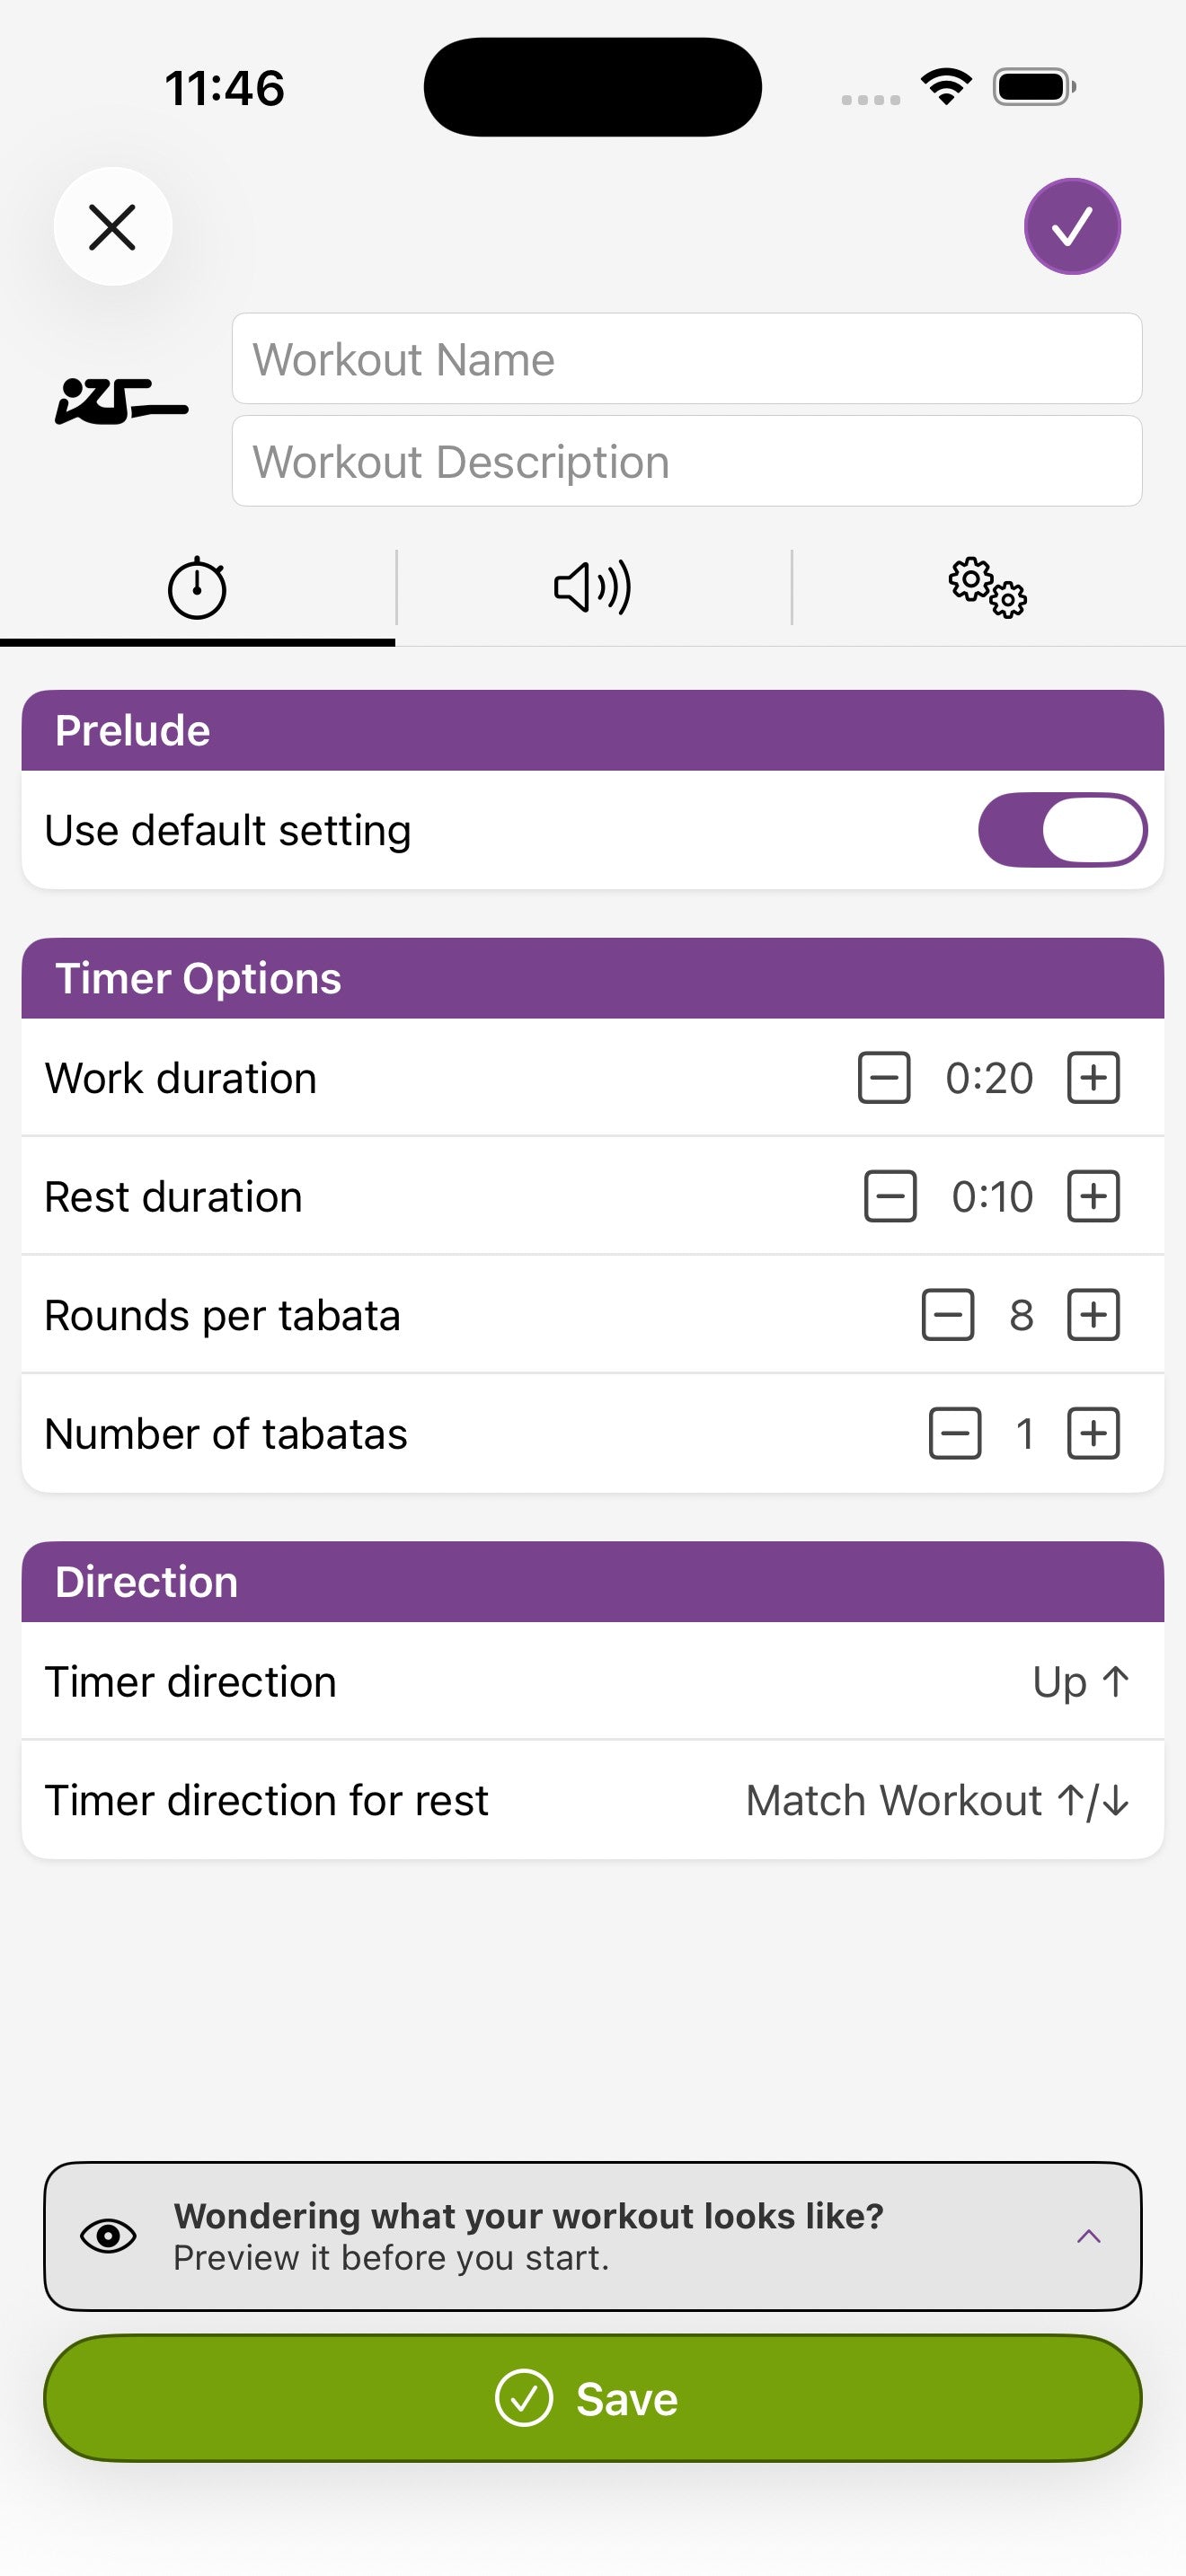
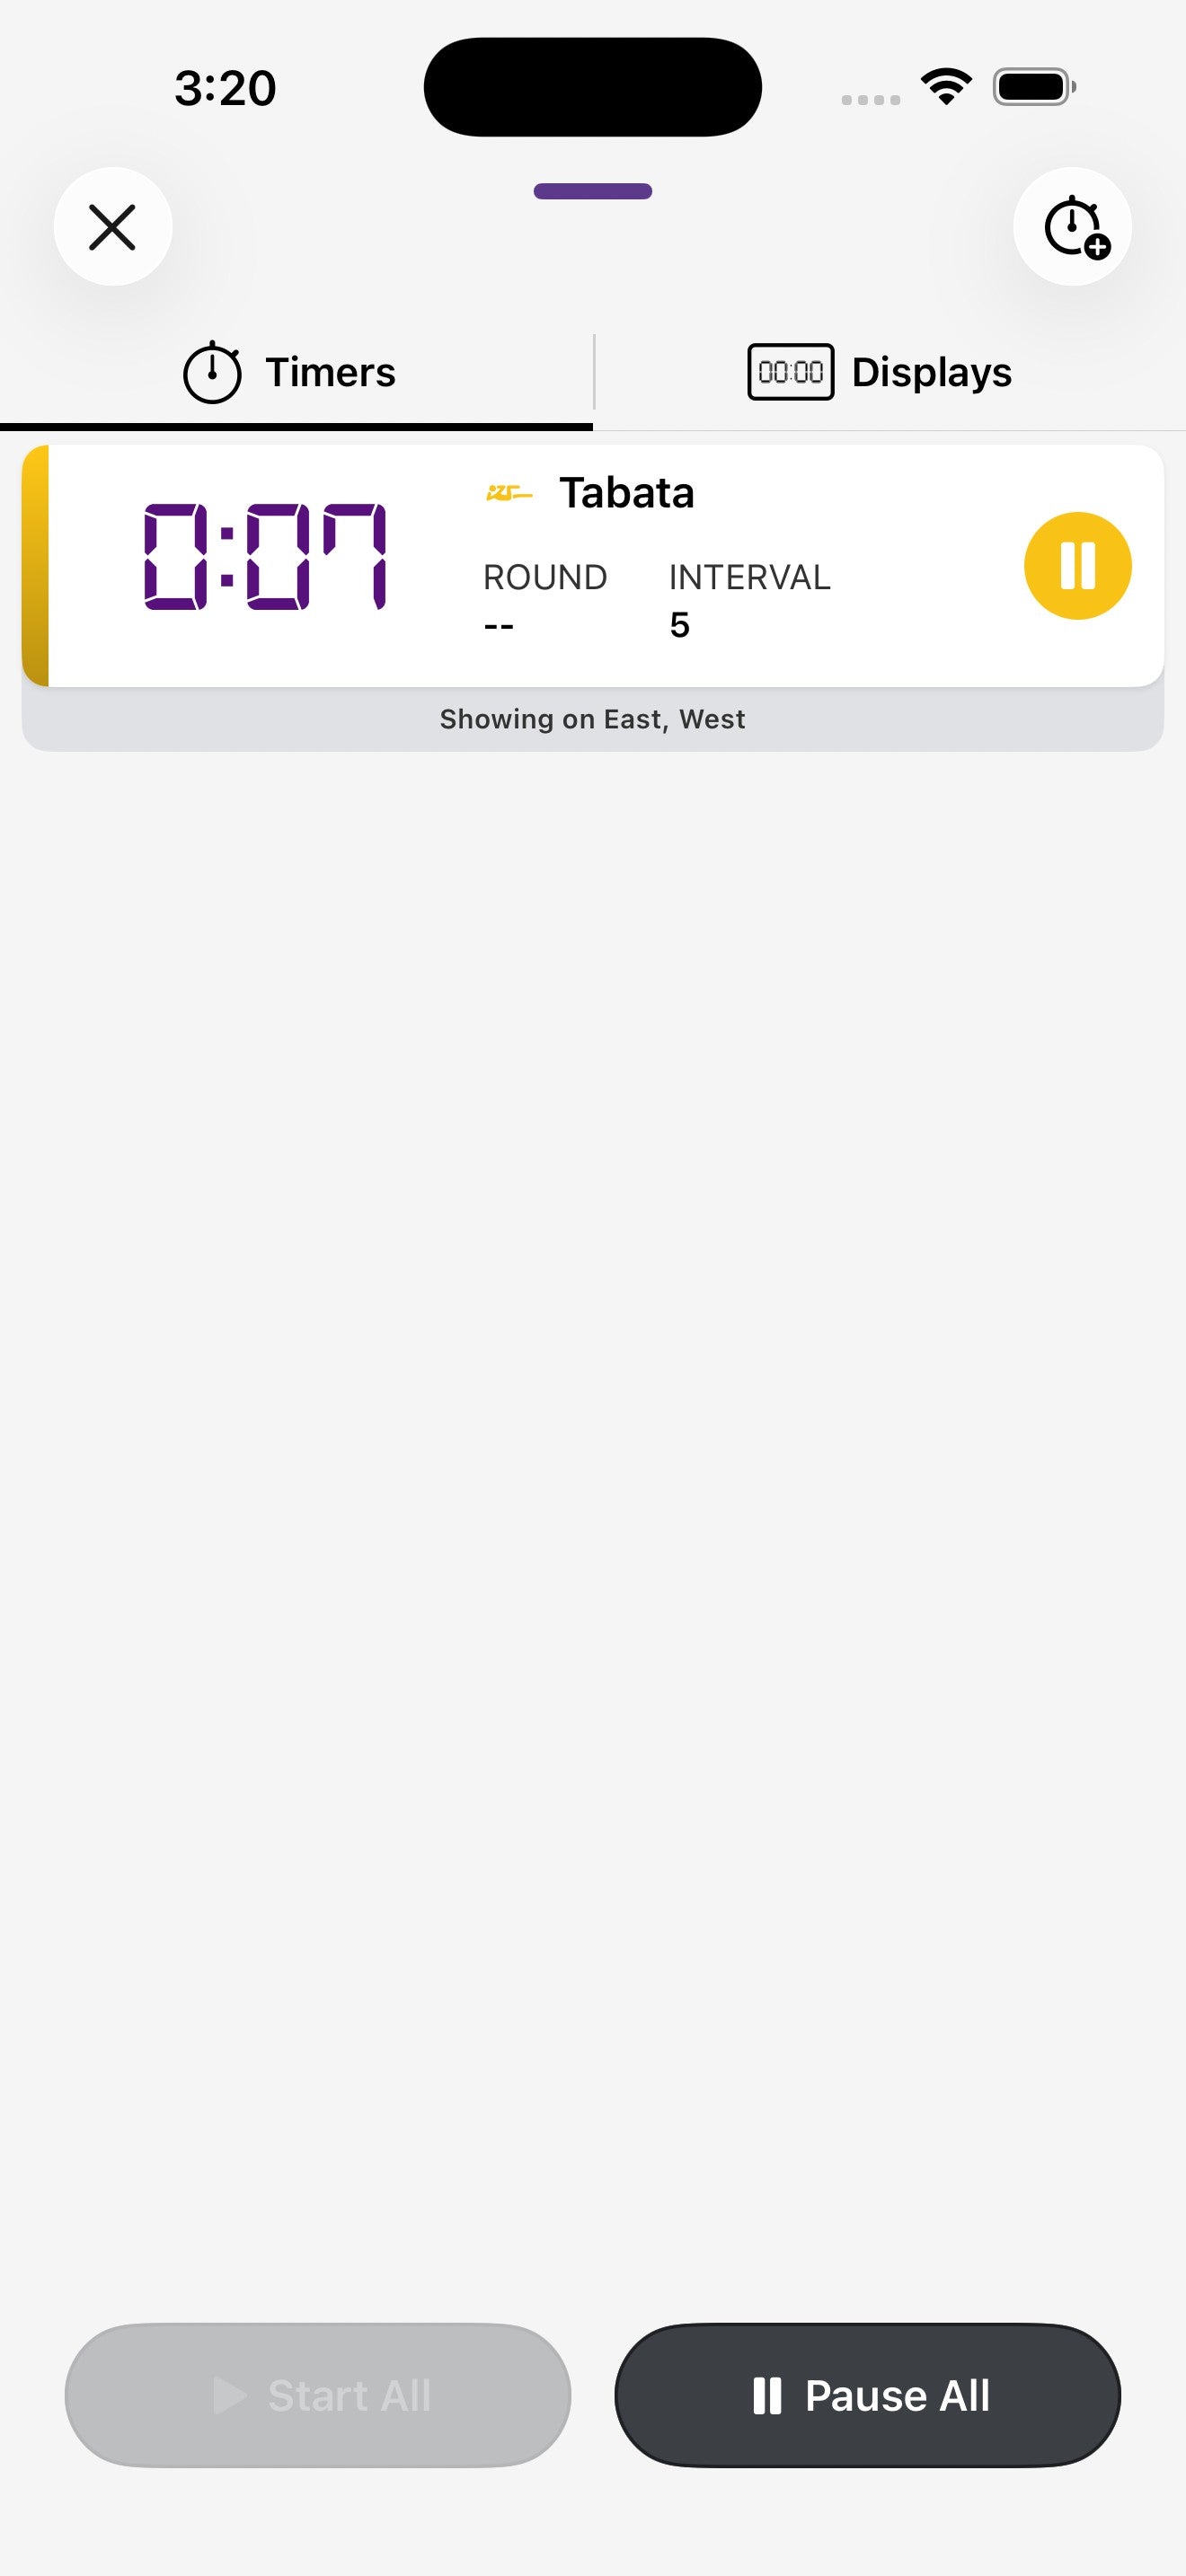
Tabata
Configure the work duration, rest duration, rounds per Tabata, and how many Tabatas to chain together. Advanced options let you keep or skip the rest on the last round.

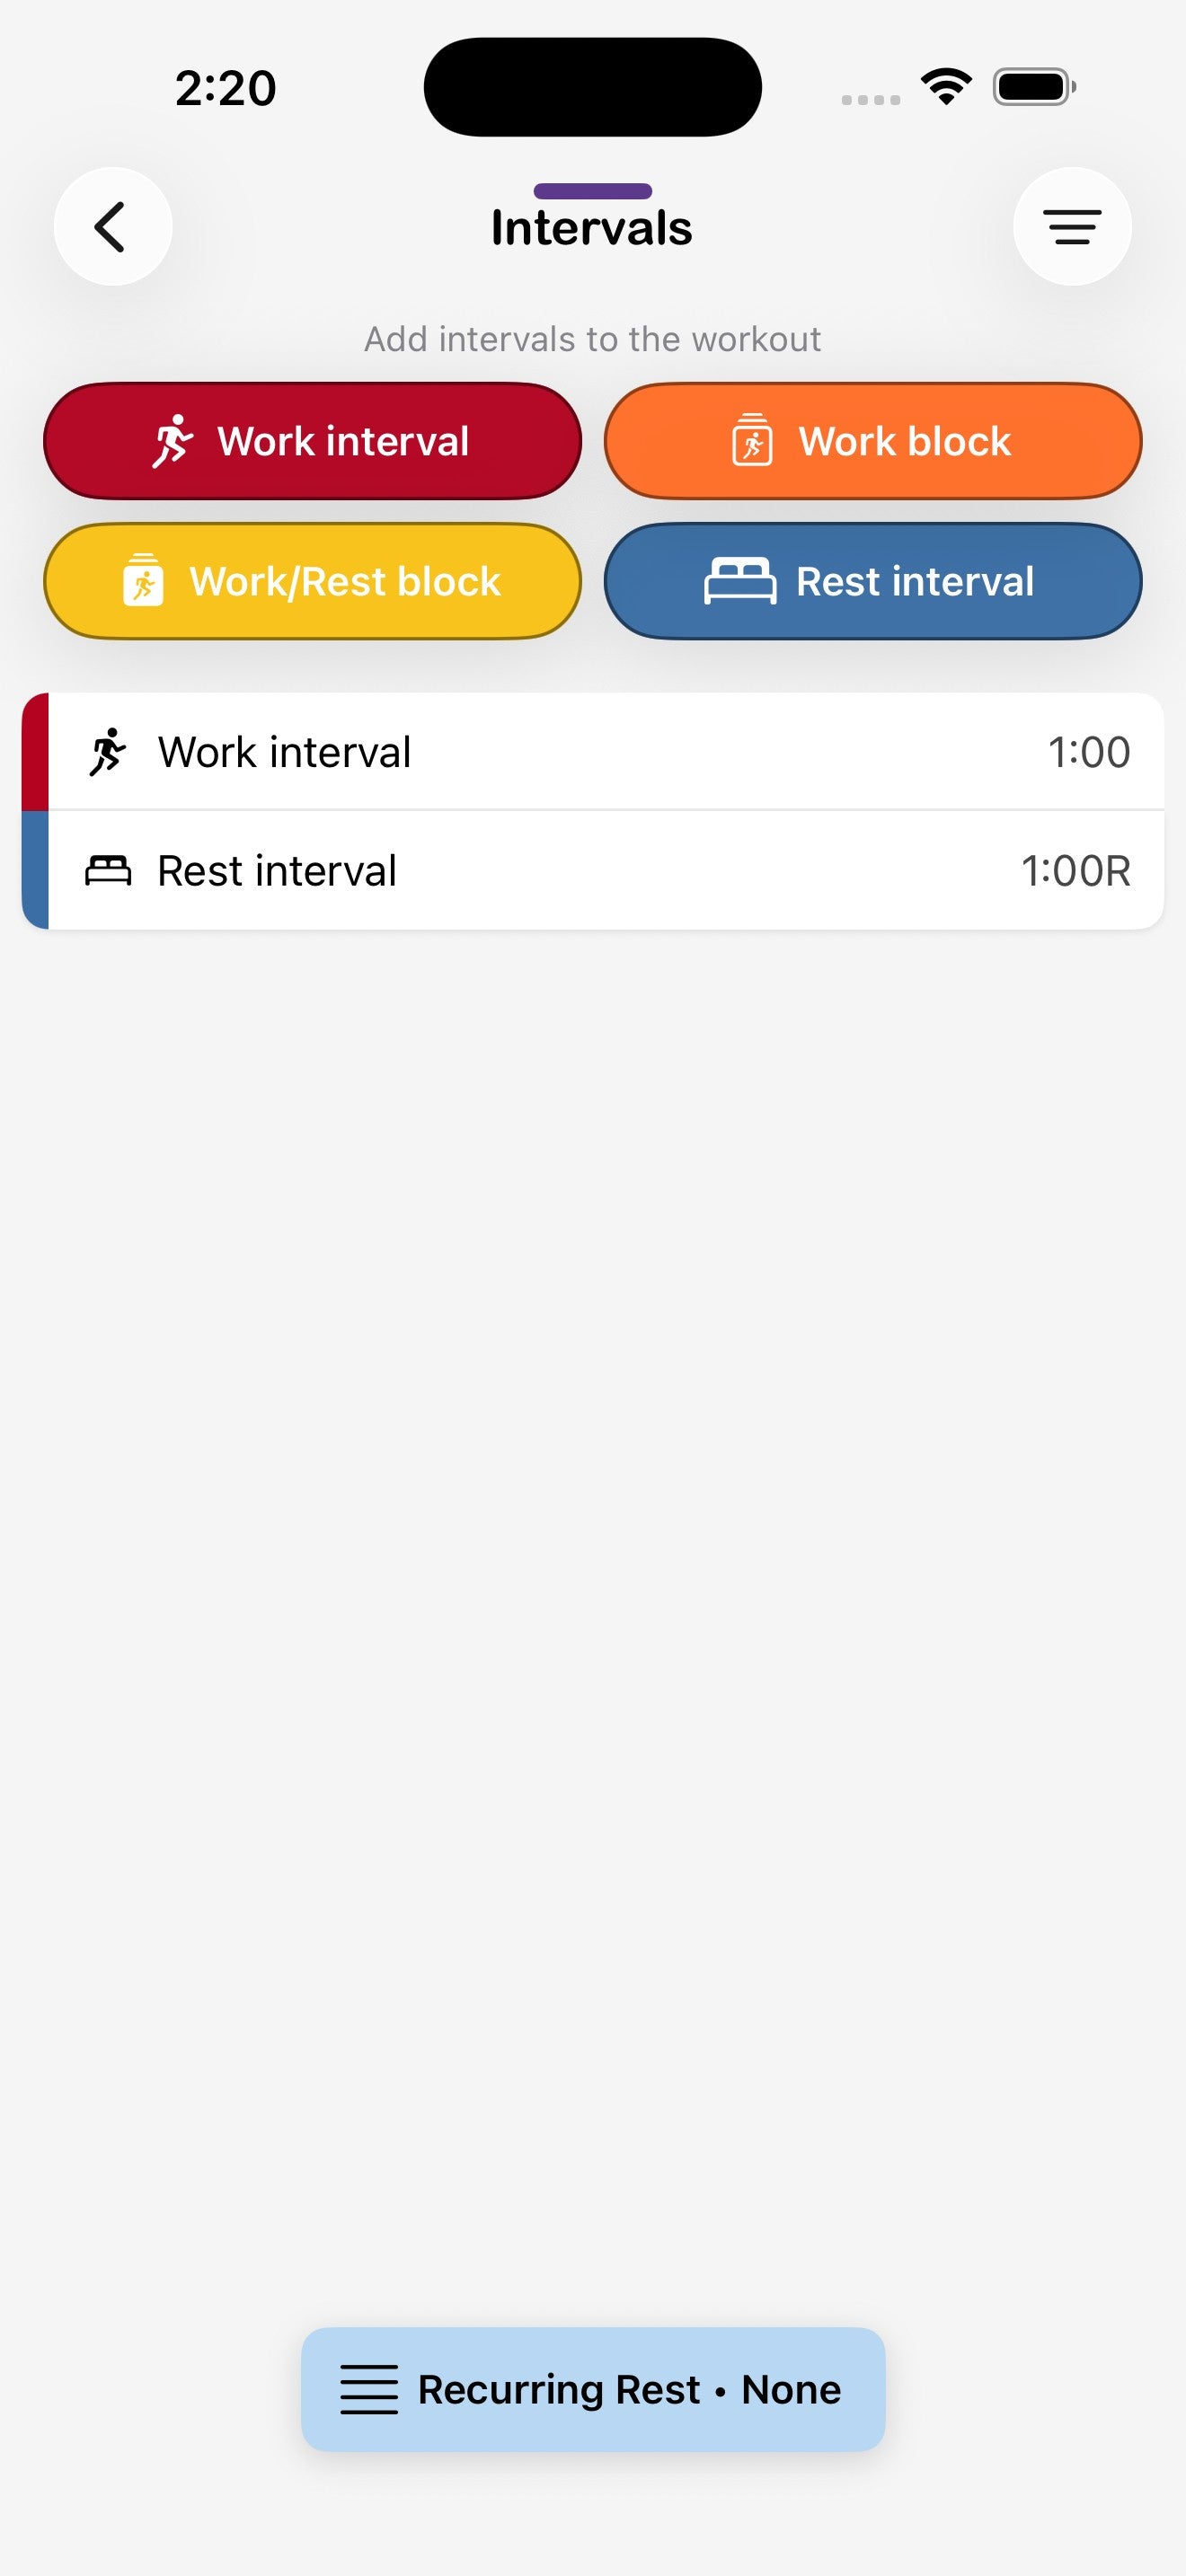
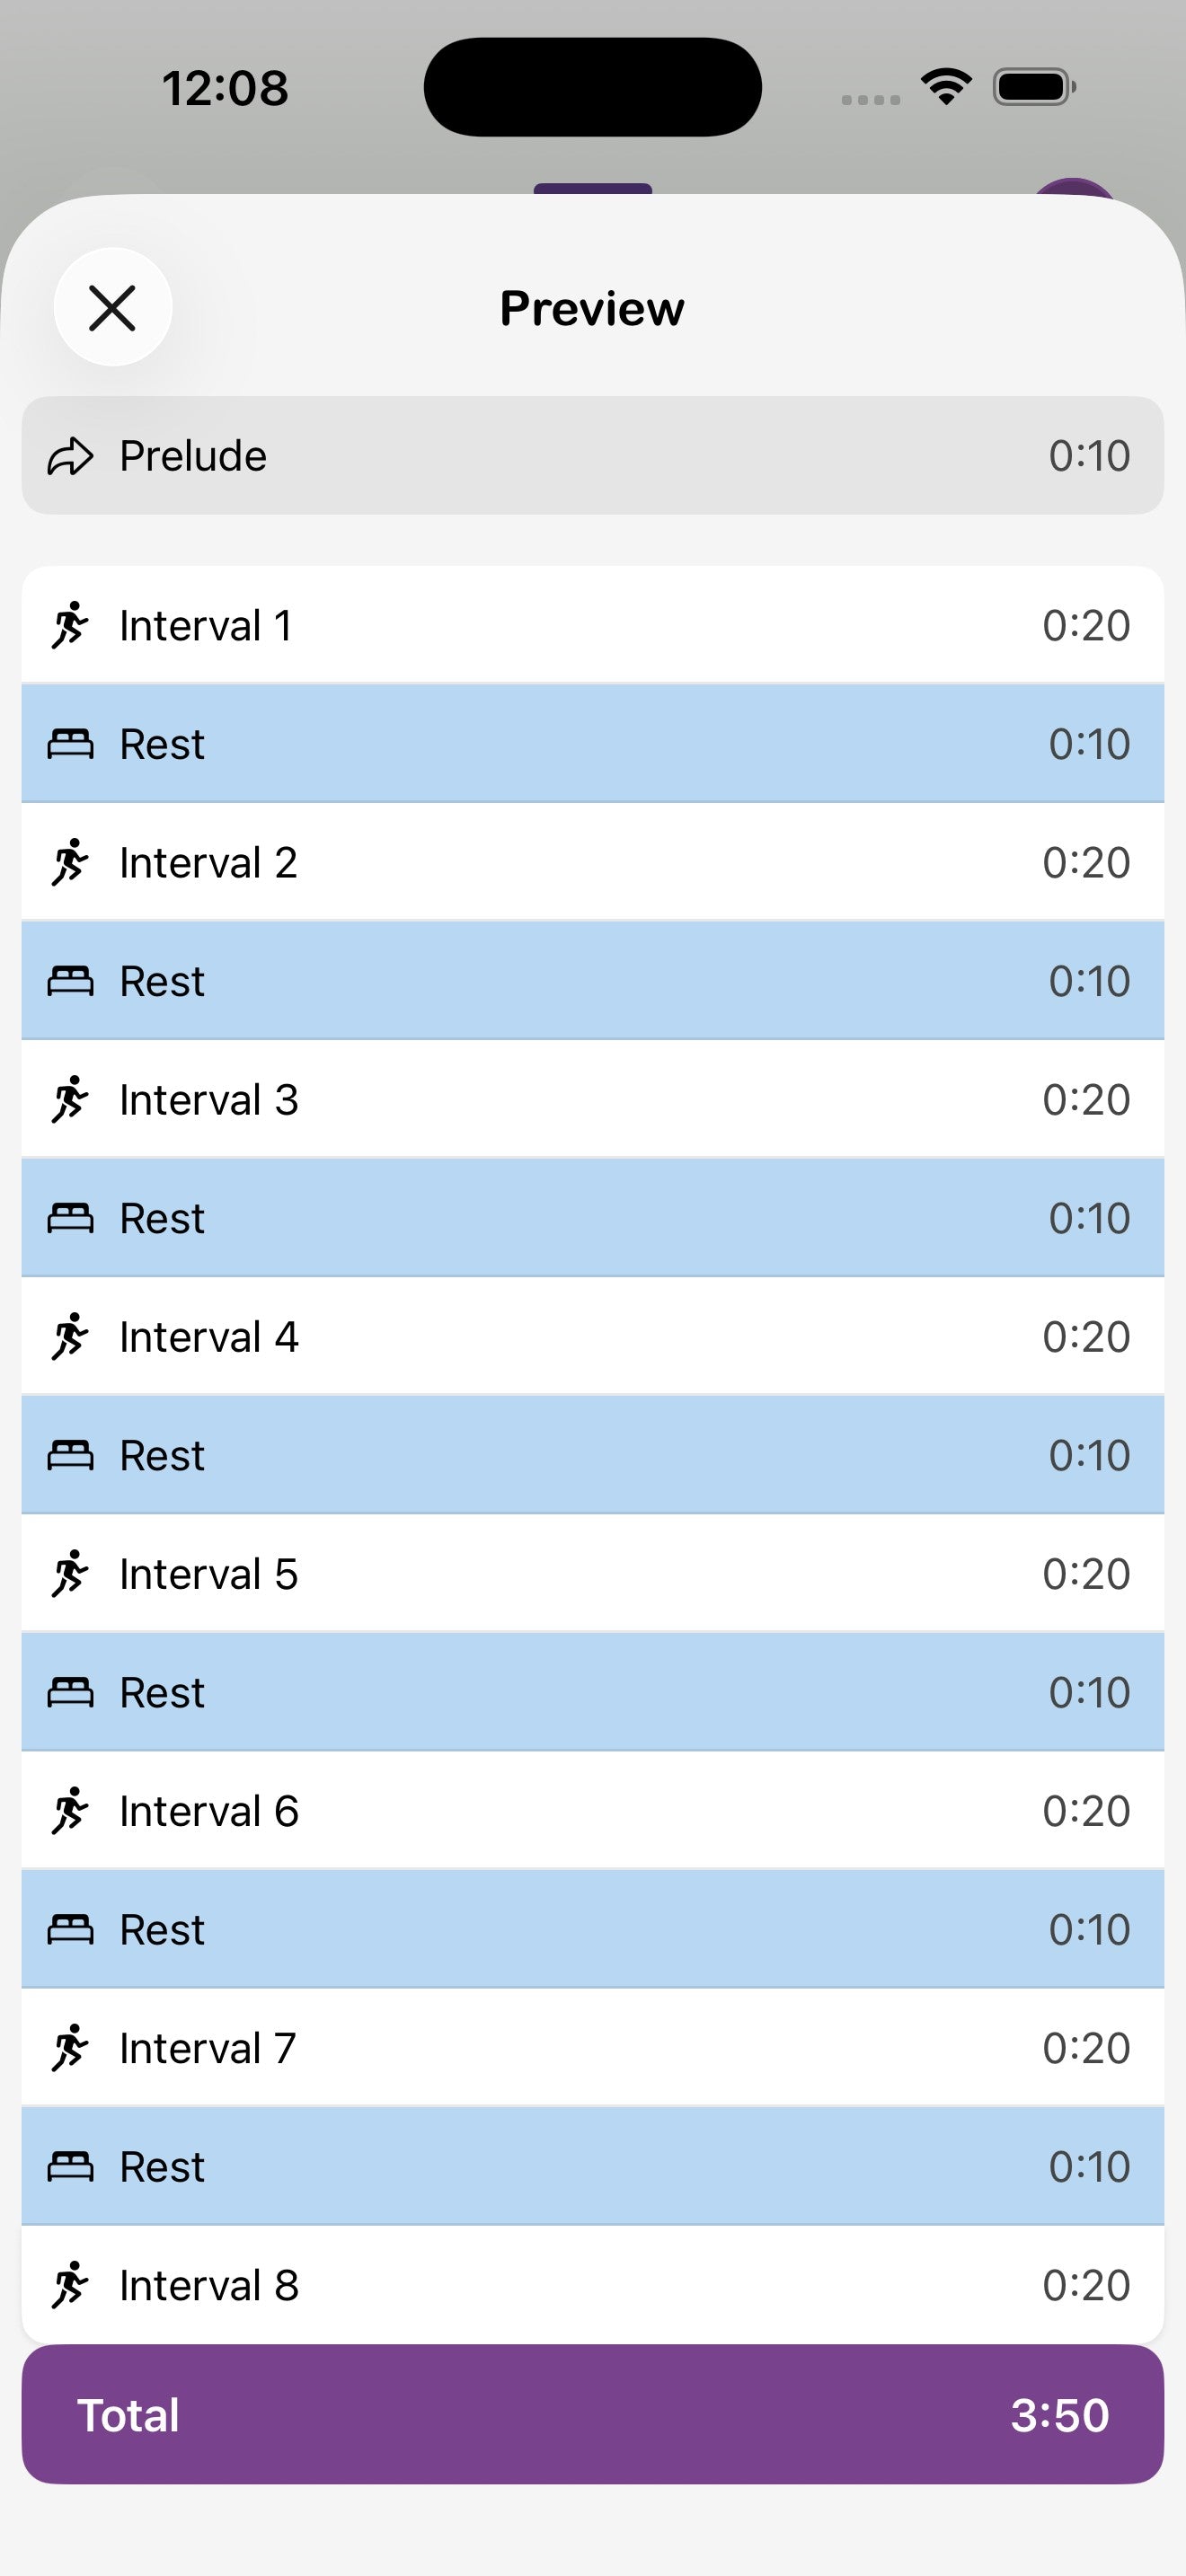
Mixed Intervals
Mixed Intervals has two configuration screens. The main config screen sets the prelude, repetitions, and direction. From there, tap Tap To Setup next to Intervals to open the intervals editor and add Work, Rest, Work Block, or Work/Rest Block items. Stack them in any order and add a recurring rest block if you want one inserted automatically.
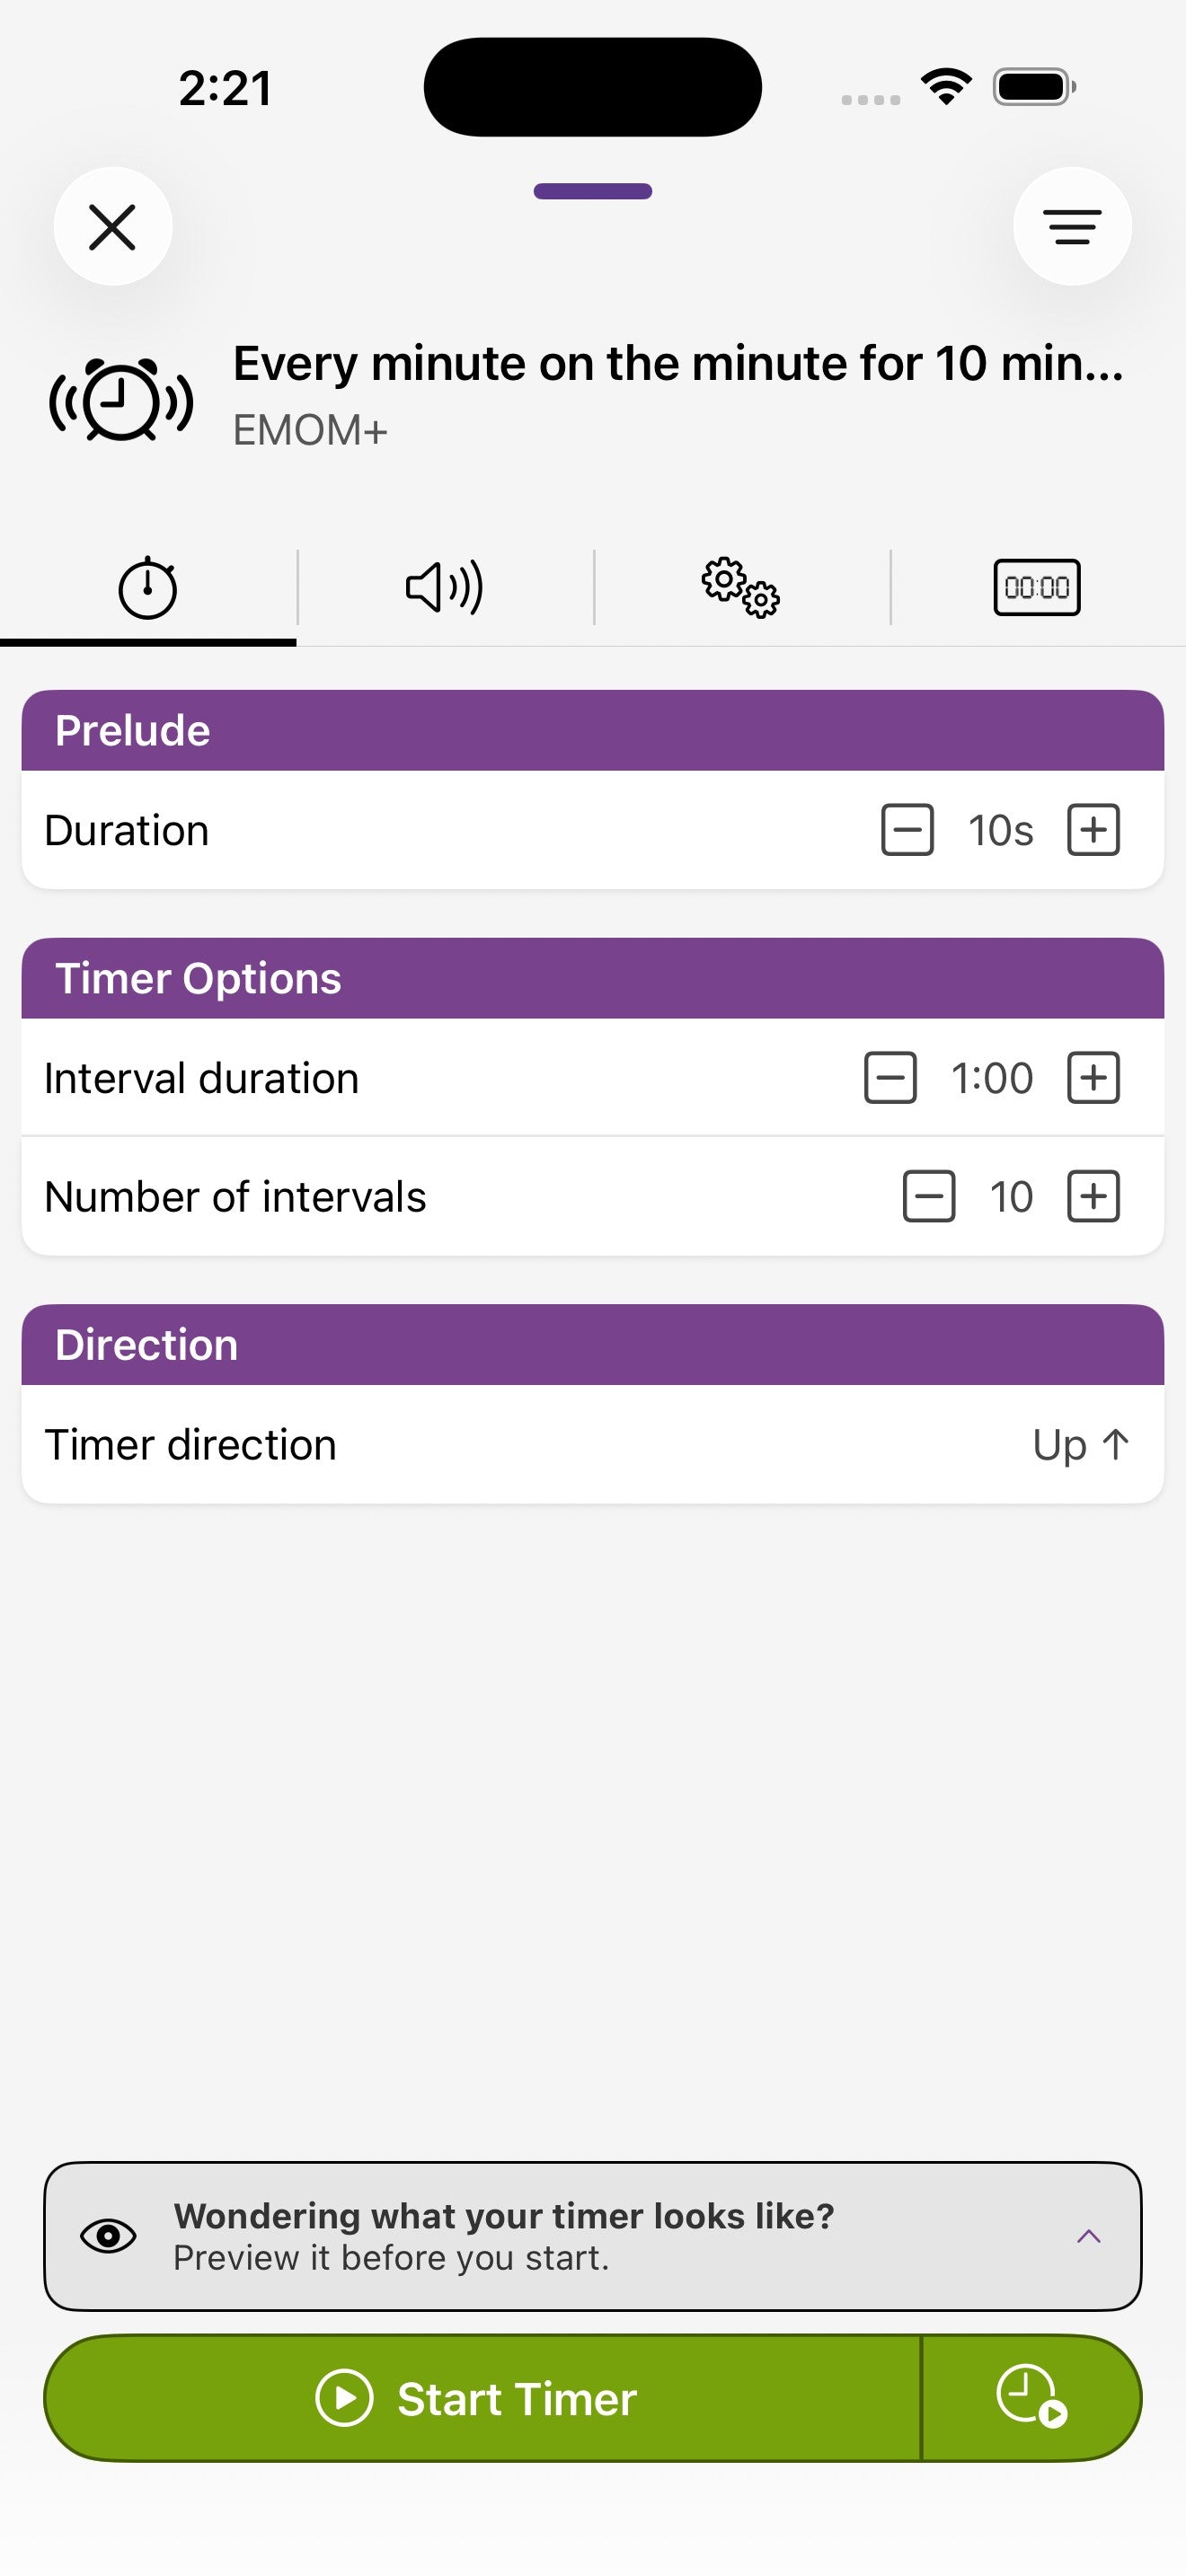
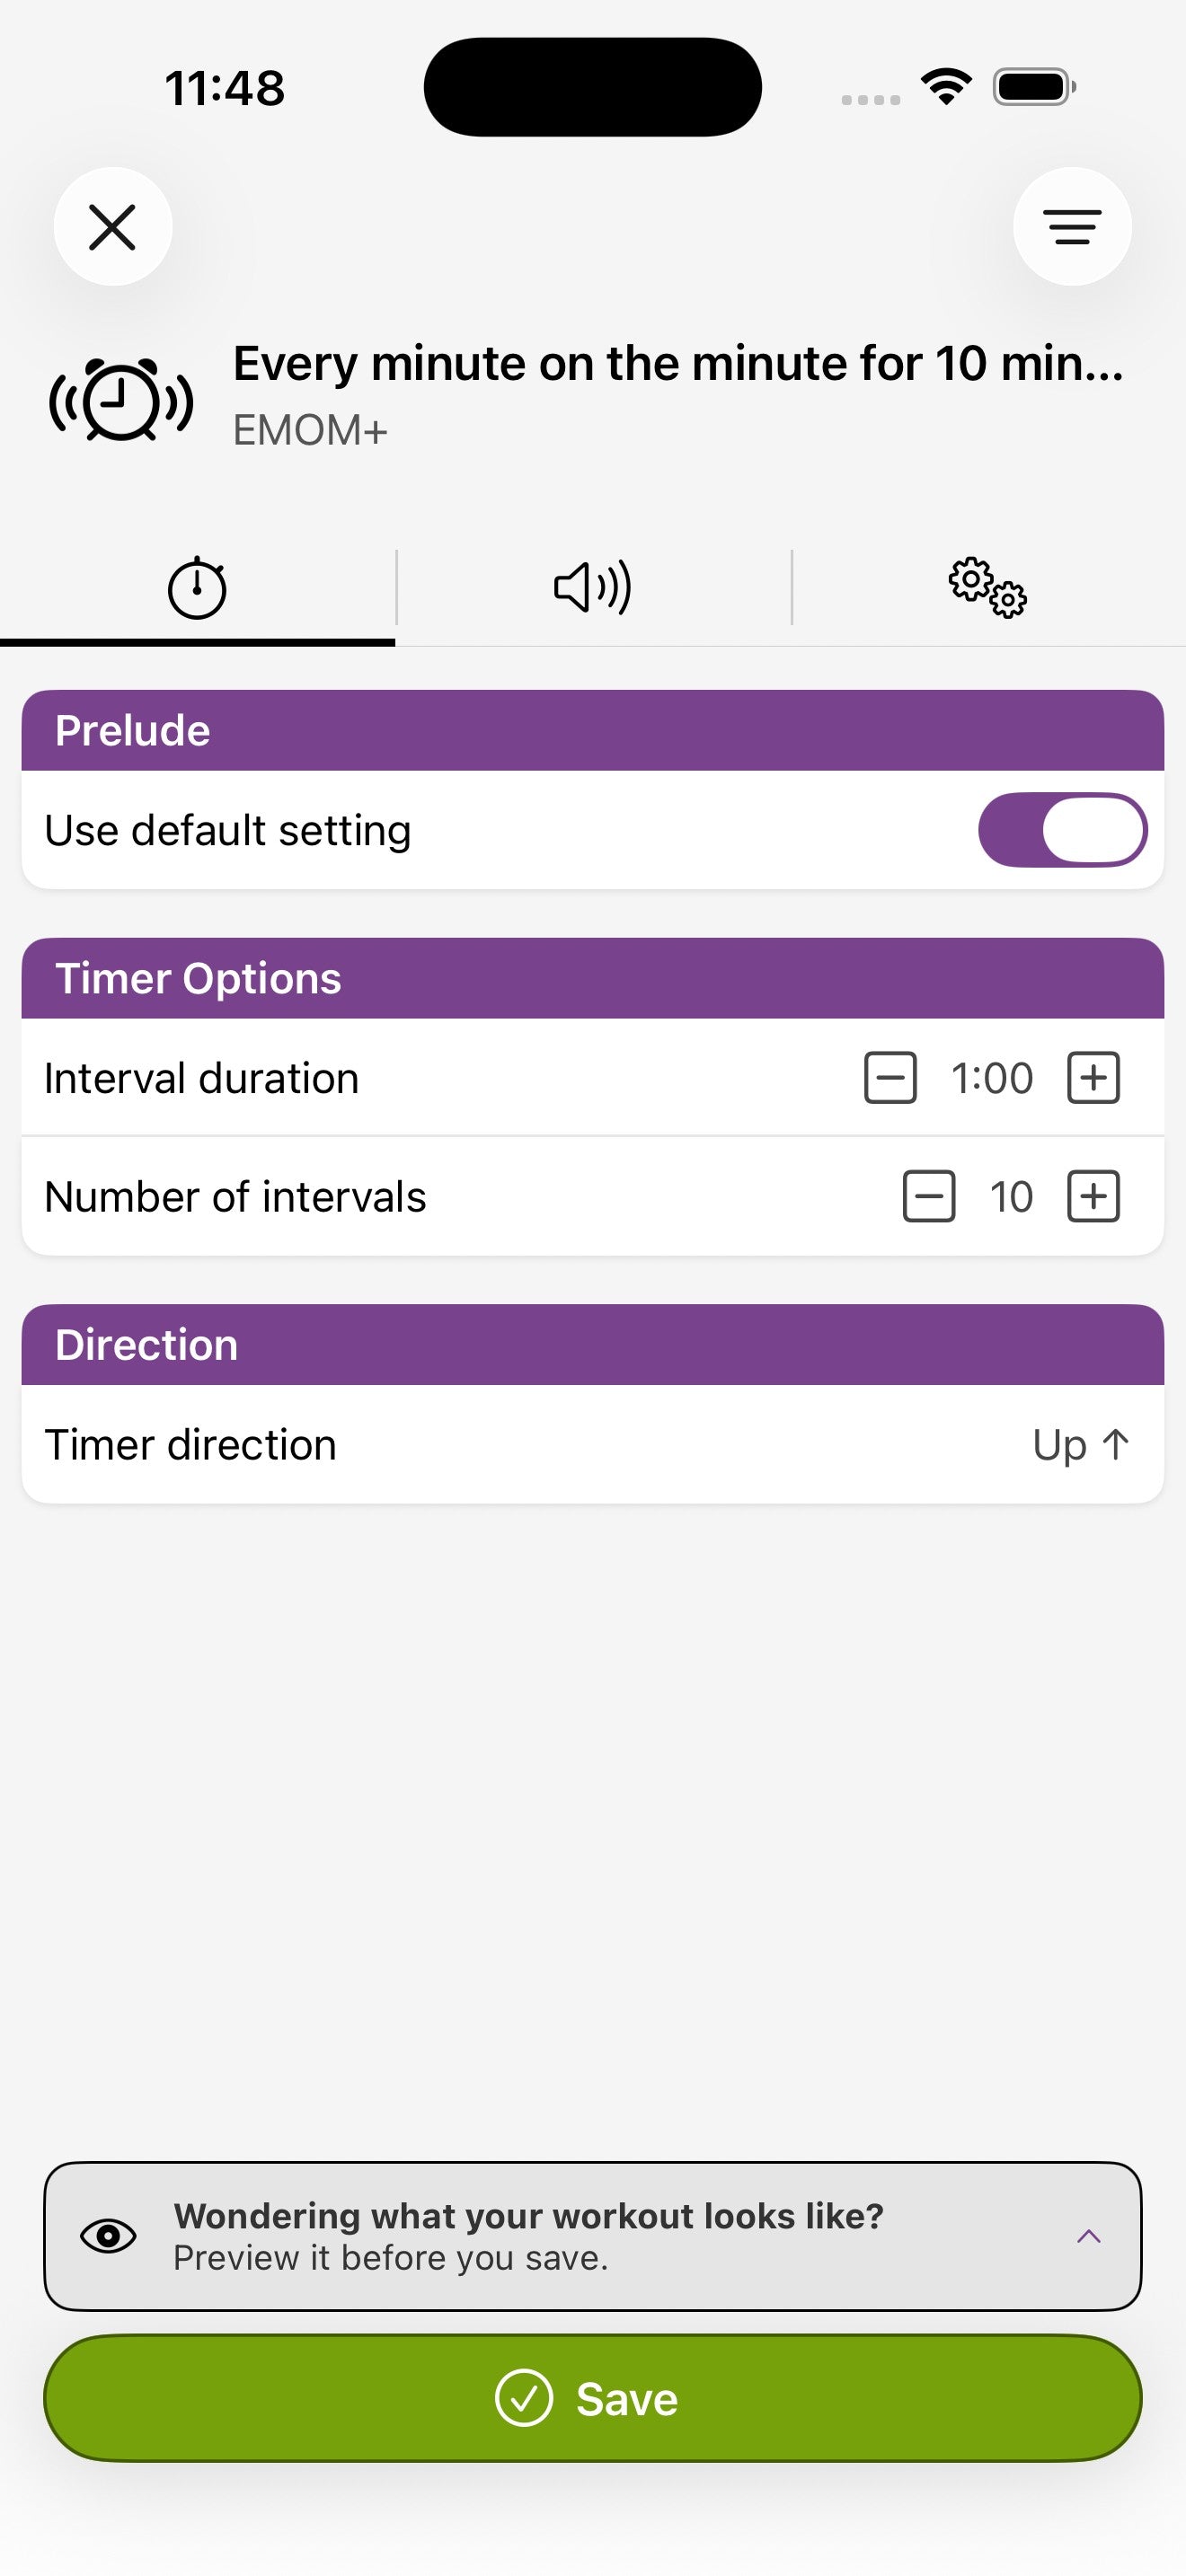
EMOM+
Set how often a new interval should kick off (every minute, 90 seconds, or anything you choose) and how many intervals to run. The Flex Timer status display can show the round number, time, or stay blank.
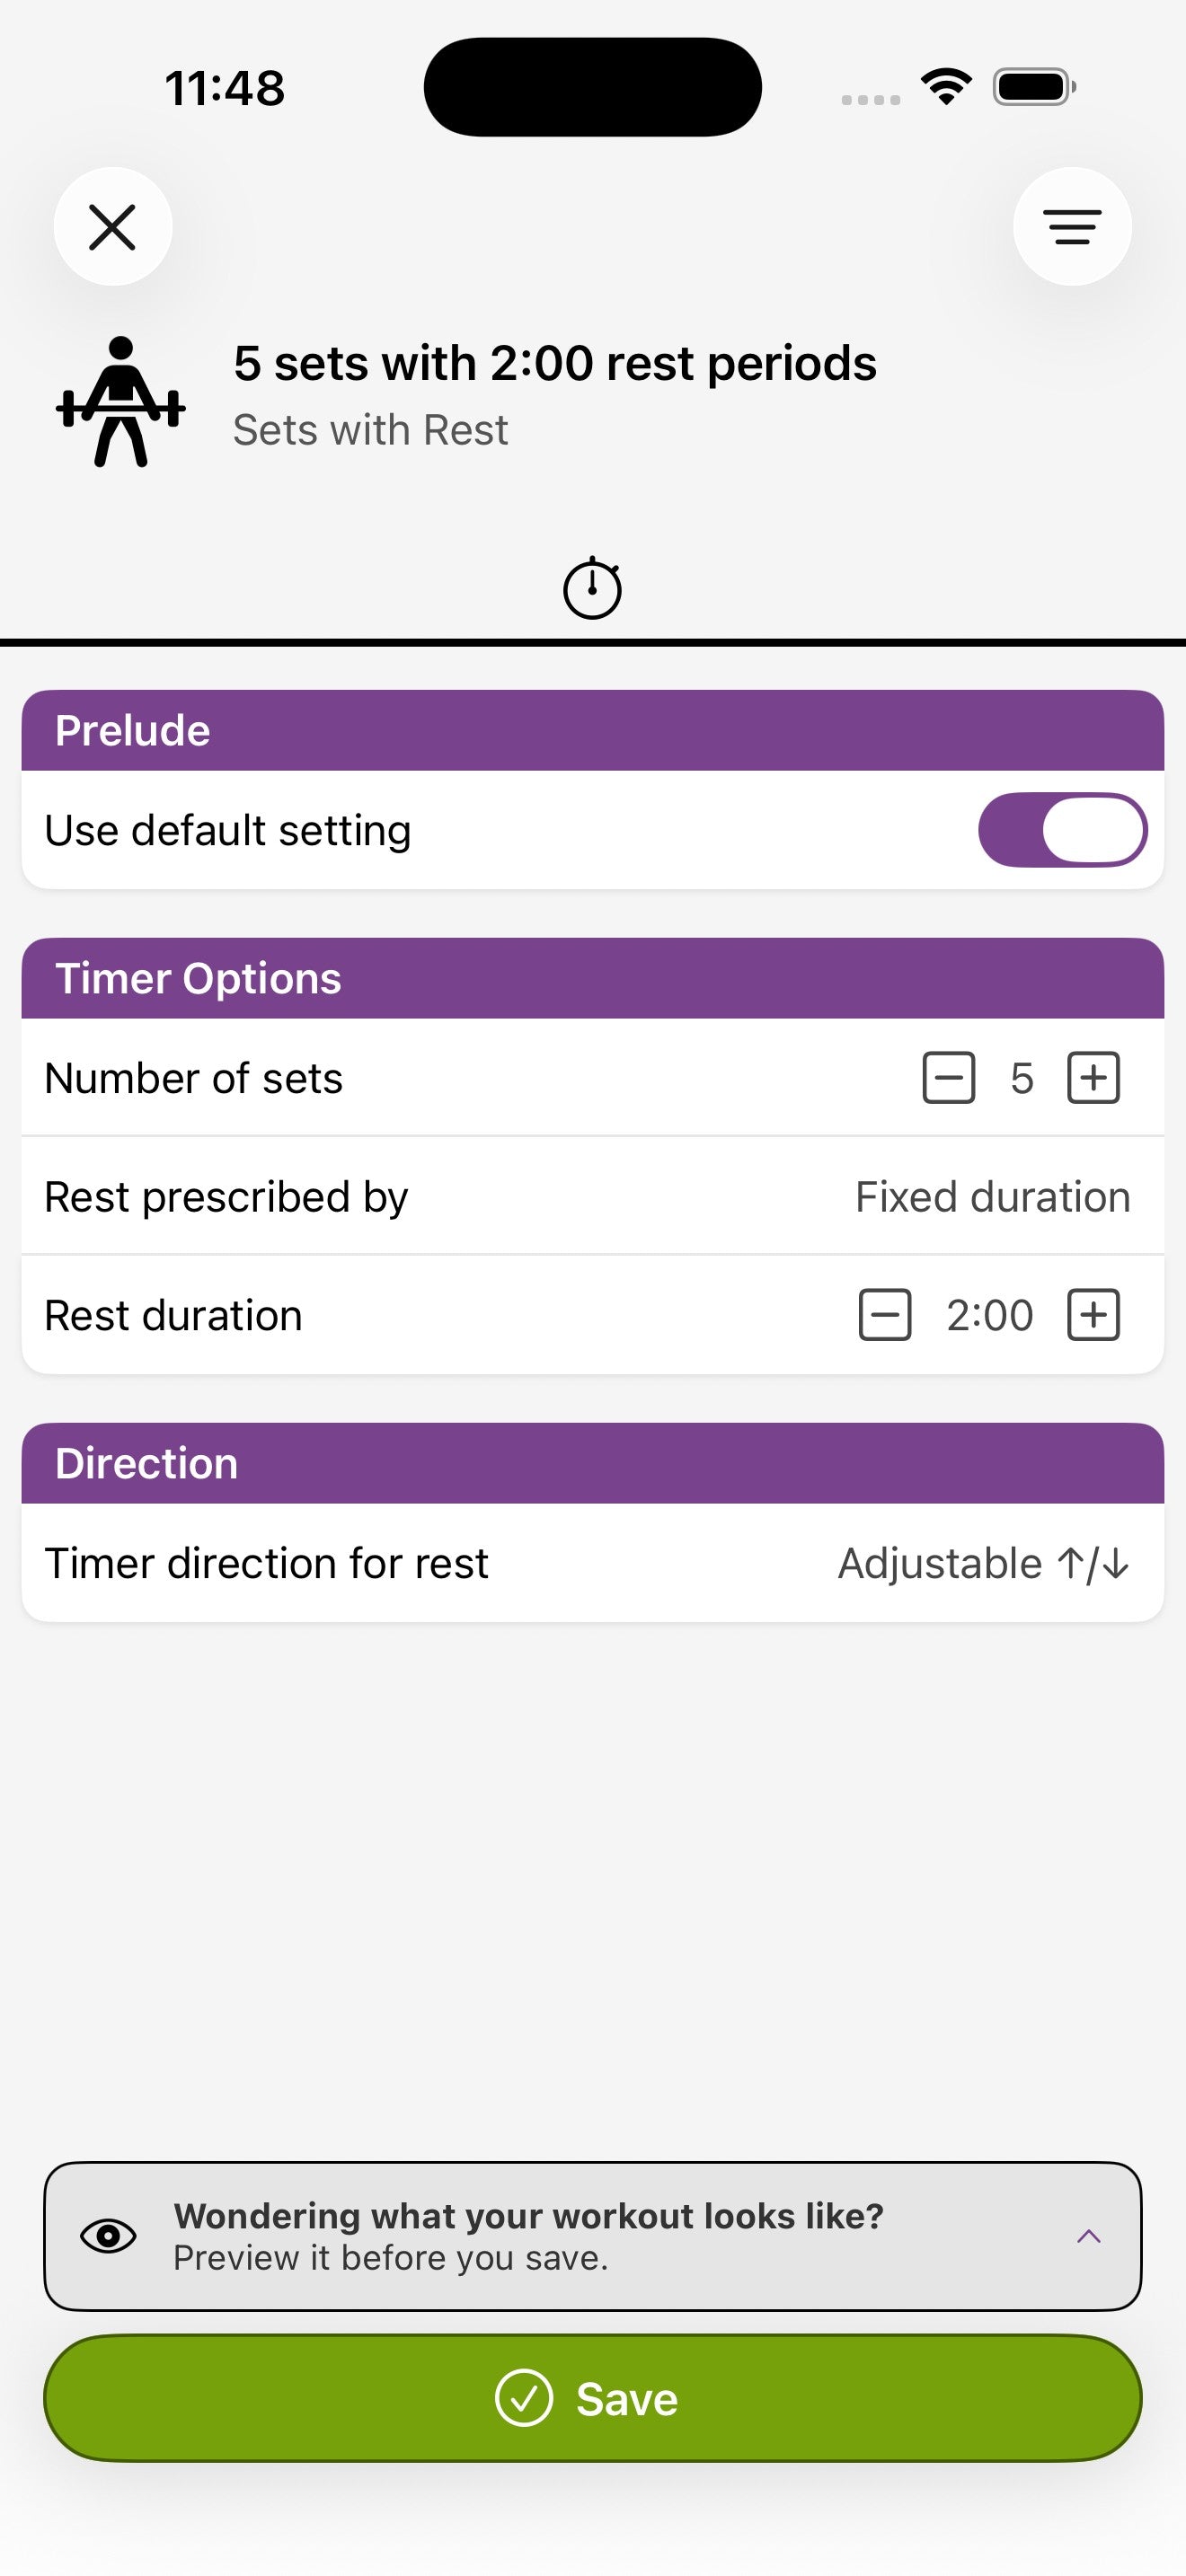
Sets with Rest
Choose the number of sets and how rest is prescribed. Sets with Rest has two flavors of rest, controlled by the Rest prescribed by option:
- Fixed duration — every rest is the same length (e.g. 2:00).
- Work to rest ratio — the rest scales to how long you actually took on the set (e.g. a 1:1 ratio rests for the same duration as the set you just finished).

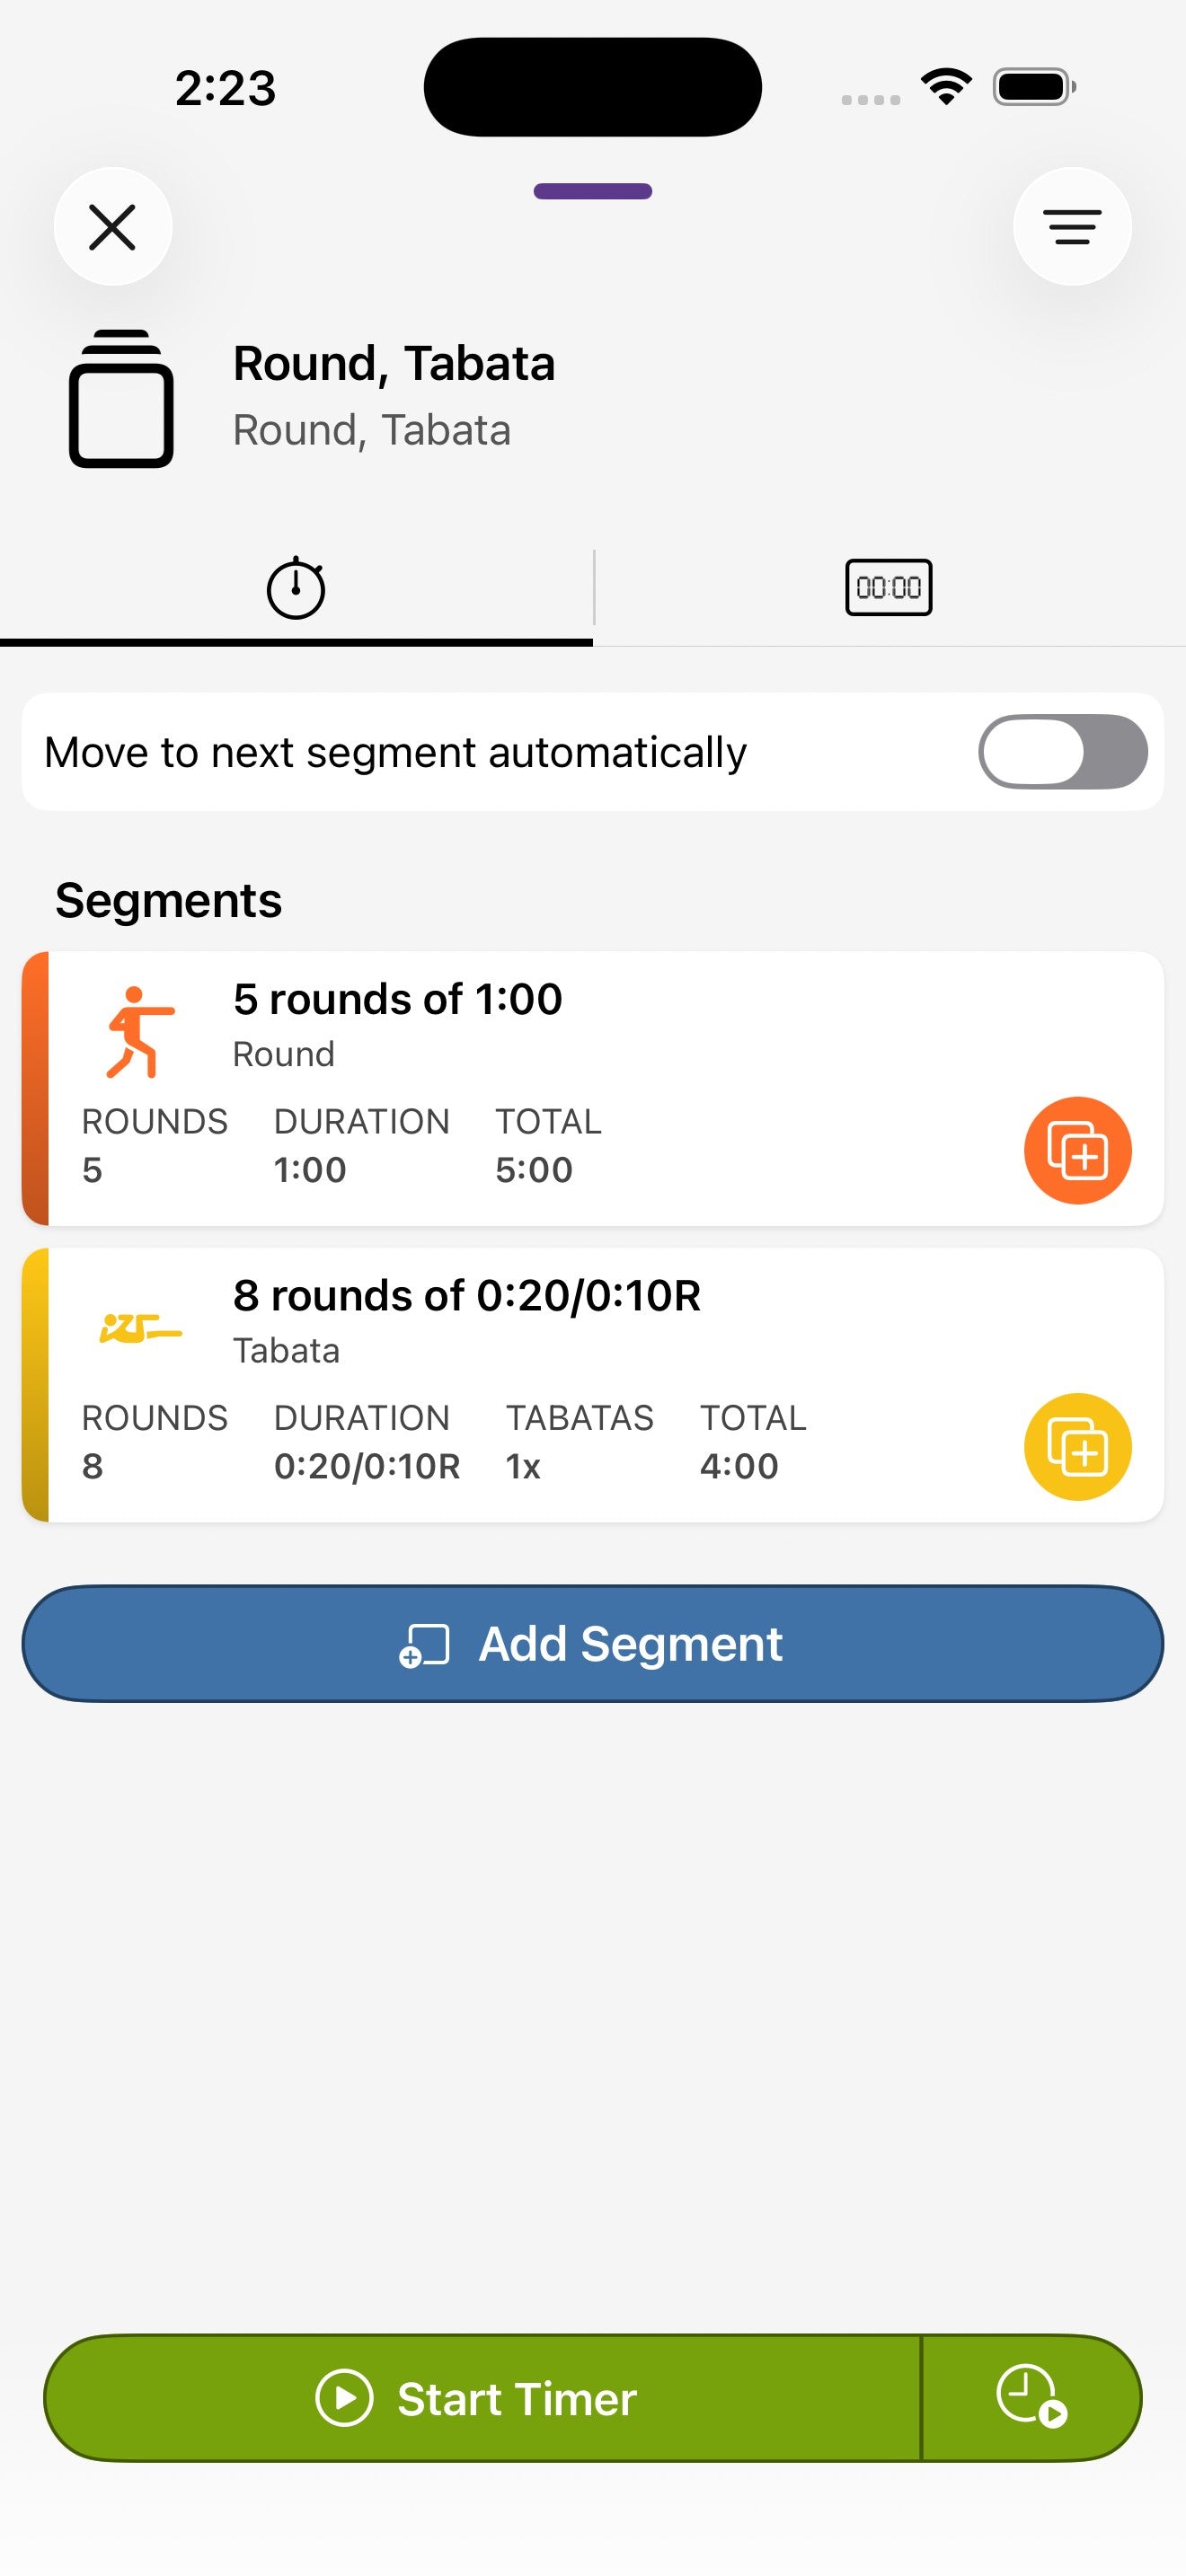
Multi Segment
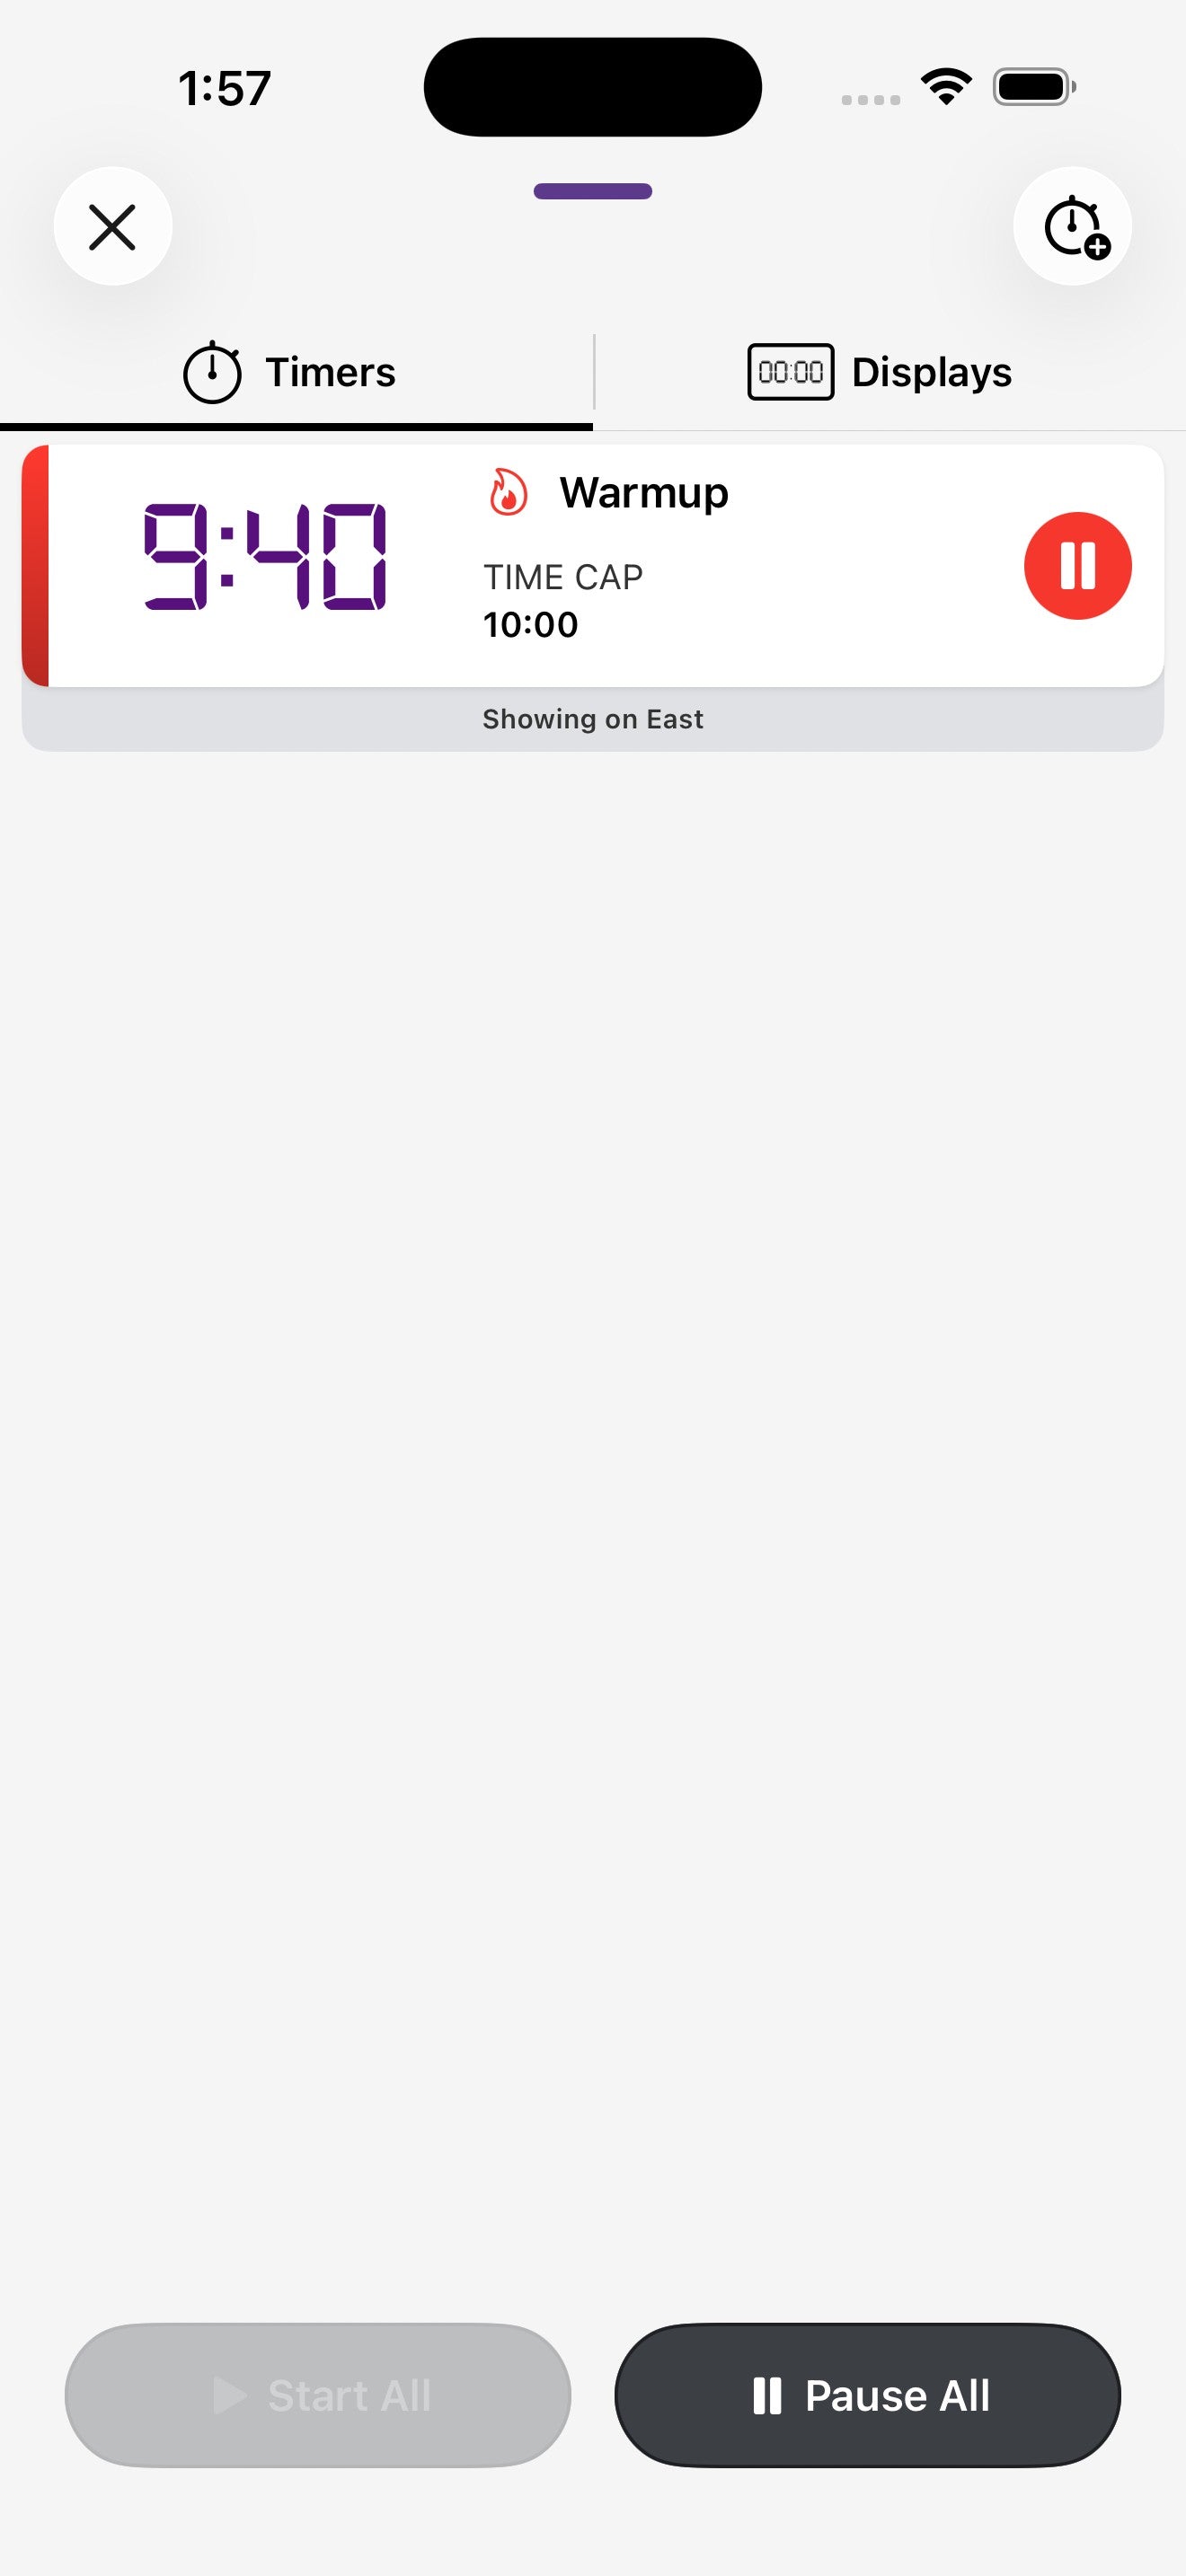
Build a full training session by adding segments — a Warmup, a Standard piece, some Rounds, then a Cooldown, for example. Each segment keeps its own settings, and you can choose to advance automatically or manually between them.
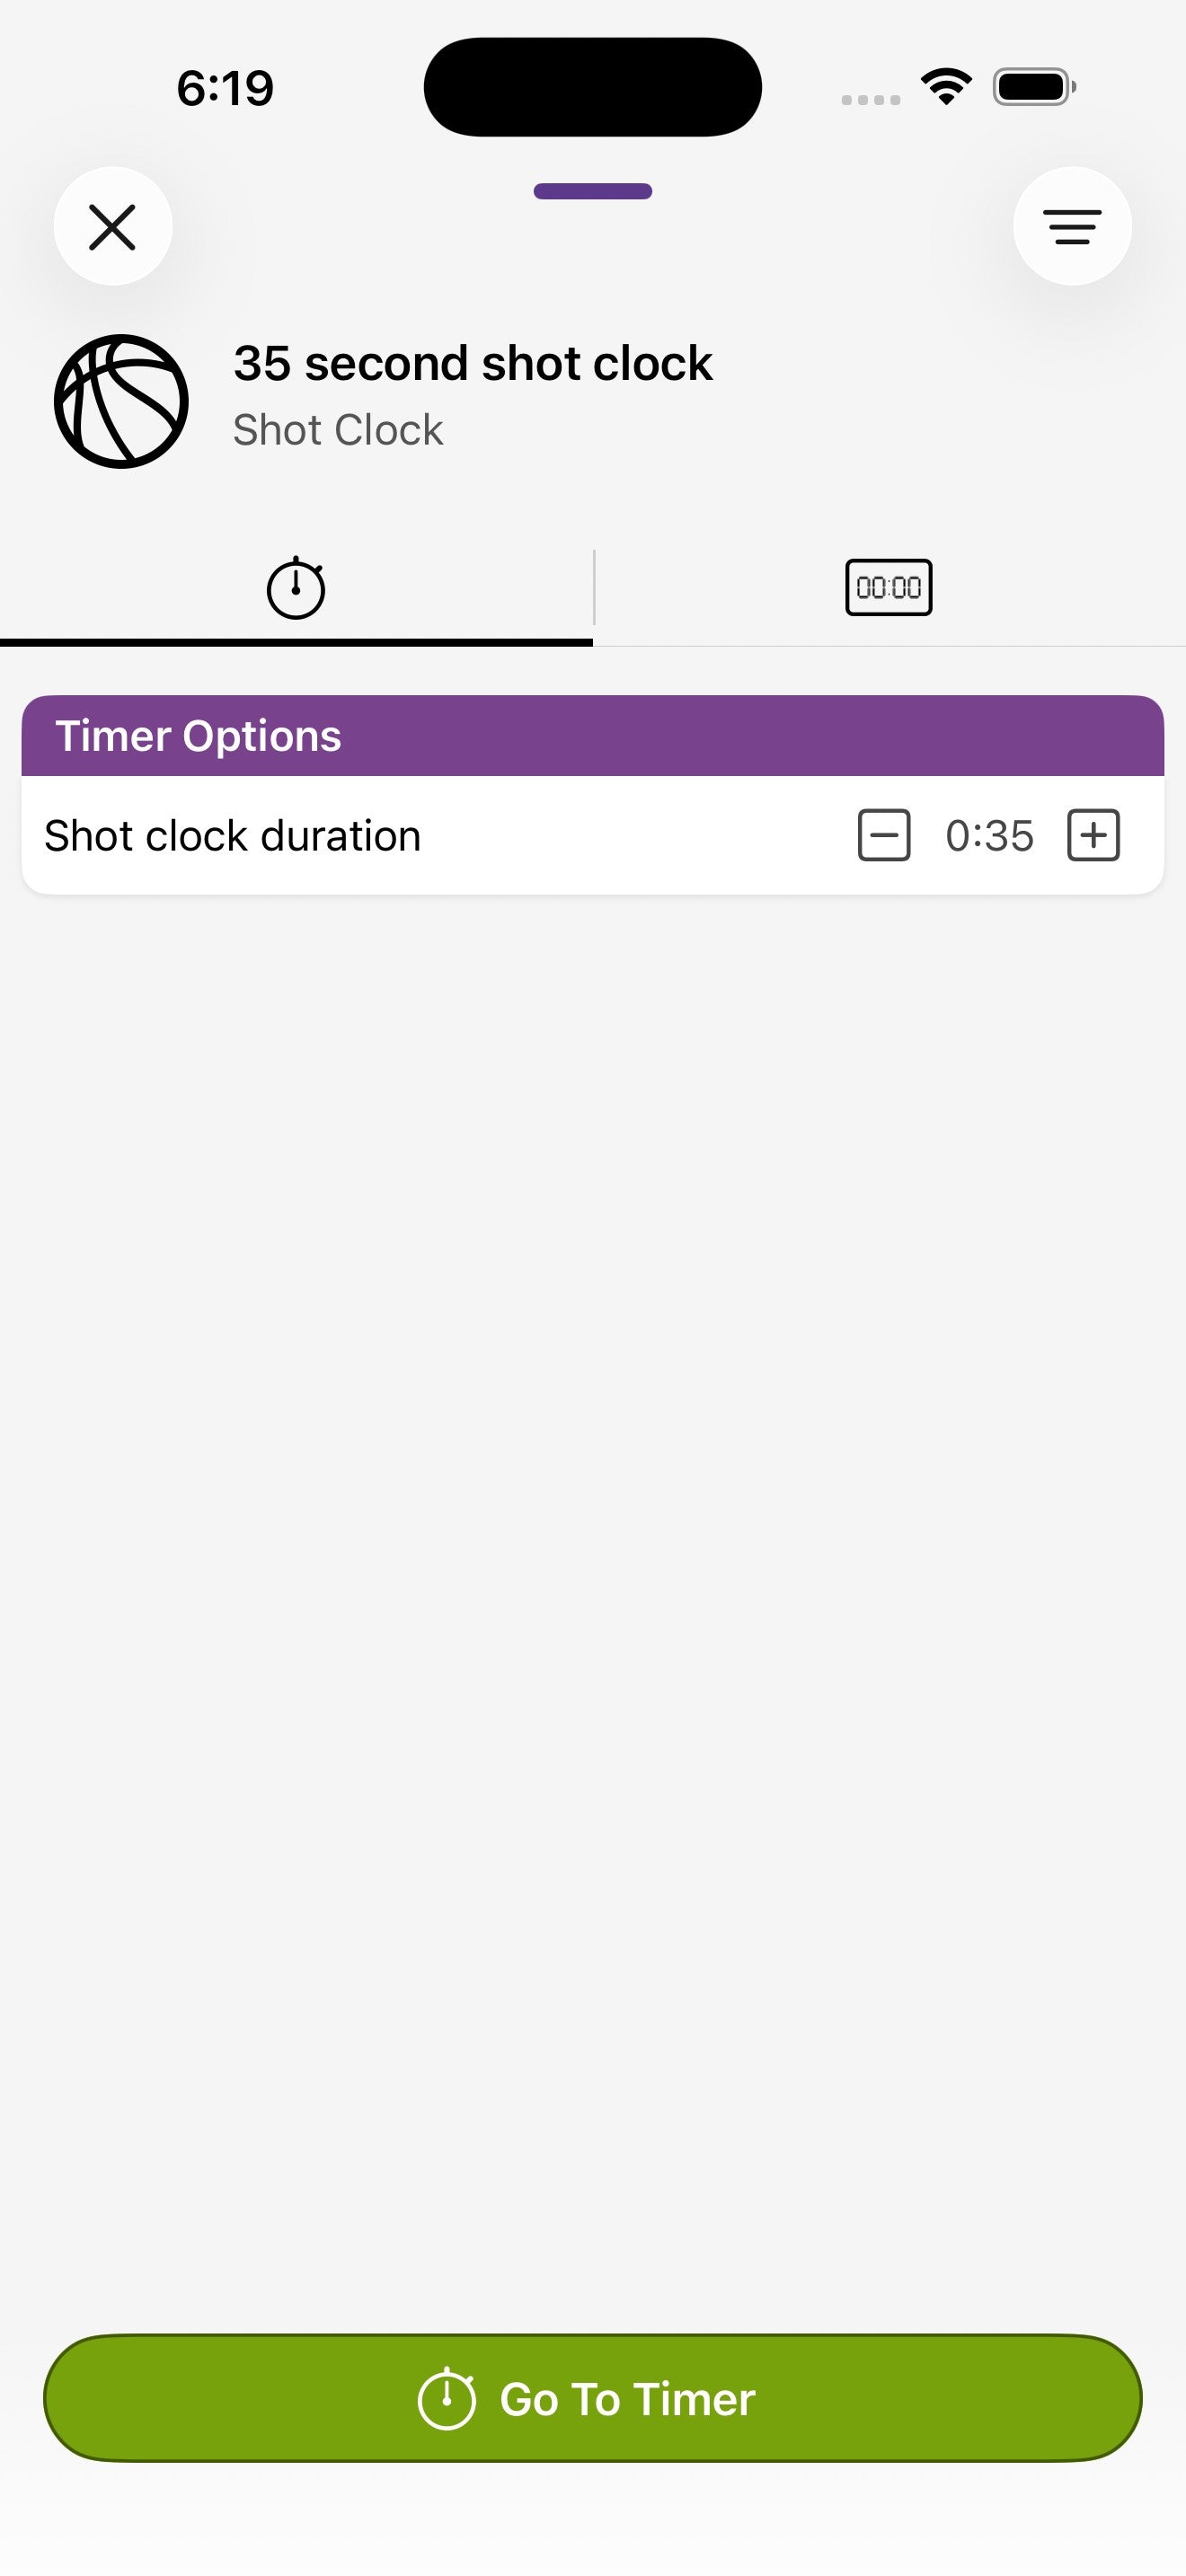
Sport modes
Preview, edit details, save to library
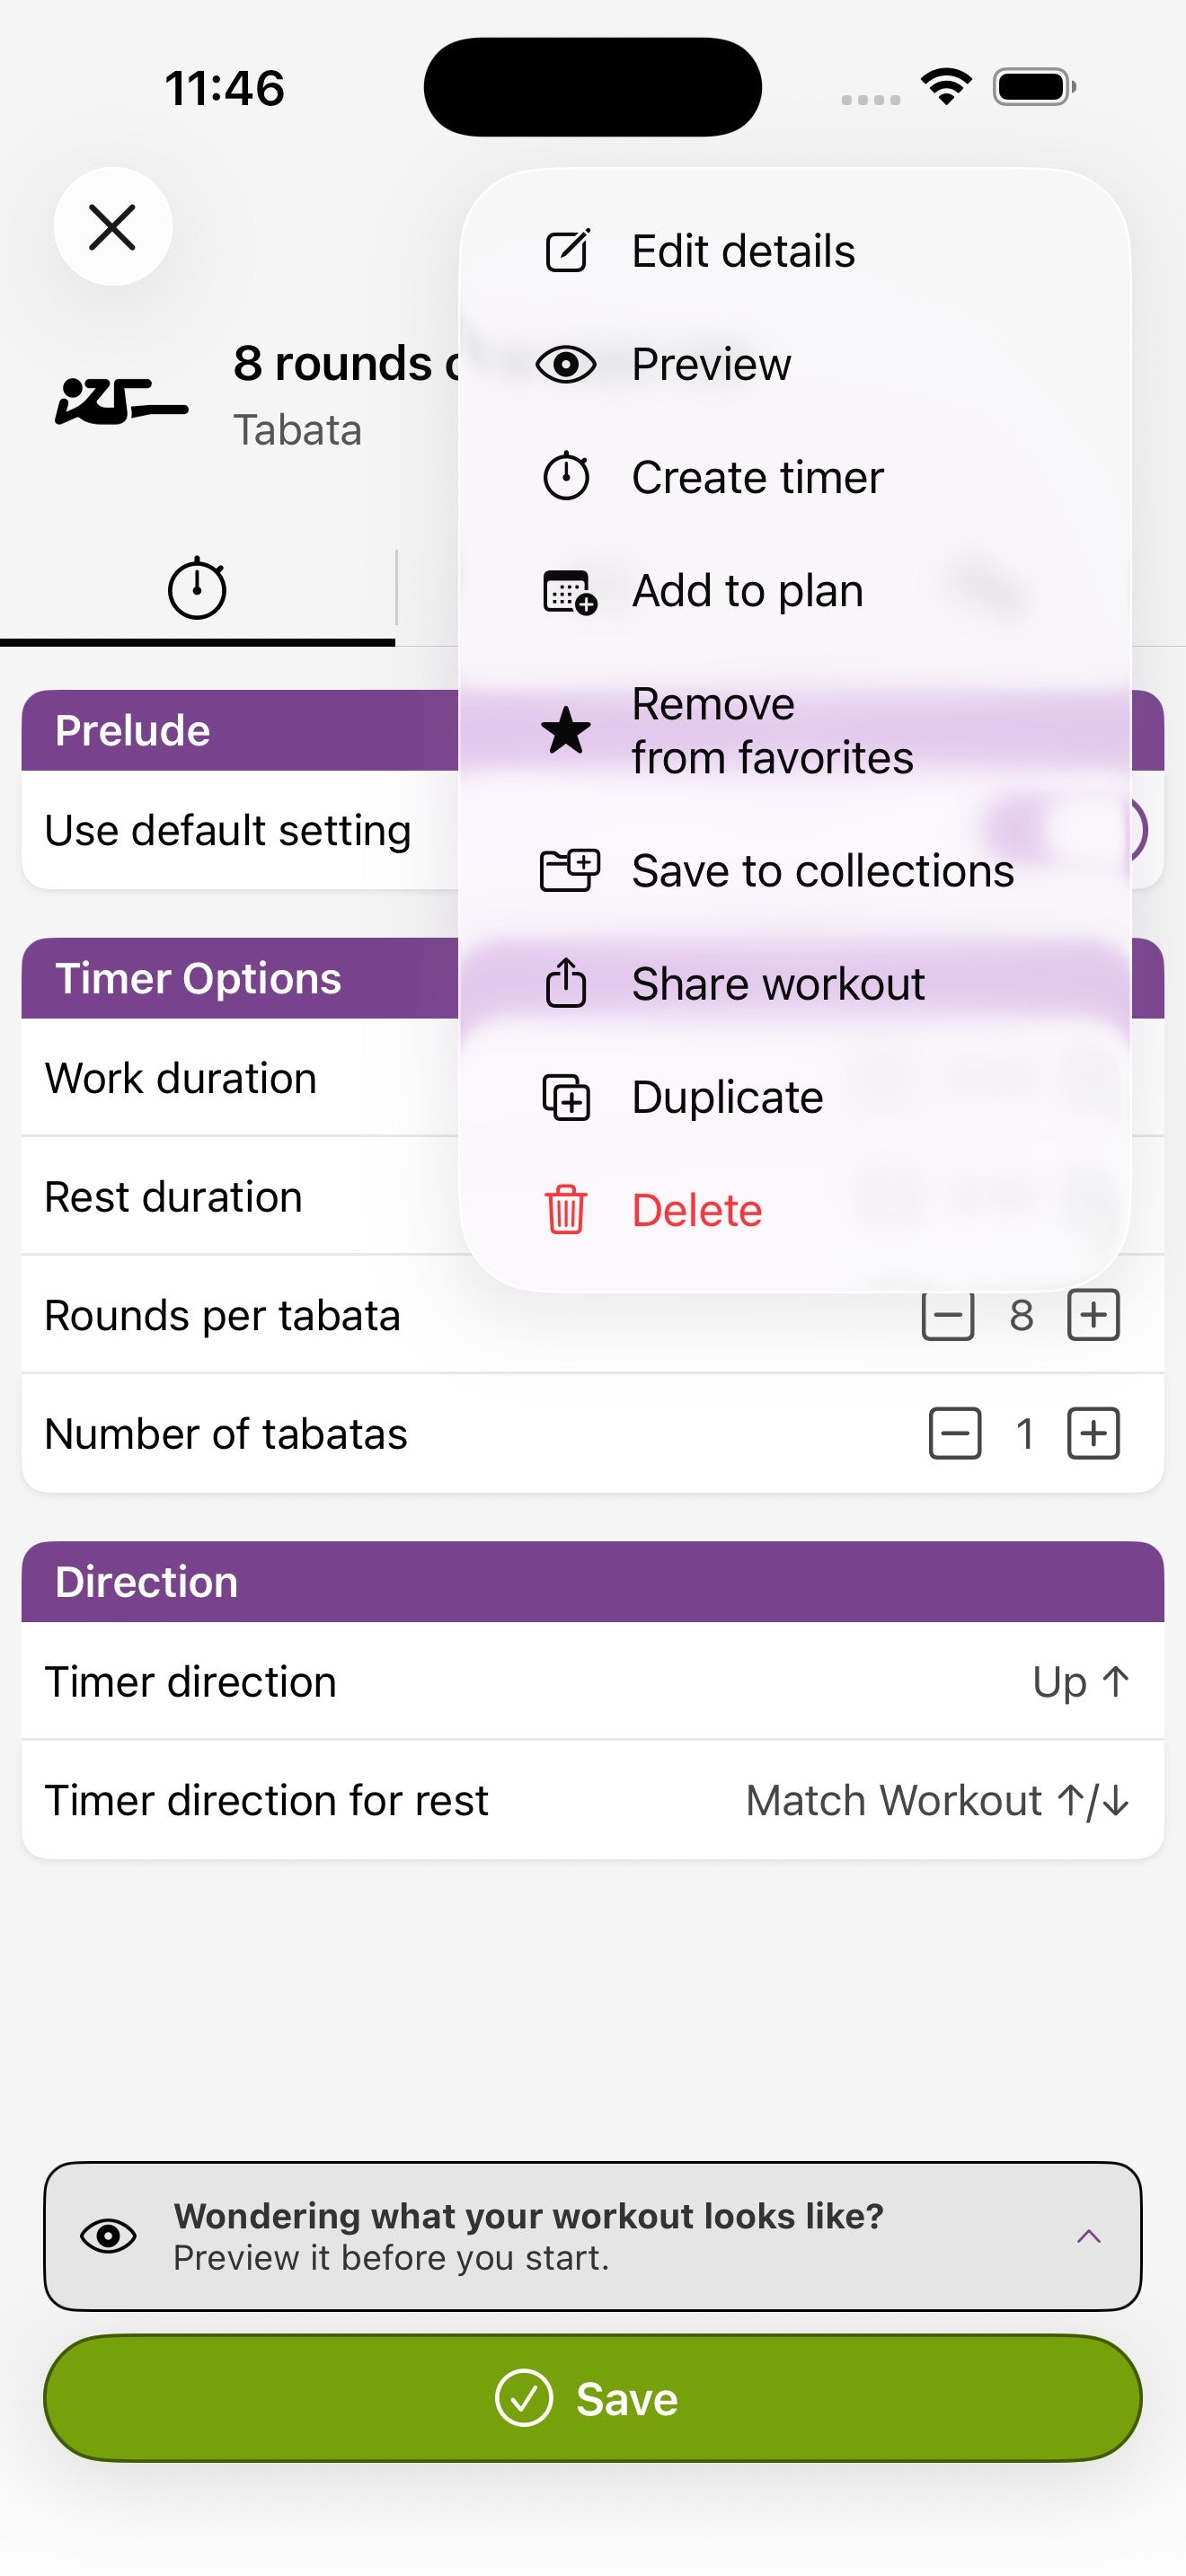
Tap the menu icon (≡) in the top-right of any configuration screen to access:
- Edit details — give the workout a name and description.
- Preview — review the full breakdown (prelude, intervals, total time) before committing.
- Create timer — start a fresh timer based on the current config.
- Add to plan — schedule this workout on a day in the Planning tab.
- Save to collections — add this workout to a collection in your Library.
- Share workout — generate a share code others can import.
- Duplicate — copy as a starting point for a variation.
- Delete — remove from your library.
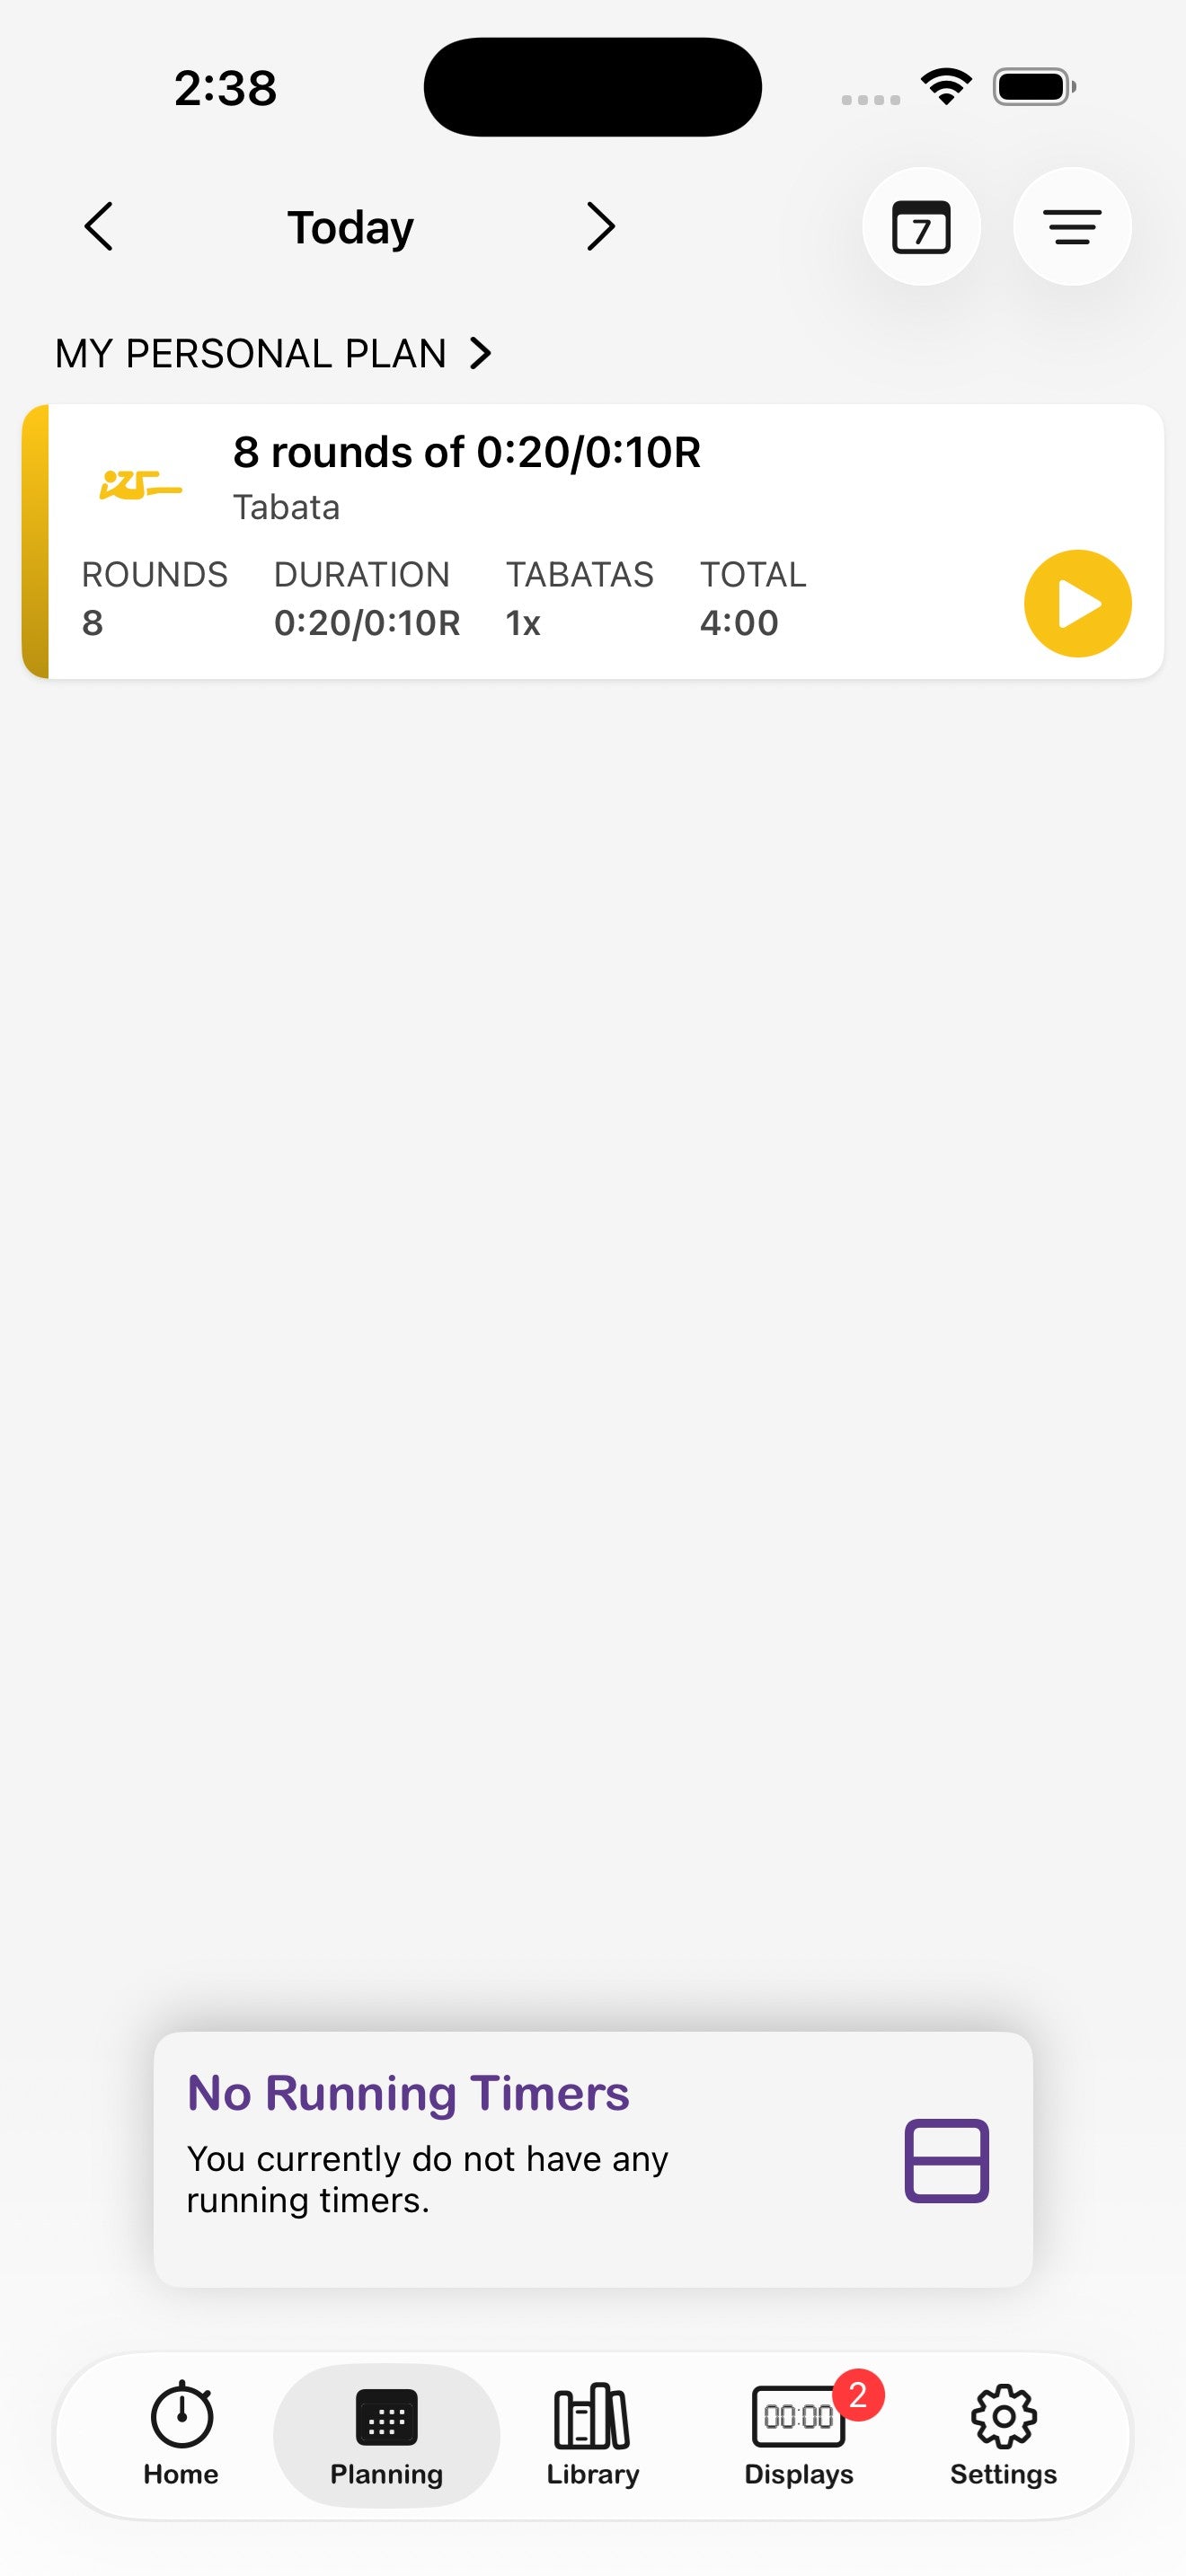
7. Running timers
Once you tap Start Timer, the app switches into the running view: a giant clock face, large round/interval indicators, transport controls, and a progress bar.
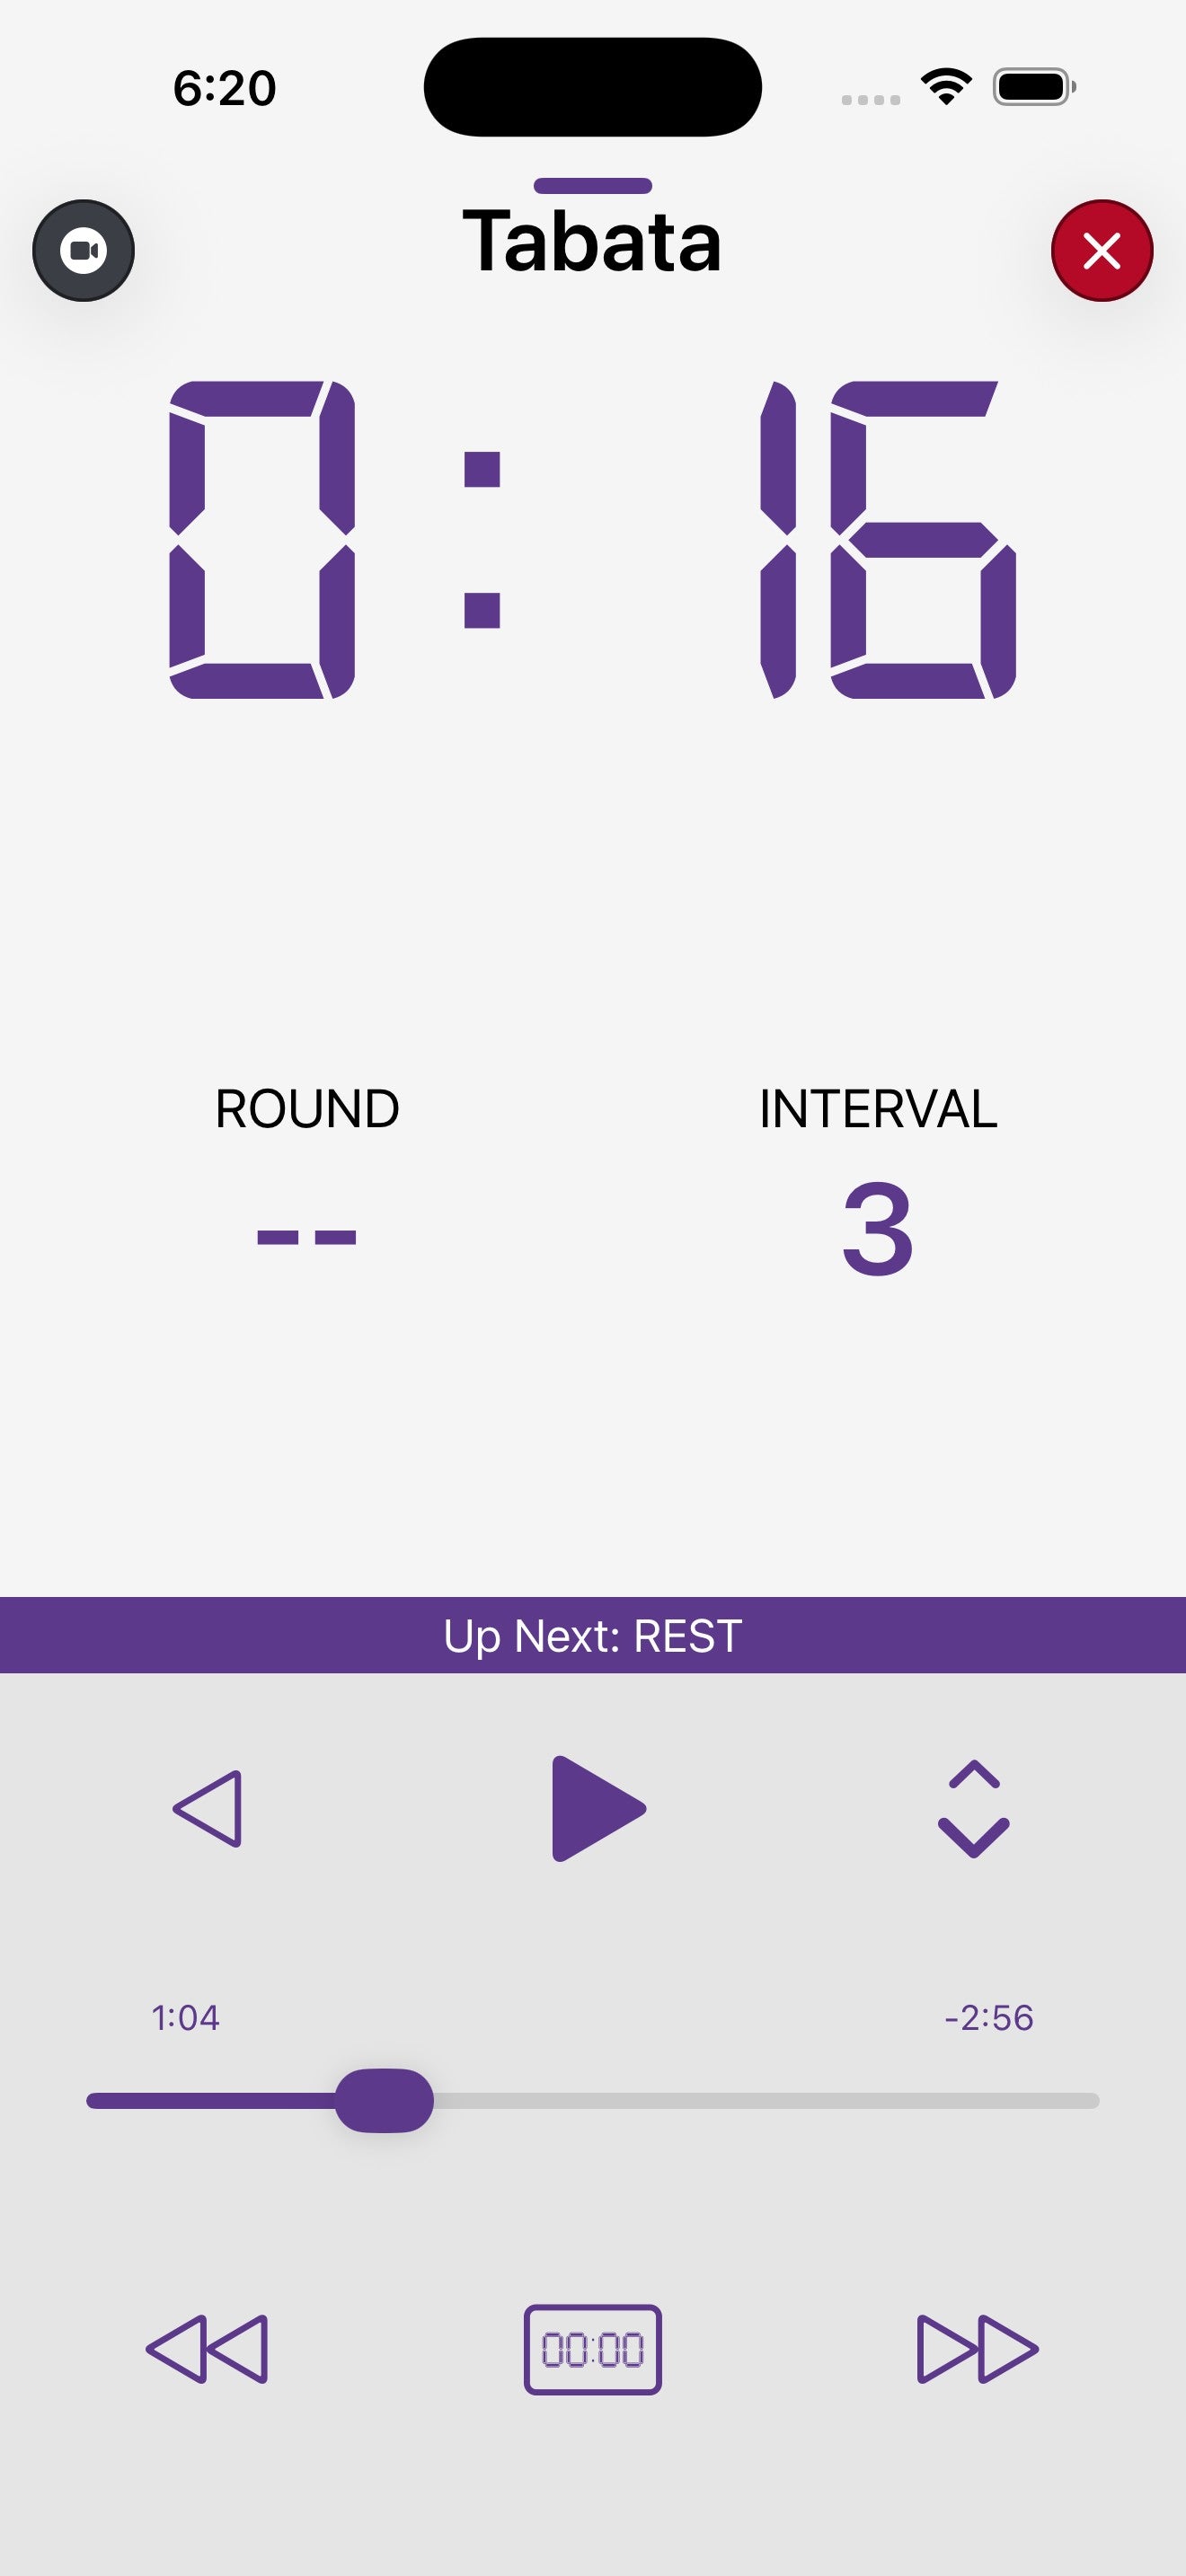
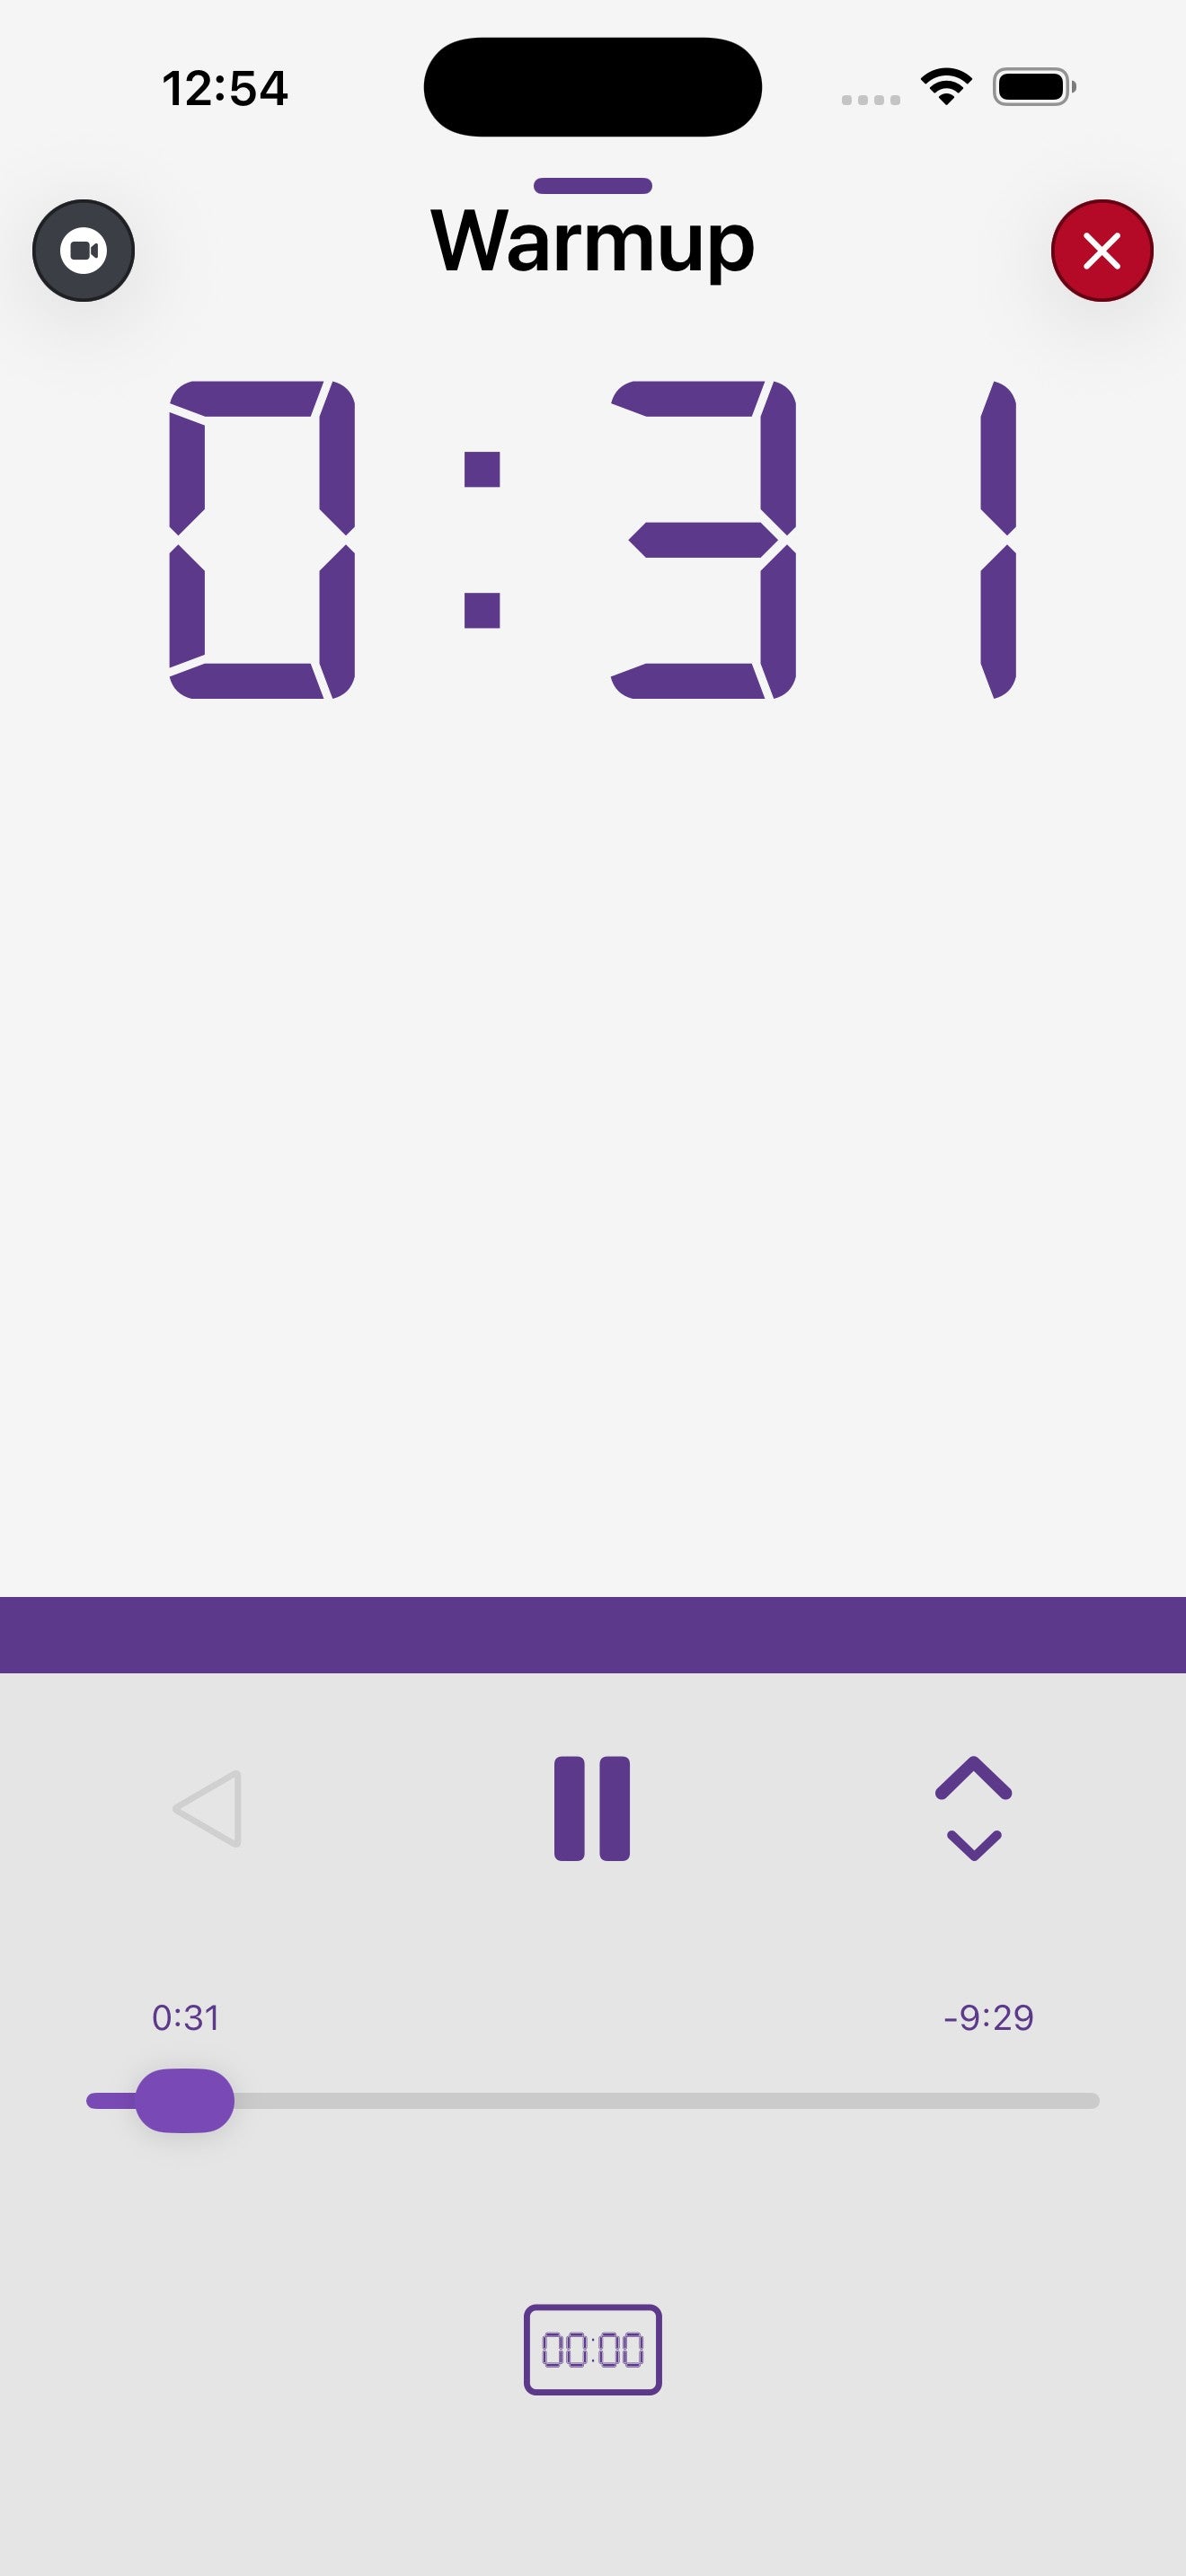
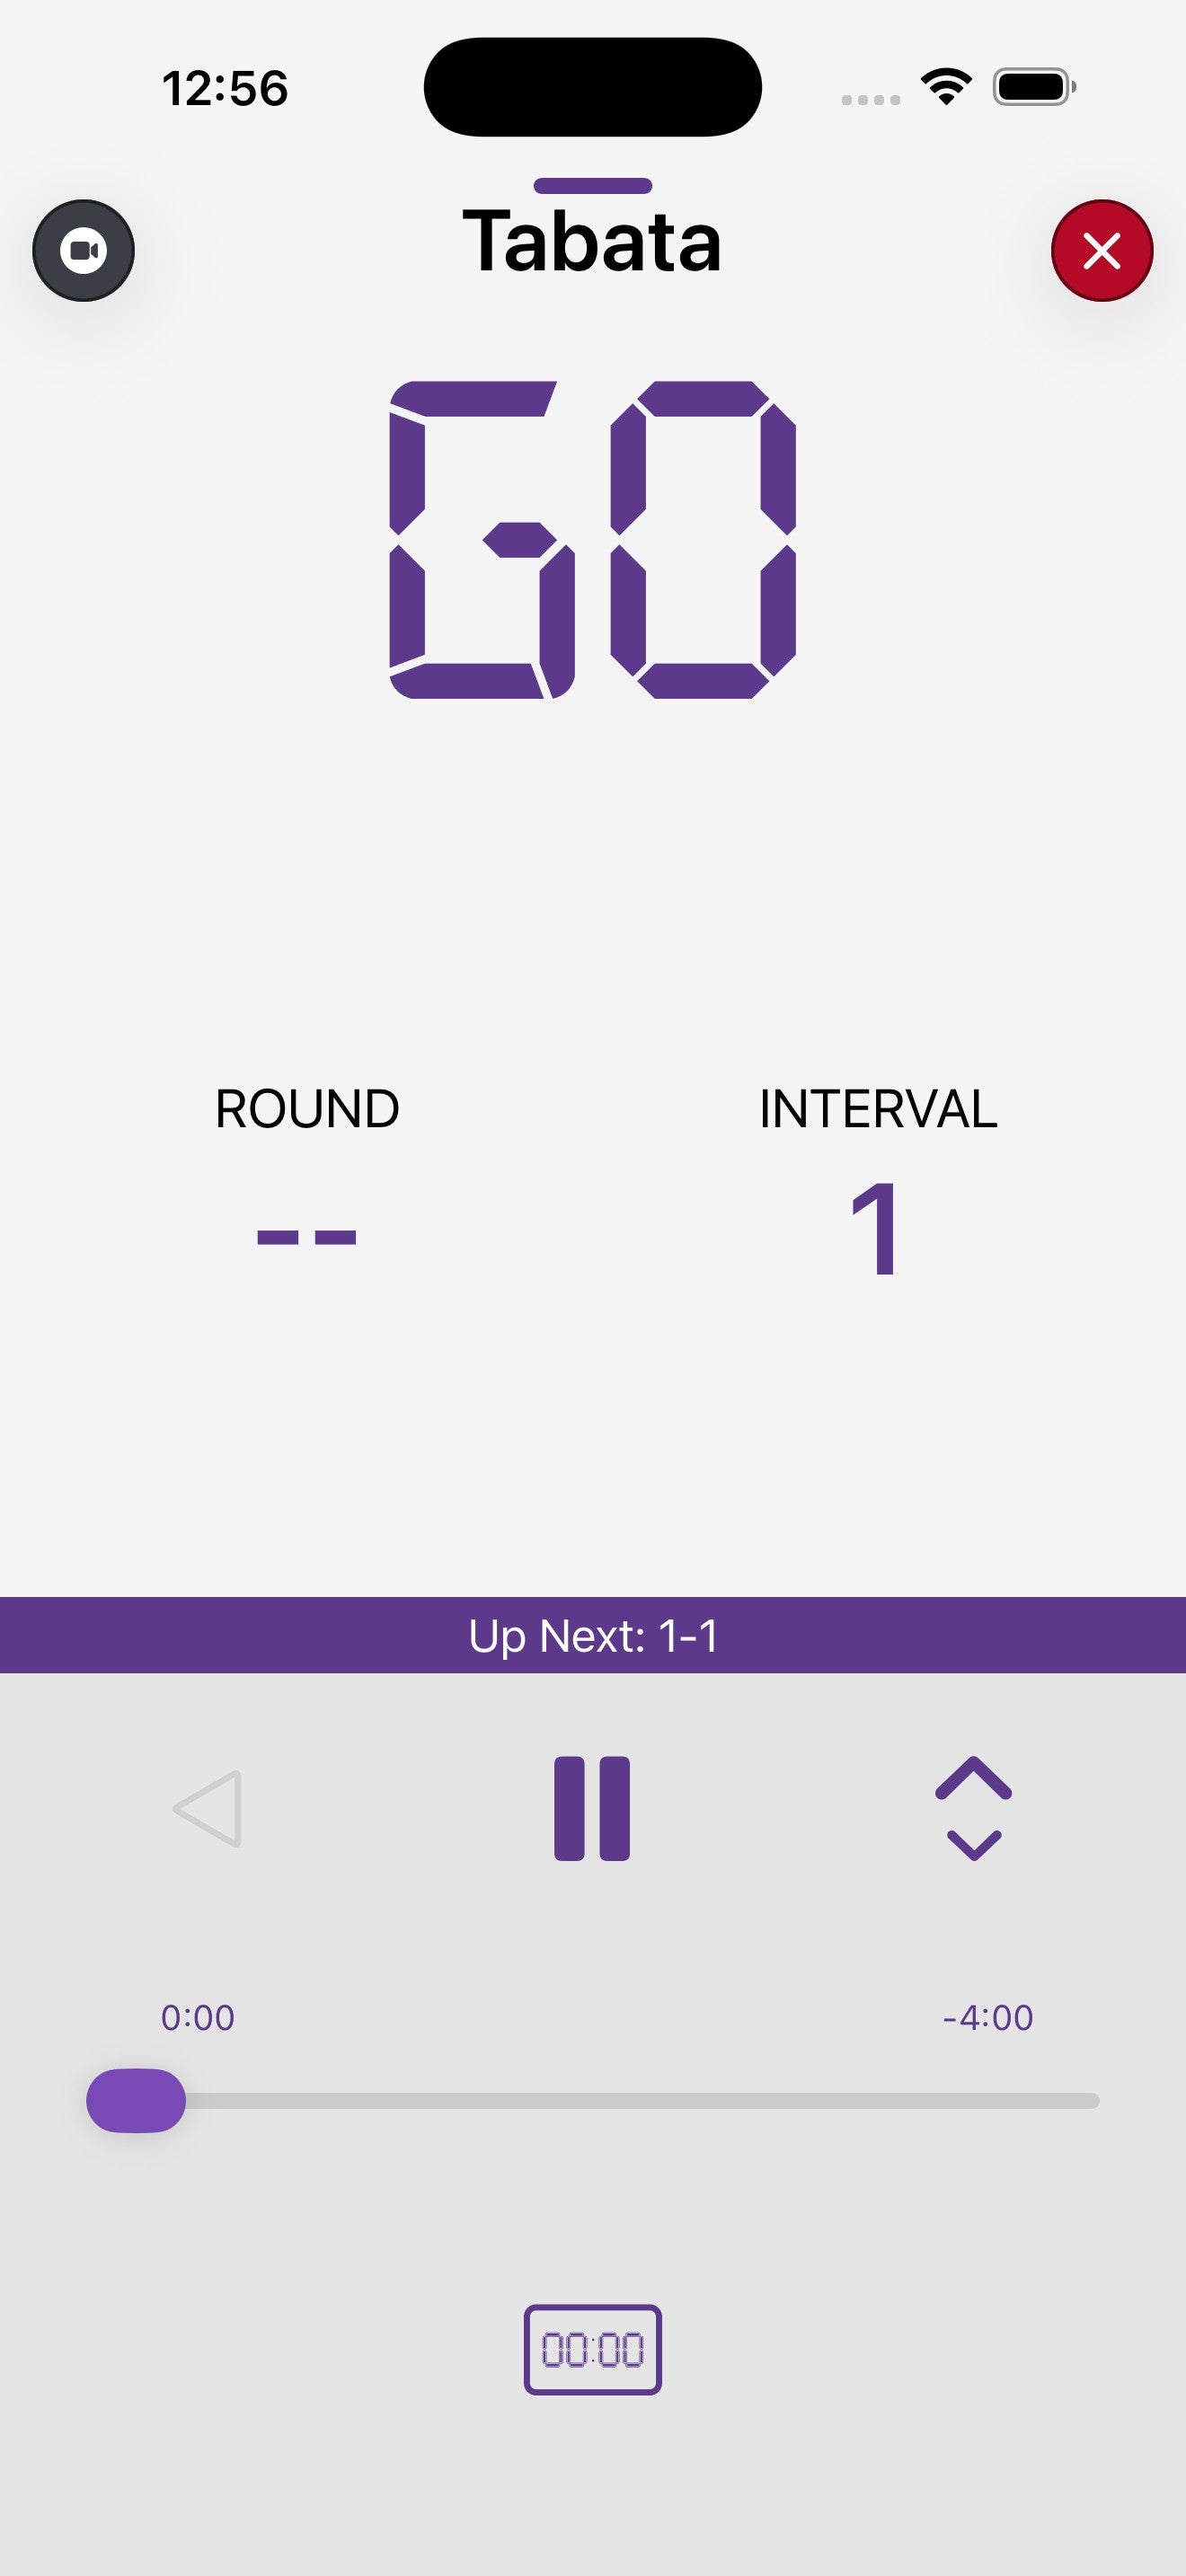
Transport controls
- Play / Pause — the centre button starts and stops the timer.
- Skip back (◁) — jumps to the previous round or interval.
- Skip forward (▷▷) — jumps ahead to the next round or interval.
- Skip backward (◁◁) — steps back further through the workout.
- Up / Down arrows — step the current value up or down.
- Progress bar — shows elapsed and remaining time across the full workout.
- 00:00 button — opens the Displays sheet to re-route the workout to a different Flex Timer mid-session.
Choose displays during a run
Tap the 00:00 button to open the Displays sheet. Tap a display to toggle it on or off for the current workout — useful when you want to free up a display for another class.
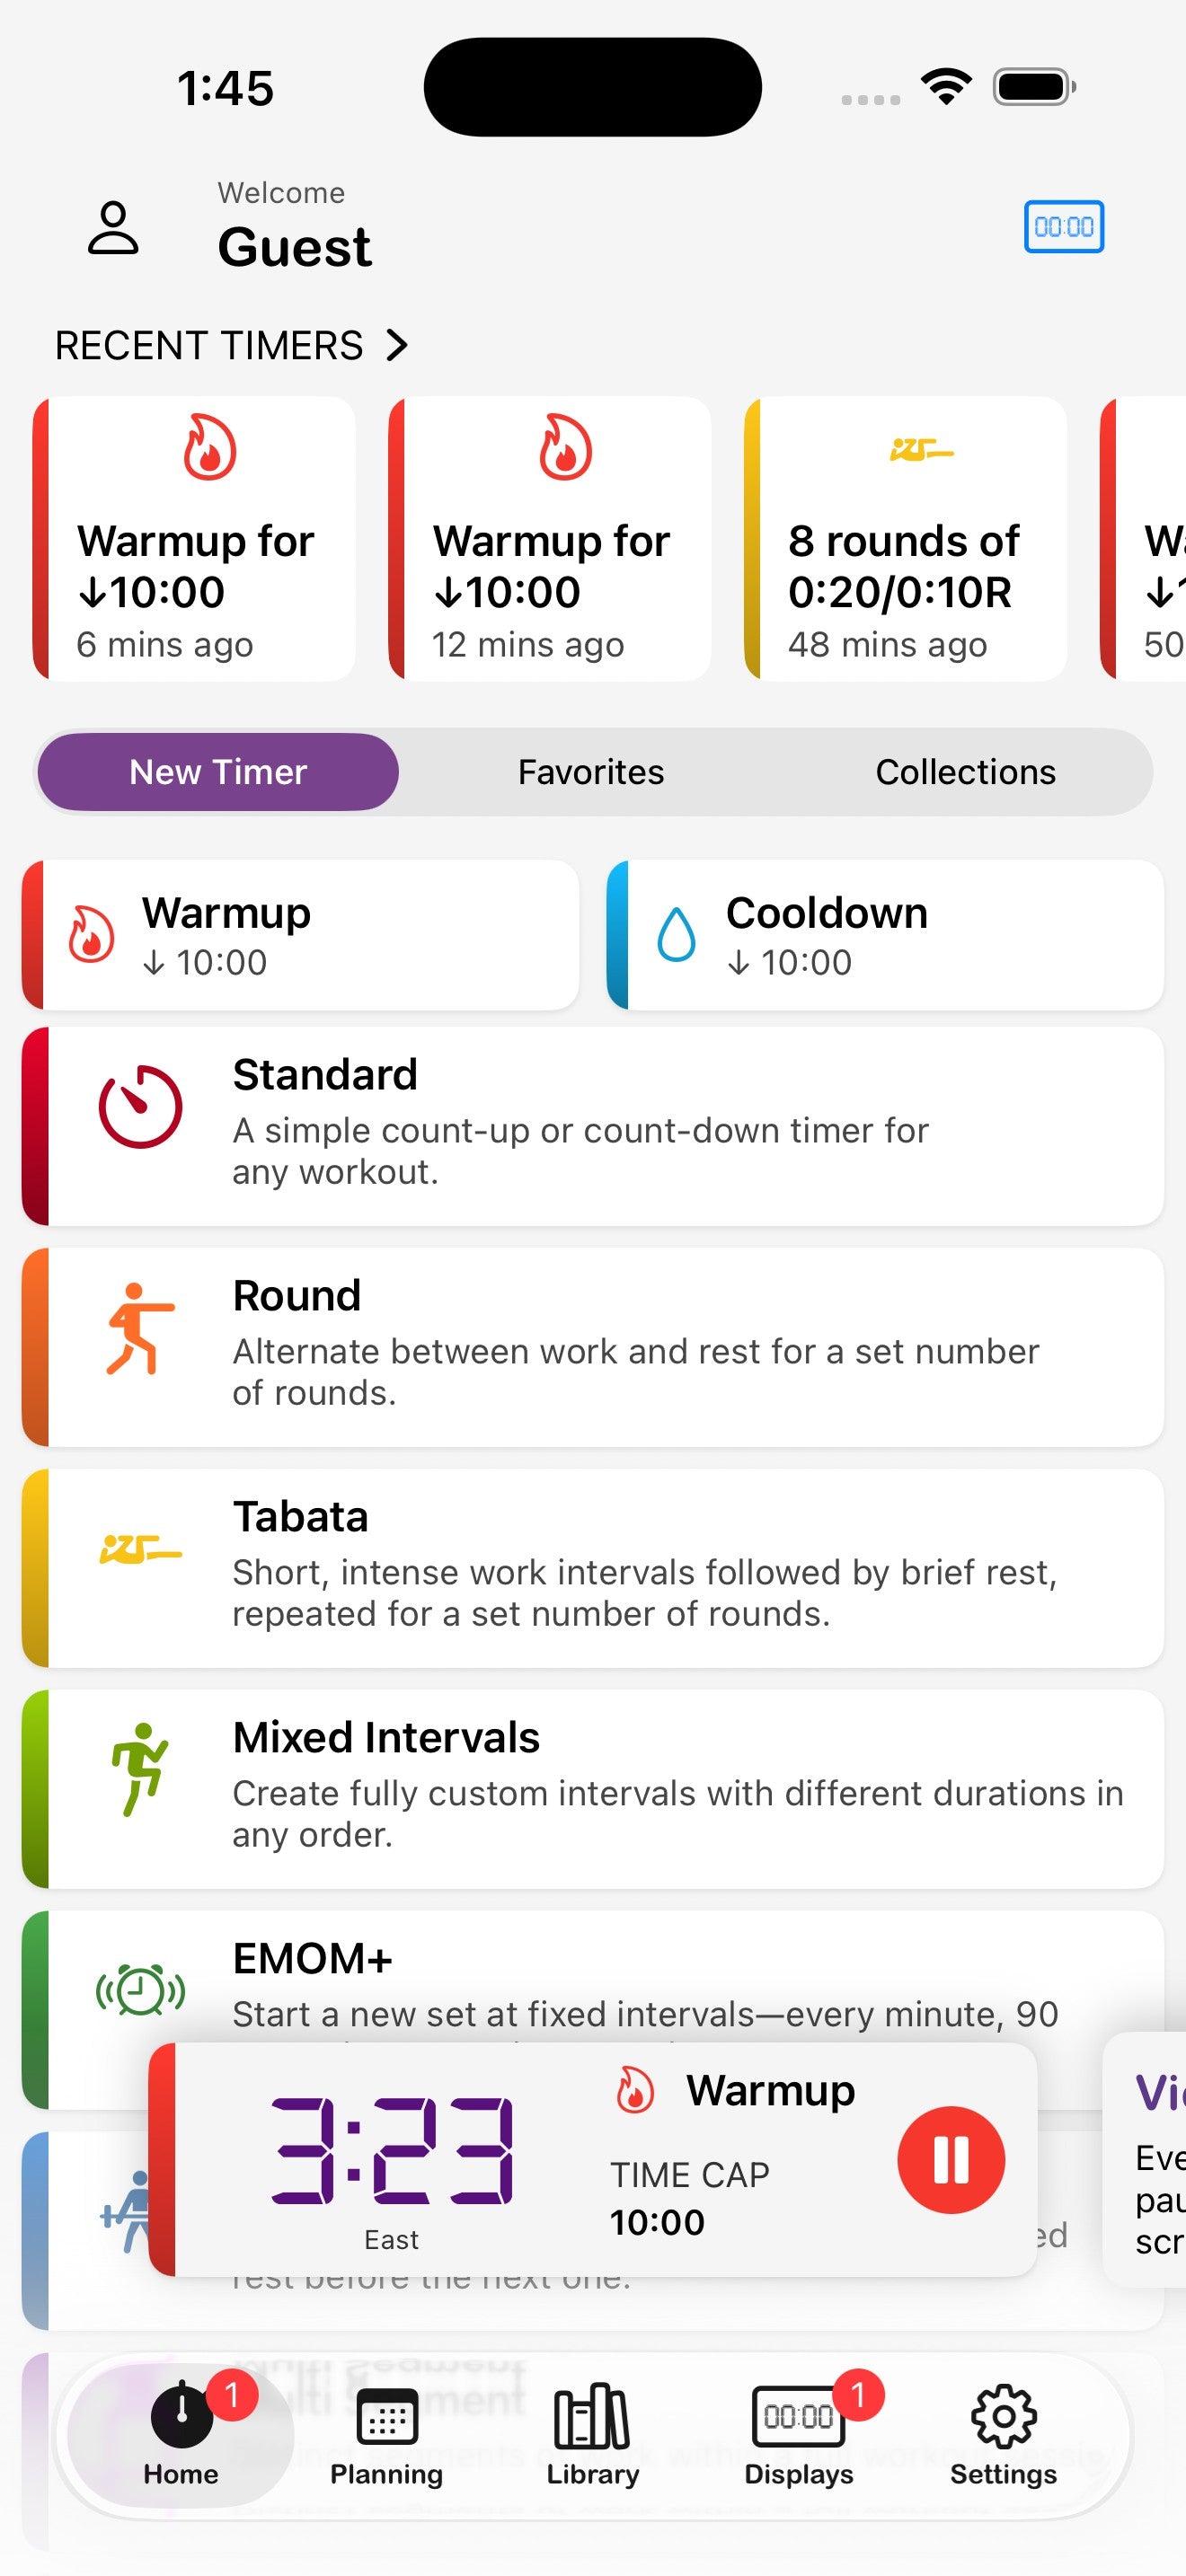
8. Closing & minimizing timers
A running timer doesn't have to dominate the screen. You can minimize it back to the home screen, swap to another tab, and come back — or close it entirely when you're done.
Minimize a running timer
Swipe down from the top of the running screen to dock the timer to the bottom of the home screen. The full clock keeps ticking on any connected Flex Timers.
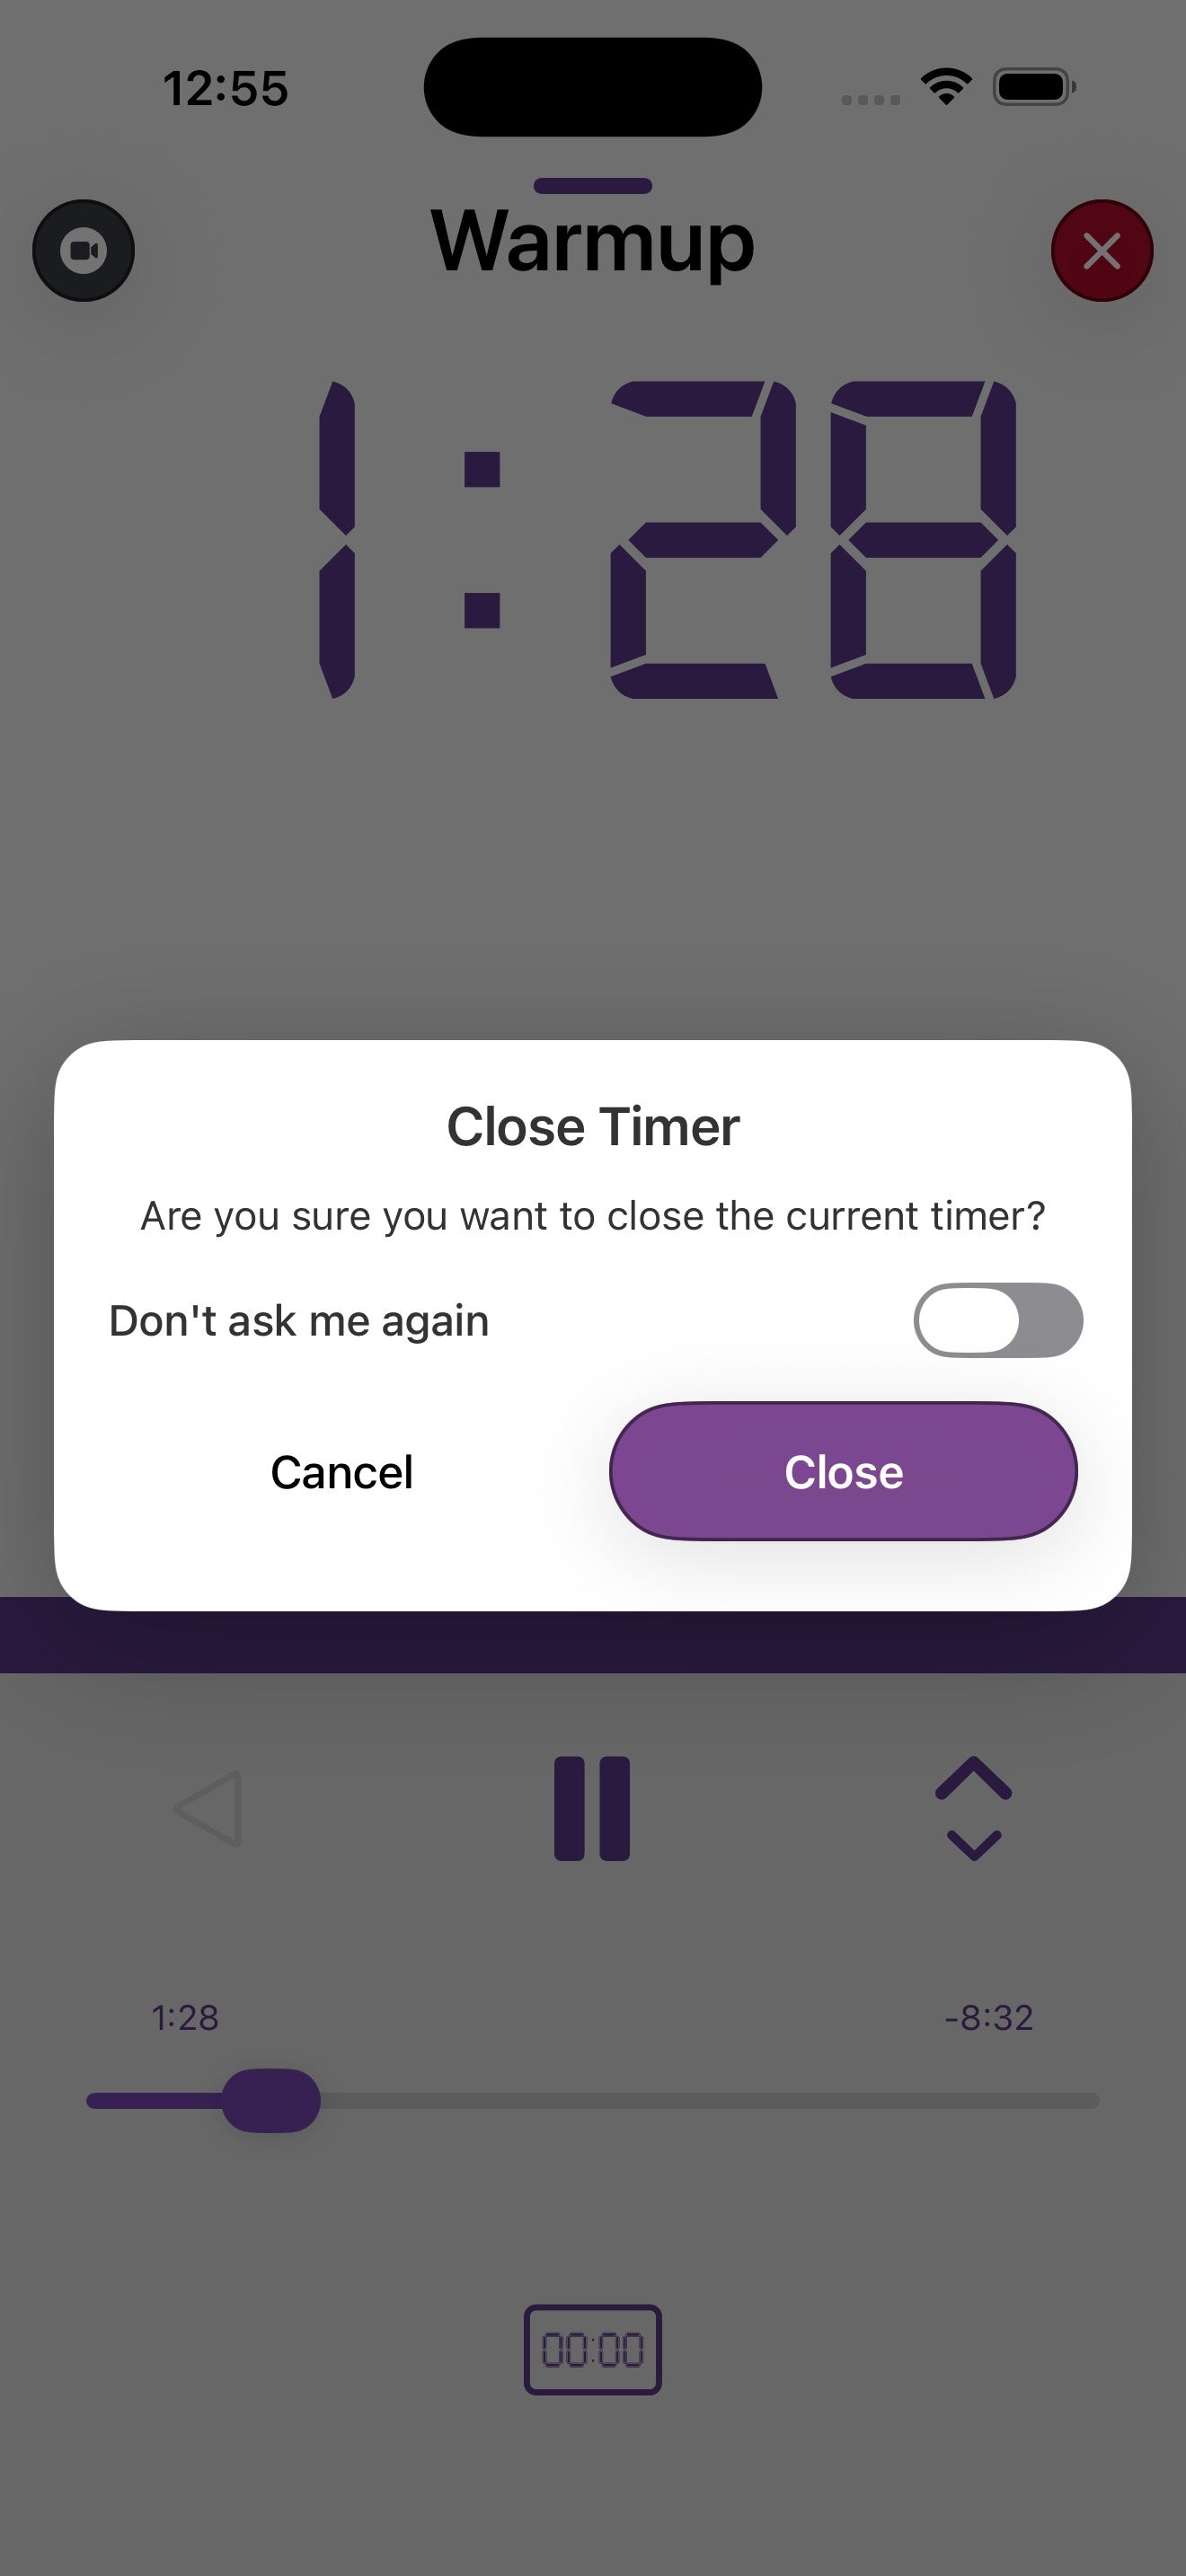
Close a timer
- Tap the red X in the top-right of the running view.
- Confirm with OK. (Toggle Don't ask me again if you'd rather skip the prompt next time — you can re-enable it in Preferences.)
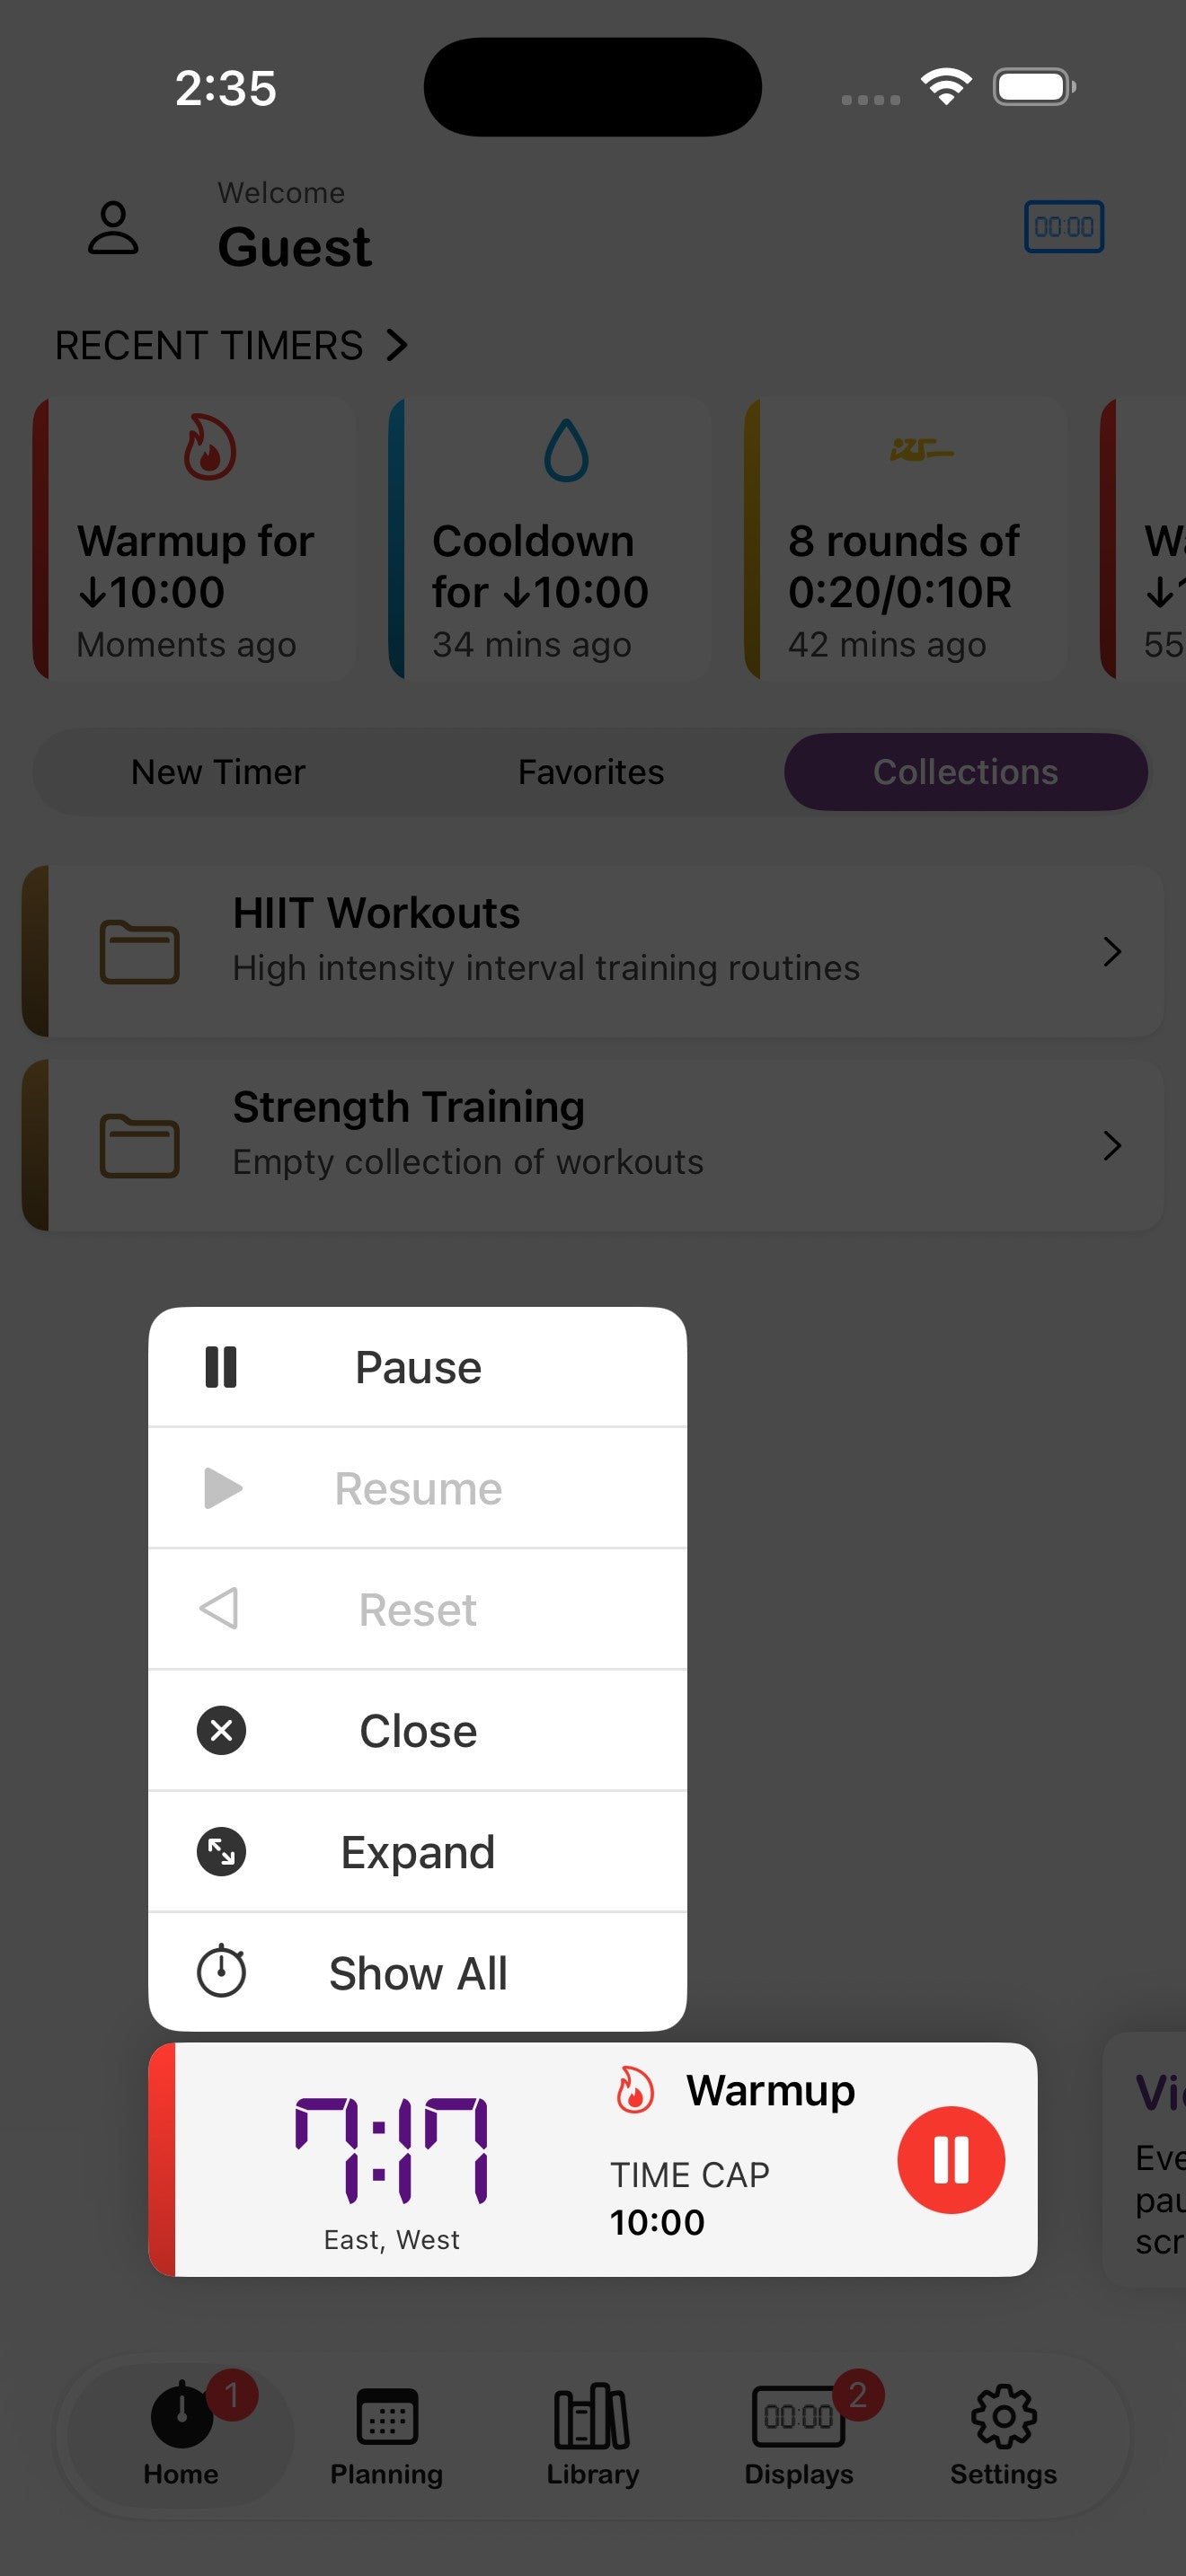
Quick actions on the minimized timer
Long-press the docked timer to bring up:
- Pause / Resume — toggle the run without expanding.
- Reset — back to the start of the workout.
- Close — end the timer.
- Expand — return to the full running view.
- Show All — open the Active Timers screen.
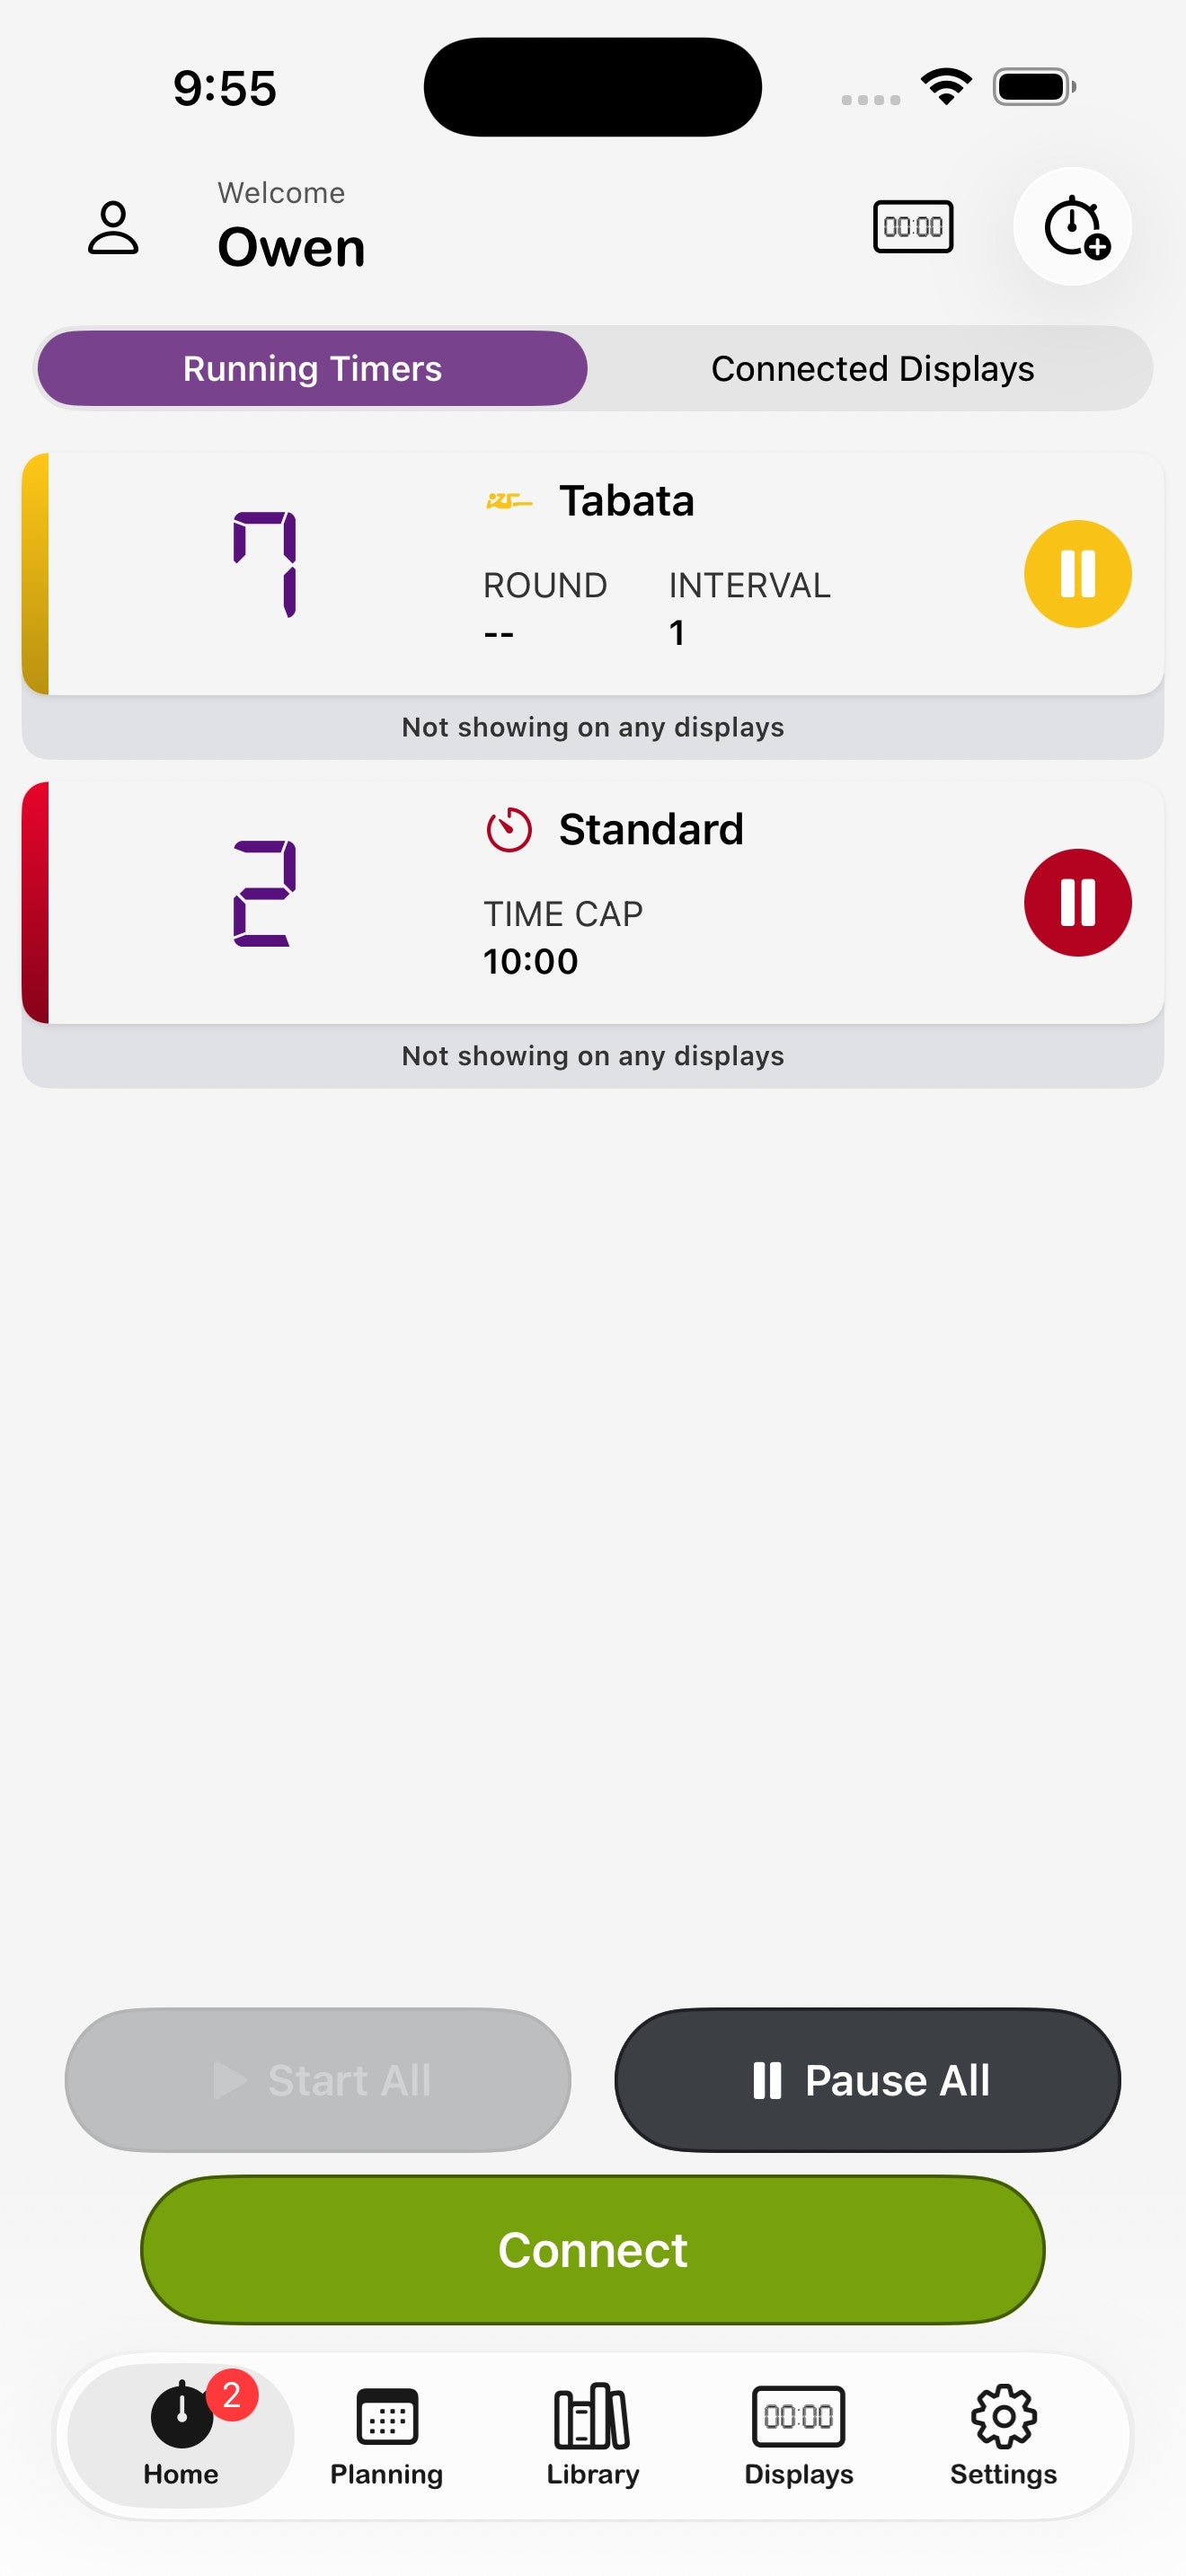
9. Running multiple timers at once
Coaching parallel classes? Running a tournament with several courts? The app can drive multiple timers in parallel and assign each one to specific Flex Timer displays.
How it works
- Make sure Run multiple timers at once is enabled in Preferences → Personalization → Features.
- Start the first timer — assign it to one or more displays on its Displays tab.
- Minimize the running timer or jump back to the home screen.
- Tap the + timer icon to start another. Assign it to a different display.
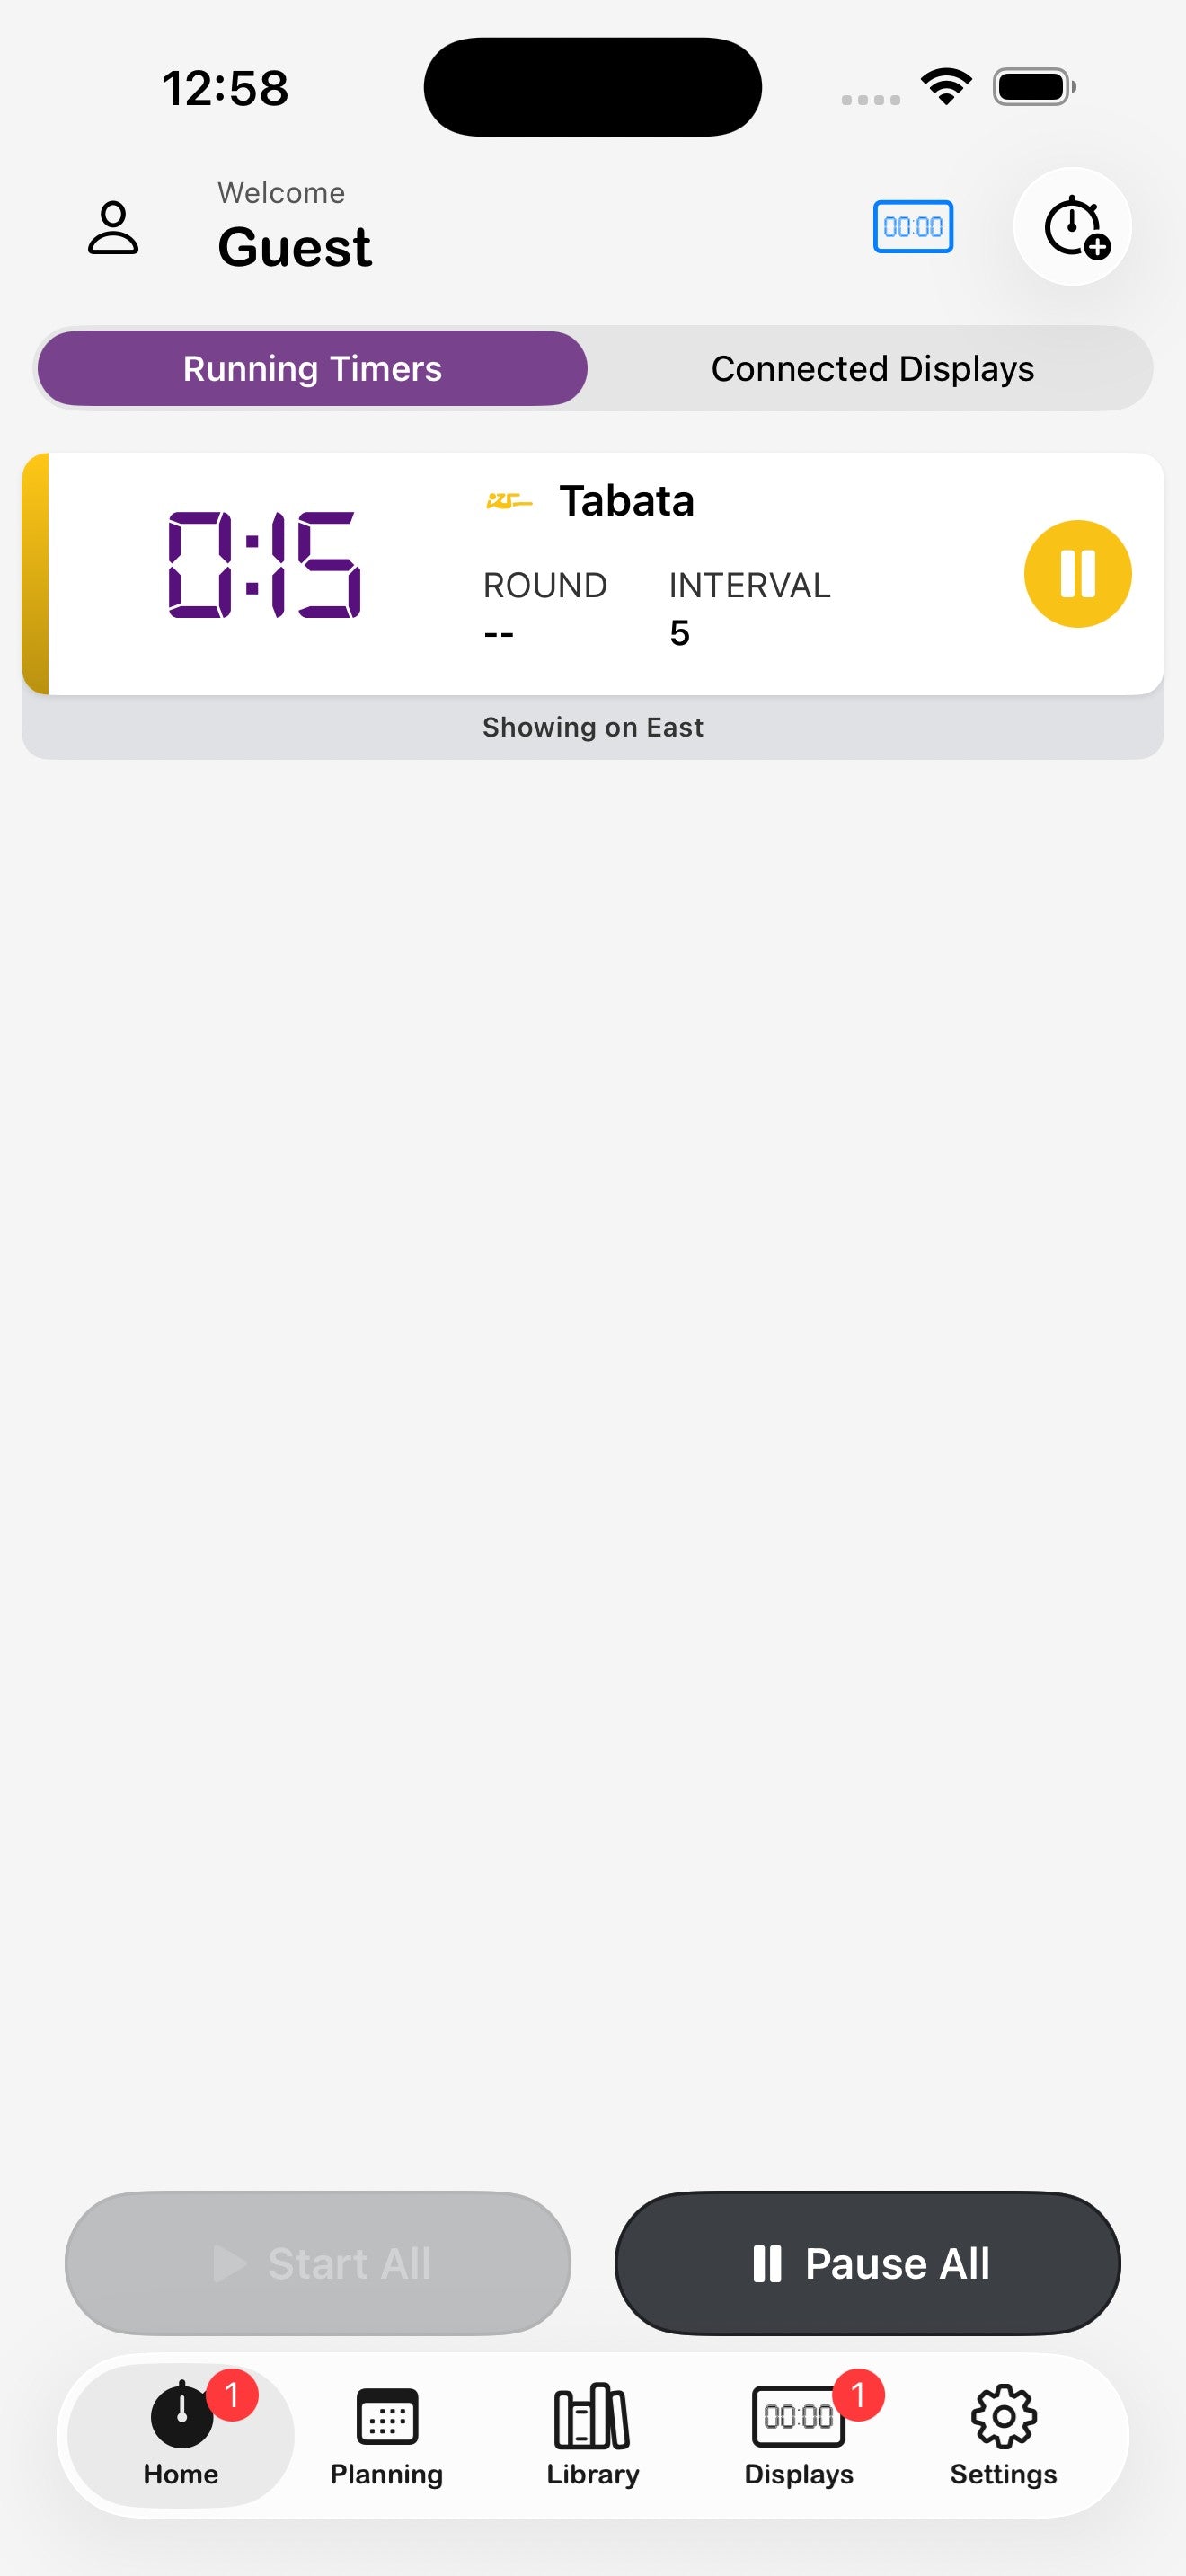
- Open Active Timers (the timer-plus icon at the top of the home screen) to see every running workout in one place.
Active Timers — Timers vs Displays view
On the Timers tab, each running workout shows once with its assigned displays listed underneath. On the Displays tab, the same workouts are grouped by display so you can quickly see what's on each Flex Timer at a glance.
10. Recording workout videos iOS only
Capture your set and overlay the timer in real time. The record button (top-left of the running timer screen) records video with the digital clock, round, and interval information baked in — perfect for form checks, social posts, or coaching review. This feature is available on iOS only.
Record a workout
- Start a timer the way you normally would.
- Tap the record button in the top-left of the running view.
- Grant camera and microphone permission the first time.
- The recording starts automatically — your workout continues uninterrupted.
- Tap the record button again to stop. The video is saved to your photo library.
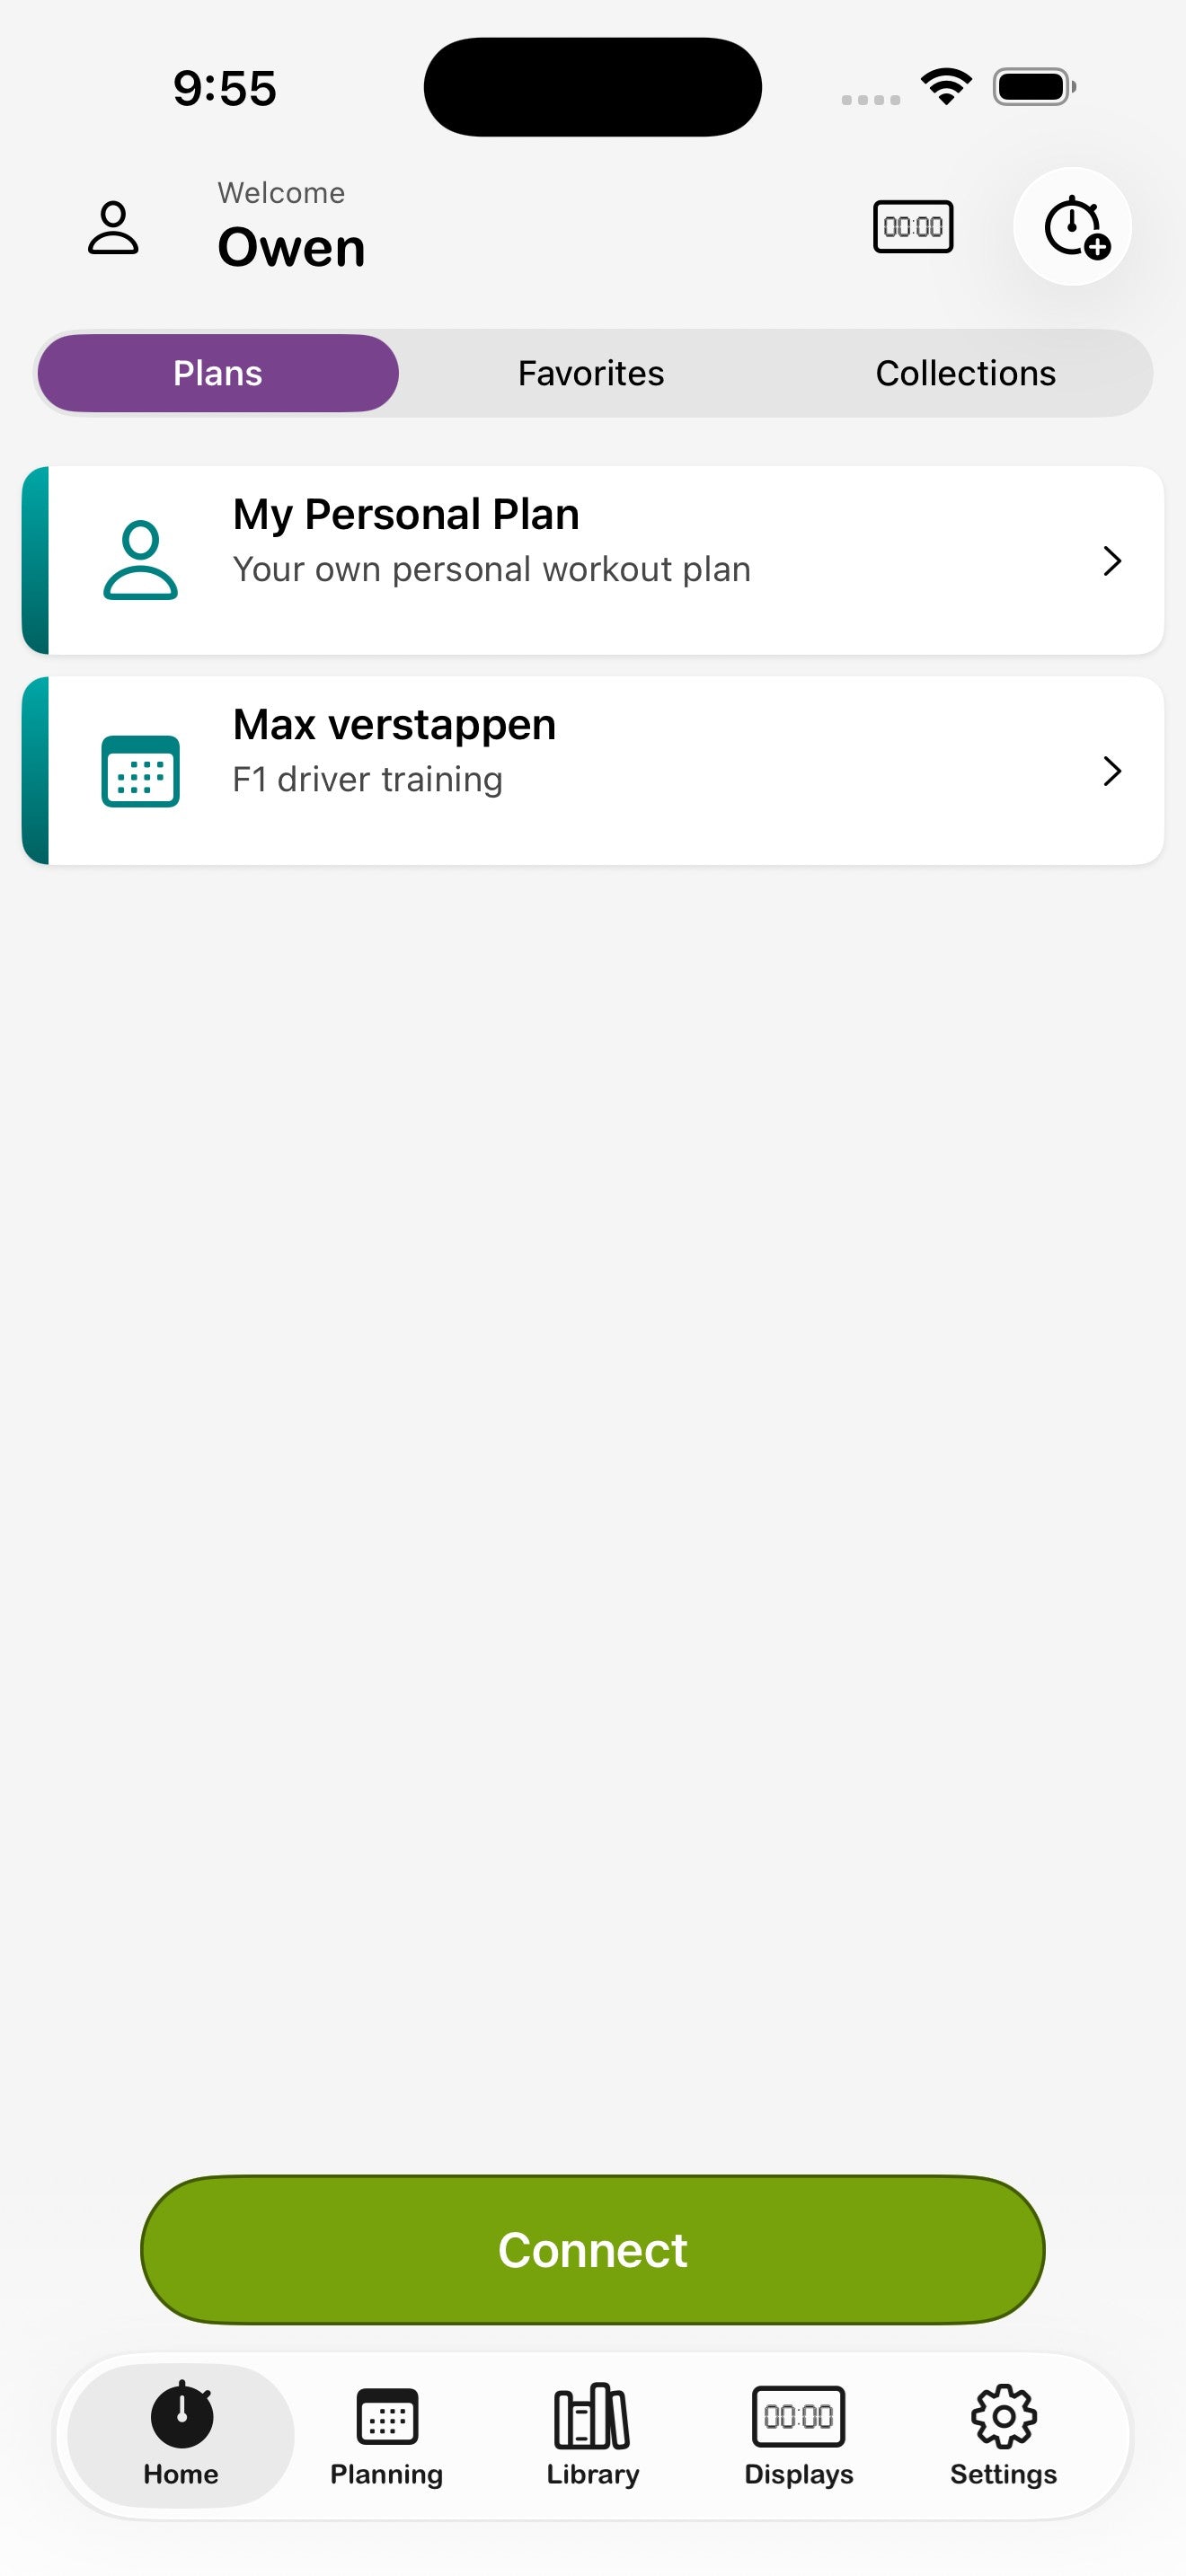
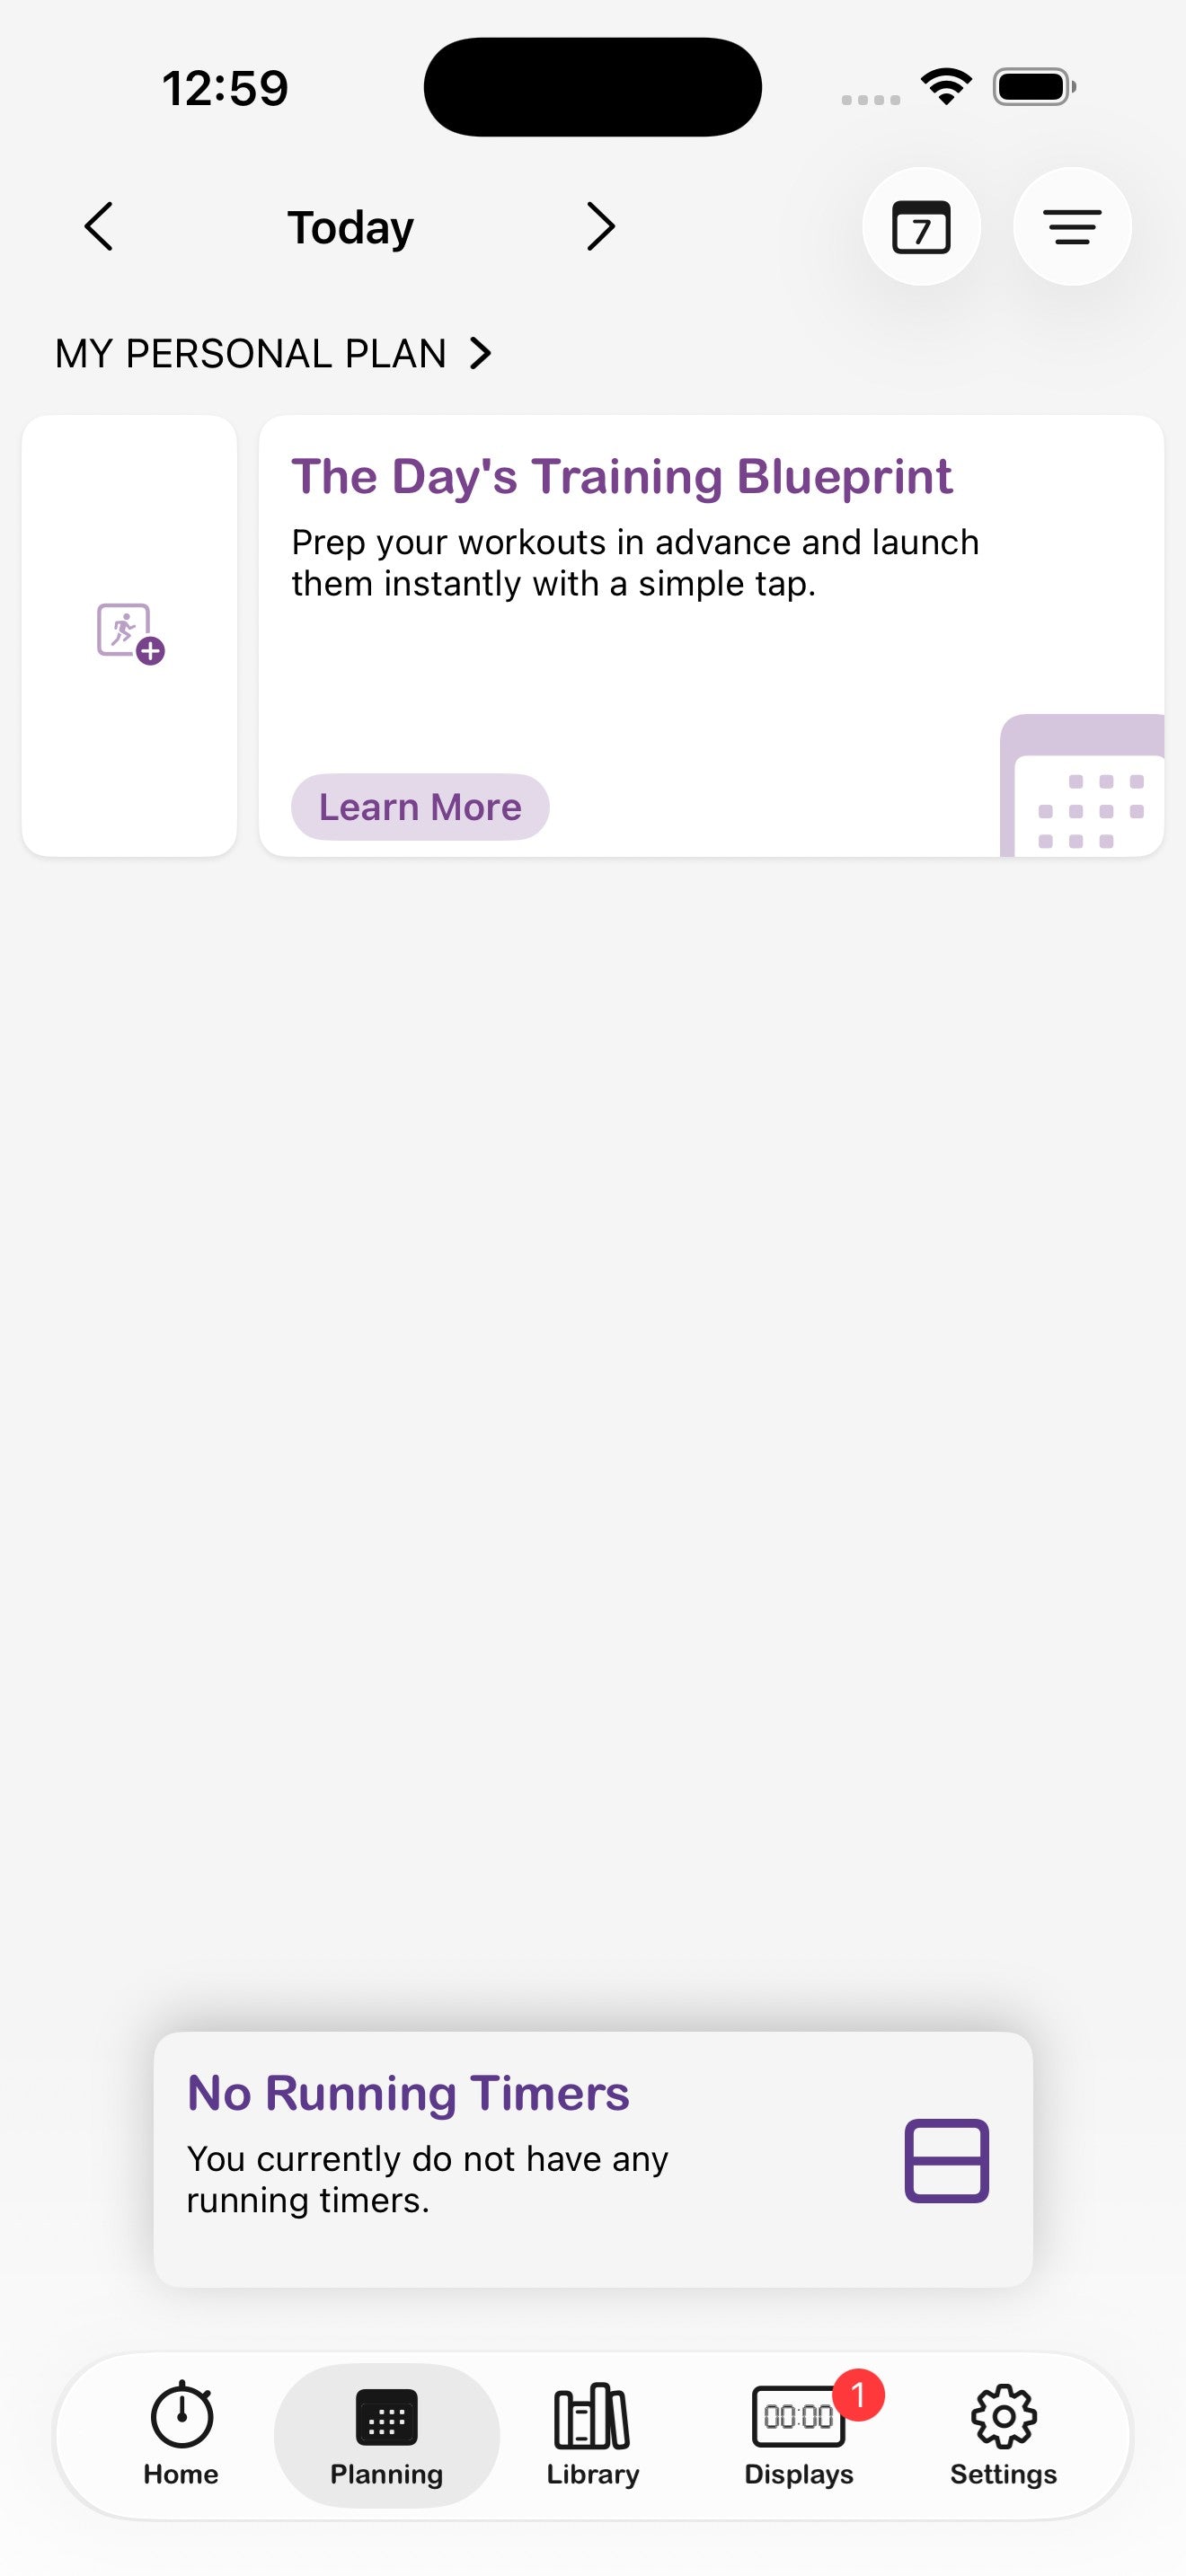
11. Planning
The Planning tab is your training calendar. Schedule workouts in advance and launch them with one tap on the day they're due — perfect for following a programmed cycle or building out a class schedule.
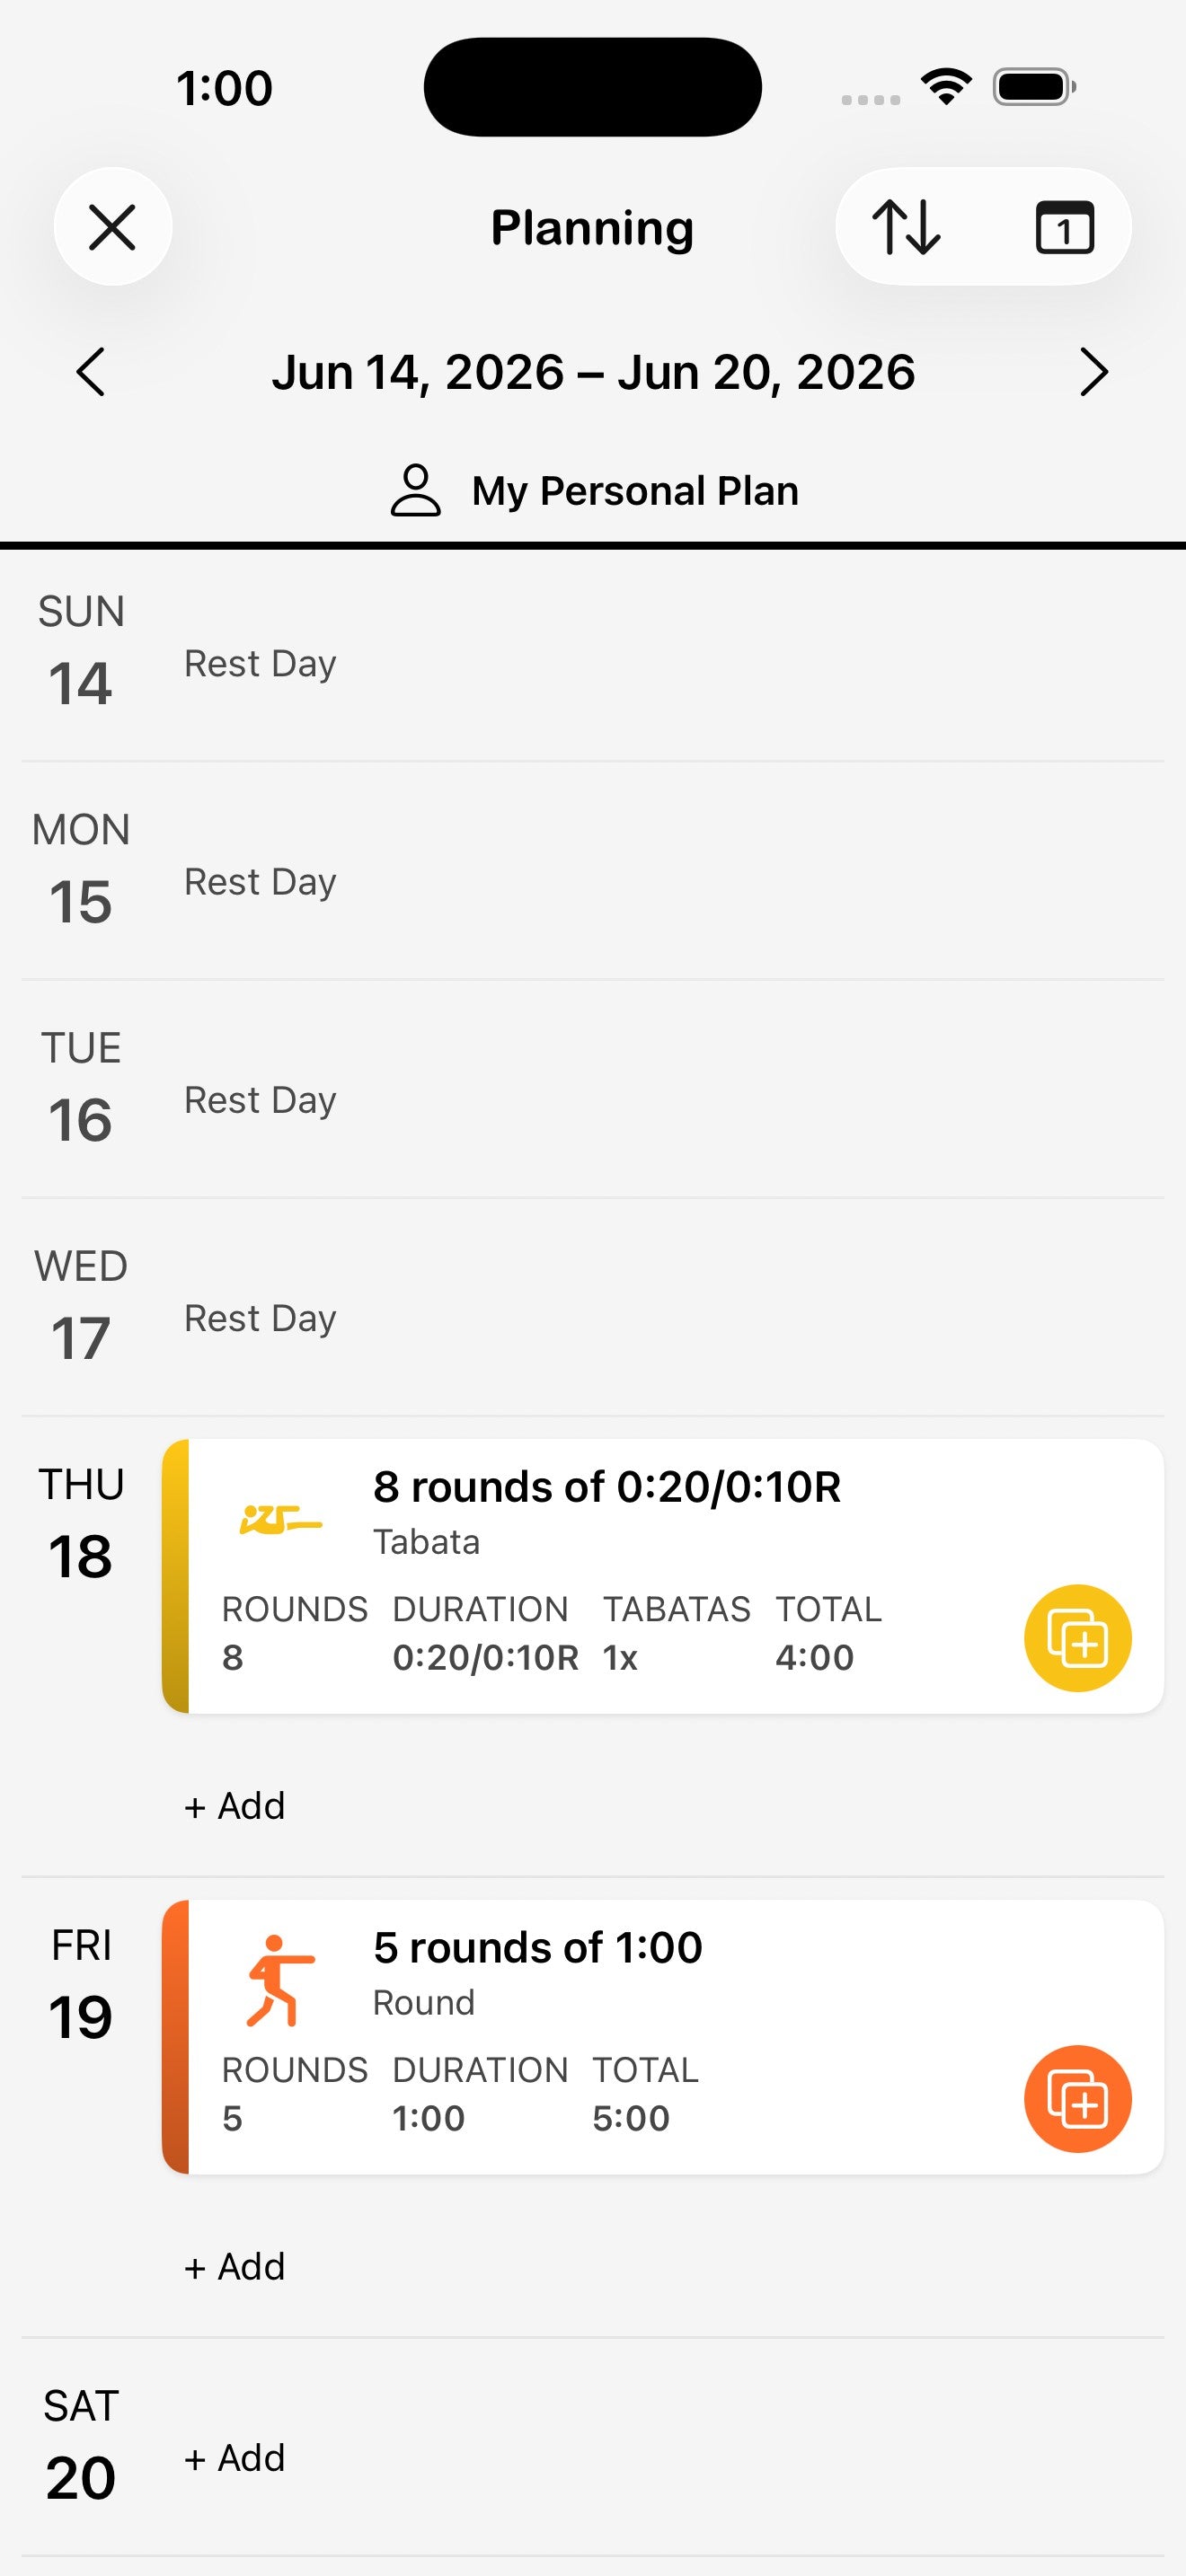
Add a workout to a day
- Open the Planning tab from the bottom nav.
- Tap + Add on the day you want to schedule.
- Pick a timer mode (or choose from your Favorites or Collections), configure it, and tap Save.
Switch between week and day views
The arrows at the top step through dates, the calendar icon jumps to a date, and the up/down arrows switch the layout between a single day and a full week.
Configure a planned workout
When you add a workout to a day, the same timer configuration screen opens so you can set the exact durations, rounds, and direction before saving it to the plan. Tap Save to commit it to the selected day.
To create or manage whole plans (rename, archive, delete), tap the menu icon (≡) in the top-right of the Planning tab and choose Create plan or Manage plans.
Run a planned workout
On the day, open Planning and tap the play button on the workout card. The timer launches with all of its saved settings. If you've assigned displays, those connect automatically.
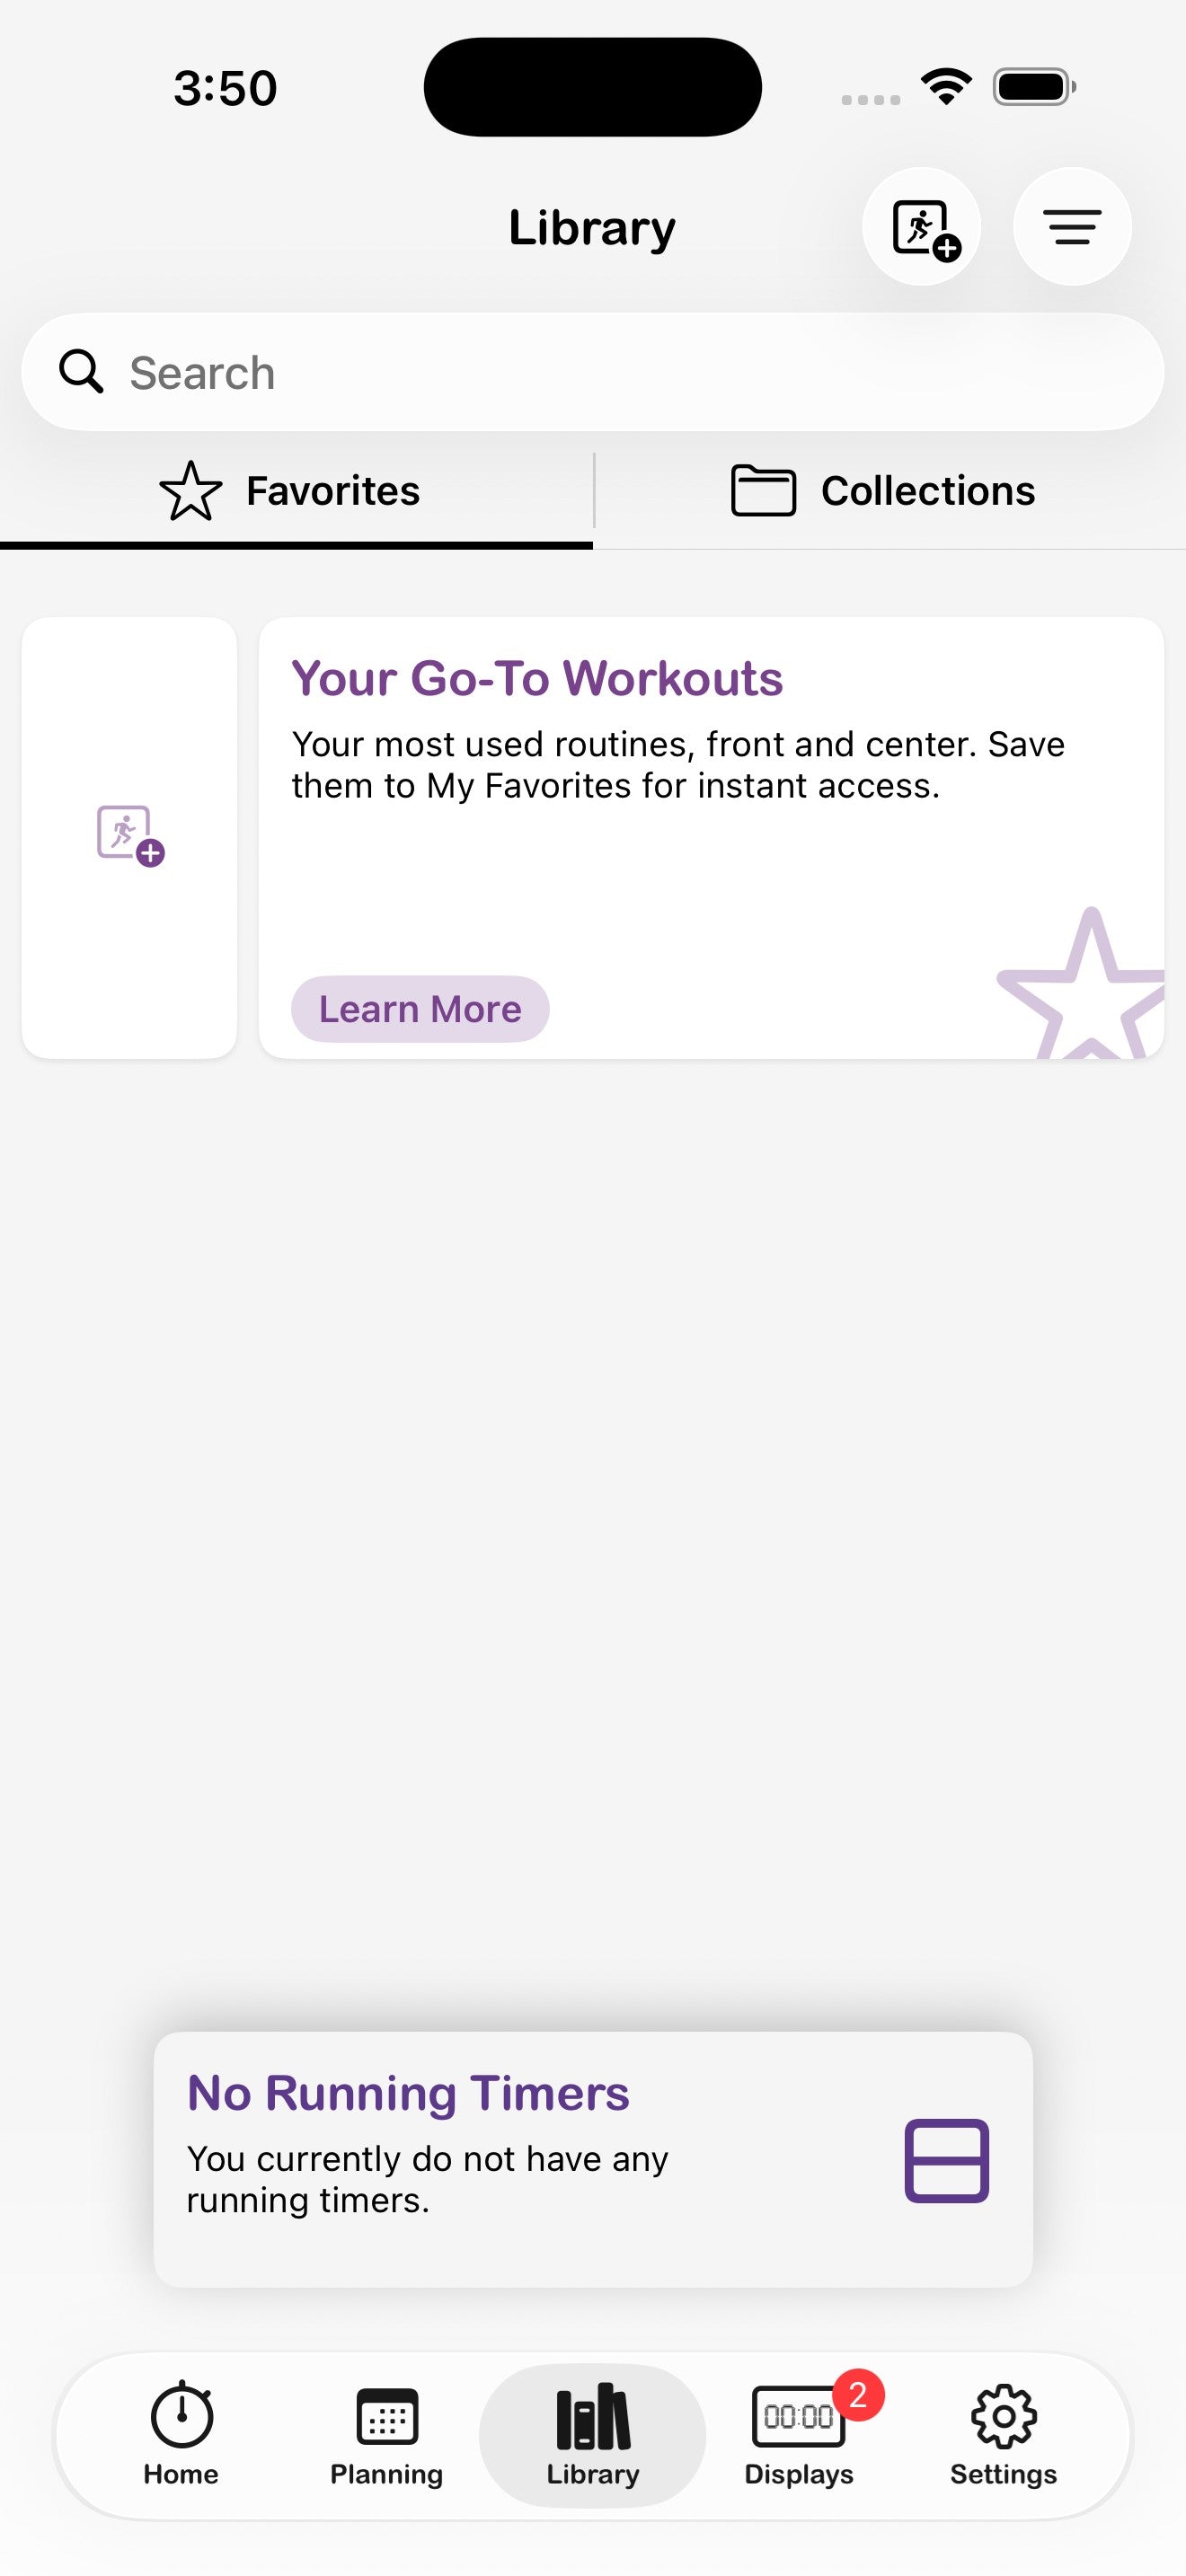
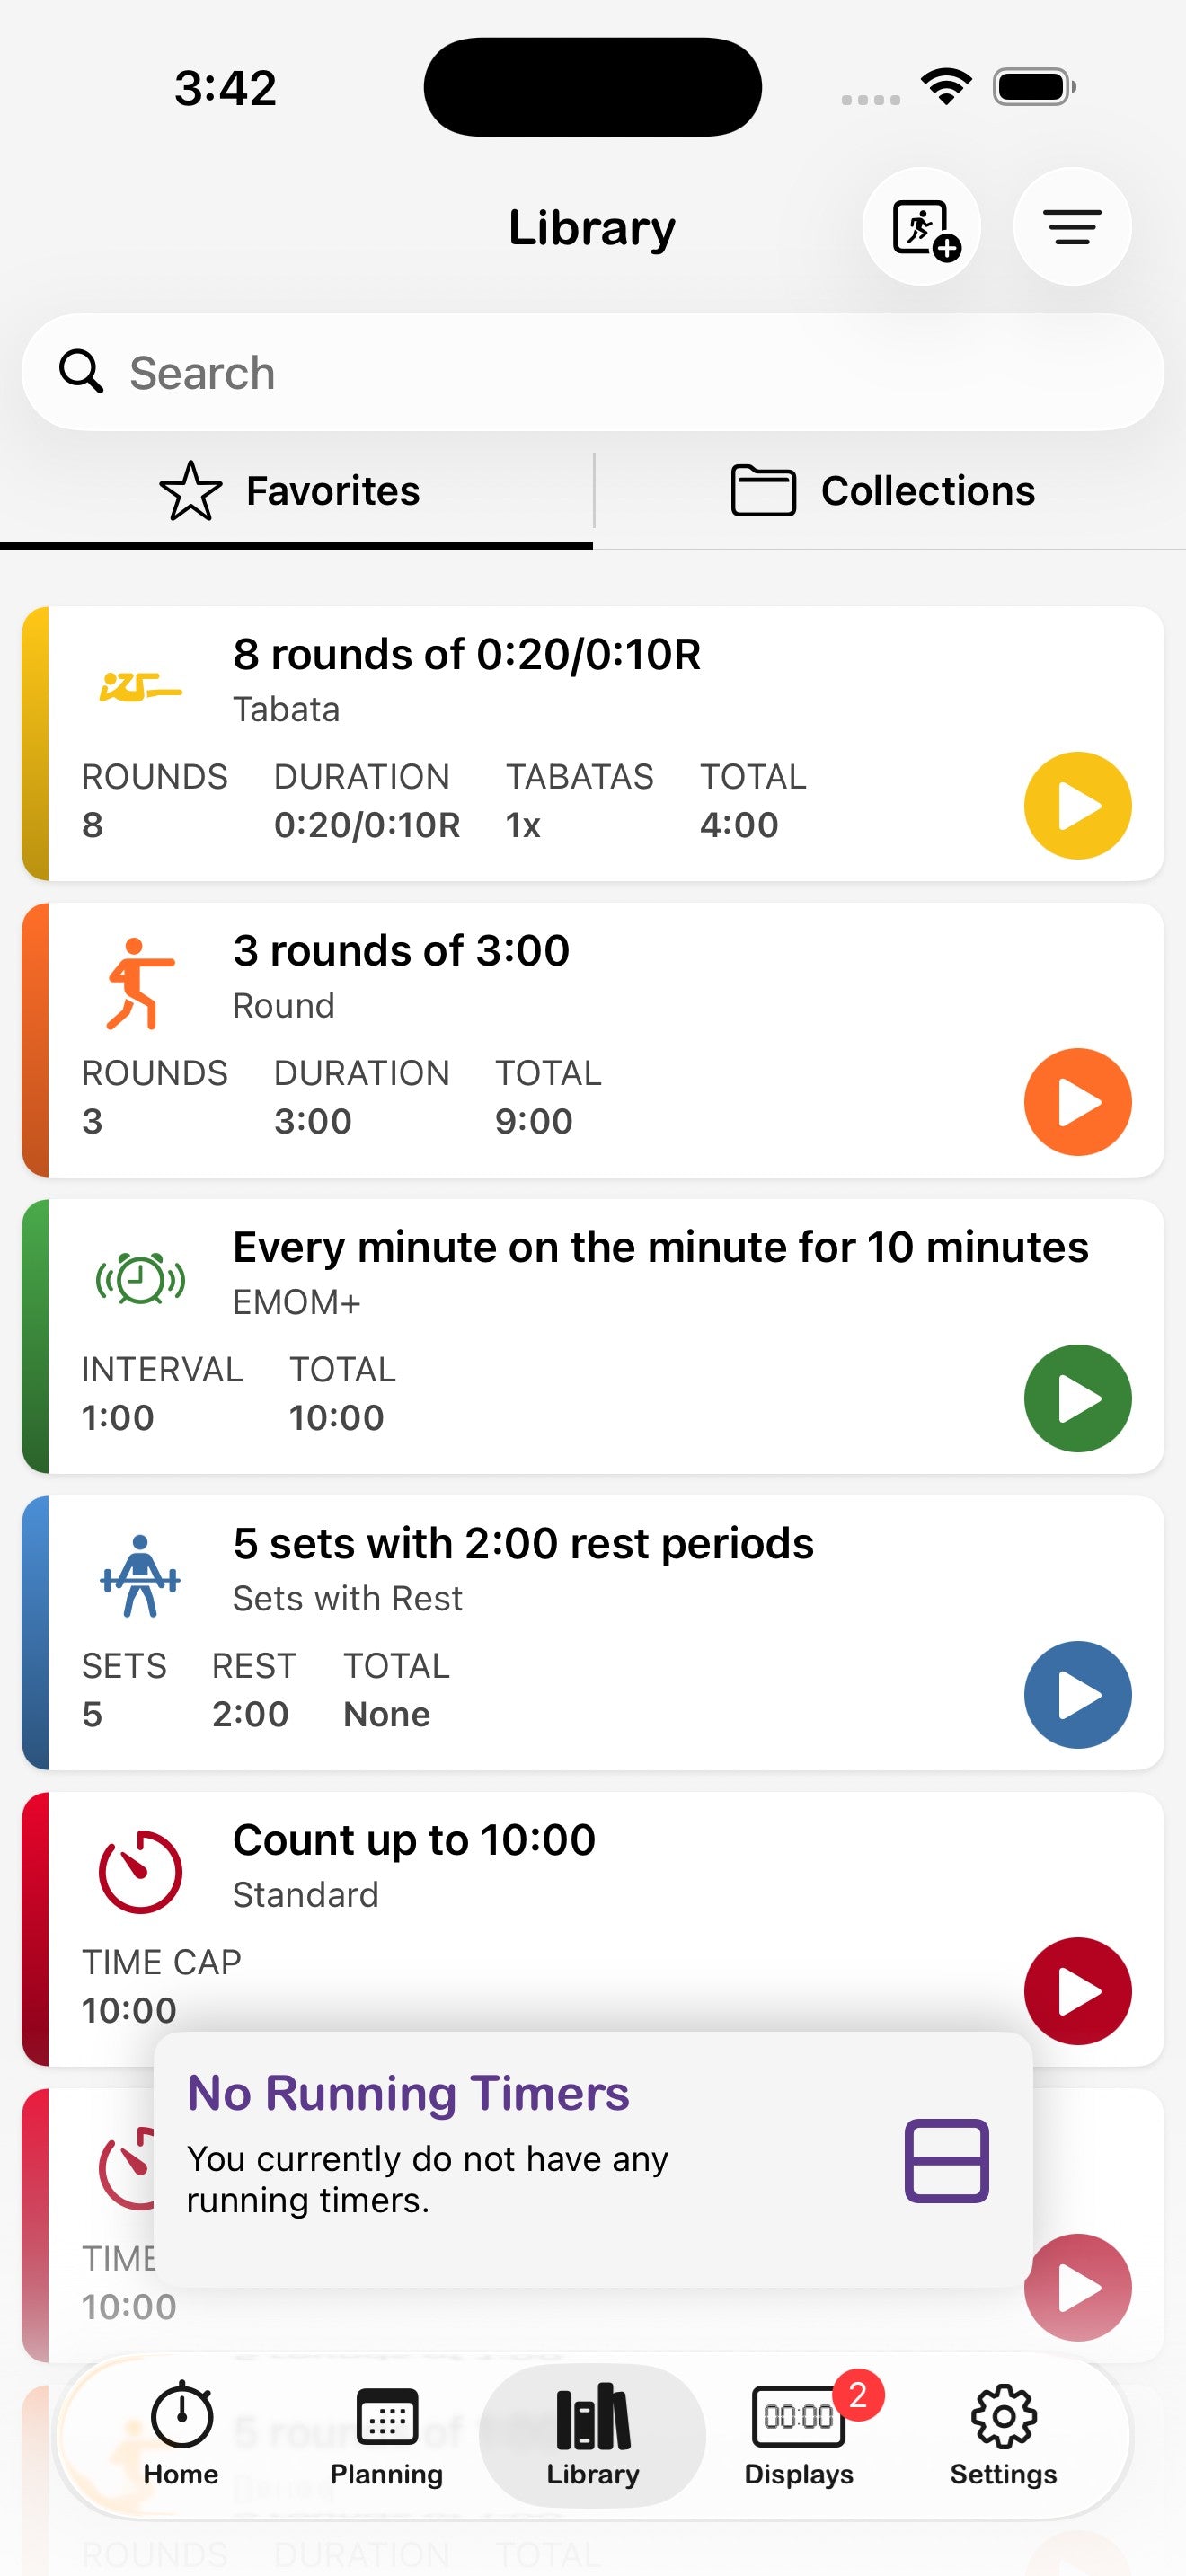
12. Library — Favorites, Collections & Search
The Library is where every saved workout lives. Two tabs split the view: Favorites for quick-access singles, Collections for grouped sets of workouts (like "Upper Body" or "Bootcamp Class").

Save a workout to the Library
- Configure a timer the way you want it.
- Tap the menu icon (≡) in the top-right and choose Save to collections.
- Optionally tap Edit details first to give it a name and description.
Build a Collection

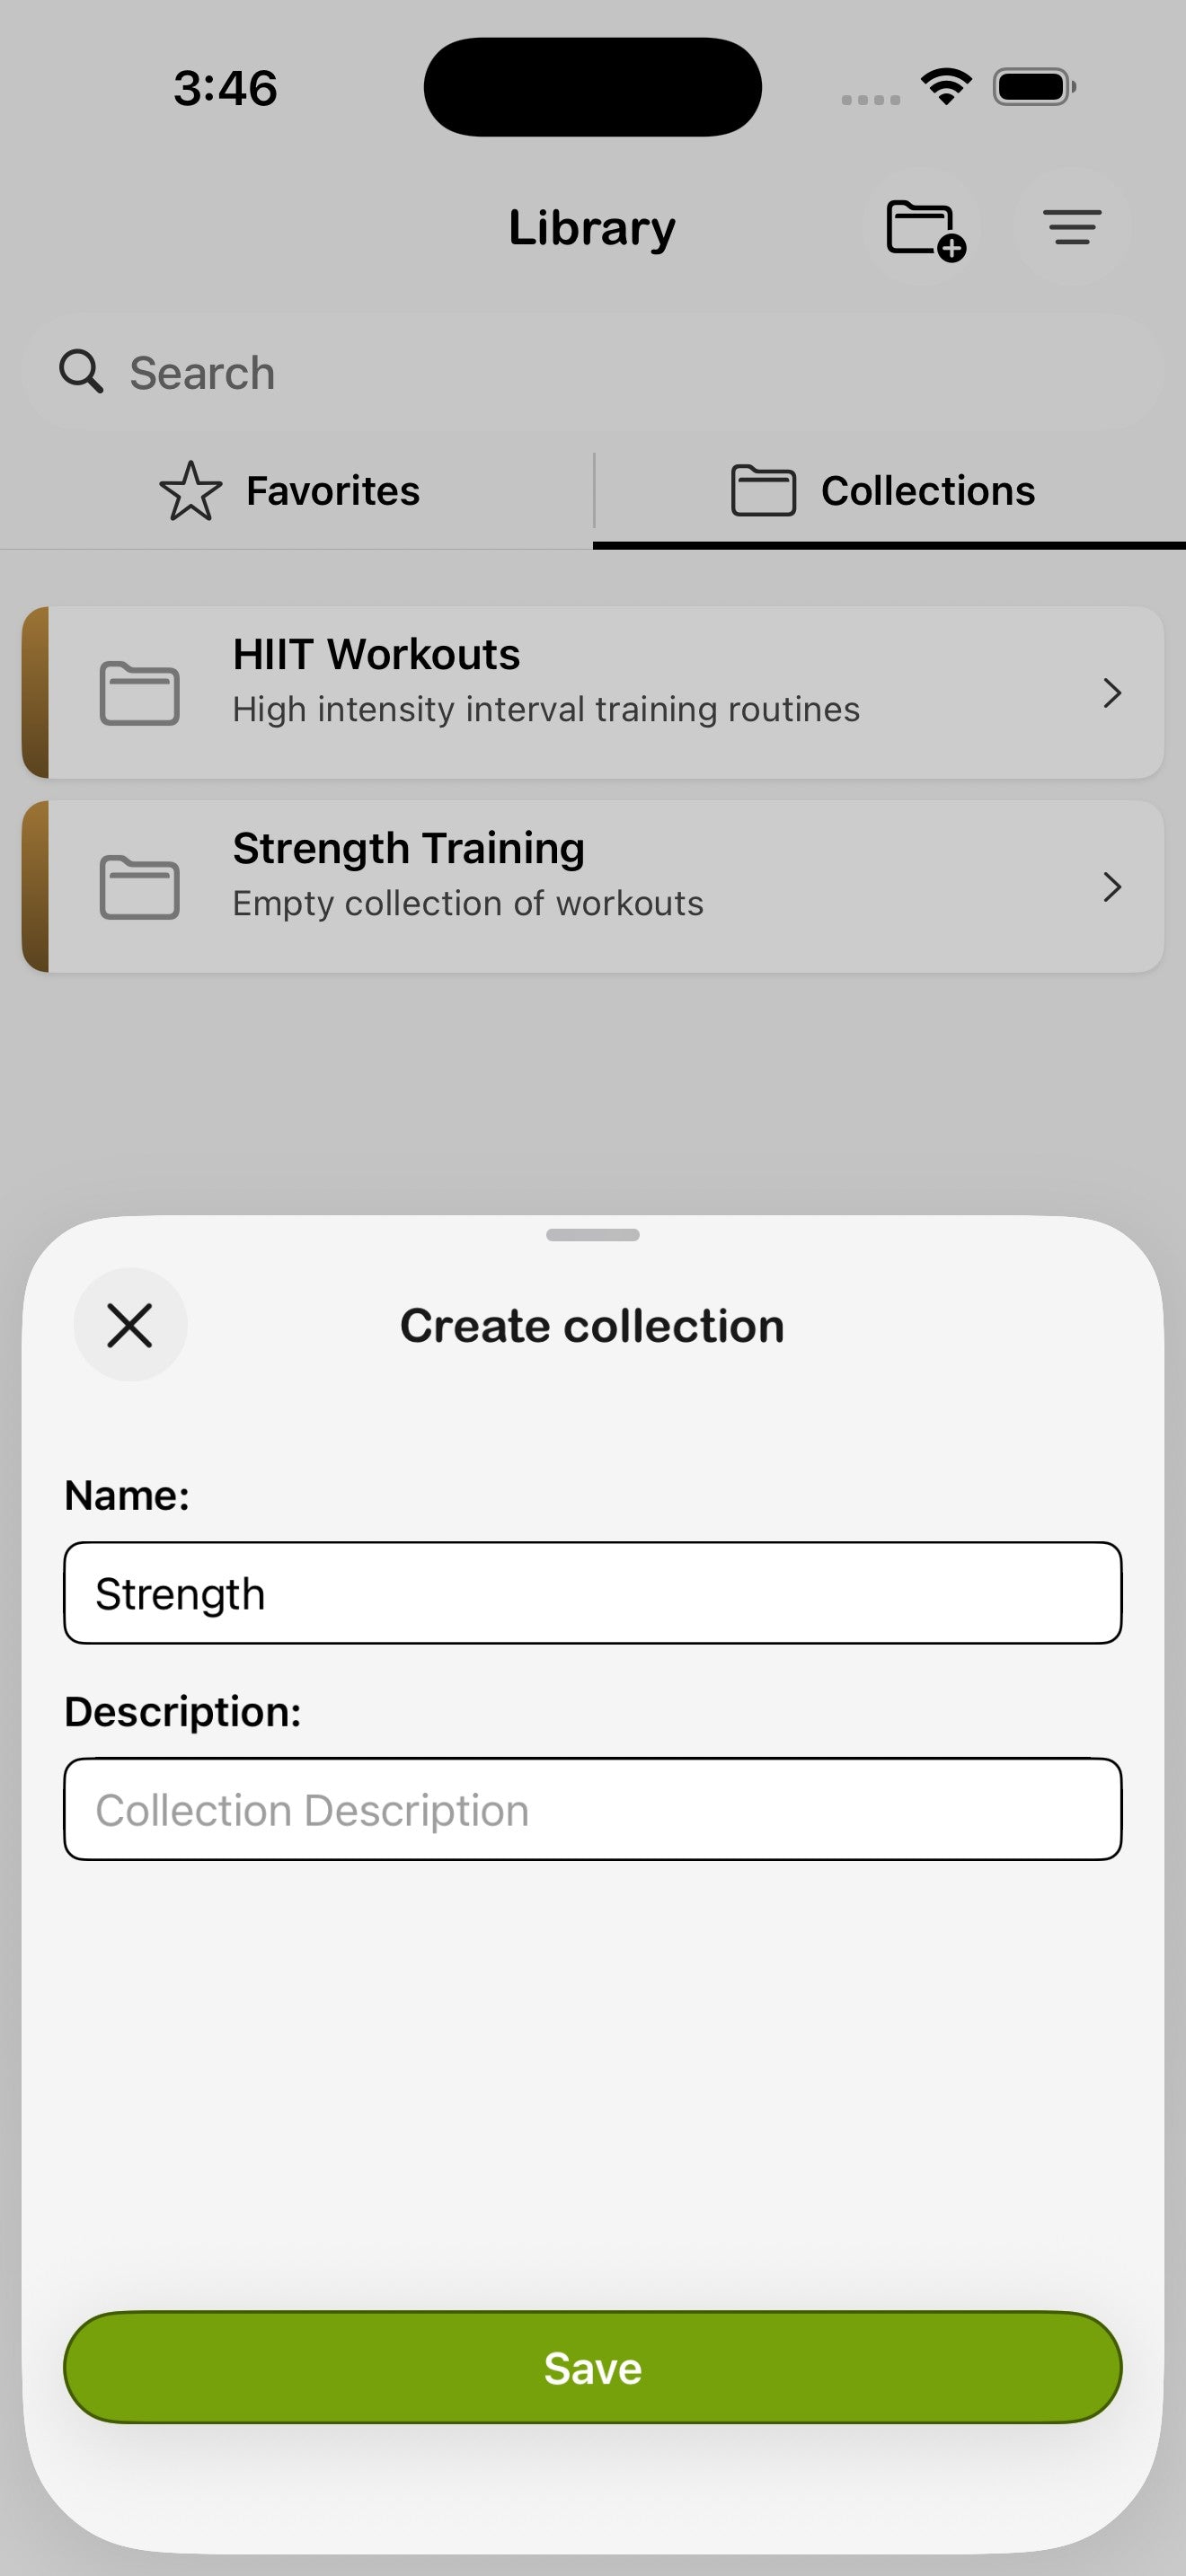

- Open the Library and switch to the Collections tab.
- Tap the folder-plus icon at the top right.
- Give the collection a name (e.g. Strength) and an optional description, then tap Save.
- Open the collection and tap + to add workouts to it.
Edit, duplicate, or delete a workout
Open any saved workout and tap the menu icon (≡) in the top-right to access its full action set:
- Edit details — change the name or description.
- Preview — see a structured breakdown of the workout.
- Create timer — start a new timer using this workout's settings.
- Add to plan — schedule it on a day in the Planning tab.
- Save to collections — add it to a collection.
- Share workout — see Sharing.
- Duplicate — copy as a starting point for a variation.
- Delete — move to the recoverable trash (kept 30 days).
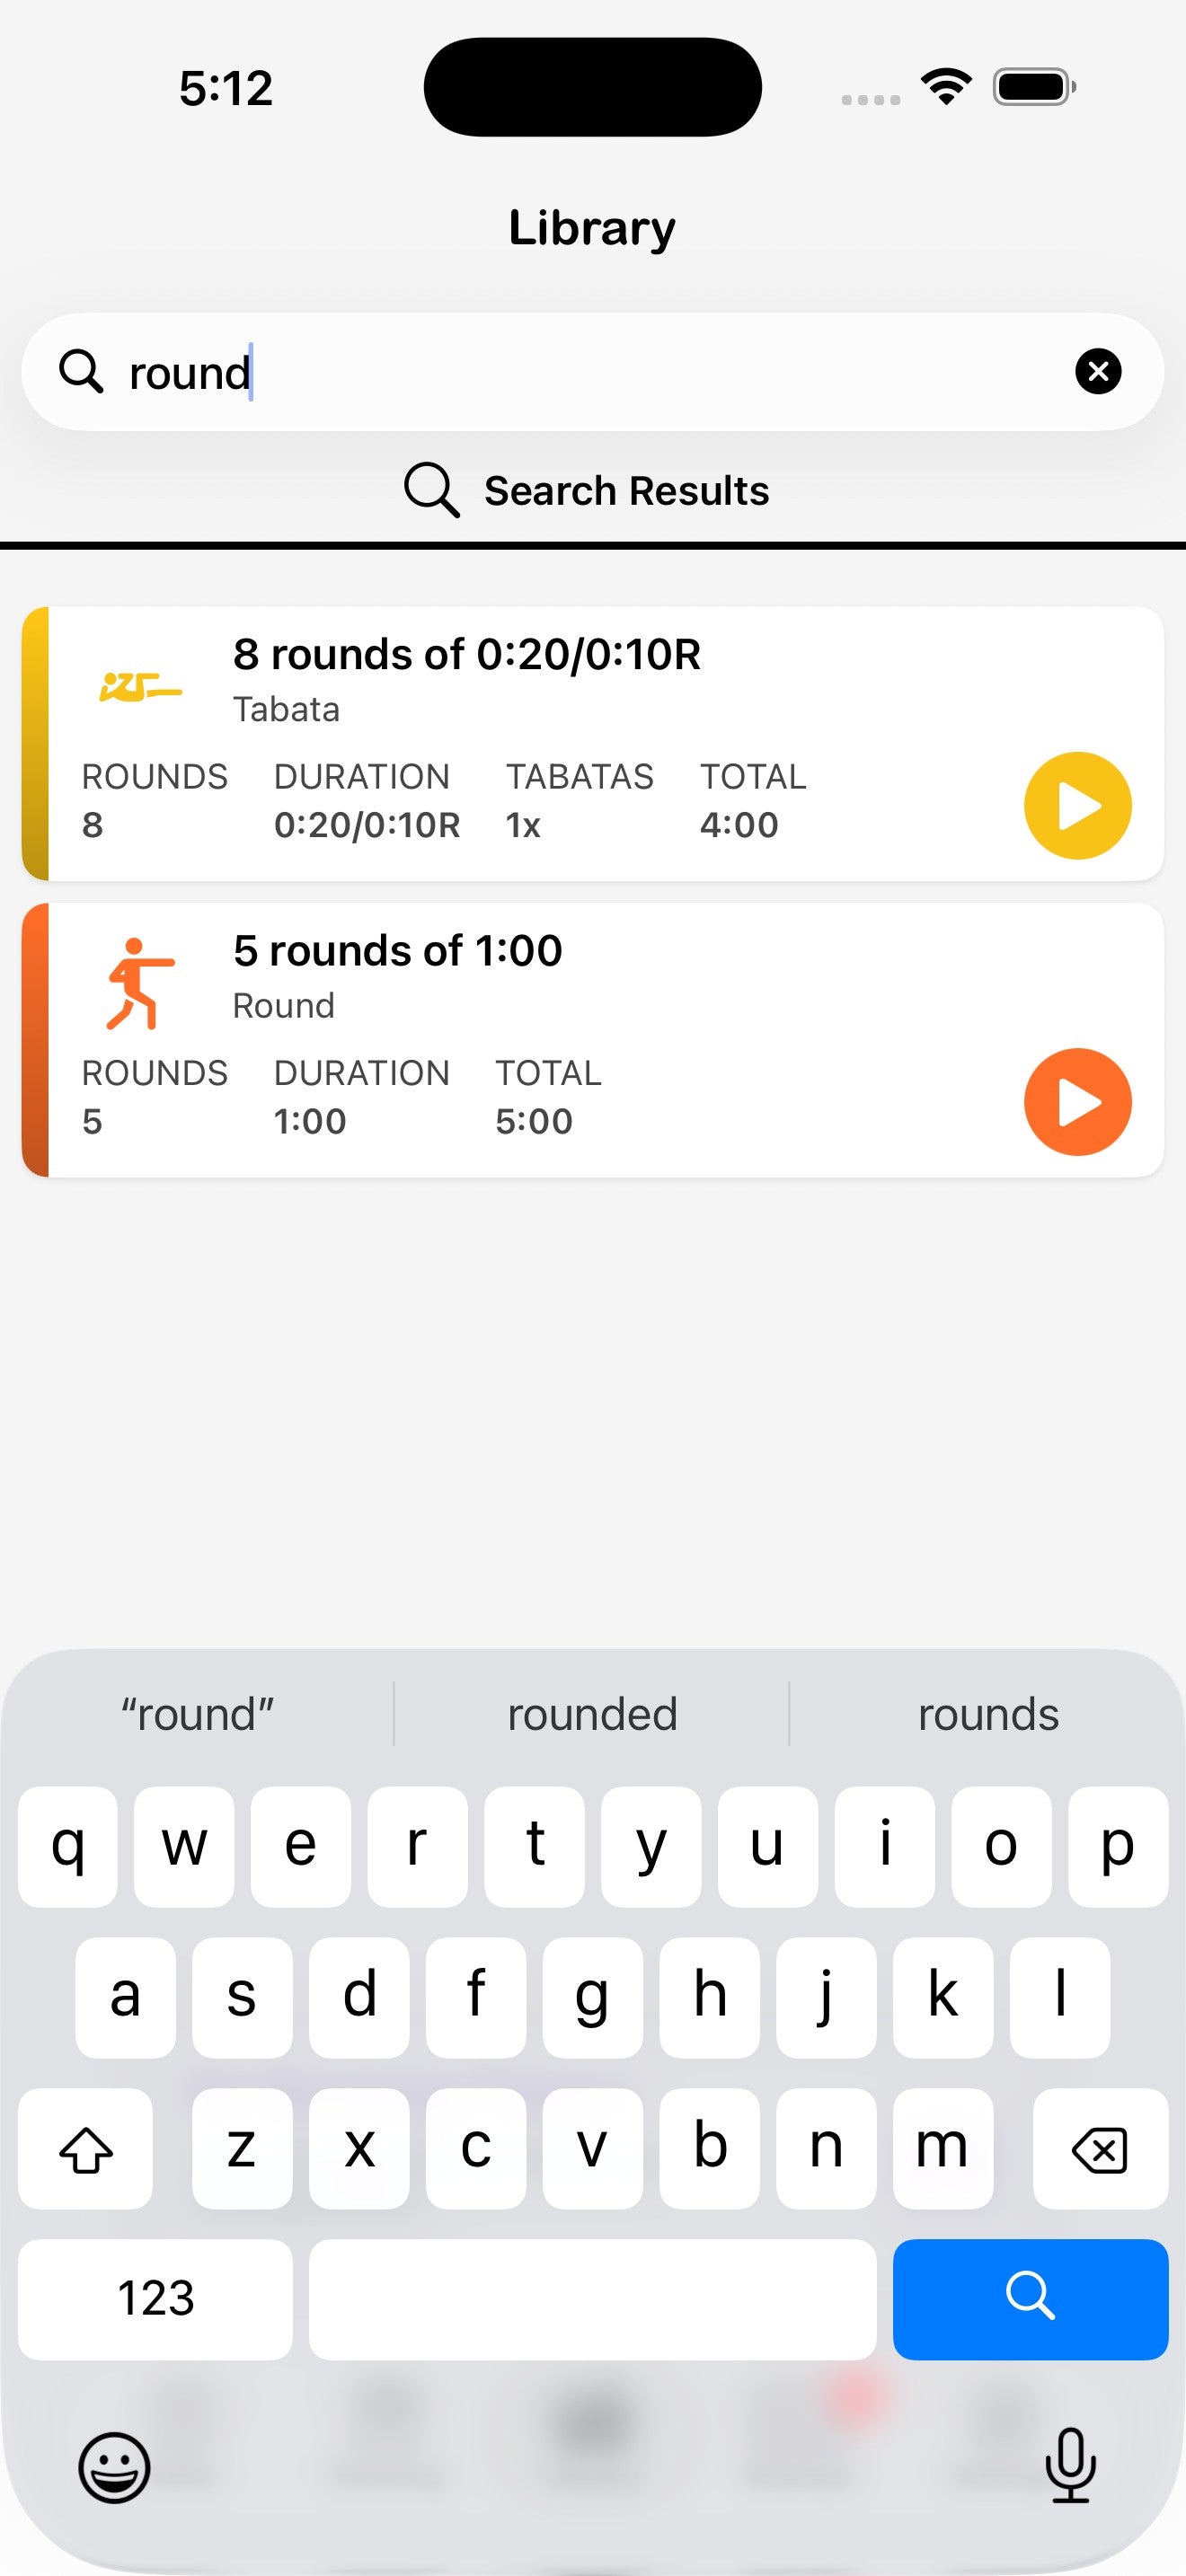
Search
The search bar at the top of the Library searches both Favorites and Collections by name. Start typing and matches appear as a single combined list — collections show with their folder icon, individual workouts show with their timer icon.
13. Sharing workouts & collections
Every workout and collection has a short share code. Send it to anyone running Flex Timer and they can import the same setup with one tap, or redeem the code by hand.
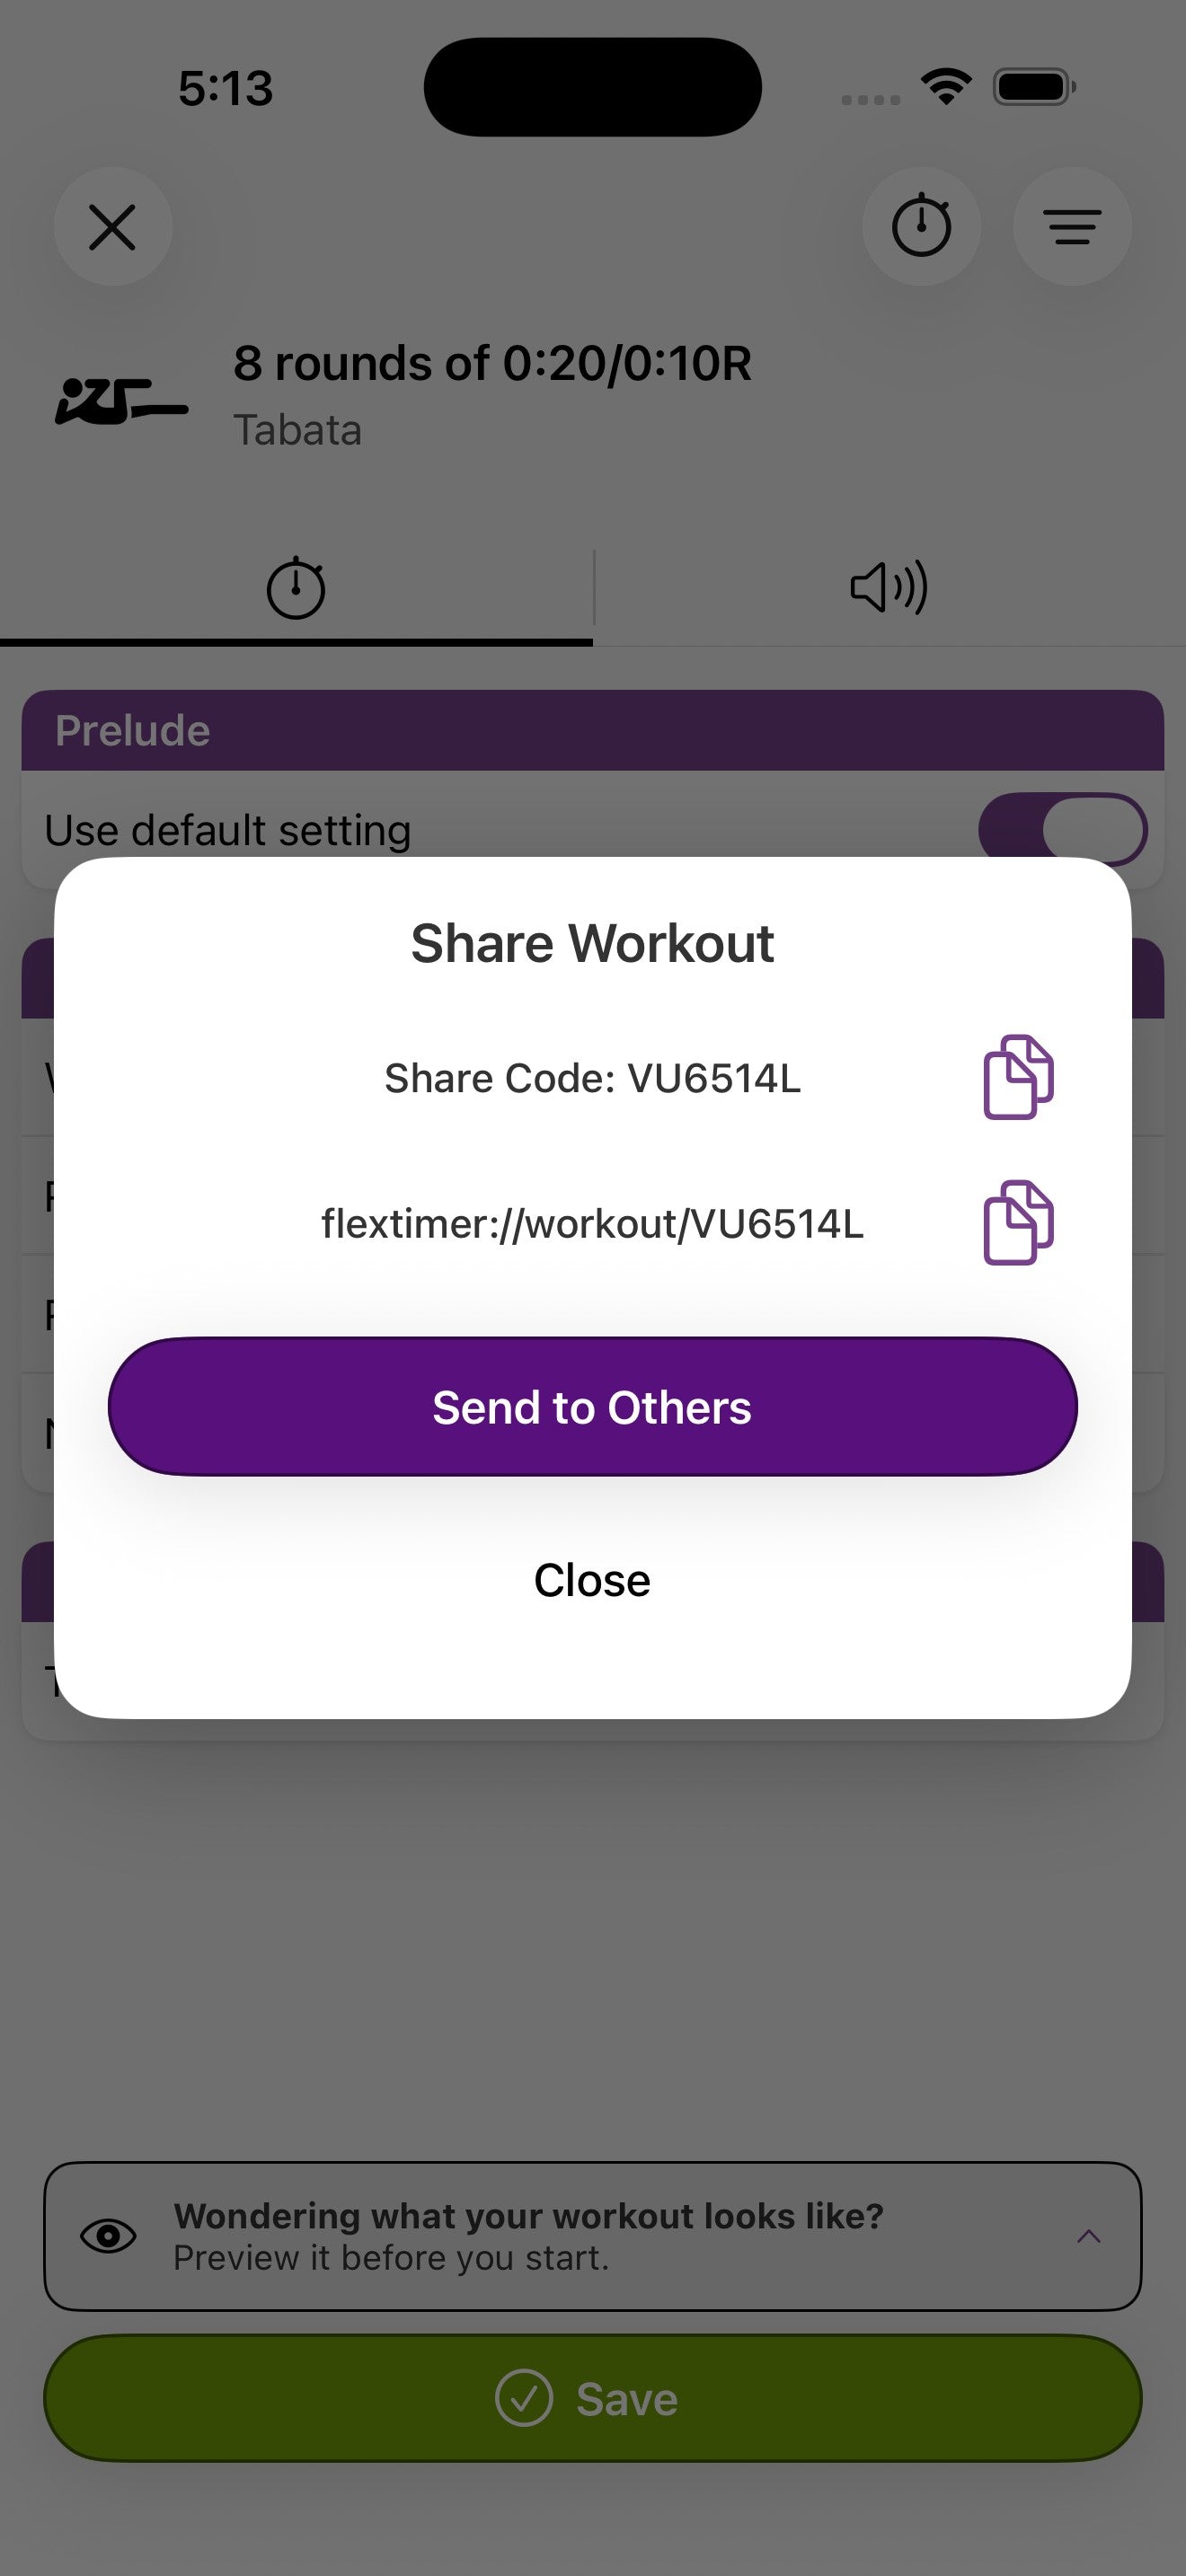

Share a workout
- Open the workout from the Library or its config screen.
- Tap the menu icon and choose Share workout.
- Tap the copy icons next to the Share Code or the flextimer:// link to copy them, or tap Send to Others to use the iOS share sheet.
Share a collection
Same flow, but on the collection itself: open the collection, tap its menu, and choose Share collection. The recipient gets every workout in the collection in one shot.
Redeem a share code
On the receiving device, open the share link (it deep-links straight into the app), or paste the share code in the Library — pick the destination based on what you're importing:
- To import a single workout, paste the code in Library → Favorites. The workout is added to your favorites.
- To import a collection as a brand-new entry, paste the code in Library → Collections. To import a workout into an existing collection, open the collection first (Library → Collections → [collection name]) and paste the code there.
VU6514L are designed to be read aloud or written on a whiteboard, useful for in-person classes.
14. Settings
The Settings tab in the bottom nav is the home for accounts, hardware, support, and storefront links. It's also the gateway into Preferences.
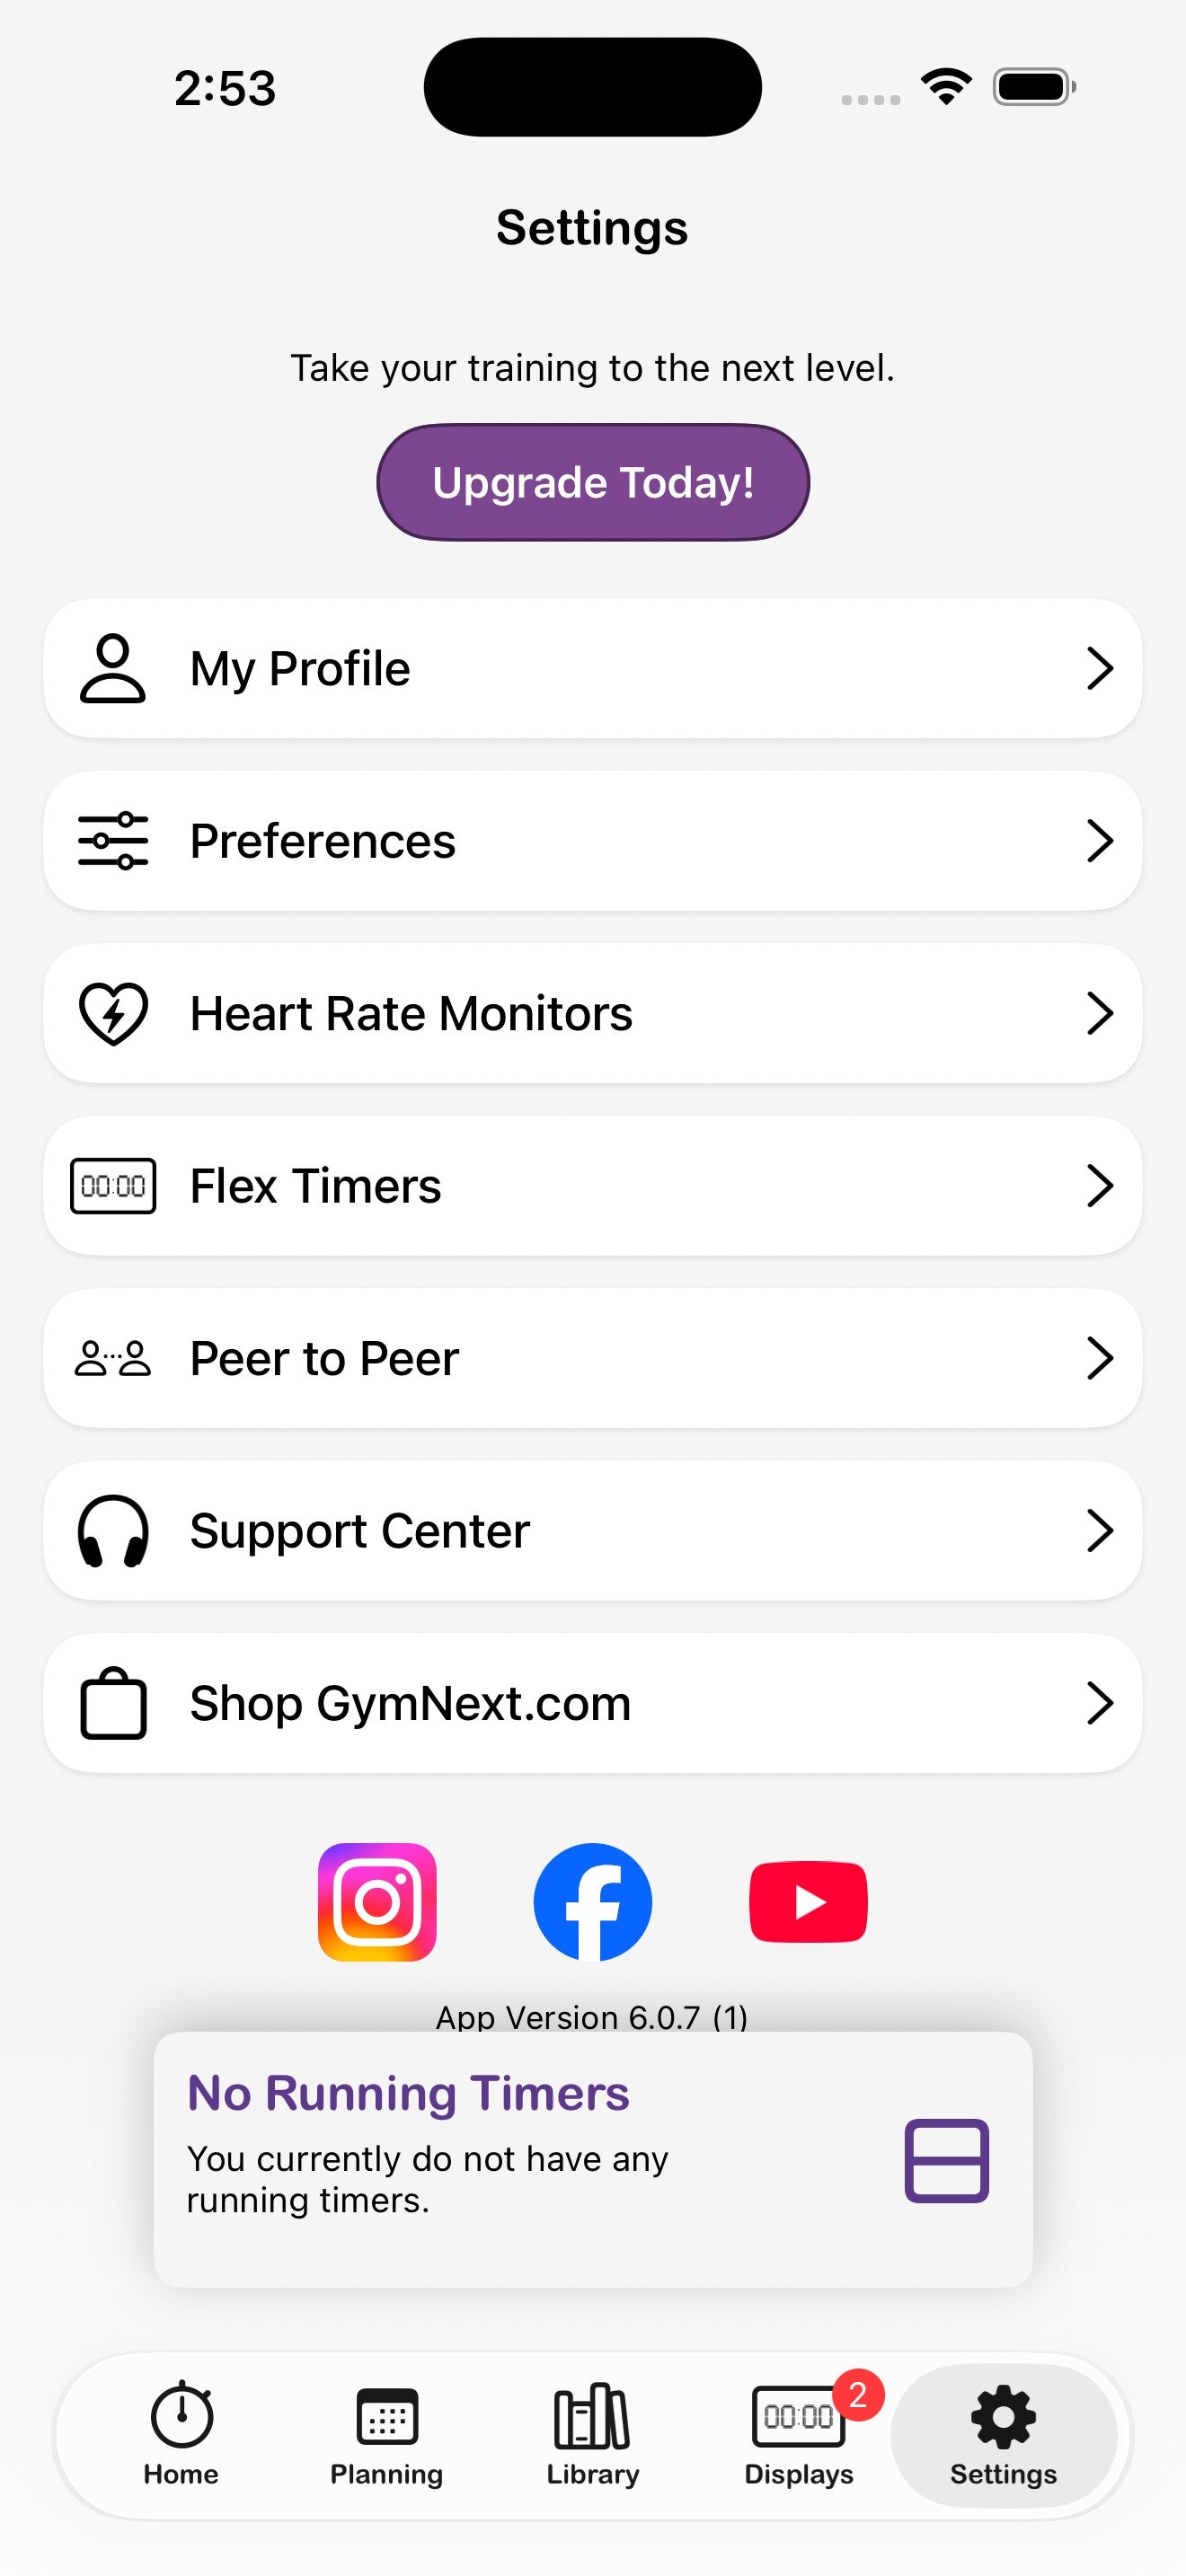
What's on the Settings screen
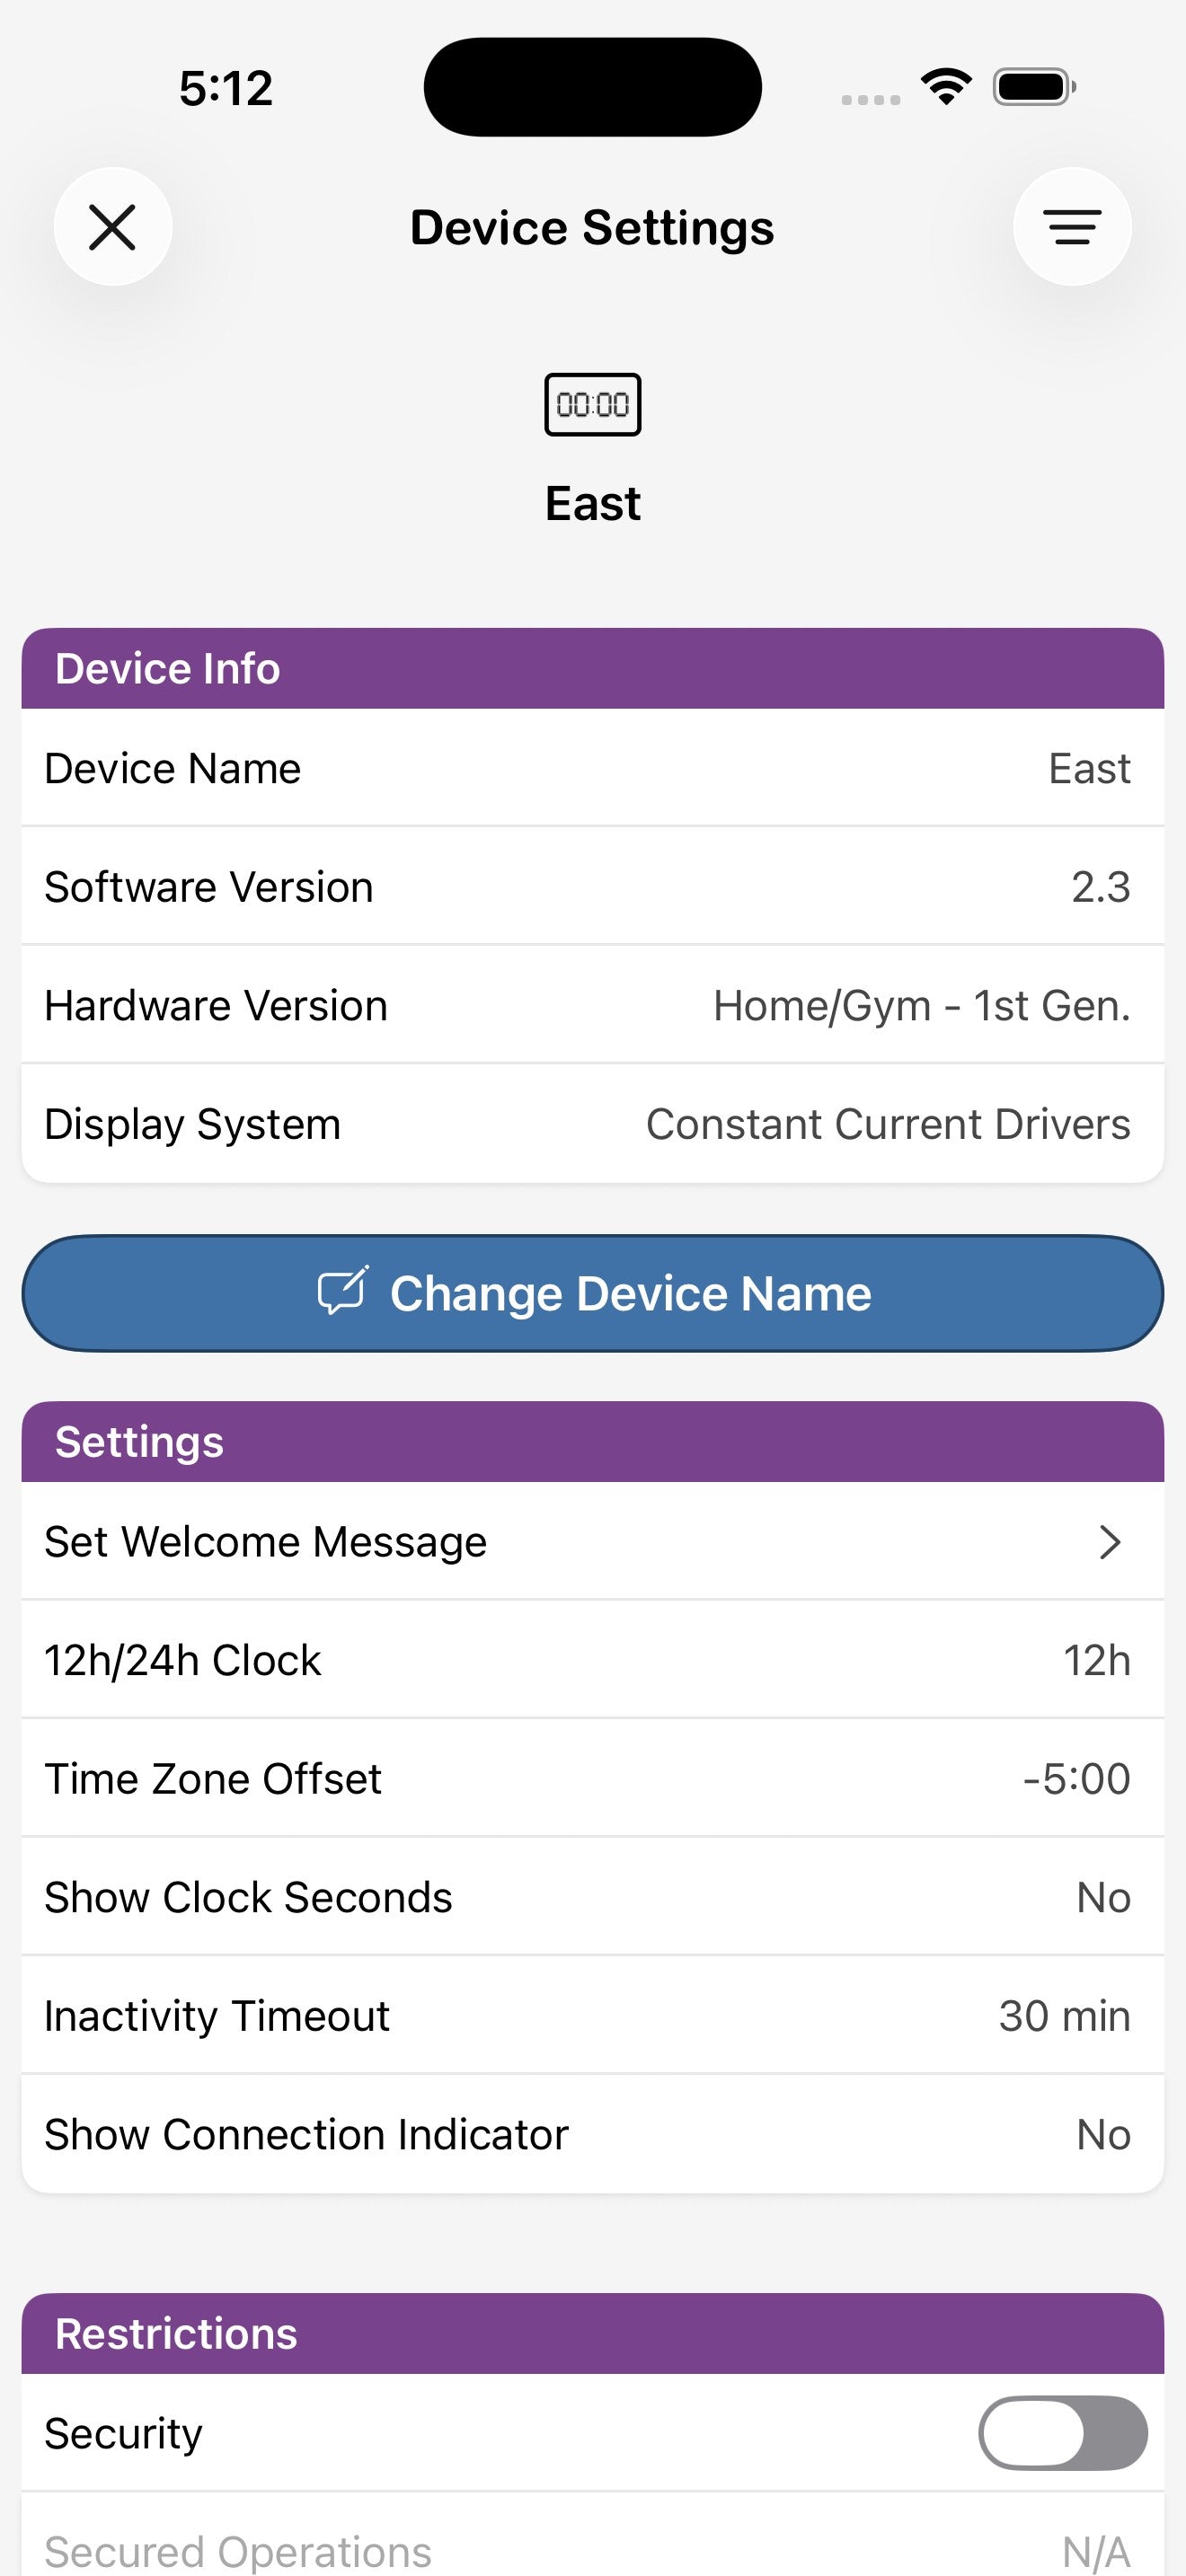
Per-display settings
Tap a Flex Timer in the displays list to open its Device Settings: rename it, set the 12 / 24-hour clock, time-zone offset, inactivity timeout, security restrictions, and run a system test. Use Factory Reset as a last resort — it wipes all per-device settings.
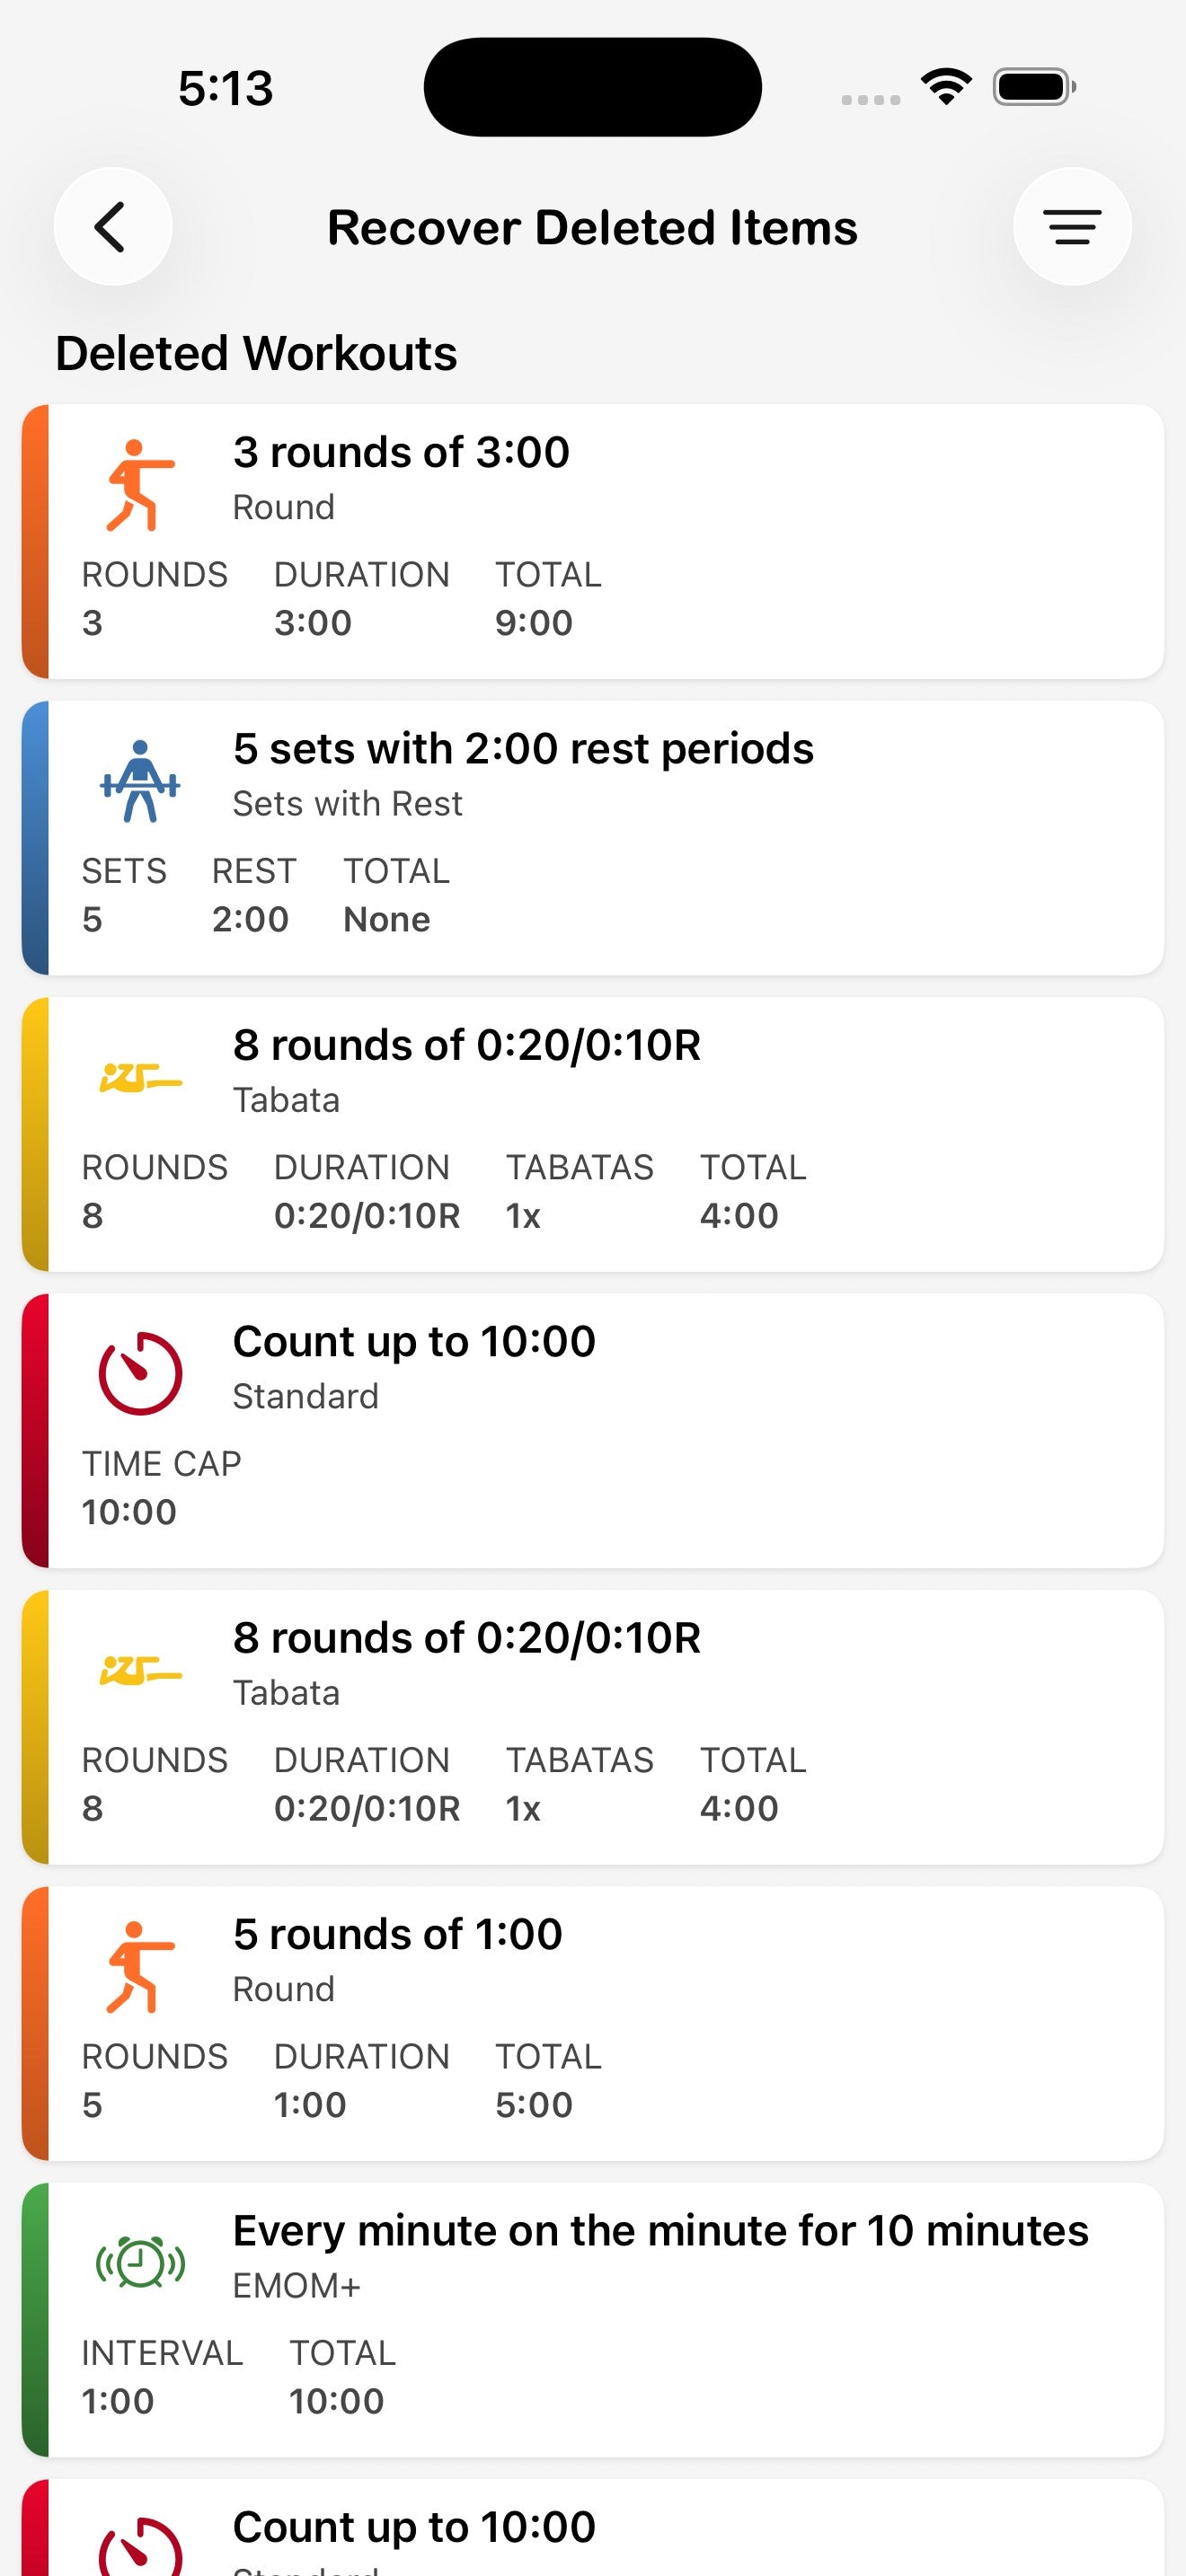
Recover deleted items
Anything you delete — workouts, collections, plans — is held for 30 days before it's permanently removed. Open Recover Deleted Items from Settings to restore them, and to surface any orphaned workouts (workouts no longer attached to a collection).
15. Preferences
Open Settings → Preferences for the deep configuration of how the app looks, sounds, and behaves. Five sections cover everything.
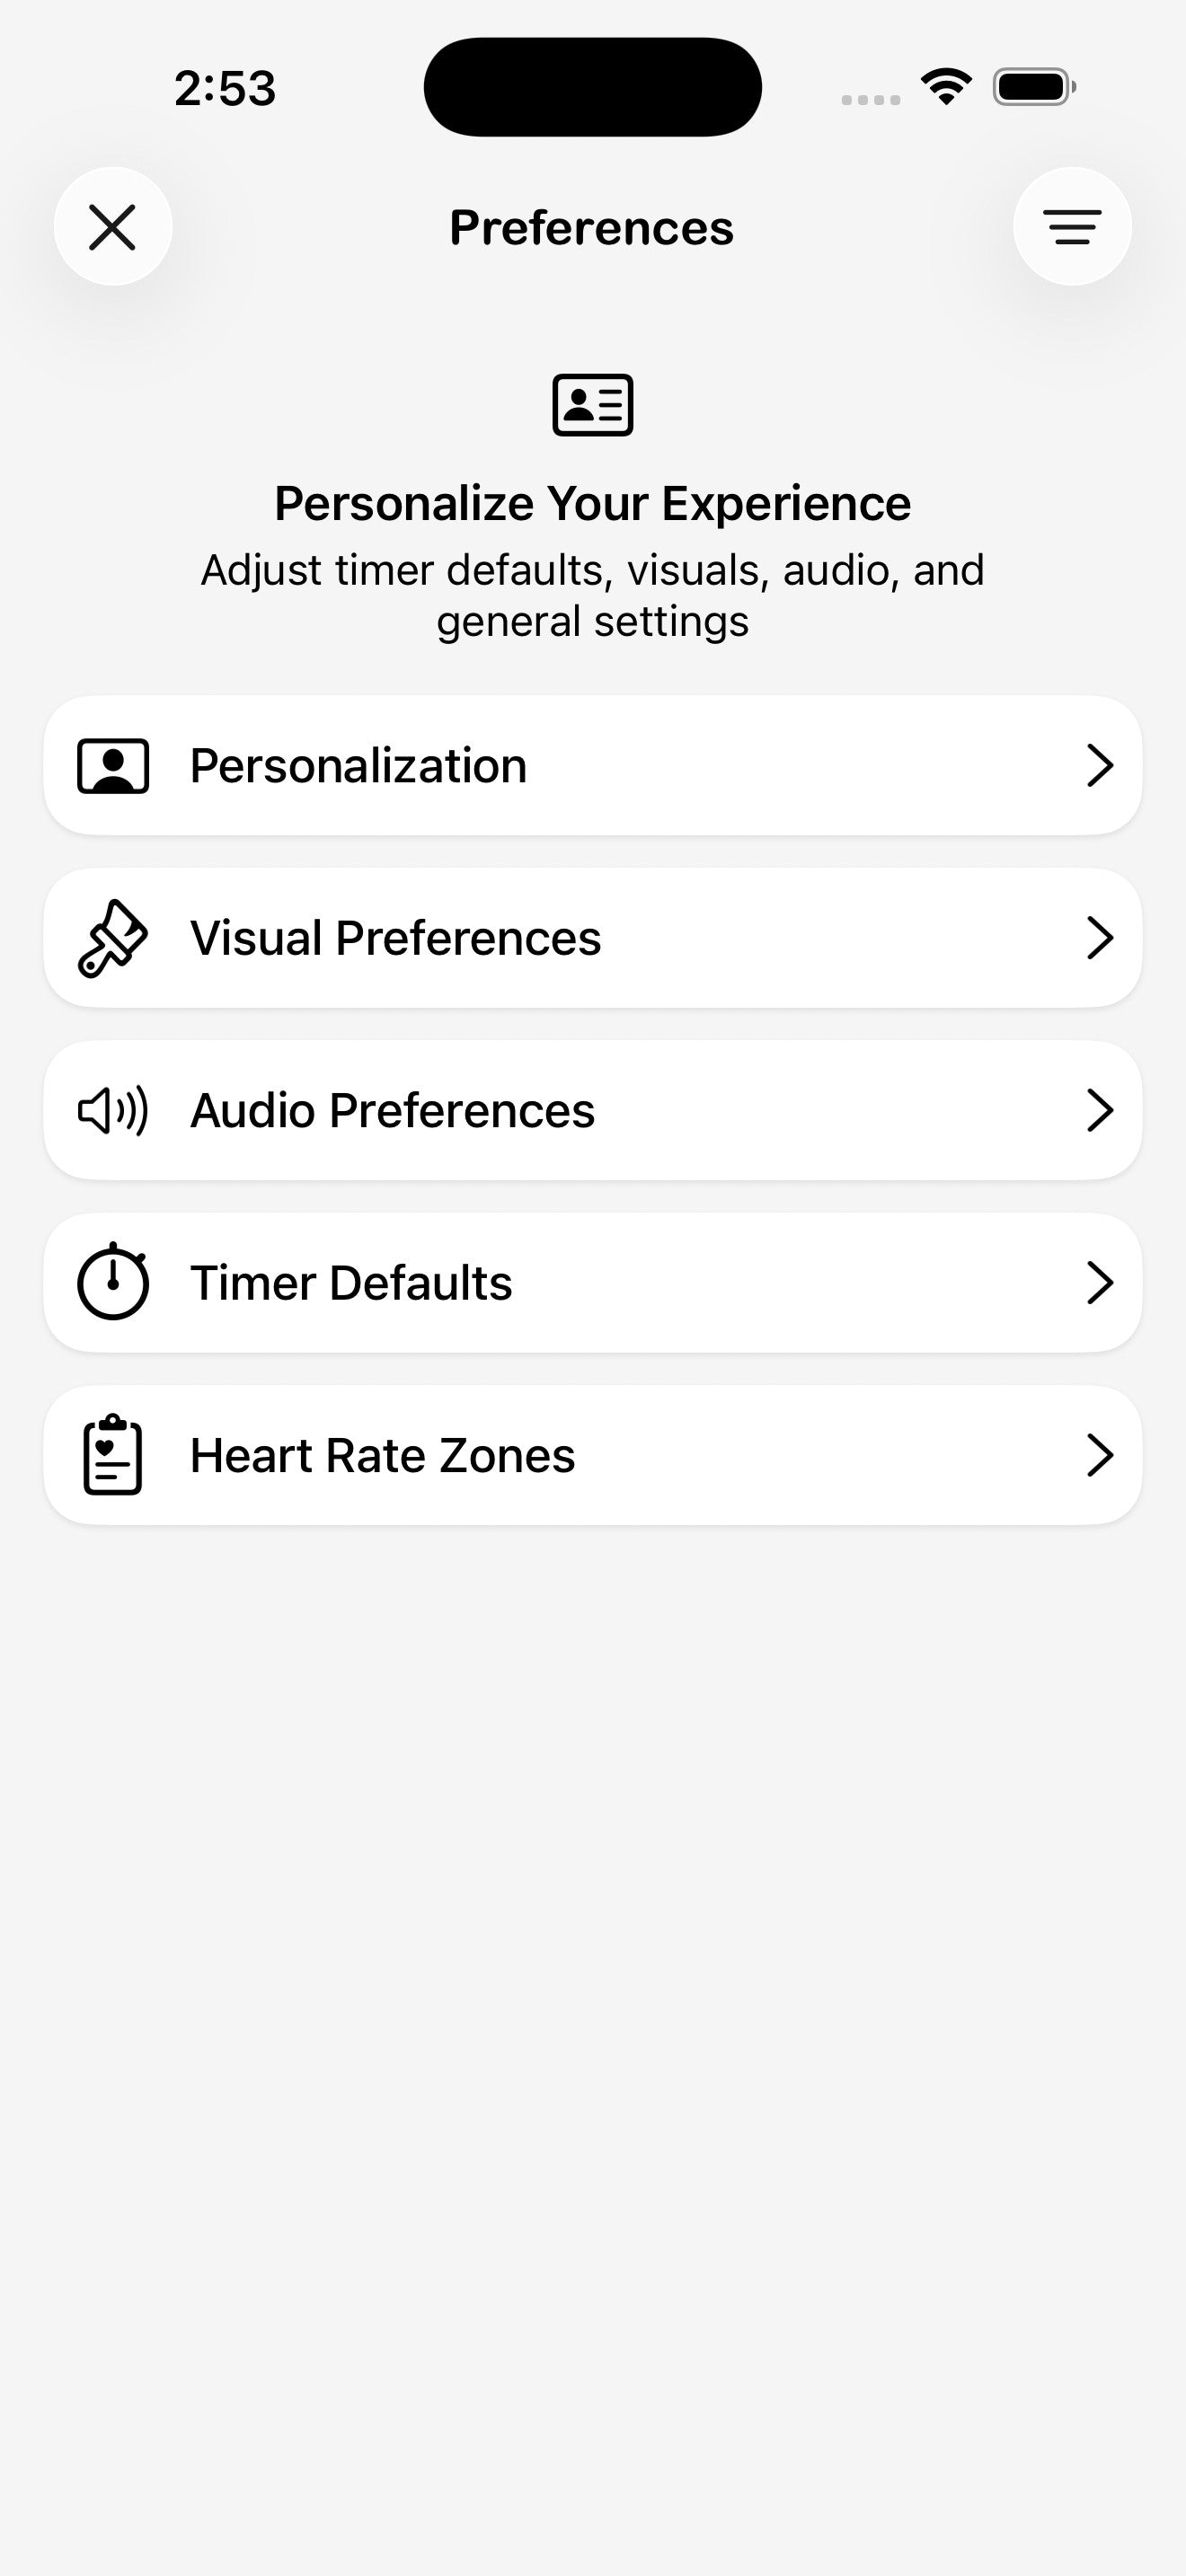
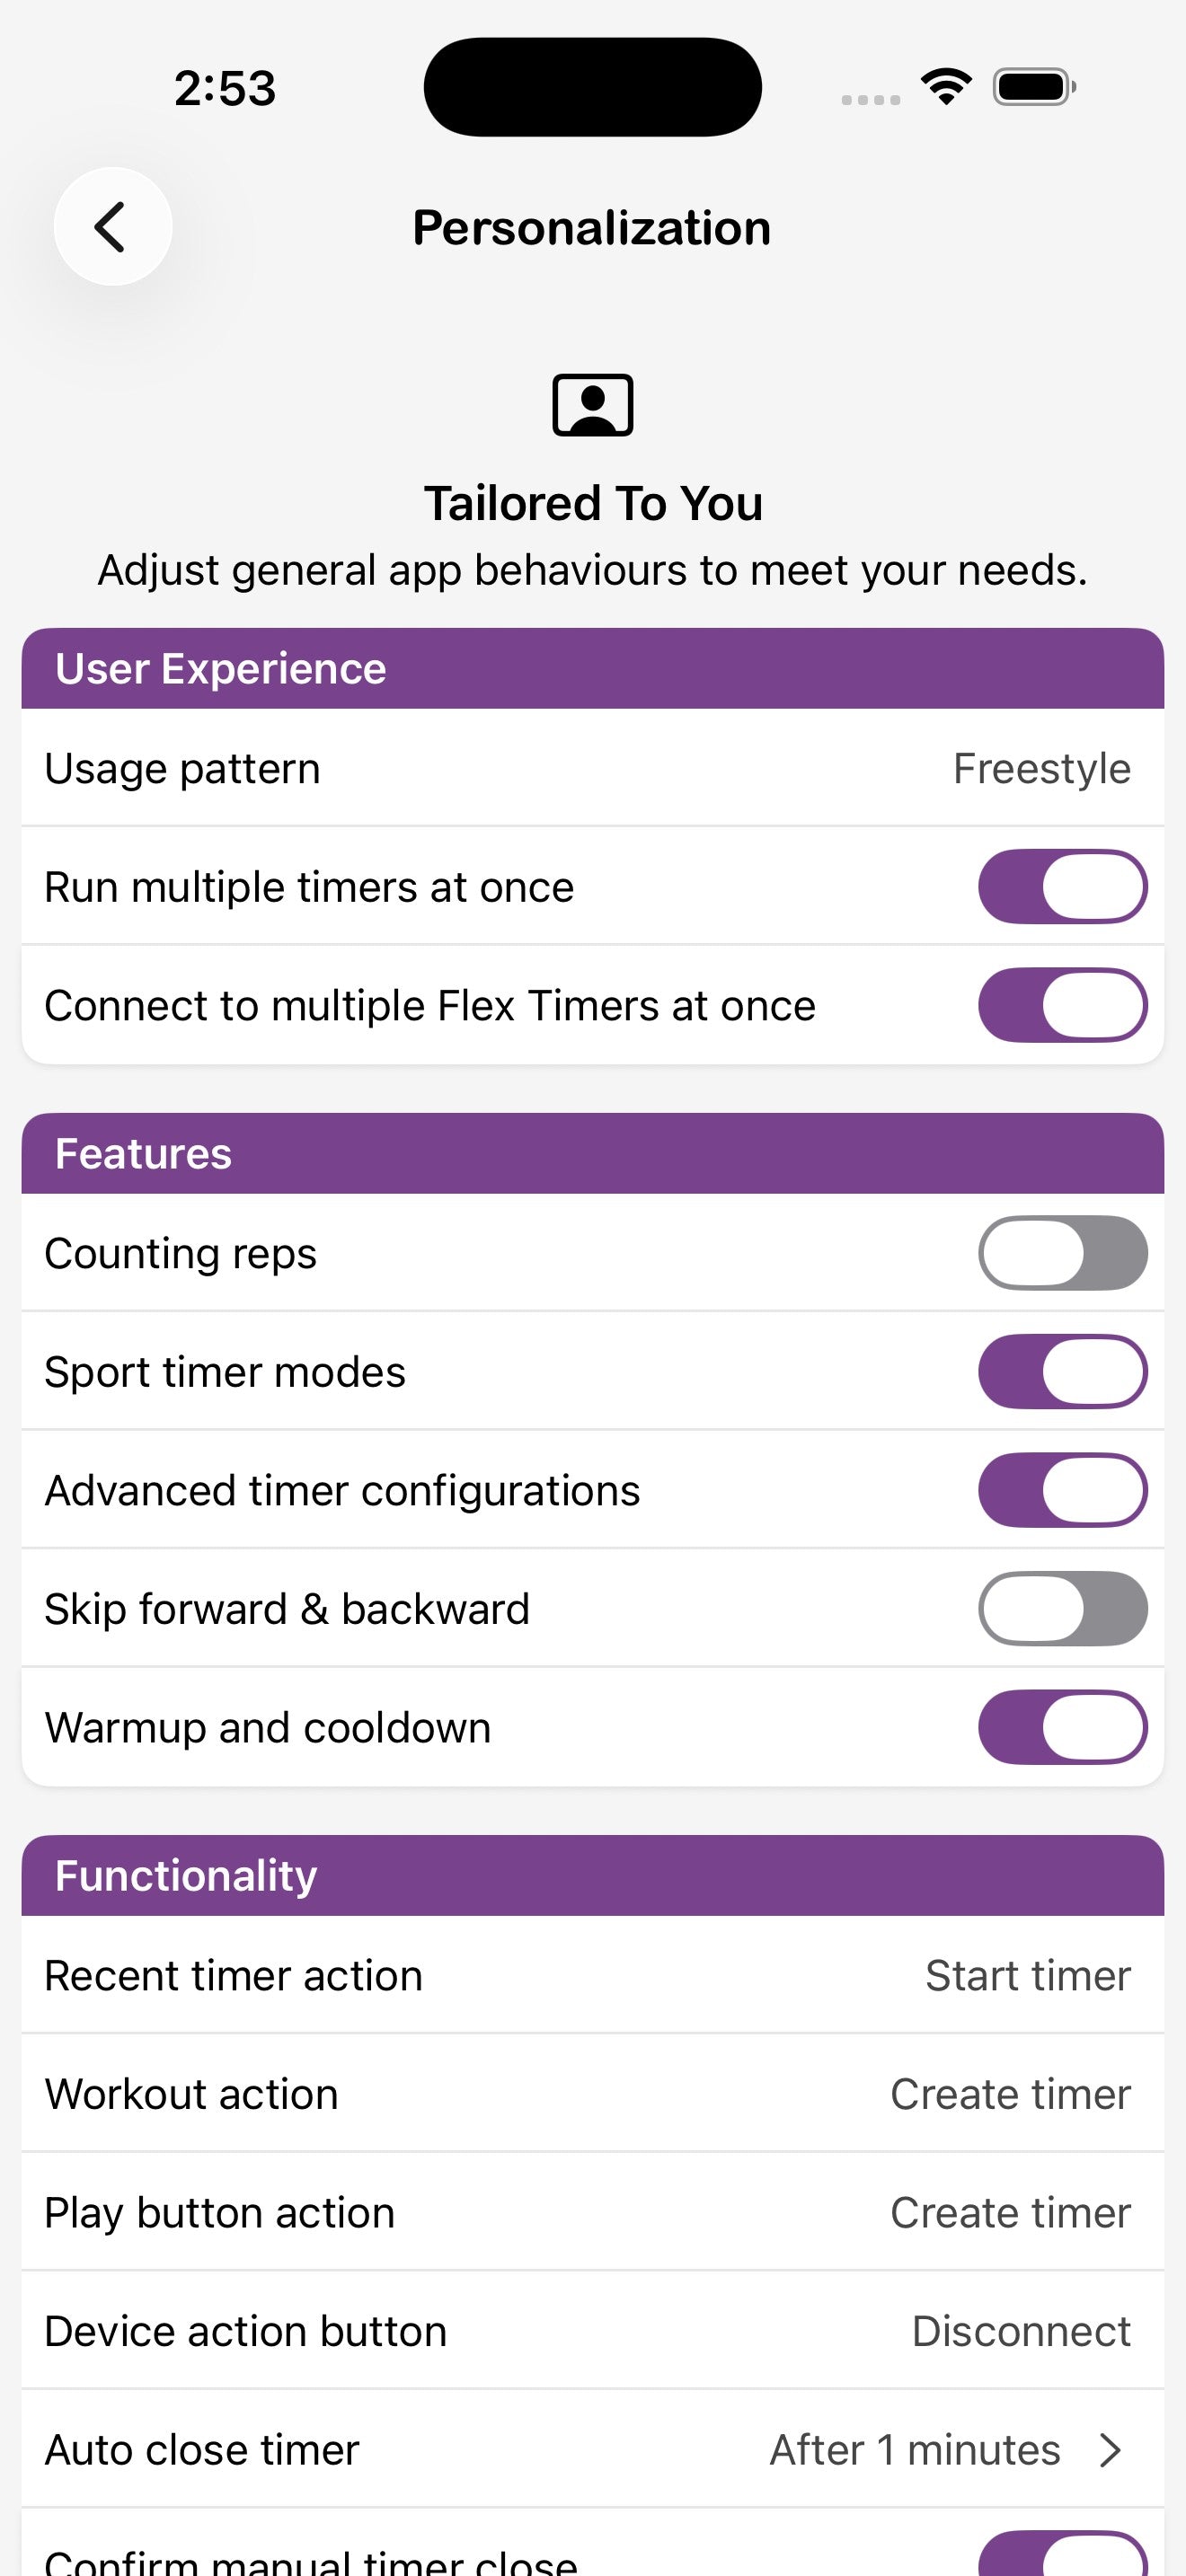
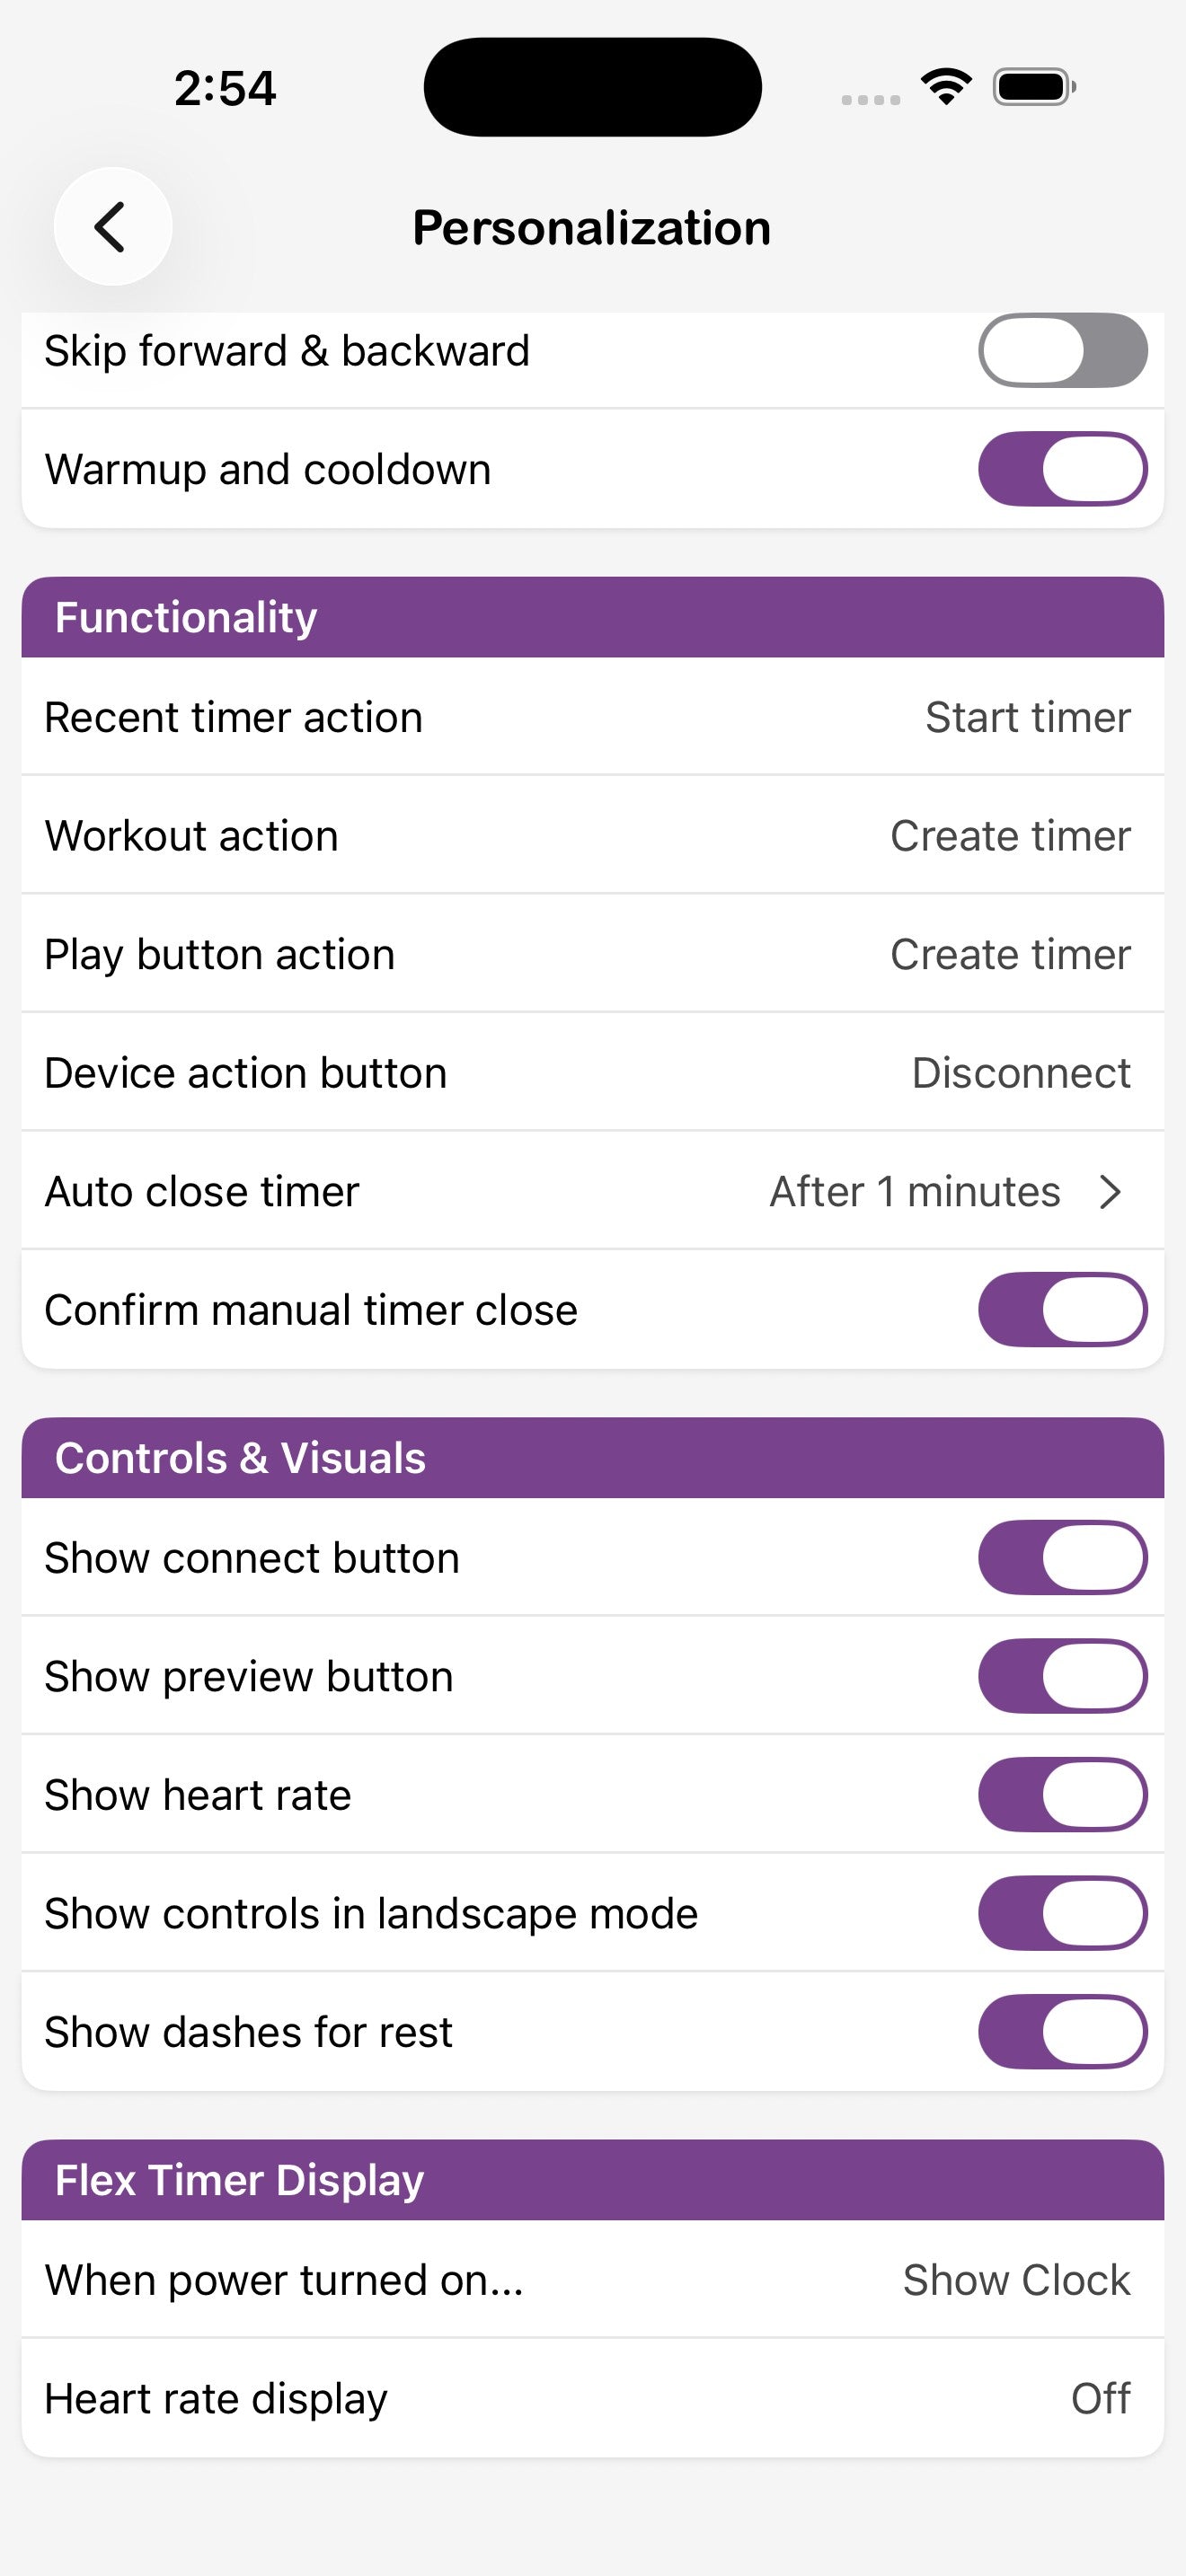
Personalization
Timer Defaults
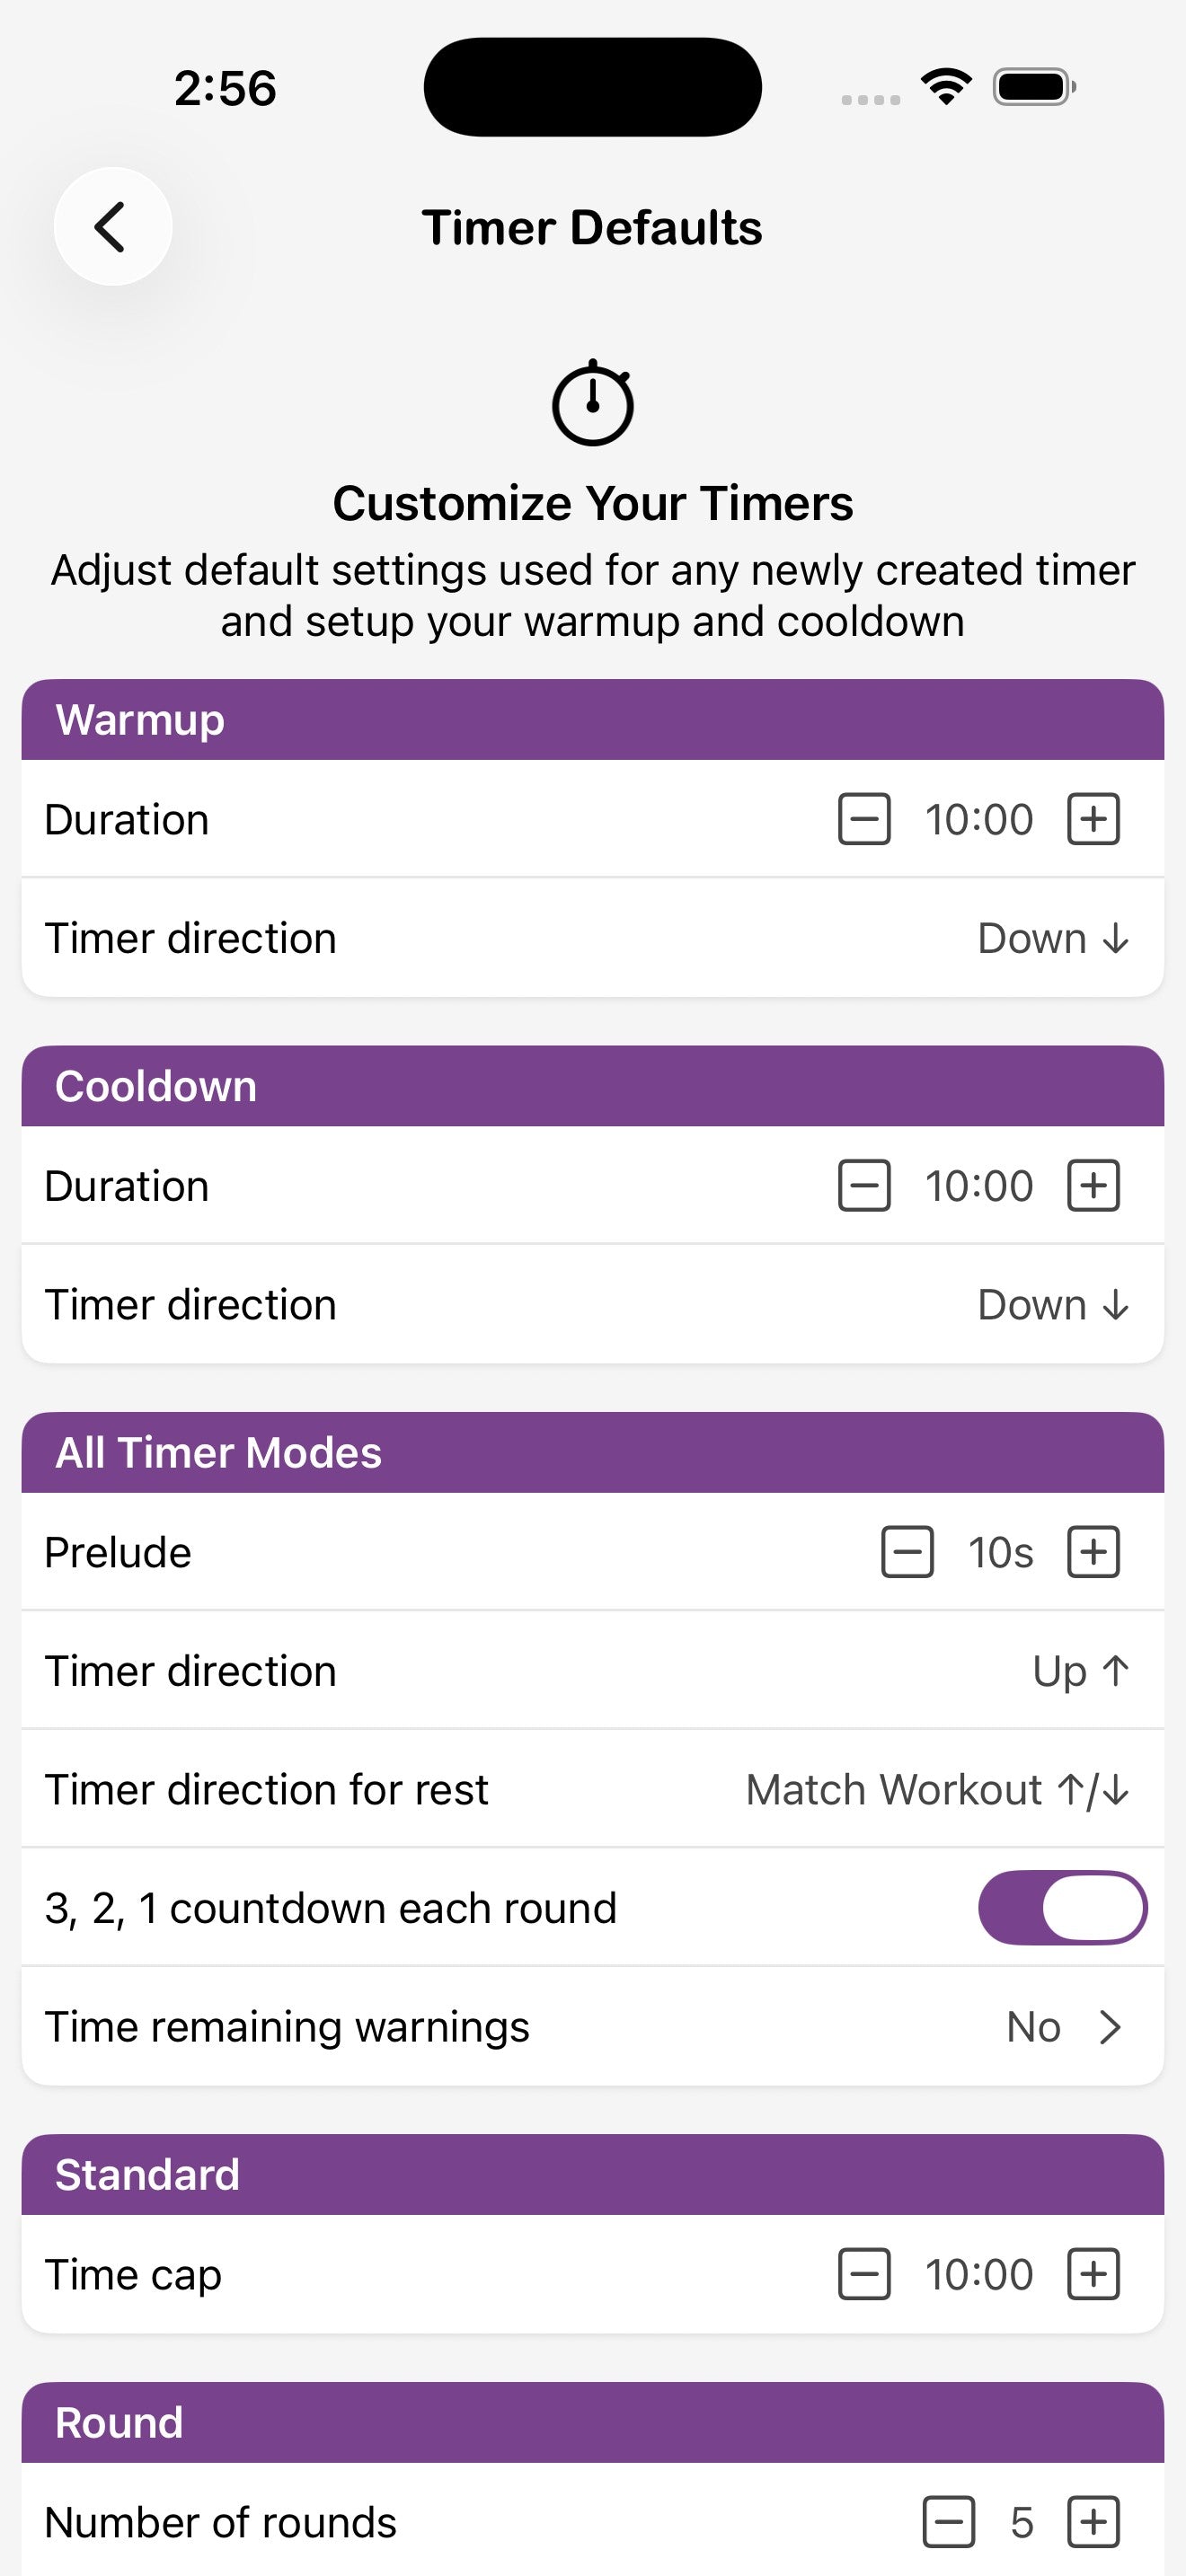
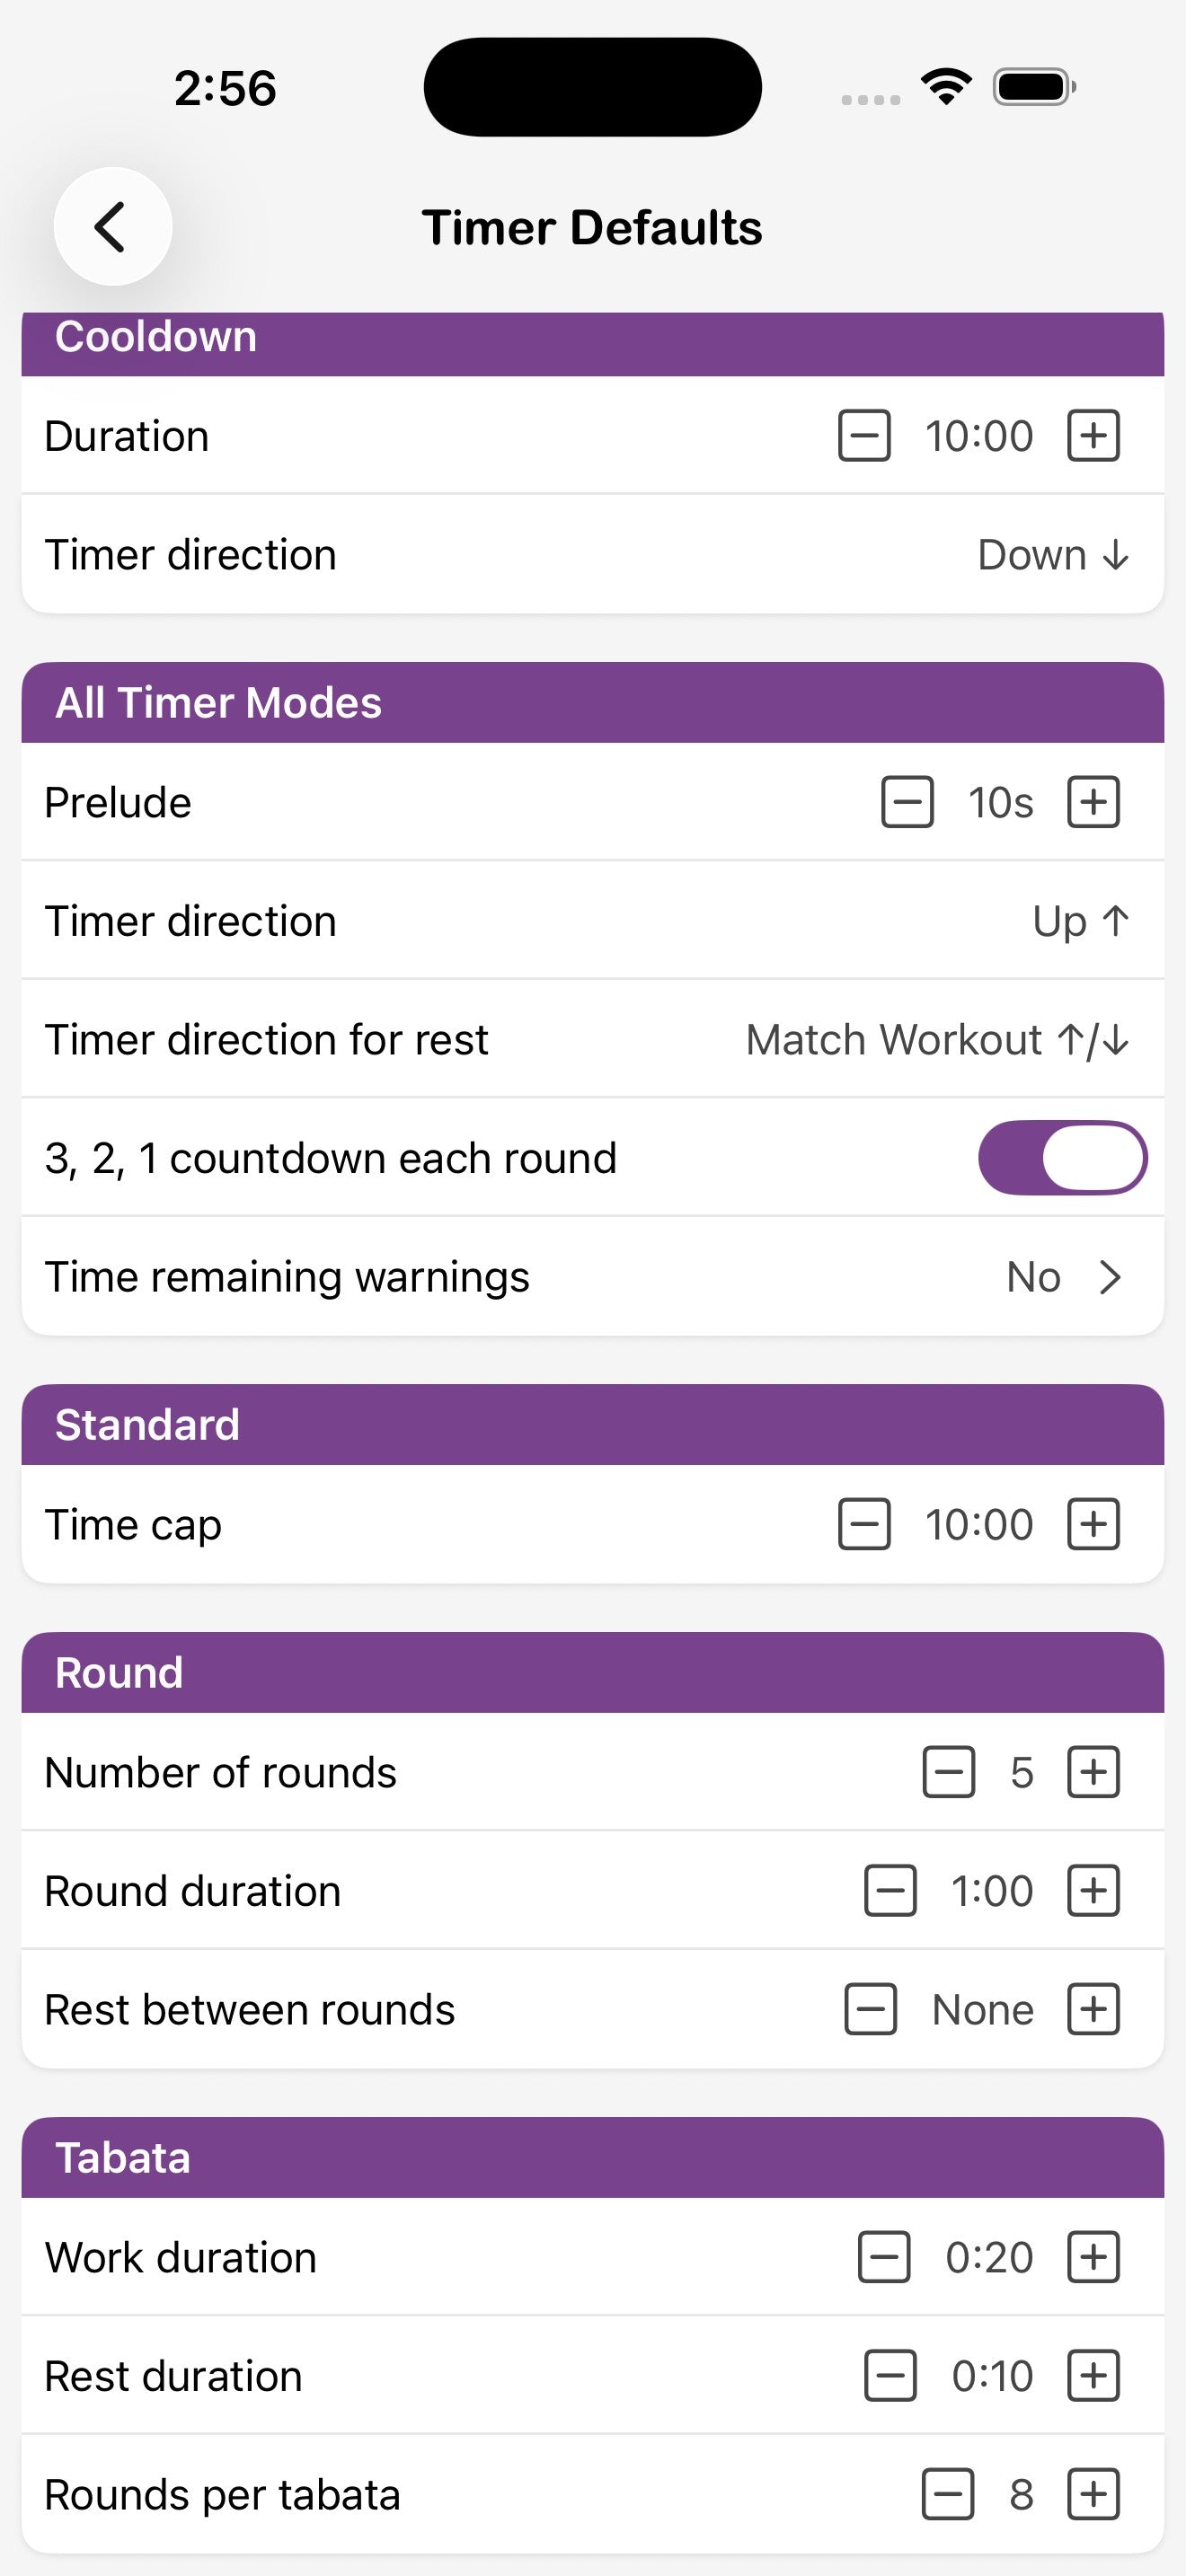
Set the default duration and direction for Warmup and Cooldown, the default prelude for every other mode, and the starting values for each timer type. Anything you set here is applied to every newly created timer of that type.
Visual Preferences
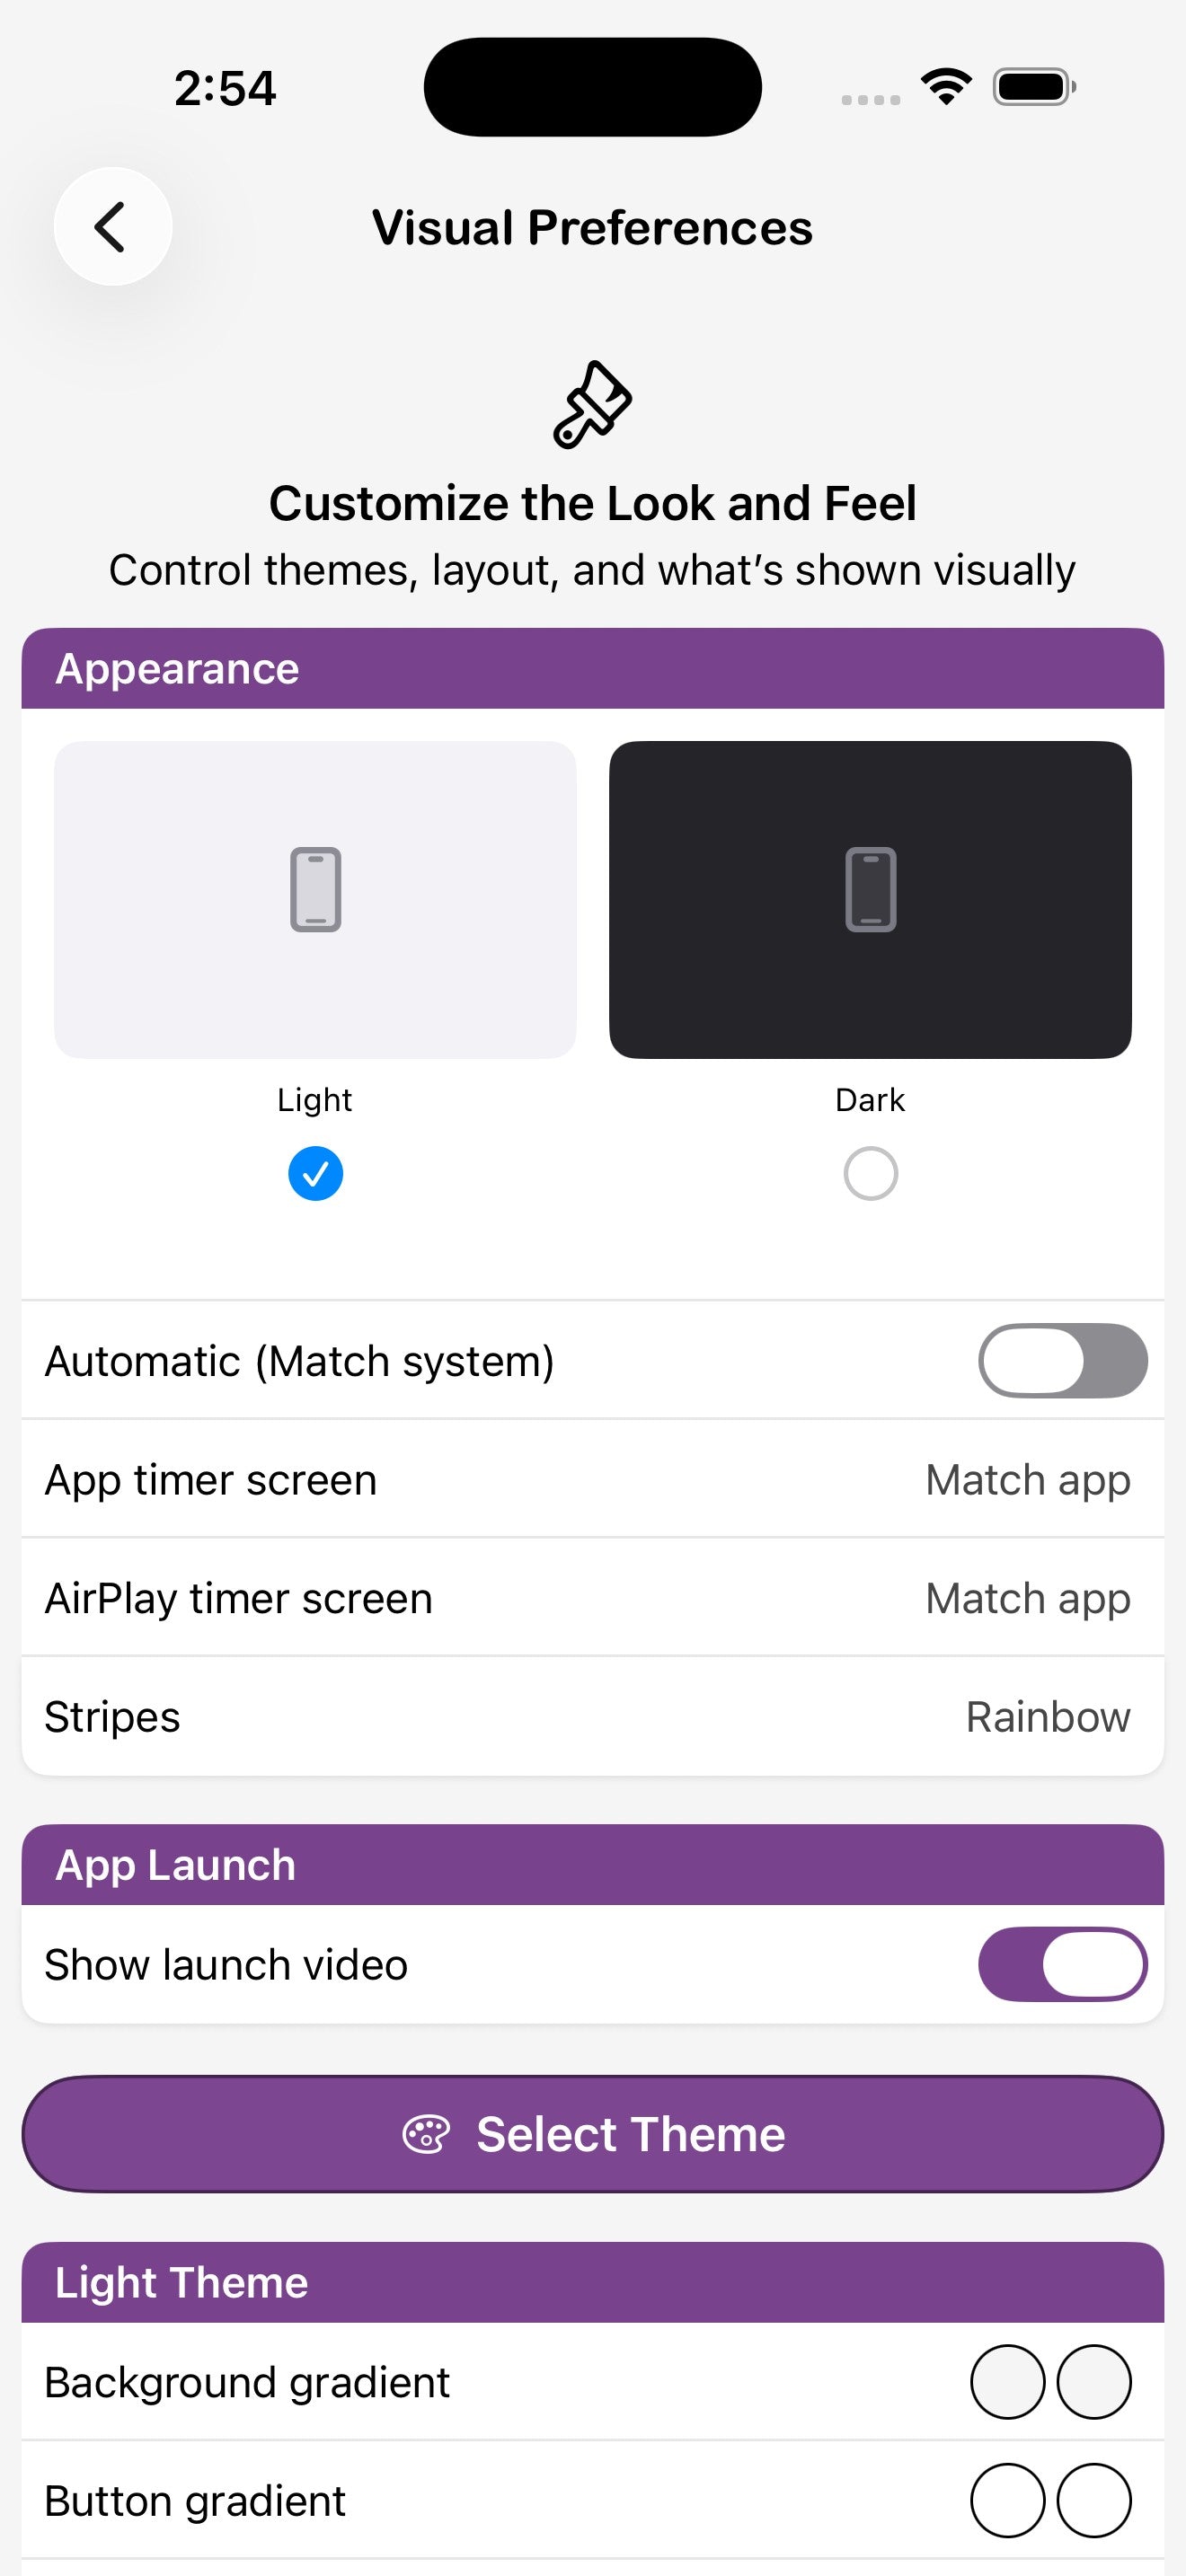
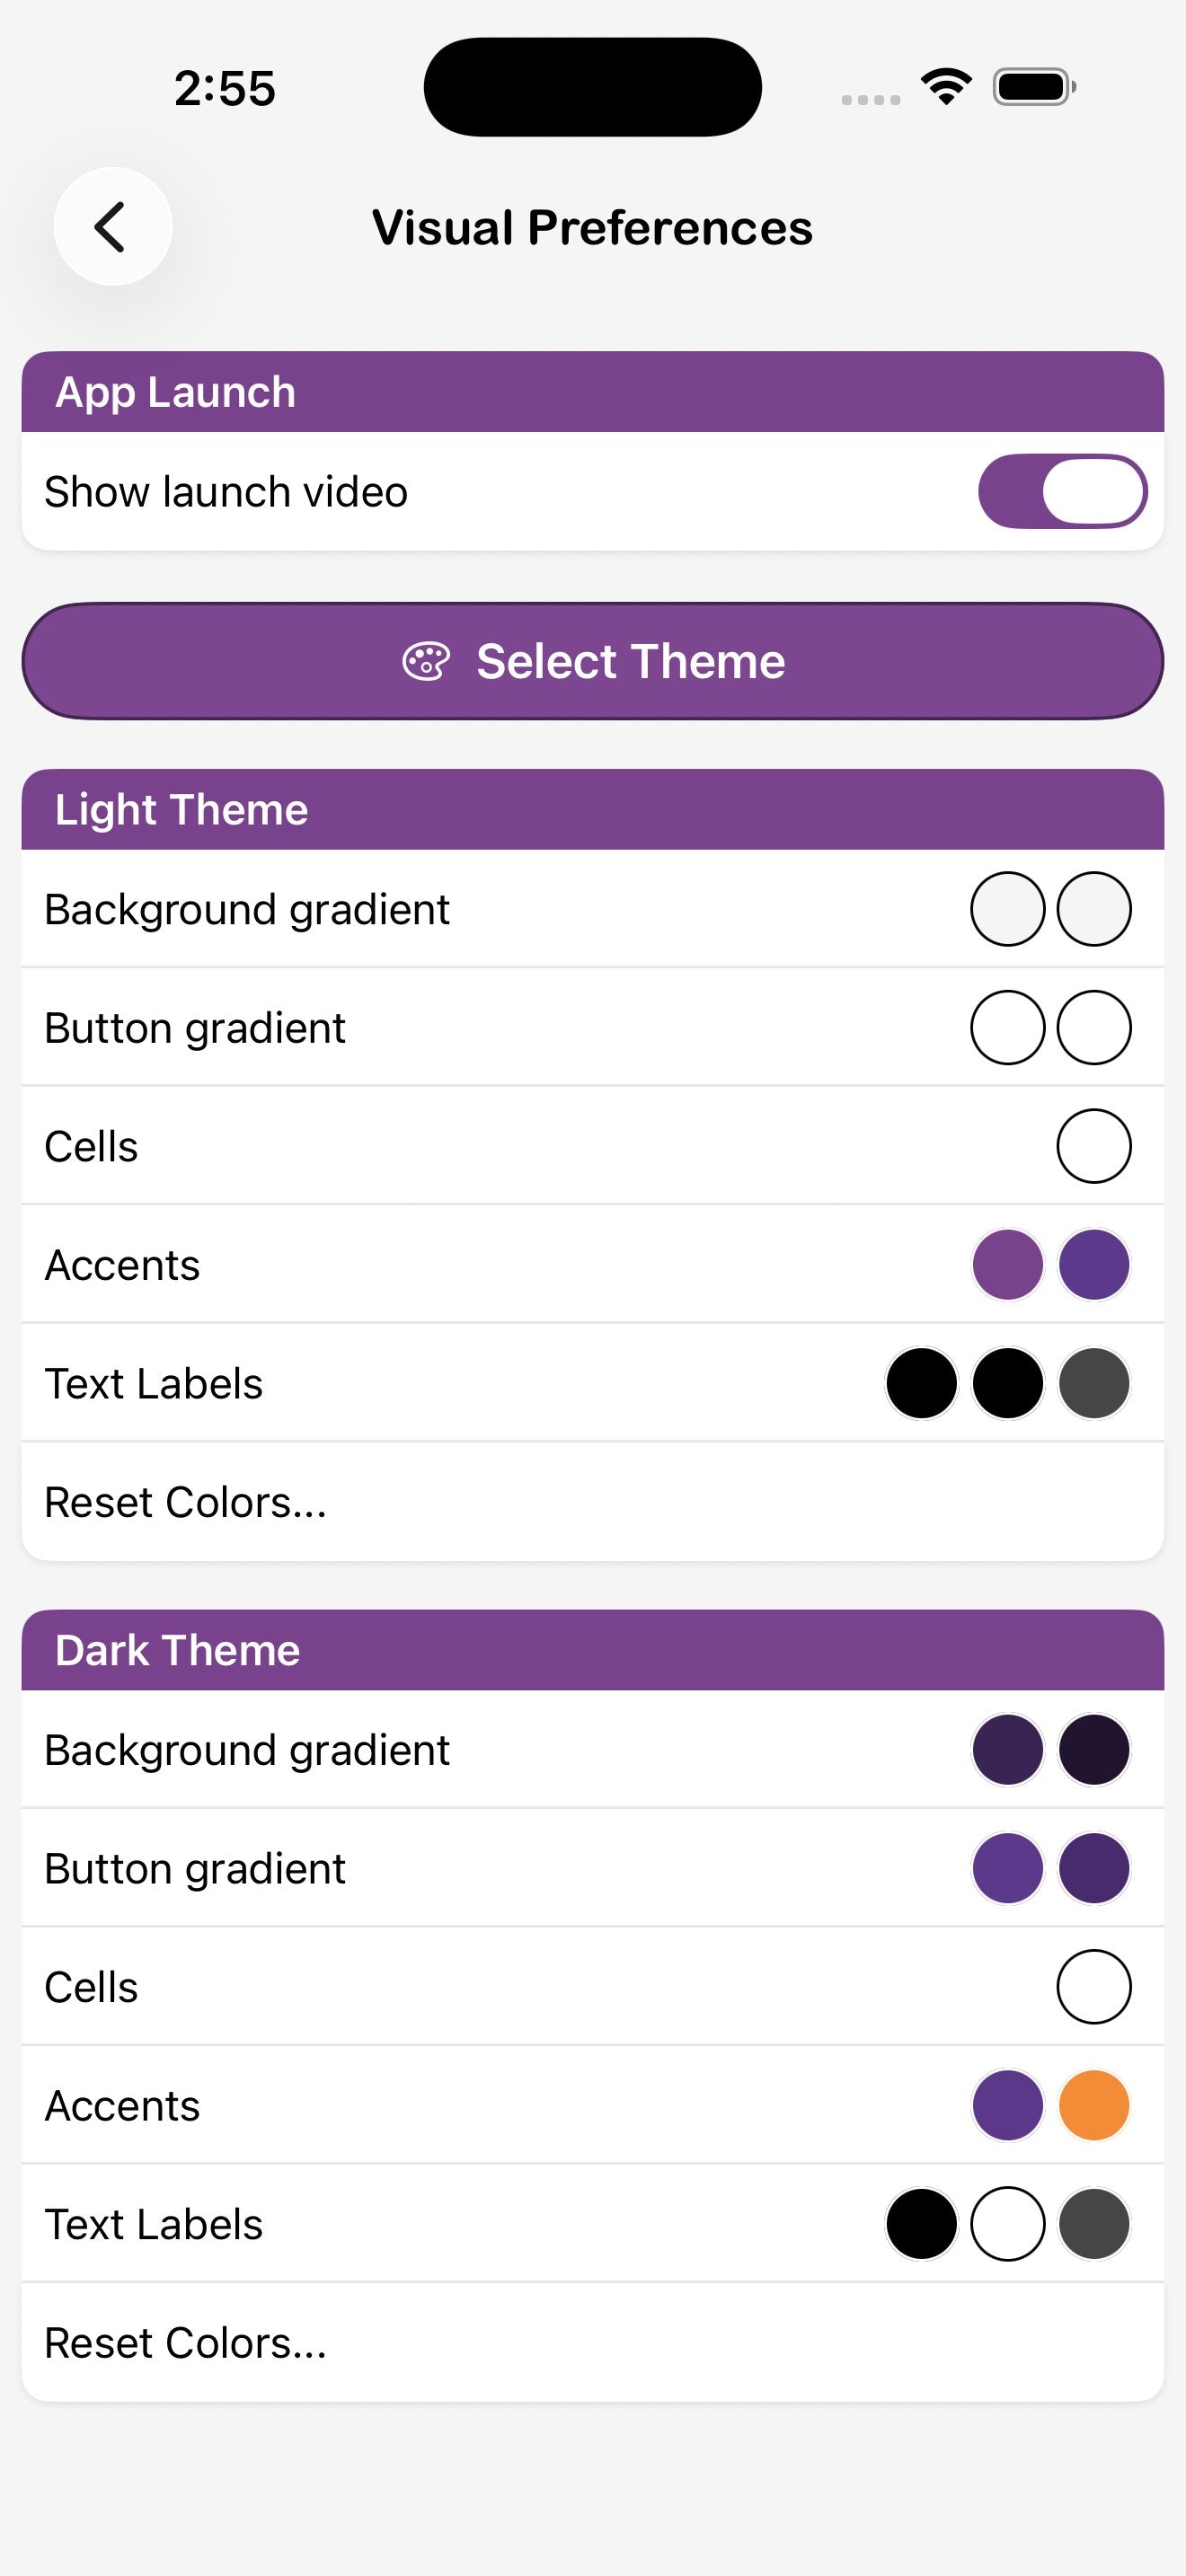
Switch between Light, Dark, and Automatic appearance, choose the look of the app and AirPlay timer screens, swap the workout stripe colors, and customize background, button, cell, accent, and text colors per theme. App Visuals toggles include showing heart rate, controls in landscape, and dashes for rest periods. Flex Timer Visuals control what the LED display shows when powered on and whether to display heart rate.
Audio Preferences
Heart Rate Zones
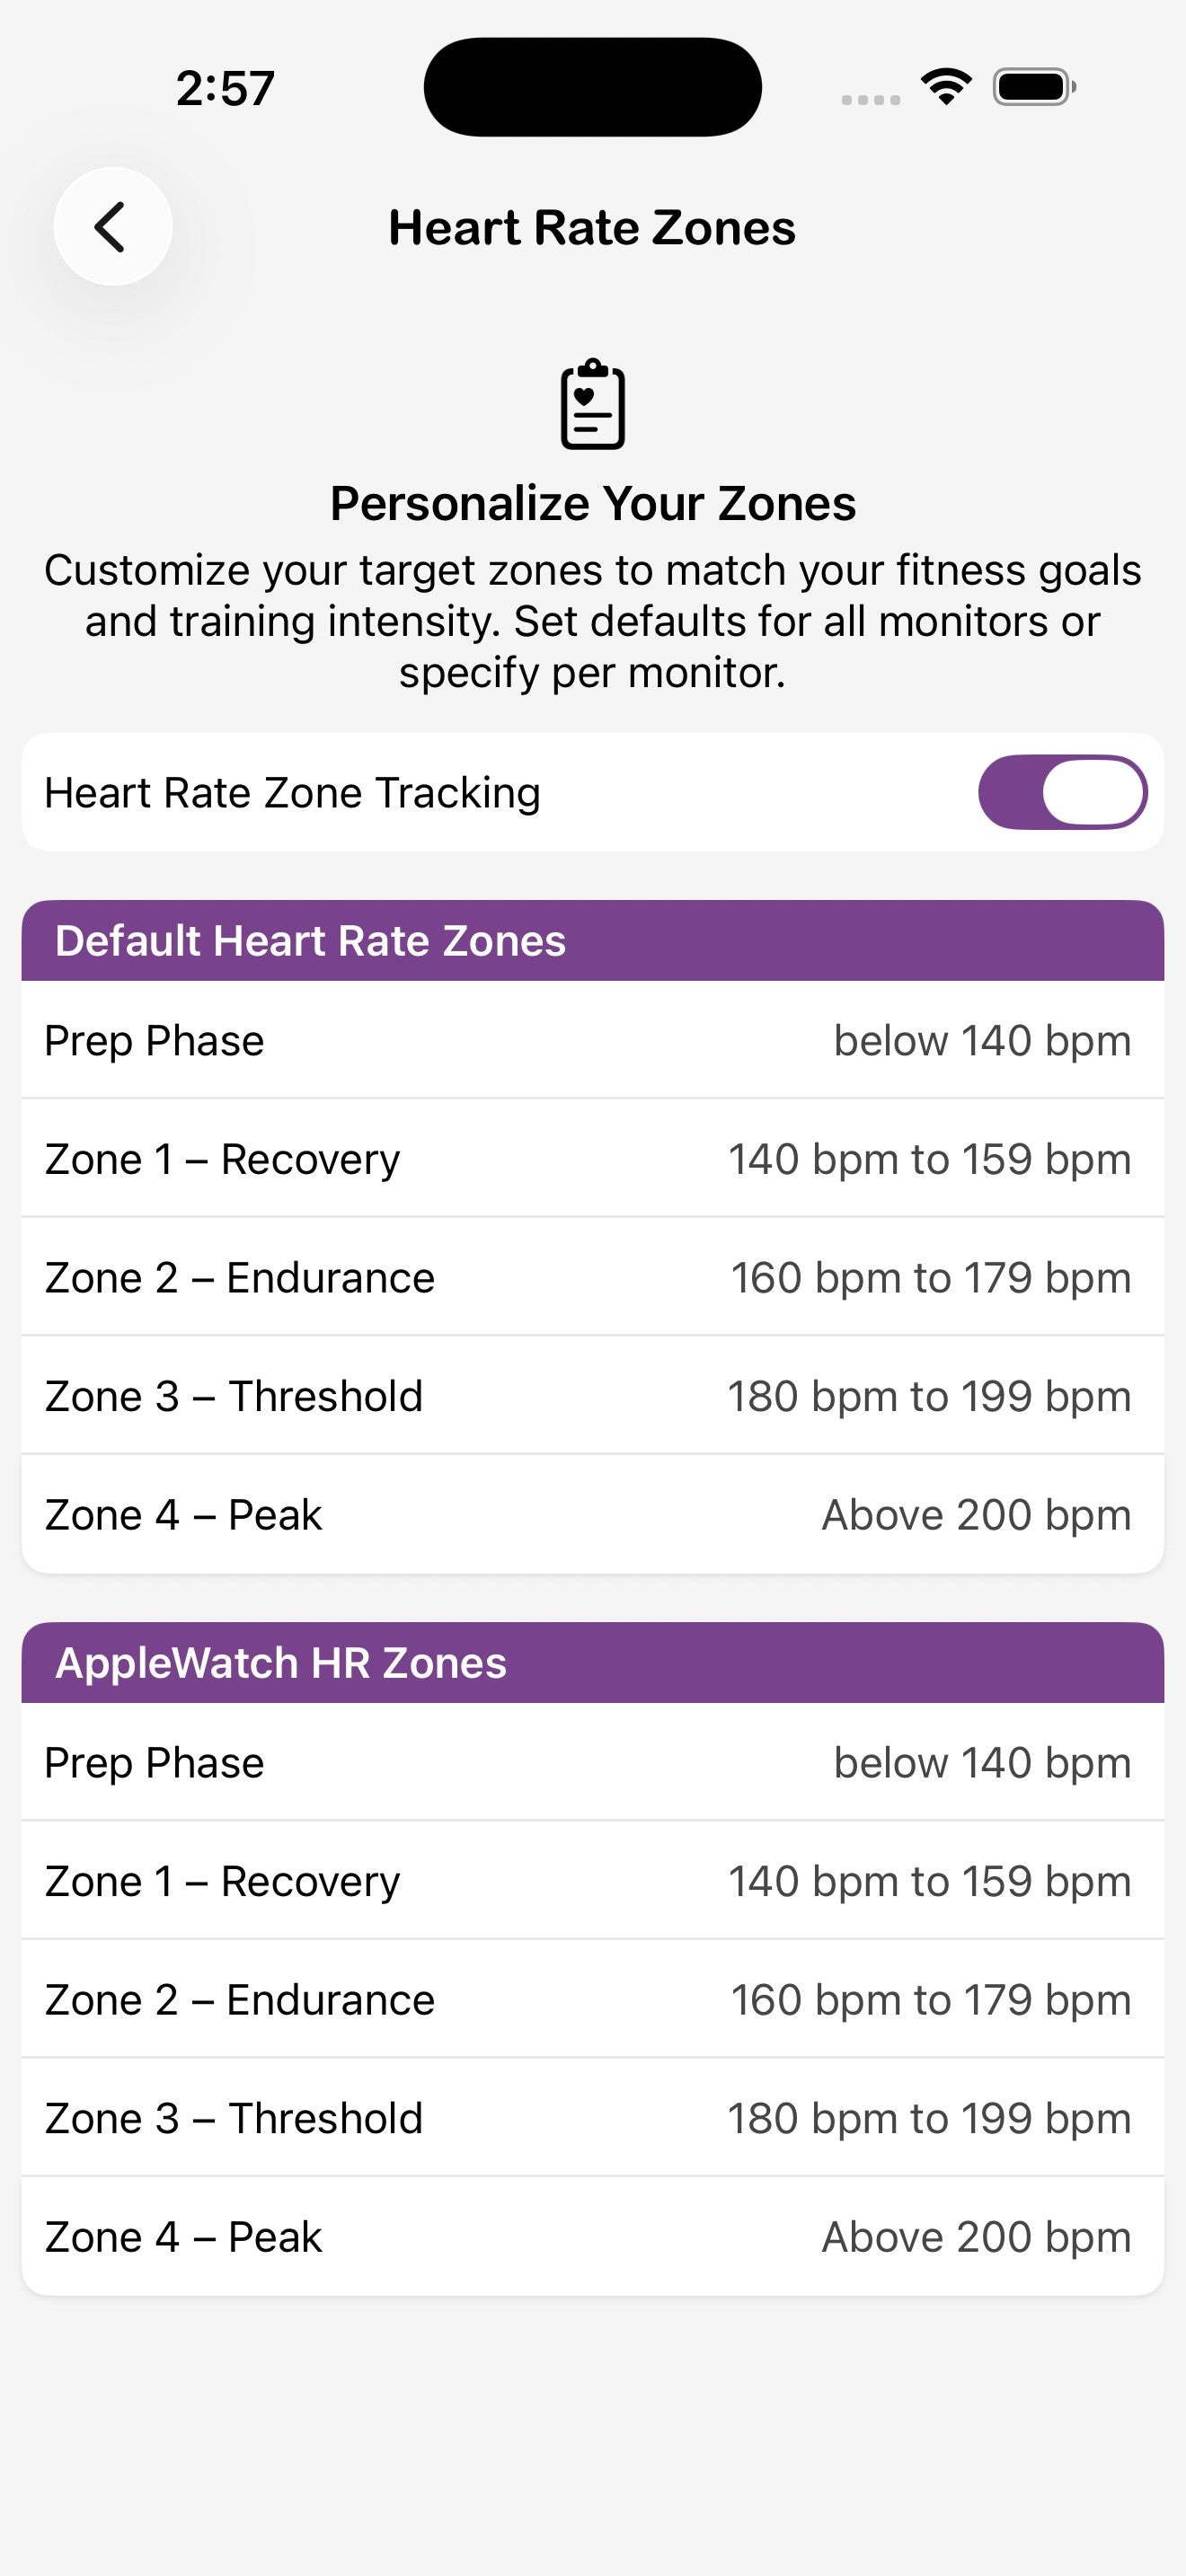
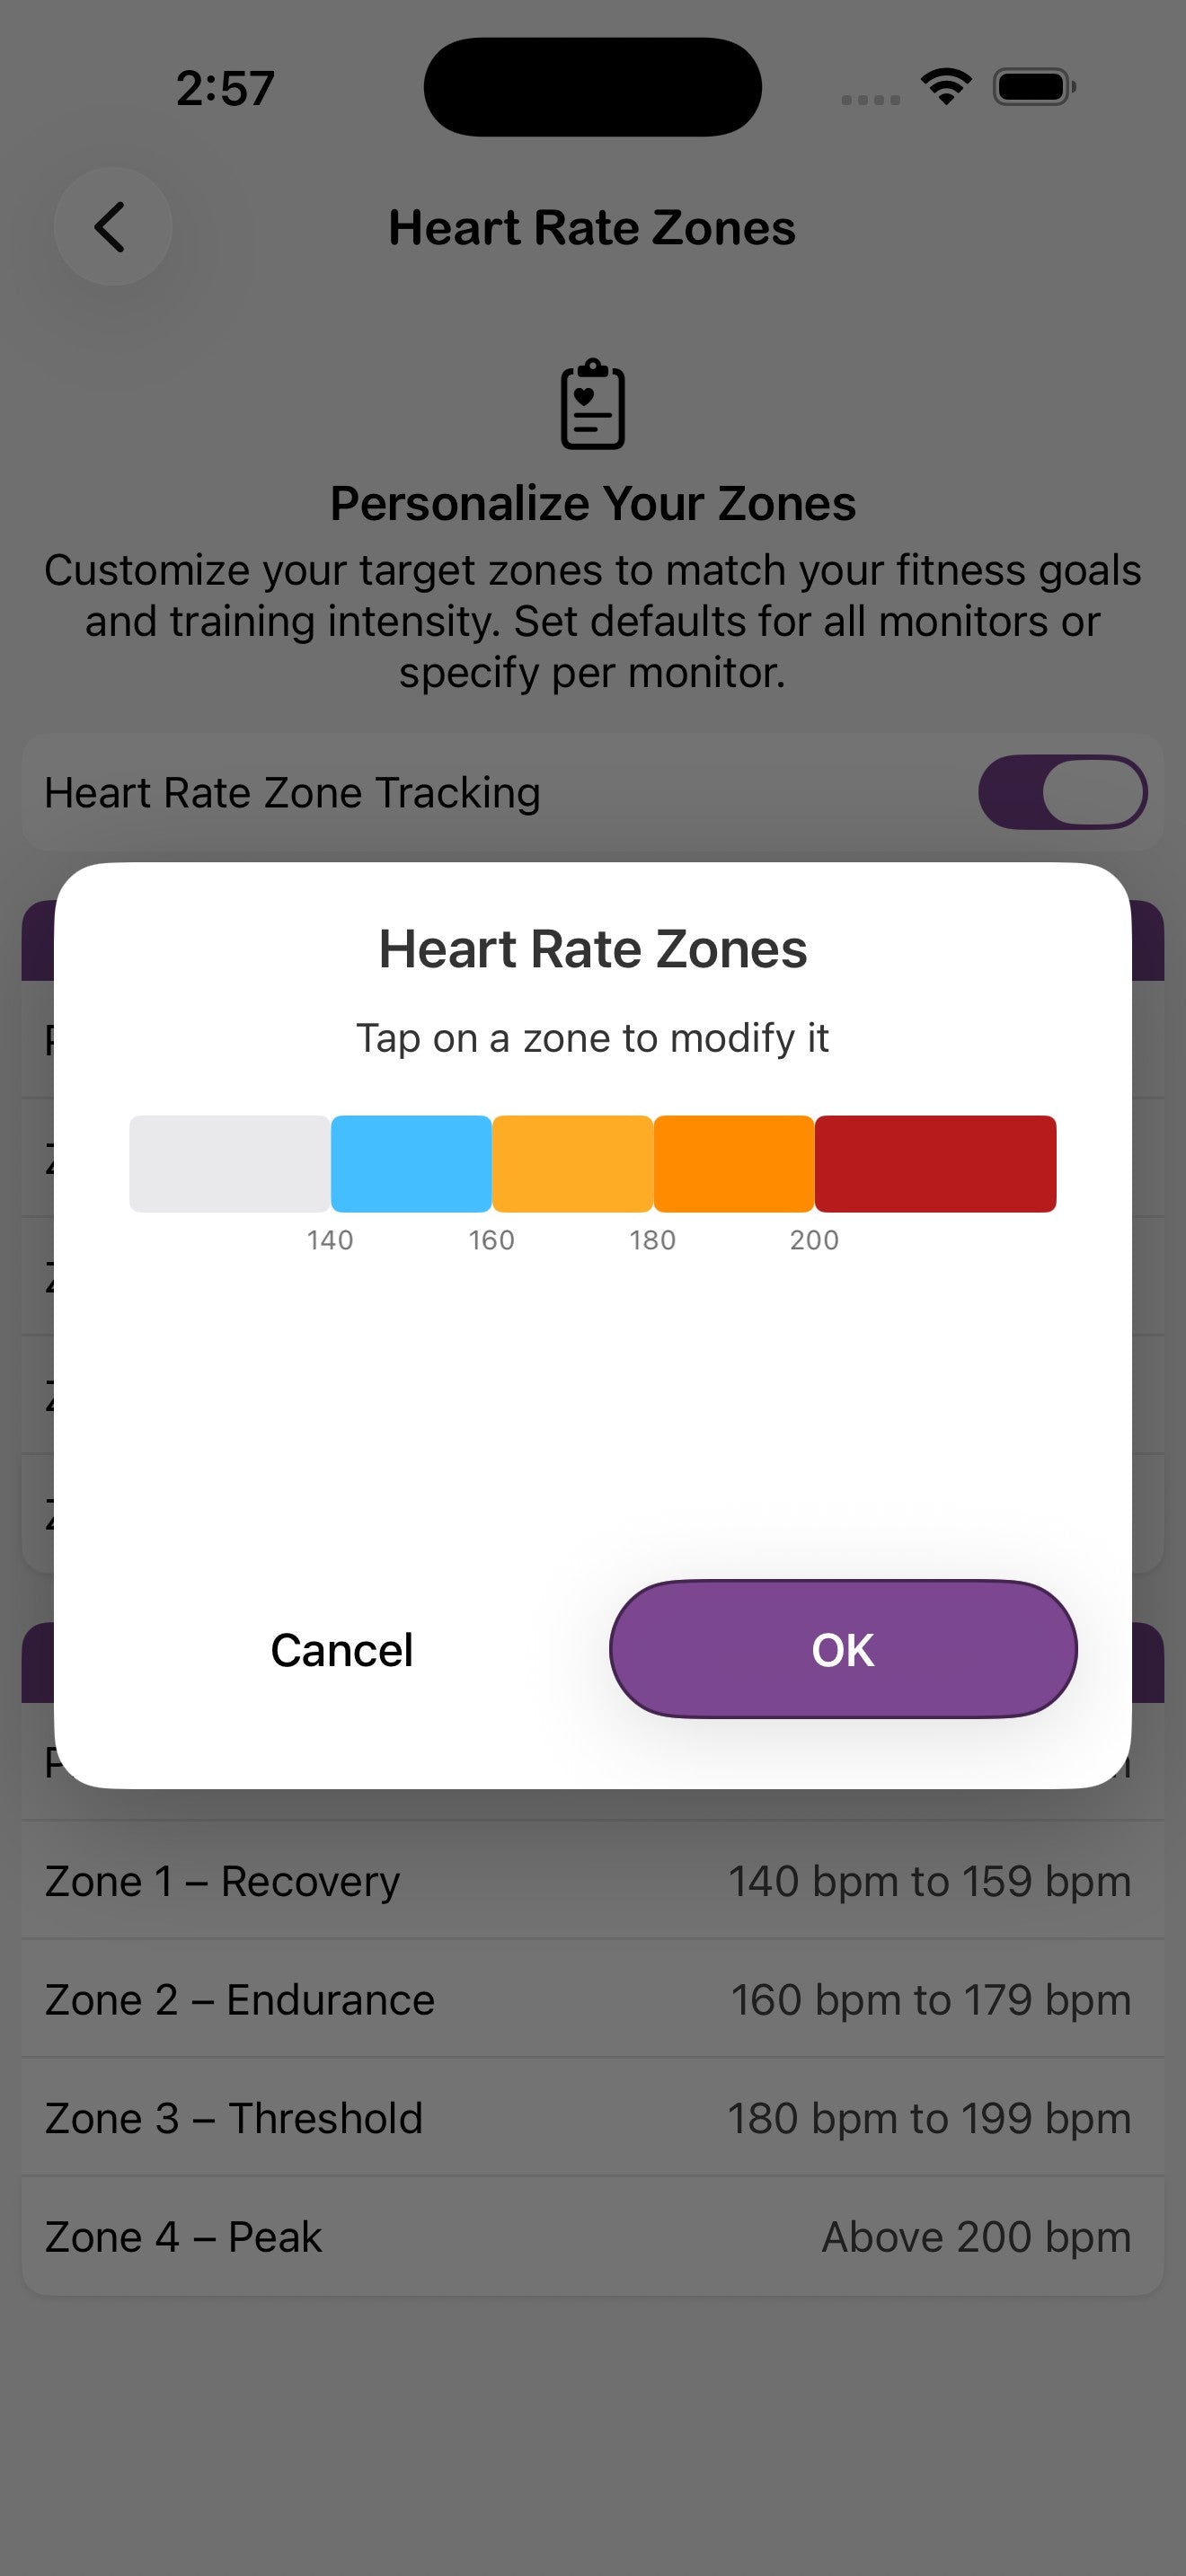
Toggle Heart Rate Zone Tracking to colour-code the timer screen based on your current zone. Customize the BPM ranges for Prep, Recovery, Endurance, Threshold, and Peak — separately for default Bluetooth monitors and the Apple Watch if you use both.